
Even though washing machines are designed to make our clothes spotless, they can accumulate a surprising amount of dirt, grime, and odor over time. This often-overlooked issue can lead to clothes that don’t smell truly fresh, or even a musty scent transferring from your washer to your freshly laundered items. If you own a front-loading washing machine, you might be particularly familiar with the challenges of keeping it pristine, especially concerning the notorious rubber gasket. Residue from detergents, fabric softeners, lint, and even food debris can cling to various parts of the machine, creating a breeding ground for mold, mildew, and bacteria. The good news is that giving your front-loading washing machine a thorough deep clean is far easier than many people imagine. I personally encountered this very problem with my own machine, struggling with persistent odors and build-up, until I discovered an incredibly helpful and straightforward cleaning method. Inspired by valuable insights, particularly from experts like Dirt Farmer Jay on YouTube, I learned that a sparkling clean and odor-free washer is just a few simple steps away. This comprehensive guide will walk you through the process, ensuring your front-loader not only looks clean but also performs at its best, delivering genuinely fresh laundry every time.
How to Deep Clean Your Front-Loading Washing Machine and Eliminate Odors
A well-maintained washing machine is crucial for effectively cleaning your clothes and ensuring they come out smelling fresh. Front-loading machines, while energy-efficient and gentle on fabrics, are prone to accumulating moisture and detergent residue, which can lead to unpleasant odors and mildew growth. Regular deep cleaning not only combats these issues but also extends the life of your appliance and maintains its optimal performance. This guide provides a straightforward, highly effective method to deep clean your front-loading washing machine, focusing on key areas often overlooked and offering practical tips for lasting freshness.
Step 1: The Powerful Vinegar Cycle for Internal Cleaning
The first and most crucial step in rejuvenating your front-loading washing machine is to tackle the internal plumbing and tub with a natural, yet potent, cleaning agent: white vinegar. Vinegar is renowned for its acidic properties, making it an excellent natural disinfectant, deodorizer, and descaler. It effectively cuts through soap scum, mineral deposits, and the greasy residue that can cling to the drum and hoses, which are often the culprits behind musty smells and inefficient washing. This initial deep-cleaning cycle targets hidden grime and bacterial buildup throughout the machine’s internal system.
To begin, pour approximately two cups of distilled white vinegar directly into your washing machine’s detergent dispenser. For an extra boost against stubborn odors or buildup, you can also pour about a cup directly into the drum itself. The dispenser drawer is often a hotspot for mold and detergent buildup, so adding vinegar here ensures it gets a thorough cleaning as the water flushes through. Next, select the hottest water setting available on your machine. This could be a dedicated “sanitize,” “tub clean,” or simply the “hottest wash” cycle. High temperatures enhance vinegar’s cleaning power, helping it to dissolve stubborn grime, mineral deposits, and kill bacteria and mold more effectively. Ensure no clothes are inside the machine during this process.
Run a full cycle with the vinegar and hot water. As the cycle progresses, the powerful vinegar solution will work its way through the entire system – the plumbing, the detergent dispenser, the drum, and even the often-hidden components like the pump and drain hoses. This process effectively flushes out accumulated residue, neutralizes embedded odors, and disinfects all interior surfaces. You might be surprised by the amount of murky water or debris that drains out during this cycle, a clear testament to its effectiveness. This initial vinegar wash is fundamental in preparing your machine for a deeper, more targeted manual clean and sets the foundation for a truly fresh appliance.

Step 2: Thoroughly Clean and Dry the Rubber Gasket and Interior
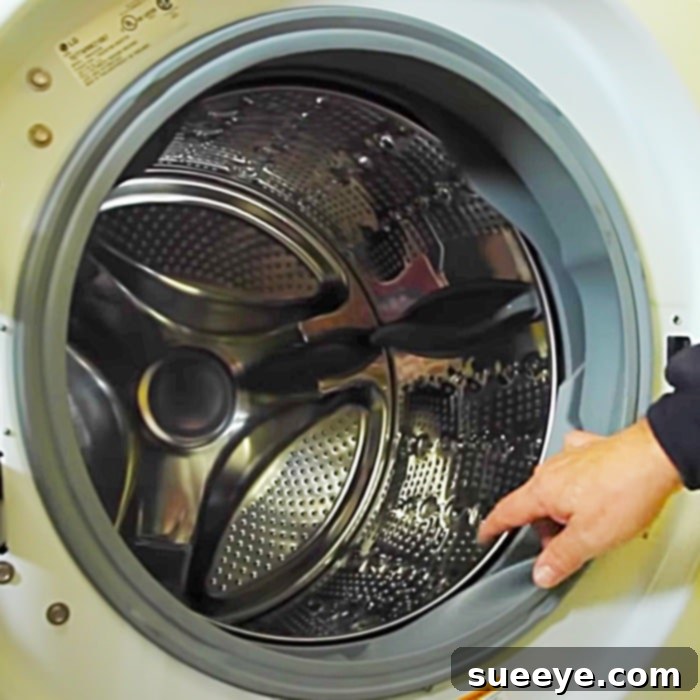
Once the vinegar cycle is complete, the next critical area to address is the rubber gasket – also commonly known as the door seal or boot – around the entrance of the drum. This component is arguably the most problematic part of front-loading washing machines when it comes to mold, mildew, and foul odors. Its intricate design, with numerous folds and crevices, naturally traps water, lint, hair, and detergent residue, creating an ideal, dark, and damp environment for microbial growth if not regularly cleaned and dried. Addressing this area is paramount for eliminating persistent musty smells.
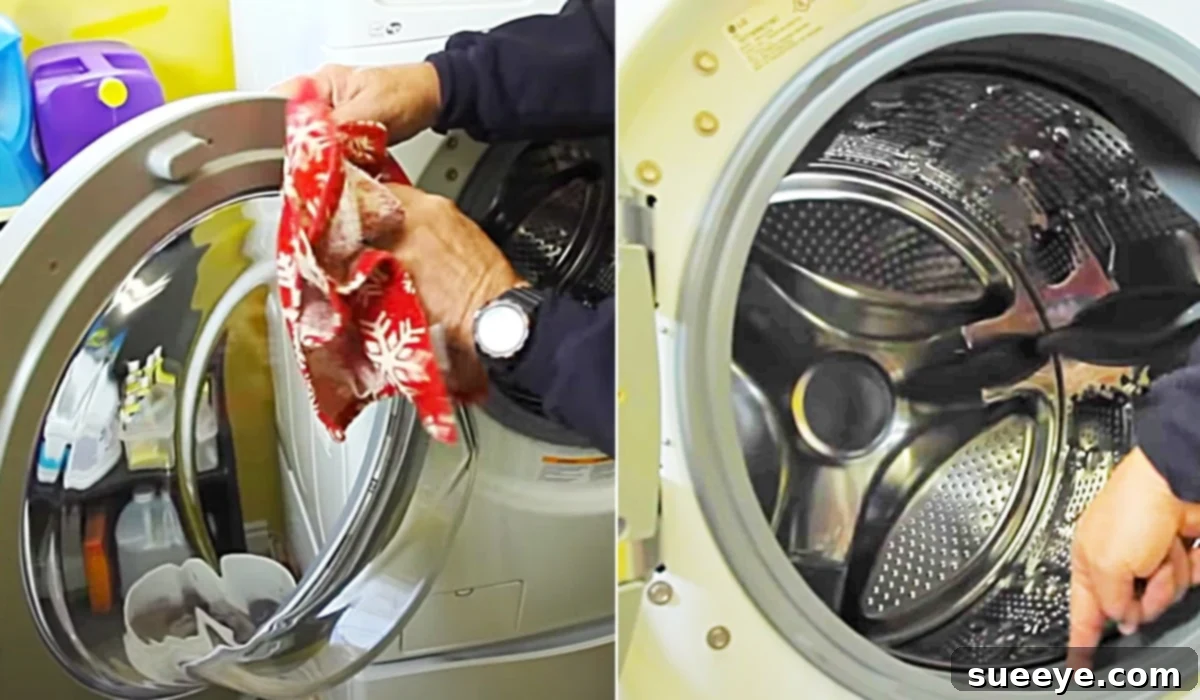
After the cycle finishes, open the washing machine door wide. Carefully pull back the folds of the rubber gasket. You will likely find a collection of dark, slimy buildup, possibly even small items like socks, coins, or hairpins that have been trapped. Using a clean microfiber cloth, sturdy paper towels, or even an old toothbrush for tighter spots, thoroughly wipe down the entire surface of the gasket. Pay particular attention to both the visible parts and deep within its folds and underneath its lip, where moisture and debris often hide. For stubborn mold and mildew stains, you can dampen your cloth with a solution of equal parts warm water and vinegar, or a specialized washing machine cleaner. Scrub vigorously to remove all visible grime and discolouration. Don’t forget to wipe the glass door itself, which can also accumulate residue and water spots.
The importance of drying extends beyond this initial manual cleaning. After every single load of laundry, it is imperative to wipe all accessible areas of your washing machine dry, especially focusing on the rubber gasket and the interior of the drum. Lingering moisture is the primary cause of stench and mold development in front-loaders. Take an extra minute to wipe down the inside of the door, the drum interior, and particularly, every fold of the gasket. This simple habit can drastically reduce the chances of mold and mildew taking hold, keeping your machine smelling fresh and your clothes truly clean. Following this, it’s highly recommended to leave the washing machine door ajar between washes. This allows for constant air circulation, preventing moisture from becoming trapped and creating a humid, dark environment where odors and mold thrive. This preventative measure is one of the most effective ways to maintain a fresh-smelling appliance.
Step 3: Clean the Detergent Dispenser Drawer
The detergent dispenser drawer is another common culprit for hidden grime and mold in front-loading machines. Over time, residual liquid detergent, powder, and fabric softener can accumulate, becoming sticky and attracting mildew, which then contributes to overall machine odor. Many people overlook cleaning this component, yet it can significantly impact the hygiene of your wash cycles. Most dispenser drawers are ingeniously designed to be easily removable, making them simple to clean.
To clean it, first, pull out the drawer completely from its housing. If you’re unsure how to remove it, consult your washing machine’s user manual – usually, there’s a release tab or button. Once removed, you’ll likely find a congealed mess of old detergent, fabric softener, and possibly even black mold growing in the corners and crevices. To loosen this stubborn buildup, soak the entire drawer in a basin of hot soapy water for about 30 minutes, or a strong solution of hot water and vinegar. This will help to break down the hardened residues.
After soaking, use an old toothbrush, a small bottle brush, or a stiff-bristled brush to meticulously scrub away all residue from every compartment, opening, and crevice of the drawer. Pay close attention to the siphon cap in the fabric softener compartment, as this is a notorious spot for sludge. Don’t forget to also clean the housing where the drawer sits inside the machine; this area can also harbor significant mold and mildew. Use a damp cloth, possibly dipped in your vinegar solution, to wipe it clean thoroughly. Rinse the drawer thoroughly under running water until all soap and debris are gone, and then let it air dry completely before returning it to the machine. Leaving it ajar between washes is also a good practice to prevent future buildup.
Step 4: Don’t Forget the Drain Pump Filter
Many front-loading washing machines are equipped with a drain pump filter, typically located at the bottom front of the machine, usually hidden behind a small access panel or kick plate. This filter is a critical component designed to catch lint, coins, buttons, hair, and other small foreign objects that might accidentally fall out of pockets or off clothing, preventing them from clogging the drain pump. If this filter is left uncleaned, the accumulated debris can become a significant source of foul odors, impede proper drainage, and potentially lead to costly machine malfunctions. Cleaning it regularly is a vital part of comprehensive washer maintenance.
Before you attempt to open the filter, ensure you have a shallow pan, a cookie sheet, or old towels readily available. Position these under the access panel to catch any residual water that will inevitably leak out when the filter is opened. Carefully open the access panel – it usually unclips or unlatches easily. You’ll then see the circular drain filter. Slowly twist and pull out the filter. Be prepared for a gush of water, and then you’ll discover the collection of trapped items. Remove all lint, hair, and debris from the filter. Rinse the filter thoroughly under running water, and use a small brush (like an old toothbrush) to scrub away any stubborn grime or slime. Inspect the filter housing as well, wiping away any buildup you can reach.
Once the filter is impeccably clean, securely reinsert it by twisting it back into place until it’s snug. Make sure it’s tightly sealed to prevent leaks. Finally, close the access panel. Cleaning this drain pump filter every few months, or more frequently if you have pets or do a lot of laundry, can significantly improve your machine’s efficiency, prevent unpleasant smells, and extend its lifespan. It’s a small task with a big impact on your machine’s health.
Step 5: Exterior Wipe-Down and Control Panel
While the internal workings and seals are crucial for a clean wash, the exterior of your washing machine also benefits greatly from a regular wipe-down. This step contributes to the overall hygiene and aesthetic of your laundry area, preventing the buildup of dust, detergent splashes, and fingerprints that can make your machine look neglected. A clean exterior reflects a well-cared-for appliance.
Use a soft, damp microfiber cloth moistened with a mild all-purpose cleaner or a simple solution of water and white vinegar. Gently wipe down the top, sides, and front of the machine. For stainless steel finishes, ensure you wipe with the grain to avoid streaks. Pay particular attention to the area around the detergent dispenser and the door handle, as these are frequently touched and can accumulate grime.
When cleaning the control panel, exercise caution. To avoid damaging any sensitive electronics, always spray your cleaner onto the cloth first, rather than directly onto the panel. Then, carefully wipe the panel, paying attention to the crevices around knobs and buttons where dust and grime can settle. Avoid saturating the panel with liquid. For stubborn marks, a cotton swab dipped in cleaner can be effective for precision cleaning around buttons. A clean exterior not only makes your laundry space more inviting but also maintains the condition of your appliance’s finish, preserving its appearance over time.
Preventative Measures for a Long-Lasting, Fresh Washer
Beyond deep cleaning, adopting a few simple yet effective habits can significantly help keep your front-loading washing machine fresh, clean, and odor-free between major cleaning sessions. These daily and weekly practices are key to preventing the buildup of moisture, mold, and residue that lead to common front-loader problems:
- Always Use HE Detergent: High-efficiency (HE) washing machines are designed to operate with very little water. Therefore, always use HE-specific detergent, which produces less suds. Using regular detergent in an HE machine can lead to excessive suds and a thick, slimy residue that encourages mold and mildew growth.
- Measure Detergent Correctly: More detergent doesn’t automatically mean cleaner clothes; in fact, it often means the opposite. Using too much detergent leaves behind residue on your clothes and within the machine, contributing to odor and buildup. Always follow the manufacturer’s recommendations for detergent dosage based on load size and soil level.
- Avoid Overloading Your Machine: Overloading prevents clothes from tumbling freely and rinsing properly. This can leave detergent residue on your garments and inside the machine, leading to buildup and reduced cleaning effectiveness. Always allow enough space for clothes to move.
- Remove Laundry Promptly: One of the simplest yet most effective preventative measures is to remove wet clothes from the washer as soon as the cycle finishes. Leaving damp laundry in the drum creates a warm, humid environment that is ideal for mold and mildew to begin forming and transferring their musty smell to your clothes.
- Leave Door and Dispenser Ajar: After each wash cycle, make it a habit to leave the washing machine door and the detergent dispenser drawer slightly open. This allows air to circulate freely inside the drum and dispenser, helping all interior surfaces to dry completely. This crucial step significantly inhibits mold and odor development by eliminating the moist conditions they thrive in.
- Wipe Down After Each Use: A quick wipe of the rubber gasket and the interior of the drum after every few loads takes less than a minute but makes a huge difference in preventing moisture and residue buildup. Keep a dedicated cloth handy for this purpose.
- Run a Monthly Maintenance Cycle: Even with daily preventive measures, a quick “tub clean” cycle (if your machine has one), or a hot water wash with a cup of white vinegar or a quarter cup of baking soda once a month can keep your machine in top condition, flushing out any nascent buildup before it becomes a problem.
These comprehensive tips are truly a must-see for anyone with a high-efficiency front-loading washing machine aiming for immaculate laundry and a long-lasting appliance. By diligently following these easy yet highly effective steps – from a thorough deep clean to adopting consistent preventative habits – you can significantly reduce the chances of unpleasant odors, unsightly mold growth, and premature wear in your valuable appliance. A clean washing machine not only ensures your clothes are impeccably clean and fresh but also contributes to the longevity and optimal efficiency of your investment. Make these practices a regular, integral part of your laundry routine, and enjoy the benefits of a fresh, high-performing washer for many years to come!