
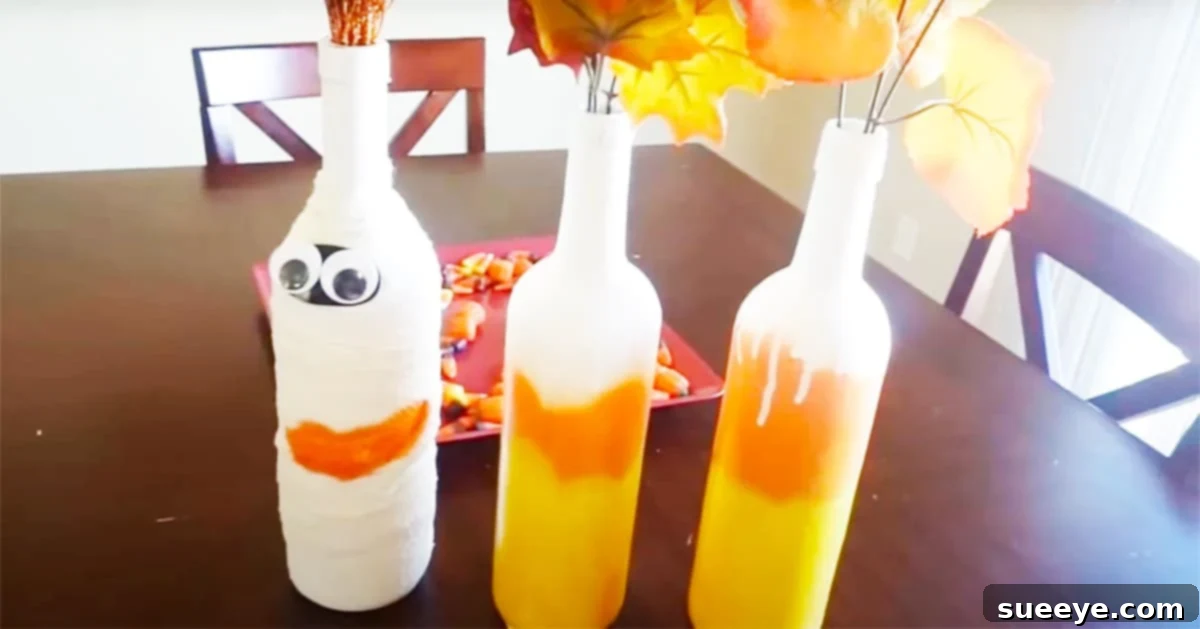
Transform Empty Wine Bottles into Stunning Fall & Halloween Decor: A DIY Guide
As the leaves begin to change and a crispness fills the air, our thoughts often turn to cozy home decor and festive celebrations. Fall and Halloween offer a wonderful opportunity to infuse your living space with warmth, charm, and a touch of spooky fun. One of the most rewarding and sustainable ways to achieve this is by transforming everyday items into extraordinary decorations. Empty wine bottles, often destined for recycling, present a blank canvas for endless creative possibilities. With a little paint and a few simple embellishments, you can upcycle these bottles into eye-catching pieces that perfectly capture the spirit of the season.
This comprehensive guide will walk you through creating enchanting Fall and Halloween wine bottle designs, specifically focusing on whimsical candy corn and spooky mummy themes. Inspired by the simplicity and charm showcased in Life As Yessy’s tutorial, we’ll delve into detailed steps that make this DIY project accessible to everyone, regardless of crafting experience. Imagine these handcrafted beauties adorning your dining table as unique centerpieces, enhancing your mantelpiece, or adding a playful touch to your kitchen counter. This is more than just a craft; it’s an invitation to unleash your creativity, reduce waste, and add a personalized touch to your seasonal decor.
What makes this project truly special is its ease and affordability. You’ll find that most of the required supplies are either readily available around your home or can be purchased without breaking the bank. It’s an excellent activity to enjoy solo, with friends, or with family, creating lasting memories alongside beautiful decorations. While we’ll focus on the candy corn and mummy designs, remember that this tutorial serves as a foundation. Feel free to experiment with different colors, patterns, and themes to truly make these upcycled wine bottles your own unique artistic expression.
Essential Supplies for Your Upcycled Bottle Project
Gathering your materials is the first exciting step in any DIY adventure. For these Fall and Halloween wine bottle creations, you’ll be delighted by how few items you truly need. We’ve listed the core supplies, along with some suggestions for alternatives and helpful additions to ensure your crafting experience is smooth and successful.
- Empty Wine Bottles: The stars of our show! Any shape or size will work, offering different canvases for your designs. Collect a variety for an interesting display. Ensure they are thoroughly cleaned and labels removed for the best results.
- Faux Leaves: Perfect for adding an autumnal touch to your finished bottles. Look for leaves in traditional fall colors like deep reds, oranges, and yellows. These can often be found at craft stores or dollar stores.
- Mummy Decor Kit (or Supplies): While a kit might offer convenience, you can easily gather individual components. This typically includes gauze, cheesecloth, or strips of white fabric for wrapping, and googly eyes or small black buttons for the mummy’s face.
- Spray Paint (Yellow, White, Orange): These are key for the vibrant candy corn design and the clean base for your mummy. Opt for paints specifically designed for glass or multi-surface use. Consider both matte and glossy finishes to see what you prefer.
- Cardboard or Drop Cloth: Essential for protecting your workspace from paint overspray. Old cardboard boxes, newspapers, or a designated drop cloth will serve this purpose well.
Additional Tools & Optional Items:
- Painter’s Tape: Crucial for creating crisp lines when painting the candy corn design. Various widths can be useful.
- Hot Glue Gun and Glue Sticks: Indispensable for securing faux leaves, mummy wraps, googly eyes, and any other embellishments.
- Utility Knife or Scraper: Helpful for removing stubborn wine bottle labels.
- Rubbing Alcohol or Goo Gone: To eliminate any sticky residue left by labels.
- Clear Sealer Spray: An optional step to protect your finished designs and give them a professional, durable finish.
- Newspaper or Paper Towels: For general cleanup and drying.
Step-by-Step Directions to Craft Your Festive Bottles
Now that you have all your supplies ready, let’s dive into the creative process. Remember, patience and thin coats are key to achieving a professional-looking finish with spray paint.
Phase 1: Preparing Your Wine Bottles
The foundation of any great DIY project lies in thorough preparation. Clean bottles ensure paint adheres properly and your final design looks flawless.
- Label Removal: Begin by removing all labels from your empty wine bottles. A highly effective method is to fill a sink or bucket with hot water, add a few drops of dish soap, and submerge the bottles. Allow them to soak for at least 30 minutes, or even a few hours, to loosen the adhesive.
- Scrape and Scrub: Once softened, most labels should peel off easily. For stubborn residues, gently scrape with a utility knife or an old credit card. If a sticky film remains, apply a small amount of rubbing alcohol or a specialized adhesive remover like Goo Gone and scrub with a sponge.
- Thorough Cleaning and Drying: After removing all labels and adhesive, wash the bottles thoroughly with soap and water to remove any remaining residue or grease. Rinse them completely and allow them to air dry upside down on a rack or on paper towels. Ensure they are completely dry, inside and out, before proceeding to the next step, as any moisture can affect paint adhesion.
Phase 2: Applying the Base Coat
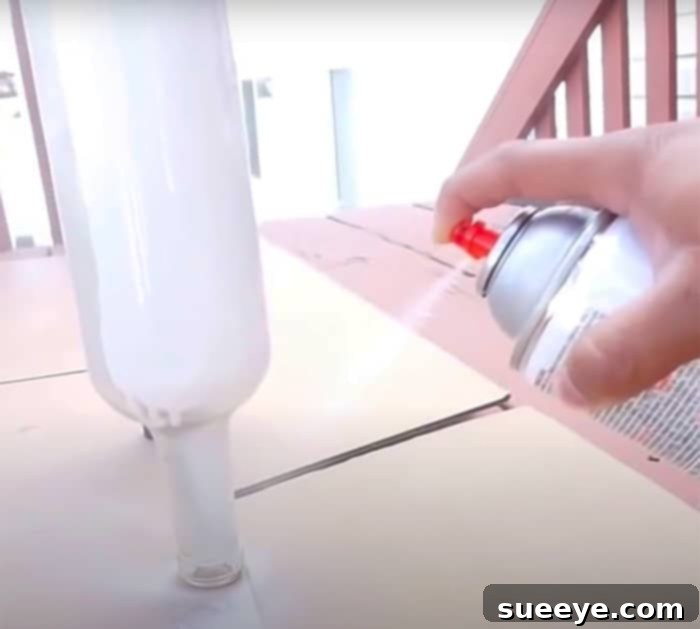
A consistent base coat is essential, especially for the vibrant candy corn design and the clean look of the mummy.
- Set Up Your Workspace: Lay down cardboard or a drop cloth in a well-ventilated area, preferably outdoors or in a garage with open windows. This protects your surfaces from overspray.
- First Coat of White Paint: Place your dried wine bottles upside down on the cardboard. Holding the white spray paint can about 8-12 inches away, apply a thin, even coat over the entire bottle surface. Use steady, sweeping motions. Avoid applying too much paint at once, as this can lead to drips and an uneven finish.
- Allow to Dry: Let the first coat dry completely according to the paint manufacturer’s instructions (usually 15-30 minutes).
- Second Coat (and Third if Needed): Flip the bottles right-side up if needed to cover any missed spots, or simply apply a second thin coat of white paint if the first coat appears translucent. Repeat the drying process. You want a solid, opaque white base before moving on.
Phase 3: Crafting the Candy Corn Design
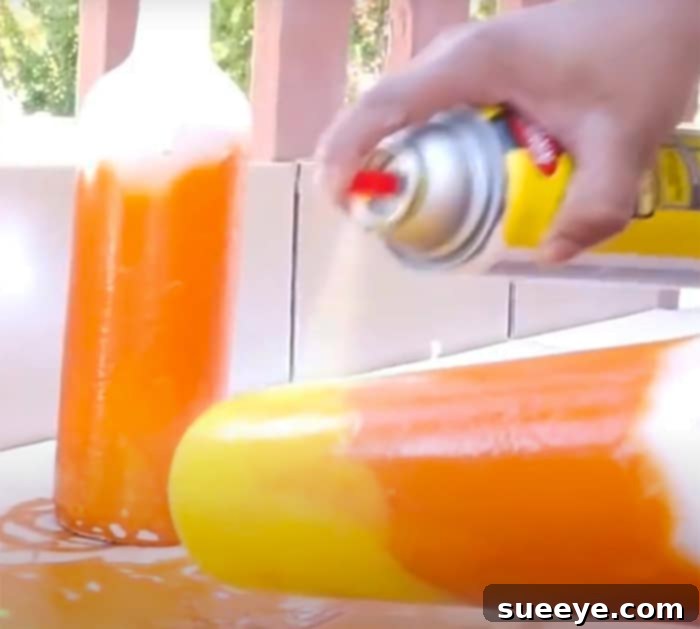
The iconic candy corn pattern is created by layering colors with careful taping. This is where your painter’s tape comes in handy.
- Mark Your Sections: Once the white base is fully dry, visualize the three candy corn sections: white (top), orange (middle), and yellow (bottom). Since your bottle is already white, you’ll be adding the orange and yellow.
- Tape for Orange Section: Use painter’s tape to create a clean line separating the top white section from where the orange will begin. Wrap the tape smoothly around the bottle. Ensure the tape is firmly pressed down to prevent paint bleed.
- Apply Orange Paint: With the bottom part of the bottle exposed, spray the orange paint in thin, even coats over the middle section. Allow each coat to dry before applying the next, until you achieve a vibrant, opaque orange.
- Tape for Yellow Section: Once the orange paint is completely dry (this is crucial to avoid lifting the orange paint with the tape), carefully apply a new strip of painter’s tape just below the orange section, marking off the boundary for the yellow.
- Apply Yellow Paint: Spray the bottom section of the bottle with yellow paint, again using thin, even coats and allowing proper drying time between applications.
- Remove Tape: Once all paint layers are dry to the touch, carefully peel off all painter’s tape. Peel slowly and at an angle to reveal your crisp candy corn stripes. If there are any minor bleeds, a small brush and touch-up paint can fix them.
Phase 4: Crafting the Mummy Design
For a spooky mummy, the white base is already perfect! Now, it’s time for the wrap.
- Prepare Mummy Wraps: If using a mummy kit, follow its specific instructions. Otherwise, take your gauze, cheesecloth, or white fabric strips and tear or cut them into varying widths and lengths. Some fraying adds to the authentic mummy look.
- Start Wrapping: Apply a dab of hot glue near the top of your white-painted bottle (near the neck). Press the end of a gauze strip onto the glue to secure it.
- Wrap and Secure: Begin wrapping the gauze around the bottle, overlapping layers in a haphazard way to mimic bandages. Periodically secure the strips with small dots of hot glue to prevent them from unraveling. Don’t worry about perfection; an irregular wrap enhances the mummy’s charm.
- Add Eyes: Once the bottle is sufficiently wrapped, hot glue googly eyes onto the front, peeking out from between the ‘bandages’. Alternatively, you can draw eyes with a black marker or paint.
- Optional Distressing: For an aged, antique mummy look, you can lightly mist the wrapped bottle with a very diluted brown or grey paint spray, or even gently rub with a damp tea bag to stain the fabric slightly.
Phase 5: Embellishments and Finishing Touches
Adding the final details truly brings your creations to life!
- Attach Faux Leaves: For the Fall-themed bottles (or even the spooky ones for a rustic touch), use your hot glue gun to attach faux leaves around the neck of the bottle, at the base, or in small clusters.
- Seal for Durability (Optional but Recommended): Once all paint and glue are completely dry, consider applying a clear acrylic sealer spray. This will protect your designs from nicks, scratches, and dust, ensuring they last for many seasons to come. Apply in thin, even coats in a well-ventilated area.
Why Upcycle Wine Bottles for Decor?
Repurposing empty wine bottles for home decor is more than just a fun craft; it’s a smart and sustainable choice with numerous benefits:
- Sustainability and Eco-Friendliness: By upcycling, you’re giving bottles a new life, reducing waste, and lessening the demand for new manufactured goods. It’s a simple step towards a more sustainable lifestyle.
- Cost-Effectiveness: You’re starting with a free base material! Most of the additional supplies are inexpensive, especially if you source them from dollar stores or use items you already have on hand. This makes it an incredibly budget-friendly way to refresh your seasonal decor.
- Unique and Personalized Decor: Mass-produced decorations often lack character. Handcrafted items, like these painted wine bottles, offer a unique charm and allow you to infuse your personal style into your home. No two bottles will be exactly alike, making your decor truly one-of-a-kind.
- Creative Outlet: Crafting is a fantastic way to relax, de-stress, and express your creativity. This project provides an opportunity to experiment with colors, textures, and designs, fostering a sense of accomplishment.
- Versatility: Painted wine bottles aren’t just for Fall and Halloween! The techniques learned can be applied to create decor for any season or occasion, from elegant centerpieces for weddings to vibrant spring arrangements.
Tips for a Flawless Finish and Long-Lasting Decor
Achieving a professional look is easier than you think with these expert tips:
- Ventilation is Key: Always work in a well-ventilated area when using spray paint. Outdoors is ideal. If indoors, ensure windows are open and consider wearing a mask.
- Multiple Thin Coats vs. One Thick Coat: This cannot be stressed enough for spray painting. Thin coats dry faster, adhere better, and prevent drips and uneven textures. Patience pays off!
- Proper Drying Time: Allow ample drying time between coats and before applying tape or handling. Rushing can lead to smudges, peeling paint, or a sticky finish.
- Test Before You Spray: If you’re new to spray paint, practice on a piece of scrap cardboard first to get a feel for the nozzle and spray pattern.
- Clean Nozzles: If your spray paint nozzle gets clogged, remove it and clean it with mineral spirits or nail polish remover. You can also hold the can upside down and spray until only clear propellant comes out, which cleans the nozzle.
- Storing Your Creations: When the season ends, carefully wrap your decorated bottles in tissue paper or bubble wrap and store them in a box to protect them from dust and damage until next year.
Beyond Candy Corn and Mummies: Customization Ideas
While the candy corn and mummy designs are festive and fun, this project is highly adaptable. Here are some ideas to spark your imagination:
- Ghostly Bottles: Simply paint bottles white, then use black paint or a permanent marker to draw spooky eyes and a mouth.
- Pumpkin Bottles: Paint bottles orange and then add green stems (using paint or real twigs) and black carved-face details.
- Witch-Themed Bottles: Paint bottles black, purple, or green, then add witch hat cutouts, googly eyes, or glitter accents.
- Harvest & Autumn Themes: Instead of Halloween-specific designs, paint bottles in rich autumnal colors like deep red, rust, gold, or forest green. Embellish with twine, burlap, miniature pinecones, or dried berries for a rustic Fall look.
- Glitter and Stencils: Add sparkle with glitter glues or spray glitters. Use stencils to create intricate patterns or words like “BOO!” or “FALL.”
- Chalkboard Paint: Use chalkboard paint for a rustic look where you can write seasonal messages with chalk.
- Battery-Operated Fairy Lights: Turn your decorated bottles into luminous decor by inserting a string of battery-operated fairy lights inside. This creates a magical glow, perfect for evenings.
Displaying Your Masterpieces
Once your beautiful Fall and Halloween wine bottles are complete, it’s time to showcase them!
- Dining Table Centerpiece: Arrange a collection of candy corn and mummy bottles (perhaps mixed with some plain autumnal bottles) on a tray with faux leaves, small pumpkins, and candles for a stunning dining table display.
- Mantel Decor: Line your fireplace mantel with your creations, interspersed with garlands, candles, and other seasonal accents.
- Entryway Welcome: Place a few bottles on your entryway console table to greet guests with festive cheer.
- Kitchen Island or Counter: Brighten up your kitchen space by adding these decorative bottles to an island or counter.
- Window Sills: Let them catch the light by placing them on sunny window sills.
- Groupings: Display bottles in varying heights and designs together for visual interest. Odd numbers (like 3 or 5) often create the most pleasing arrangements.
Conclusion: Embrace the Joy of Handmade Seasonal Decor
From simple empty vessels to captivating decorative pieces, these upcycled wine bottles embody the spirit of creativity and resourcefulness. This DIY project is a testament to how easily you can transform ordinary items into extraordinary home accents that celebrate the Fall and Halloween seasons. Whether you’re drawn to the cheerful stripes of candy corn or the playfully spooky appeal of a mummy, the process is rewarding, affordable, and incredibly fun.
The beauty of handmade decor lies in its imperfection and the personal story it tells. Each brushstroke, each piece of tape, and every carefully placed embellishment contributes to a unique item that truly reflects your style and effort. So, gather your supplies, put on some festive music, and embark on this delightful crafting journey. We encourage you to use this guide as your starting point, but don’t hesitate to let your imagination run wild. Experiment with colors, explore different themes, and create a collection of Fall and Halloween wine bottles that are uniquely yours.
Repurposing old items not only benefits your wallet and the environment but also adds a layer of warmth and authenticity to your home. So go ahead, transform those forgotten wine bottles into treasured seasonal decor and enjoy the compliments they’re sure to bring! Happy crafting!