
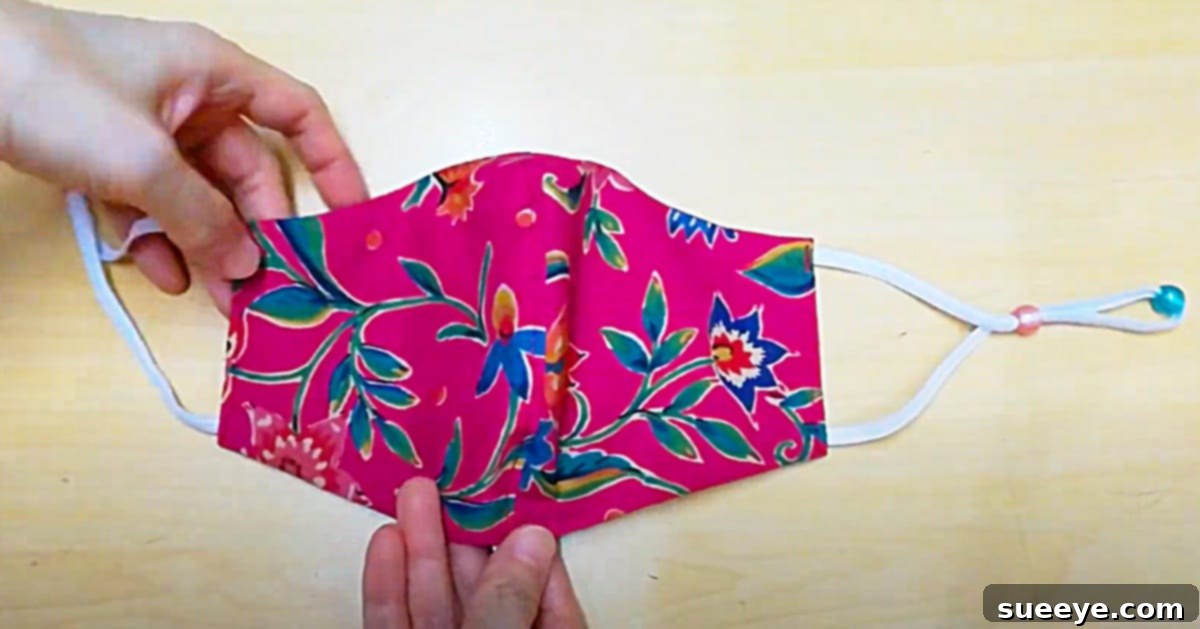
DIY Face Mask with Adjustable Ear Loops Using Beads for Ultimate Comfort
In a world where personal well-being and health remain paramount, face masks have become an integral part of our daily lives. While mask mandates may be evolving, the personal choice to wear a mask for protection, whether during allergy season, flu season, or in crowded spaces, is still a common practice. One of the biggest challenges many people face with standard masks is discomfort, especially around the ears, or a poor fit that compromises effectiveness. This often leads to constant adjustments, skin irritation, and an overall unpleasant experience.
Imagine a face mask that not only offers excellent protection but also conforms perfectly to your unique face shape, providing unparalleled comfort. This is where the innovative concept of adjustable ear loops using beads comes into play. We are thrilled to share a brilliant face mask idea that incorporates beads to effortlessly adjust the ear loops, guaranteeing a snug yet comfortable fit for everyone. When we discovered this ingenious adjustable mask video tutorial by Simplicity on YouTube, we were incredibly eager to explore its potential and share its benefits with our community. This earpiece design is particularly remarkable for individuals with sensitive ears, as it alleviates the pressure and friction often caused by fixed-length elastic bands.
Creating your own adjustable face mask not only provides a customized solution to common mask-wearing issues but also offers the satisfaction of a DIY project. This guide will walk you through the necessary materials, tools, and a detailed step-by-step process to craft a face mask that you’ll actually enjoy wearing. Say goodbye to uncomfortable ear pain and hello to a perfectly fitting, reusable mask designed with your comfort in mind. Even if local regulations are changing, having a comfortable, high-quality mask on hand is always a smart choice for your personal health and peace of mind.
Why Choose an Adjustable Face Mask with Beads? The Benefits of a Custom Fit
The innovation of adjustable ear loops using beads transforms the face mask experience from a necessity into a comfortable accessory. Here’s why this design stands out:
- Superior Comfort: Traditional elastic ear loops often cause discomfort, chafing, or pressure behind the ears, especially during prolonged wear. With adjustable beads, you can easily loosen or tighten the loops to find the perfect tension, distributing pressure evenly and eliminating ear fatigue. This is a game-changer for anyone who has experienced the dreaded “mask ear” soreness.
- Perfect Fit for All Face Shapes: No two faces are exactly alike, and a one-size-fits-all mask rarely provides an optimal fit. Adjustable ear loops allow you to tailor the mask precisely to your face, minimizing gaps around the cheeks, nose, and chin. A snug fit is not just about comfort; it’s crucial for the mask’s effectiveness in filtering airborne particles.
- Enhanced Protection: By achieving a custom, secure fit, the adjustable mask significantly reduces air leakage around the edges. This means fewer unfiltered particles entering or exiting the mask, enhancing its protective capabilities for both the wearer and those around them.
- Reduced Fogging for Glasses Wearers: A common frustration for glasses wearers is lens fogging caused by warm breath escaping from the top of the mask. An adjustable fit allows you to cinch the mask more securely around the nose bridge, redirecting breath downward and dramatically reducing or eliminating fogging.
- Personalization and Style: Beyond functionality, choosing your own fabric and beads allows for a touch of personal style. You can select colors, patterns, and bead designs that reflect your personality, making mask-wearing a little less mundane and a lot more enjoyable.
- Longevity and Reusability: DIY fabric masks are designed to be washable and reusable, making them an environmentally friendly and cost-effective alternative to disposable masks. The durable construction, combined with the adjustable feature, ensures your mask will last through many washes and wears.
Essential Materials and Tools for Your DIY Adjustable Face Mask:
Embarking on this sewing project is straightforward, especially when you have all the right materials and tools at hand. Here’s a comprehensive list to get you started, along with some tips on selecting the best options:
- Fabric: Approximately 1/4 of a yard of high-quality, tightly woven cotton fabric. Soft quilting cotton, broadcloth, or a cotton-flannel blend are excellent choices due to their breathability, comfort, and ease of sewing. Consider a fabric with a fun pattern or a solid color that complements your wardrobe. For the inner layer, a softer fabric like flannel can add an extra layer of comfort against the skin.
- Elastic: About 1 to 1.5 yards of soft, 1/8 to 1/4 inch wide elastic cord or flat elastic. Braided or knitted elastic works well as it retains its stretch. Ensure it’s comfortable against the skin and durable enough to withstand repeated adjustments and washing.
- Beads: A small handful of beads (2-4 per mask) with a hole large enough to accommodate your chosen elastic, yet small enough to create friction and hold the elastic in place once adjusted. Wooden, plastic, or glass beads with a smooth finish are ideal to prevent snagging the elastic. Test your elastic with your beads beforehand to ensure compatibility.
- Wonder Clips (or Sewing Pins): These small, colorful clips are fantastic for holding fabric layers together, especially thick seams or when working with elastic, where pins might be cumbersome or leave marks. If you don’t have wonder clips, traditional sewing pins will work.
- A Sewing Machine: Any basic sewing machine capable of a straight stitch and perhaps a zigzag stitch will suffice. Ensure it’s in good working order and threaded correctly with a good quality polyester all-purpose thread that matches your fabric.
- A Pair of Scissors: Sharp fabric scissors are essential for clean, precise cuts. Dedicate a pair specifically for fabric to keep them sharp.
- A Rotary Cutter: While optional, a rotary cutter paired with a cutting mat makes cutting straight lines and multiple fabric layers incredibly fast and accurate. It’s a great tool for achieving professional-looking edges.
- A Cutting Mat: Protects your work surface and provides a grid for accurate measurements when using a rotary cutter.
- An Ironing Board and An Iron: Pressing seams is a critical step in achieving a professional finish and ensuring your mask holds its shape. A good iron and sturdy ironing board are indispensable.
- Fabric Marker or Chalk: Useful for transferring pattern markings onto your fabric for precise cutting and sewing lines.
- Safety Pin or Bodkin: Extremely helpful for threading the elastic through the ear loop casings of your mask.
Step-by-Step Guide: Crafting Your Adjustable Face Mask
This detailed guide will expand upon the core instructions provided by the excellent adjustable mask video tutorial by Simplicity on YouTube, ensuring you have all the information needed to create a perfectly fitting and comfortable face mask. Precision and patience are key to a successful outcome.
1. Prepare Your Fabric and Pattern
- Pre-wash and Iron Fabric: Before you begin, pre-wash your fabric to preshrink it and remove any manufacturing chemicals. Once dry, press it thoroughly with your iron to remove all wrinkles. This step is crucial for accurate cutting and sewing.
- Create or Select Your Pattern: You can either draft your own pattern or use a reliable template. Most fabric masks consist of two main fabric pieces (front and lining), often rectangular or contoured for a better fit over the nose and chin. Ensure your pattern includes seam allowances (typically 1/4 inch or 3/8 inch). If following the Simplicity tutorial, they will guide you on drawing out your specific pattern dimensions. For a basic rectangular mask, a common size might be two pieces of fabric, approximately 9×7 inches, which will be folded and sewn.
- Cut Your Fabric Pieces: Lay your pressed fabric flat on your cutting mat. Place your pattern pieces on the fabric, aligning with the grainline for stability. Use your fabric marker or chalk to trace the pattern. Then, with your sharp fabric scissors or rotary cutter, carefully cut out the required number of fabric pieces. Typically, you’ll need two outer fabric pieces and two lining fabric pieces.
2. Construct the Main Mask Body
- Sewing the Mask Panels: Take two of your fabric pieces (one outer, one lining if you’re making a two-layer mask, or two outer if using a single layer folded design). Place them right sides together. Stitch along the designated edges, usually the top and bottom curved or straight edges, leaving the sides open. Use a 1/4 or 3/8-inch seam allowance. Repeat this for the other two fabric pieces.
- Clip and Turn: For curved seams, make small clips into the seam allowance (without cutting through the stitching) to help the curve lie flat. For corners, trim the seam allowance diagonally across the corner. Turn the fabric right side out and press the seams flat and crisp.
- Assemble Inner and Outer Layers (if applicable): If you have separate outer and lining layers, insert the lining piece into the outer piece, ensuring right sides are out for both and they fit snugly. Align the seams carefully.
- Topstitching (Optional but Recommended): For a more professional finish and added durability, topstitch along the top and bottom edges of your mask, about 1/8 inch from the edge. This also helps keep the layers together and provides a crisp edge.
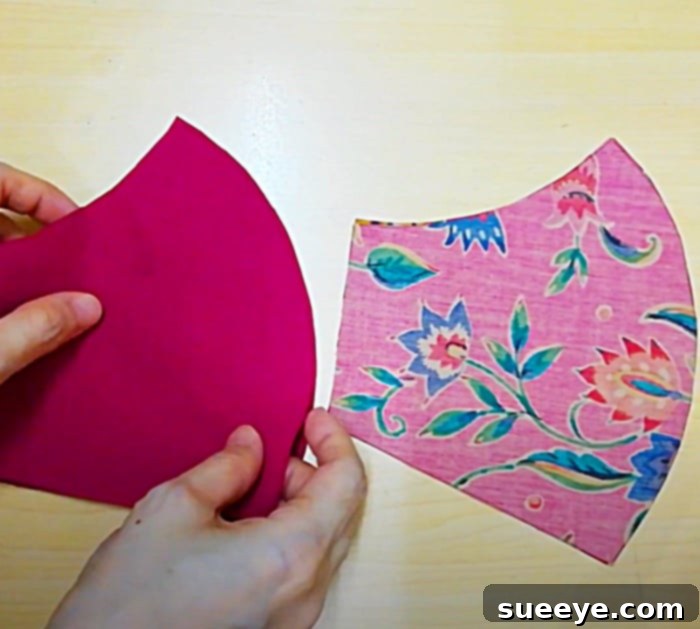
3. Create the Ear Loop Casings and Attach Elastic
- Prepare Side Edges for Casings: Turn under the raw side edges of your mask twice (e.g., 1/4 inch then another 1/2 inch) to create a casing for the elastic. Press firmly with your iron to create sharp folds.
- Stitch the Casings: Stitch along the inner fold of these casings, close to the edge, creating a channel for your elastic. Ensure the channels are wide enough for your elastic to pass through easily.
- Cut and Prepare Elastic: Cut two pieces of elastic, each approximately 10-12 inches long (adjust based on head size and desired fit). Thread one or two beads onto each piece of elastic. The beads should be able to slide freely but offer some resistance when pulled, which allows for adjustment. You might tie a small knot at one end of the elastic, or simply thread it through the mask first.
- Thread Elastic Through Casings: Attach a safety pin to one end of an elastic piece. Guide the safety pin (and elastic) through one of the side casings you just created. Once threaded, pull the elastic through until the bead is outside the casing and you have an even length of elastic on both sides of the bead.
- Secure Elastic Ends: Depending on the mask design, you might loop the elastic ends together and tie a knot, or you might stitch them directly into the mask. For this design, typically, the elastic runs through the channel, and the ends are tied in a small knot, or secured by stitching within the casing to form a loop. The bead then slides along this loop to adjust its size. The Simplicity tutorial will show you exactly where to secure the elastic, often by sewing it into the corners of the mask or creating a small loop and securing the ends.
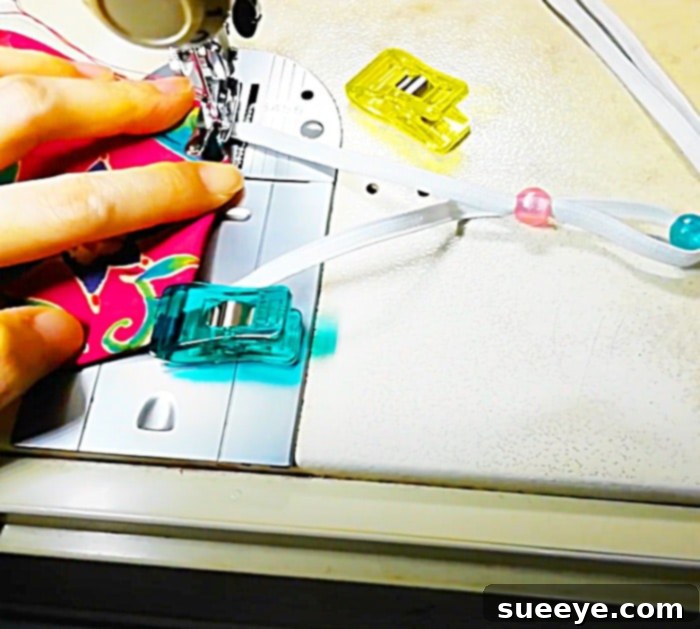
Then, you will sew on your elastic earpieces where you have added the adjustable beads. This usually involves securely stitching the ends of the elastic into the mask’s side channels, forming the ear loops, and ensuring the beads are free to slide along the elastic for adjustment.
4. Final Touches and Adjustment
- Test the Fit: Try on your newly made mask. Adjust the beads on the ear loops to achieve the most comfortable and secure fit. The mask should cover your nose, mouth, and chin without gaping, but also without pulling uncomfortably on your ears.
- Trim Threads: Snip any loose threads for a neat and professional finish.
- Final Press: Give your mask one last press with the iron to set all the seams and give it a crisp, ready-to-wear look.
Caring for Your DIY Adjustable Face Mask: Longevity and Hygiene
To ensure your handcrafted face mask remains effective and comfortable for a long time, proper care is essential. Following these guidelines will help maintain its shape, cleanliness, and the integrity of the elastic and beads:
- Regular Washing: It’s recommended to wash your mask after each use, or at least daily if worn frequently. This removes dirt, oils, and any potential contaminants.
- Washing Method:
- Machine Wash: Place your mask in a mesh laundry bag to protect the beads and elastic from tangling or damage during the wash cycle. Use a gentle cycle with cold or warm water and a mild detergent. Avoid hot water, as it can degrade elastic over time and may cause fabric shrinkage or color fading.
- Hand Wash: For extended longevity, especially for masks with delicate beads or elastic, hand washing is a great option. Fill a basin with warm, soapy water, gently agitate the mask, and let it soak for a few minutes. Rinse thoroughly under cool, running water until all soap residue is gone.
- Drying:
- Air Dry (Recommended): Lay your mask flat or hang it to air dry. This is the best method to preserve the elastic and prevent shrinkage or damage to the beads. Direct sunlight can help sanitize the mask, but excessive exposure might fade colors.
- Machine Dry: If using a dryer, opt for a low heat setting. High heat can damage elastic and cause fabric shrinkage. Remove the mask promptly to avoid excessive wrinkling.
- Ironing: If your mask becomes wrinkled, you can iron it on a medium heat setting. Be sure to avoid direct contact with the elastic and beads, as high heat can melt or damage them. Iron around these components.
- Storage: Store your clean, dry mask in a clean, breathable bag or container to protect it from dust and other contaminants until its next use.
Conclusion: Embrace Comfort and Style with Your Homemade Adjustable Mask
Creating your own face mask with adjustable ear loops using beads is more than just a sewing project; it’s an investment in your personal comfort, health, and well-being. This innovative design addresses the common frustrations associated with ill-fitting masks, offering a customizable solution that ensures a snug, secure, and incredibly comfortable fit for any wearer. Whether you have sensitive ears, wear glasses, or simply desire a mask that truly fits, this DIY approach provides an answer.
By following this comprehensive guide, from selecting the right materials to meticulously crafting each seam and incorporating the ingenious bead adjustment mechanism, you empower yourself with a skill that yields practical, stylish, and reusable protection. The satisfaction of wearing something you’ve made yourself, knowing it’s tailored specifically for your comfort, is truly unparalleled.
So, gather your materials, fire up your sewing machine, and embark on this rewarding journey. Say goodbye to discomfort and hello to a new era of personalized mask-wearing. This is a good face mask if you feel like you need to wear one, and it’s even better when it fits you perfectly. For a visual demonstration, remember to consult the original Simplicity video tutorial on YouTube to see these steps brought to life. Happy sewing!