
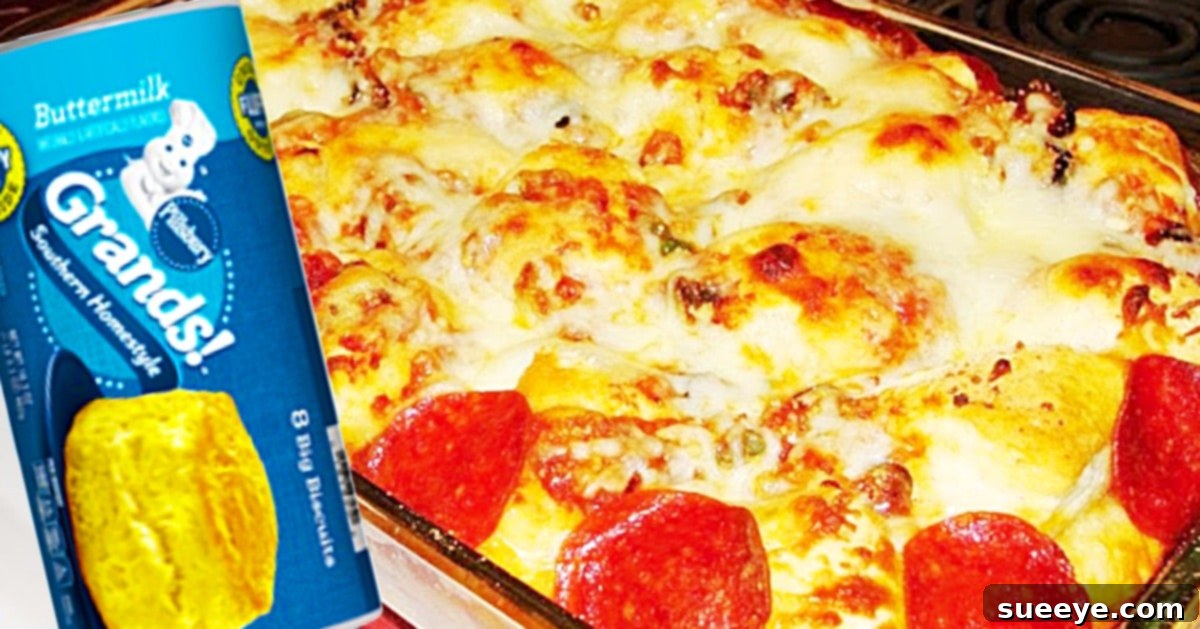
Easy Canned Buttermilk Biscuit Bubble Pizza: A Quick & Delicious Family Meal
In the quest for effortless yet utterly satisfying weeknight meals, few recipes shine as brightly as the Canned Buttermilk Biscuit Bubble Pizza. This innovative and incredibly simple approach to homemade pizza transforms humble canned biscuits into a fluffy, golden crust, creating a dish that’s not only delicious but also incredibly fun to make and eat. If you’re looking for a budget-friendly, family-friendly meal that comes together in a flash, you’ve stumbled upon your new favorite go-to recipe.
Inspired by ingenious creations like the one shared by Cooking And Crafting on YouTube, this bubble pizza concept simplifies the traditional pizza-making process without sacrificing flavor. It’s an ideal solution for busy evenings, potlucks, or simply when you’re craving a comforting meal with minimal fuss. The beauty of this recipe lies in its adaptability and the delightful texture of the “bubble” crust, which gets wonderfully soft and airy inside while achieving a perfect golden crispness on the outside. Get ready to impress your taste buds and your loved ones with this virtually effortless culinary delight!
Why You’ll Love This Canned Biscuit Bubble Pizza
The Canned Buttermilk Biscuit Bubble Pizza isn’t just another recipe; it’s a revelation for home cooks seeking convenience without compromise. Here’s why this easy pizza recipe is poised to become a staple in your kitchen:
- Unbeatable Simplicity: Forget complicated dough kneading or rising times. This recipe utilizes pre-made canned biscuits, drastically cutting down prep time and effort. It’s truly a dump-and-bake sensation.
- Budget-Friendly: Made with readily available and inexpensive ingredients, this homemade pizza offers a hearty meal without breaking the bank. It’s a smart choice for feeding a crowd or managing your grocery budget effectively.
- Incredibly Versatile: The “bubble” crust serves as a fantastic canvas for virtually any pizza topping you can imagine. From classic pepperoni to gourmet veggie combinations, you can customize it to suit every palate and preference.
- Crowd-Pleasing Perfection: Who doesn’t love pizza? This bubble pizza is a guaranteed hit with both kids and adults. Its unique, pull-apart texture makes it a fun and interactive meal for family dinners or casual gatherings.
- Quick & Easy Weeknight Solution: From start to finish, this dish can be on your table in under an hour. It’s the ultimate solution for busy weeknights when time is of the essence but you still crave a delicious, home-cooked meal.
- Minimizes Leftovers: While it’s delicious, any potential leftovers reheat beautifully, making it a great option for meal prepping or next-day lunches.
Essential Ingredients for Your Buttermilk Biscuit Bubble Pizza
The magic of this bubble pizza lies in its simple yet effective ingredient list. Each component plays a vital role in creating a balanced, flavorful, and incredibly satisfying dish. Here’s a closer look at what you’ll need and why these ingredients are key:
- 3 (7-ounce) Cans of Buttermilk Biscuits: These are the star of the show, forming the foundation of your unique bubble crust. Buttermilk biscuits lend a tender, flaky texture and a slightly tangy flavor that pairs perfectly with traditional pizza toppings.
- 1/2 cup Green Bell Pepper (chopped): Adds a fresh, vibrant crunch and a mild, sweet flavor that complements the richness of the cheese and sauce.
- 1 small Onion (chopped): Provides aromatic depth and a subtle sharpness that enhances the overall flavor profile of the pizza.
- 1 cup of Sliced Black Olives: Their briny, earthy notes offer a wonderful contrast and a classic pizza parlor taste.
- 1 (10-ounce) Can of Sliced Mushrooms (or fresh): Earthy and savory, mushrooms add umami to the pizza. If using fresh, sauté them briefly beforehand for best results.
- 2 cups of Pasta Sauce: A good quality marinara or pasta sauce forms the flavorful base. Choose your favorite brand for the best results, ensuring it’s rich and well-seasoned.
- 4 cups Grated Mozzarella Cheese: The quintessential pizza cheese! Mozzarella melts beautifully, creating that irresistible gooey, stretchy texture everyone loves. Freshly grated cheese often melts better than pre-shredded.
- Sliced Pepperoni: For that classic savory, slightly spicy kick and crisp edges when baked. Feel free to adjust the quantity to your preference.
- Parmesan Cheese: A sprinkle of Parmesan at the end adds a salty, nutty, and sharp finish, elevating the flavor and providing a lovely golden crust.
Step-by-Step Directions: Crafting Your Easy Buttermilk Biscuit Bubble Pizza
Making this canned biscuit pizza is wonderfully straightforward, requiring just a few easy steps from preparation to plate. Follow these detailed instructions to create a delicious and visually appealing bubble pizza that’s sure to be a hit.
Preparation (5-10 minutes)
- Preheat Your Oven: Start by preheating your oven to 350°F (175°C). This ensures your pizza bakes evenly and achieves a perfect golden crust.
- Prepare Your Baking Dish: Lightly grease a 9×13-inch baking dish or a similar oven-safe dish with cooking spray or a thin layer of olive oil. Greasing prevents the biscuits from sticking and helps them brown beautifully.
- Chop Your Vegetables: If not already done, finely chop your green bell pepper and onion. Slice your black olives and mushrooms (if using fresh). Having all your ingredients prepped and ready makes the assembly process smooth and quick.
Assembling the Bubble Pizza (10-15 minutes)
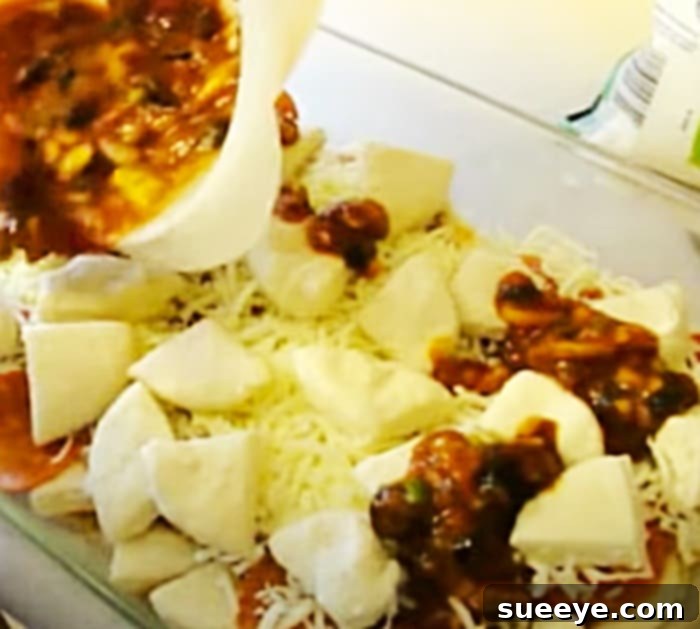
- Prepare the Biscuit Dough: Open your cans of buttermilk biscuits. Each biscuit should be cut into quarters. You can use a knife or simply tear them by hand. This smaller size helps create the “bubble” effect and allows for better sauce and topping distribution.
- Create the Biscuit Base: Scatter the quartered biscuit pieces evenly across the bottom of your greased baking dish. Press them down gently but firmly to form a cohesive, albeit slightly bumpy, bottom layer. Don’t worry about perfect coverage; the biscuits will expand and merge during baking.
- Spread the Pasta Sauce: Pour the pasta sauce evenly over the biscuit layer, spreading it right to the edges. This ensures every bite is infused with savory tomato flavor.
- Add Your First Layer of Toppings: Sprinkle about half of your chopped green bell pepper, onion, black olives, and mushrooms over the sauce. This initial layer ensures a good distribution of toppings throughout the pizza.
- Layer with Mozzarella Cheese: Generously sprinkle about 2 cups of the grated mozzarella cheese over the first layer of toppings. This creates a delicious cheesy foundation.
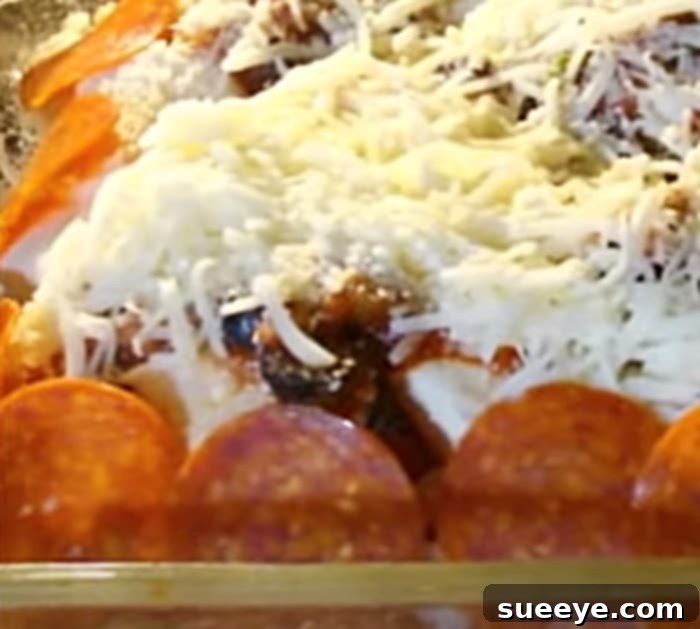
- Arrange the Pepperoni: Now, strategically place your sliced pepperoni. For a visually appealing “bubble” pizza, arrange some pepperoni pieces around the perimeter of the dish, pressing them lightly into the cheese. You can also scatter some inside the dish.
- Add Remaining Toppings and Cheese: Distribute the remaining chopped bell pepper, onion, black olives, and mushrooms over the pepperoni and cheese layer. Finish by sprinkling the remaining 2 cups of grated mozzarella cheese generously over the entire pizza.
Baking & Finishing (25-35 minutes)
- Bake the Pizza: Place the baking dish in your preheated oven. Bake for approximately 25 to 30 minutes, or until the biscuit crust is golden brown and cooked through, and the cheese is melted, bubbly, and slightly browned on top. The exact baking time may vary depending on your oven, so keep an eye on it.
- A Touch of Parmesan: In the last 5 minutes of baking, or immediately after removing it from the oven, sprinkle a generous amount of Parmesan cheese over the hot pizza. The residual heat will melt it slightly, adding another layer of savory flavor.
Serve (5 minutes)
- Rest Before Serving: Once baked, remove the bubble pizza from the oven and let it rest for 5-10 minutes. This allows the cheese to set slightly, making it easier to serve and preventing it from falling apart.
- Enjoy: Serve warm and watch it disappear! The pull-apart nature of the biscuits makes it fun to serve directly from the dish.
Tips for the Perfect Canned Biscuit Bubble Pizza
While this recipe is incredibly forgiving, a few expert tips can elevate your bubble pizza from great to absolutely phenomenal:
- Don’t Overcrowd: Resist the urge to pile on too many toppings. While customization is fun, too many ingredients can make the pizza soggy and prevent the biscuits from cooking through properly. Stick to a balanced amount.
- Pre-Cook Wet Veggies: If using water-heavy vegetables like fresh mushrooms, spinach, or zucchini, consider briefly sautéing them before adding to the pizza to remove excess moisture. This prevents a watery crust.
- Quality Ingredients Matter: Using a good quality pasta sauce and freshly grated mozzarella will make a noticeable difference in flavor and melt.
- Grease Generously: Ensure your baking dish is well-greased. This is crucial for easy removal and to prevent the biscuit crust from sticking to the bottom.
- Customize Your Biscuits: While buttermilk biscuits are traditional, you can experiment with other canned biscuit varieties like flaky layers or even crescent roll dough cut into pieces for a different texture.
- Bake Until Golden: Don’t underbake! The biscuits need to be thoroughly cooked and golden brown on top and around the edges to ensure they are fluffy and delicious.
- Let it Rest: Allowing the pizza to rest for a few minutes after baking helps the cheese set and makes serving much cleaner and easier.
Creative Variations and Topping Ideas
The Canned Buttermilk Biscuit Bubble Pizza is a fantastic base for culinary creativity. Here are some exciting variations and topping ideas to inspire your next pizza night:
- Meat Lovers’ Delight: Add cooked sausage crumbles, crispy bacon bits, and diced ham alongside the pepperoni for a hearty, protein-packed version.
- Vegetarian Feast: Load it up with even more veggies! Consider adding chopped bell peppers (red, yellow, orange), spinach, artichoke hearts, sun-dried tomatoes, or sliced zucchini.
- Spicy Kick: Incorporate sliced jalapeños, a pinch of red pepper flakes, or a drizzle of hot sauce over the finished pizza for those who enjoy a little heat.
- Gourmet Style: Swap out half of the mozzarella for provolone, smoked gouda, or cheddar cheese. Use pesto as a base instead of marinara sauce, and top with cherry tomatoes and fresh basil after baking.
- Breakfast Pizza: Transform it into a savory breakfast bake! Use scrambled eggs as a layer, top with cooked sausage, bacon, and cheddar cheese.
- Mediterranean Inspired: Use a blend of feta cheese and mozzarella, add Kalamata olives, sun-dried tomatoes, and a sprinkle of dried oregano.
- BBQ Chicken Pizza: Use BBQ sauce as the base instead of pasta sauce, top with shredded cooked chicken, red onion, and a blend of mozzarella and cheddar cheese.
Storage and Reheating Your Bubble Pizza
Should you be lucky enough to have leftovers (it’s rare!), here’s how to properly store and reheat your delicious bubble pizza:
- Storage: Allow the pizza to cool completely. Transfer any remaining slices or portions to an airtight container. It can be stored in the refrigerator for up to 3-4 days.
- Reheating in the Oven: For the best results, reheat slices in a preheated oven at 300°F (150°C) for about 10-15 minutes, or until warmed through and the cheese is bubbly again. This method helps maintain a slightly crispy crust.
- Reheating in the Air Fryer: An air fryer is excellent for quickly reheating individual slices, keeping them crispy. Place a slice in the air fryer at 325°F (160°C) for 3-5 minutes.
- Reheating in the Microwave: While convenient, microwaving can make the biscuit crust a bit soft. Heat individual slices on a microwave-safe plate for 30-60 seconds, or until hot.
Frequently Asked Questions About Canned Biscuit Bubble Pizza
Q1: Can I use other types of canned biscuits?
Absolutely! While buttermilk biscuits are recommended for their classic flavor and texture, you can experiment with flaky layer biscuits, crescent roll dough (cut into pieces), or even savory biscuit dough for variations. The key is to cut them into smaller, uniform pieces.
Q2: Can I prepare this pizza ahead of time?
You can do some prep work in advance, like chopping vegetables. However, it’s best to assemble and bake the bubble pizza fresh. Assembling it too far in advance can make the biscuit dough soggy, affecting its texture.
Q3: How do I prevent the pizza from getting soggy?
To avoid a soggy bubble pizza: 1) Don’t overload with toppings, especially wet ones. 2) If using high-moisture vegetables like fresh mushrooms or spinach, consider sautéing them briefly to remove excess water before adding. 3) Ensure your biscuits are fully cooked and golden brown.
Q4: What kind of baking dish works best?
A standard 9×13-inch rectangular baking dish is ideal, but a 10-inch round or square casserole dish can also work. Just make sure it’s oven-safe and provides enough surface area for the biscuits to spread without being too thin or too thick.
Q5: Is this recipe suitable for vegetarians?
Yes, it’s very easy to make this bubble pizza vegetarian! Simply omit the pepperoni and add extra vegetables, more cheese, or plant-based meat substitutes if desired.
Q6: Can I freeze leftover bubble pizza?
Yes, you can freeze individual slices. Wrap them tightly in plastic wrap and then aluminum foil, and store them in a freezer-safe bag for up to 1-2 months. Reheat directly from frozen in the oven or air fryer until thoroughly warmed.
Conclusion: Your New Go-To for Quick & Delicious Pizza
This Easy Canned Buttermilk Biscuit Bubble Pizza is more than just a recipe; it’s a brilliant hack for serving up comforting, delicious, and budget-friendly meals with incredible ease. Its simple ingredients, straightforward process, and endless customization options make it a fantastic choice for any occasion – from a quick family dinner to a fun potluck contribution. So, grab those cans of biscuits, unleash your creativity with toppings, and get ready to enjoy a uniquely satisfying pizza experience that tastes homemade without all the fuss. You’ll love how effortlessly this dish comes together, leaving you more time to savor the moments around the table.