
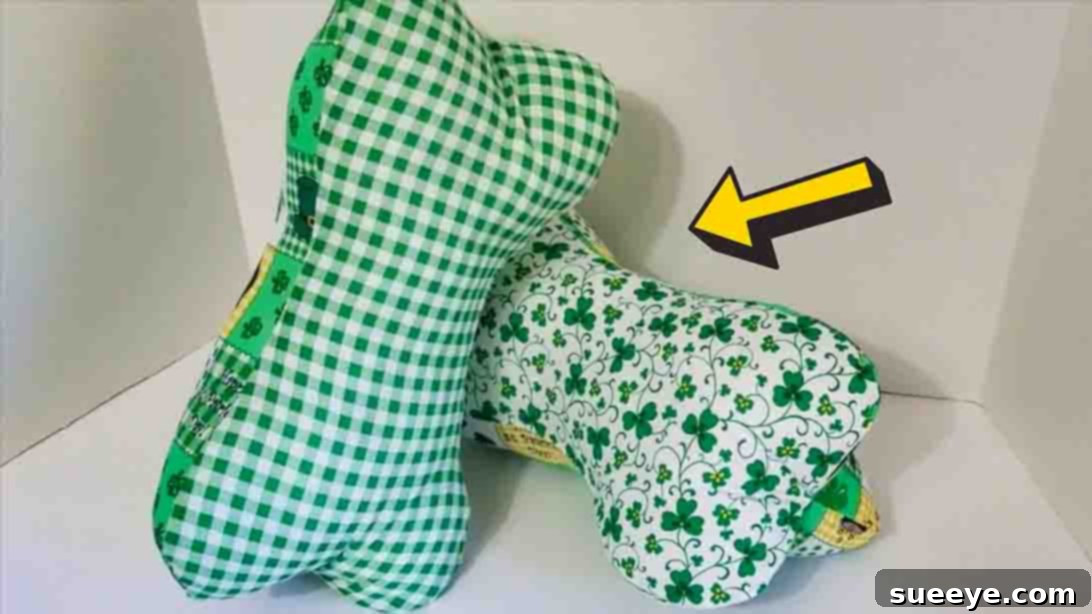
Craft Your Own Cozy Comfort: The Ultimate DIY Neckbone Pillow Tutorial
Are you searching for a rewarding and incredibly beginner-friendly sewing project that delivers both practicality and a touch of personalized charm? Look no further! This comprehensive guide will walk you through creating your very own DIY neckbone pillow, inspired by the fantastic tutorial from B4 and Afters on YouTube. This project is not only simple and quick to complete but also remarkably inexpensive, making it an ideal choice for anyone looking to dive into sewing without a huge investment.
A handmade neckbone pillow is incredibly versatile. It serves as an excellent travel companion, offering ergonomic support during long car rides, flights, or even just relaxing on the couch. Beyond its functional benefits, these cute pillows make thoughtful and personalized gifts for friends, family, or even your beloved pets. Imagine crafting a unique neck support for every member of your household, or preparing a batch as heartfelt holiday presents. This project is designed for enjoyment, promising a satisfying creative experience from start to finish.
RELATED: Easy DIY Neck Pillow Sewing Tutorial
Why Sew a DIY Neckbone Pillow? Benefits & Uses
The appeal of the neckbone pillow extends far beyond its cute aesthetic. Its unique, ergonomic shape is specifically designed to cradle your neck, providing comfortable support whether you’re napping, reading, or simply lounging. Here are just a few reasons why this DIY project is a must-try:
- Unmatched Comfort & Support: The distinctive bone shape is perfect for supporting the curve of your neck, reducing strain and promoting relaxation.
- Budget-Friendly Crafting: You can often use fabric scraps or inexpensive remnants, making this an economical way to create a functional item.
- Personalization Power: Choose fabrics that match your decor, reflect your personality, or suit the recipient’s taste. From vibrant patterns to soft, plush textures, the possibilities are endless.
- Versatile Applications:
- Travel Pillow: Essential for road trips, flights, and train journeys.
- Home Comfort: A perfect addition to your bed, sofa, or reading nook.
- Unique Gifts: A thoughtful, handmade present for birthdays, holidays, or just because.
- Pet Pillow: Many pet owners find the bone shape appealing for their furry friends (ensure materials are pet-safe!).
- Beginner-Friendly: With straightforward cuts and basic sewing techniques, even those new to sewing machines can achieve great results.
- Quick to Make: Once you get the hang of it, you can whip up one of these pillows in just an hour or two.
This tutorial, inspired by the clear instructions from B4 and Afters, breaks down the process into easy-to-follow steps. Whether you prefer to learn by watching or reading, we’ve got you covered. Let’s gather your supplies and get started on this rewarding project!
Essential Materials You’ll Need
One of the best aspects of this DIY neckbone pillow is its minimal material requirements. You likely have most of these items around your house already, or they can be easily purchased at any craft or fabric store. Choose your fabric carefully, considering both aesthetics and comfort. Soft, durable fabrics like cotton, flannel, or fleece are excellent choices for a comfortable pillow.
- Fabric: Three pieces of bone-shaped fabric. For a standard neckbone pillow, you’ll want pieces roughly 12-15 inches long and 6-8 inches wide at their widest points. Consider using two different fabrics for the top/bottom and the side panel for an interesting look, or three matching pieces for simplicity.
- Sharp Scissors or Rotary Cutter: For precise fabric cutting.
- Sewing Machine: While it is possible to hand-sew this project, a machine will make it much faster and more durable.
- Matching Thread: Polyester thread is strong and suitable for most fabrics.
- Stuffing: Polyester fiberfill is a common and affordable choice, offering a soft yet supportive feel. Other options include memory foam scraps, buckwheat hulls (for a firmer, moldable pillow), or even recycled fabric scraps.
- Pins: Essential for holding your fabric pieces together securely before sewing.
- Fabric Marker or Chalk: For tracing your bone shape onto the fabric.
- Iron and Ironing Board: For pressing seams, which always results in a more professional finish.
Step-by-Step Guide to Sewing Your Neckbone Pillow
Follow these detailed instructions to craft your perfect neckbone pillow. Take your time with each step, especially if you’re a beginner, and remember that practice makes perfect!
Step 1: Preparing Your Fabric Pieces
The foundation of your neckbone pillow lies in accurately cut fabric pieces. If you don’t have a bone-shaped pattern, you can easily create one. Search online for “bone shape template” to print one out, or freehand draw a symmetrical bone shape onto a piece of cardboard and cut it out. This will be your reusable pattern.
- Cut Your Fabric: Place your bone pattern onto your chosen fabric. Using your fabric marker or chalk, trace the outline. You will need to cut out three identical bone shapes. Ensure your cuts are precise. For a neater finish, consider adding a 1/2-inch seam allowance around your traced line, and cut along this outer line. This allowance will be included in your sewing.
- First Seam: Take two of your bone-shaped fabric pieces. Place them right sides together (the pretty sides facing each other). Align the edges carefully. Use pins to secure them in place, especially around the curves, to prevent shifting while sewing.
- Sewing the First Section: On your sewing machine, starting from the approximate middle of one long side, begin sewing with a 1/2-inch seam allowance (or whatever allowance you decided upon). Use a straight stitch and backstitch at the beginning and end of your seam to secure it. Sew carefully around the perimeter of the bone shape, following the curves smoothly. Stop sewing when you reach about halfway around, leaving roughly half of the perimeter unsewn. This unsewn section is crucial for attaching the third piece of fabric later.
Step 2: Assembling the Pillow’s Structure
This step brings the three-dimensional shape to your pillow by incorporating the third fabric piece, which will form the central band of your neckbone pillow.
- Prepare for the Third Piece: Once you’ve sewn half of the first two pieces, gently open up the sewn section. Lay the third bone-shaped fabric piece on top of one of the open pieces, ensuring their right sides are together. Align the raw edges precisely.
- Sewing the Second Section: Pin this third piece to the first sewn piece along the unsewn half. Again, start sewing from where you left off previously (or slightly before, overlapping your stitches) and sew halfway around the perimeter, just like before, using the same seam allowance. Remember to backstitch at the beginning and end. You will now have two halves sewn, with a large remaining opening.
- Connecting the Final Seam: You should now have the three pieces partially connected. Carefully align the remaining unsewn edges of the third piece with the other side of the first piece (the one you didn’t connect it to yet). Place these edges right sides together, matching the points where your previous seams ended. Pin securely along this remaining segment.
- Creating the Turning Gap: Sew this final section together, but crucially, leave a gap of about 3-4 inches unsewn along one of the straighter edges. This opening will be used to turn your pillow right side out and to add the stuffing. Make sure to backstitch firmly at both ends of this unsewn gap.
- Clip Your Curves: For a smooth, professional finish, especially with curved seams, it’s vital to clip the seam allowances. Trim any excess fabric close to the stitches (but not through them) in the curved areas. For outward curves, cut V-shaped notches. For inward curves, make small snips perpendicular to the seam line. This helps the fabric lay flat once turned.
- Turn Right Side Out: Gently reach into the unsewn gap and pull all the fabric through until the pillow is entirely right side out. Use a point turner or a dull pencil to carefully push out all the seams and curves, ensuring the bone shape is well-defined. Press the entire pillow form with an iron, paying special attention to the seams, to give it a crisp finish.
Step 3: Stuffing and Finishing Touches
This is where your pillow comes to life, gaining its plush volume and supportive feel.
- Stuff the Pillow: Begin filling the inside of your pillow with your chosen stuffing material. Take small handfuls and push them into the corners and ends first, ensuring they are firmly packed. Gradually fill the rest of the pillow, aiming for an even distribution. You can make your pillow as firm or as soft as you like, but remember that a neckbone pillow generally benefits from being fairly firm to provide adequate support. Don’t overstuff to the point where seams are stressed, but ensure there are no lumpy or empty spots.
- Hand-Sew the Gap Closed: Once you’re satisfied with the stuffing, it’s time to close the opening. Fold the raw edges of the fabric at the gap inwards, matching the seam allowance. Using a needle and matching thread, hand-sew the gap closed. The ladder stitch (also known as the invisible stitch) is ideal for this, as it creates a nearly undetectable seam. Take small, even stitches, pulling the thread taut as you go to draw the edges together neatly. Double-knot your thread at the end and trim any excess.
- Your Neckbone Pillow is Now Finished! Give your newly crafted pillow a final fluff and shape. Admire your handiwork – you’ve created a beautiful, functional, and personalized item!
Tips for a Perfect DIY Neckbone Pillow
To ensure your neckbone pillow turns out beautifully and lasts a long time, consider these additional tips:
- Test Stitches: Before sewing on your project, always test your sewing machine’s stitch length and tension on a scrap piece of your chosen fabric.
- Iron as You Go: Pressing your seams after each major sewing step (e.g., after attaching the first two pieces) makes a huge difference in the final look.
- Consistent Seam Allowance: Strive for a consistent seam allowance throughout the project. This helps maintain the pillow’s intended shape.
- Reinforce Stress Points: At the beginning and end of each seam, and especially around the curves where stress might occur, remember to backstitch to secure your stitches.
- Quality Thread: Use good quality polyester thread. It’s strong and less likely to break during sewing or with use.
- Stuffing Density: Experiment with how much stuffing you use. For a travel pillow, a firmer fill might be preferred for better support. For a decorative pillow, a softer fill might be suitable.
Personalize Your Pillow: Creative Ideas
Making a DIY neckbone pillow is just the beginning! Here are some ideas to make yours truly unique:
- Mix & Match Fabrics: Use complementary patterns or solid colors for the different bone sections. A soft flannel for the inner curve and a durable cotton for the outer parts can be both practical and stylish.
- Add Embellishments: Embroider initials, add appliques, or sew on decorative trims and pompoms (ensure they are securely attached, especially if for children or pets).
- Vary the Size: Scale your pattern up or down to create pillows for different uses – a smaller one for a child, a larger one for a pet bed, or even a mini one as a keyring charm!
- Include a Handle: Sew a fabric loop into one end of the pillow before closing the final seam. This makes it easy to carry or attach to luggage.
- Aromatherapy Pillow: Mix a small amount of dried lavender or other fragrant herbs into your stuffing for a soothing effect. Place the herbs in a small muslin bag before inserting to contain them.
Caring for Your Handmade Neckbone Pillow
To keep your beautiful handmade pillow fresh and clean, consider the type of fabric and stuffing you used. Most polyester fiberfill pillows with cotton or flannel covers can be machine washed on a gentle cycle with cold water. Tumble dry on low heat or air dry completely to prevent mildew. If you used delicate fabrics, spot cleaning or hand washing might be more appropriate. Always check the care instructions for your specific fabric if unsure.
Frequently Asked Questions (FAQ)
- Q: How long does it take to make one neckbone pillow?
- A: For a beginner, it might take 1.5 to 2 hours, including cutting and stuffing. Experienced sewers can often complete one in under an hour.
- Q: Can I hand sew this project?
- A: Yes, you can hand sew the entire pillow using a backstitch for durability. It will take significantly longer but is absolutely achievable.
- Q: What’s the best type of stuffing for a neckbone pillow?
- A: Polyester fiberfill is popular for its softness and resilience. For a firmer, moldable pillow, consider buckwheat hulls. For an eco-friendlier option, use shredded fabric scraps.
- Q: Is this pillow suitable for children or pets?
- A: Yes, but always ensure all seams are very secure, and avoid small embellishments that could be a choking hazard for young children or pets. Use pet-safe fabrics if making one for an animal.
- Q: What if I don’t have a bone-shaped pattern?
- A: You can draw one freehand on paper or cardboard. It’s essentially a rectangle with rounded ends and two inward curves on the long sides, resembling a dog bone.
Conclusion: Embrace Your Crafty Side
Congratulations! You’ve successfully learned how to create a versatile and comfortable DIY neckbone pillow. This project is a testament to how simple sewing skills can yield incredibly satisfying and functional results. Whether you’re making it for yourself, as a thoughtful gift, or for a furry friend, the joy of crafting something with your own hands is truly rewarding.
We hope this detailed tutorial empowers you to explore more sewing adventures. Don’t hesitate to experiment with different fabrics, colors, and embellishments to make each pillow uniquely yours. Share your creations with us, and keep nurturing your crafty spirit!
Many thanks again to B4 and Afters for providing the inspiration for this fantastic DIY project.