
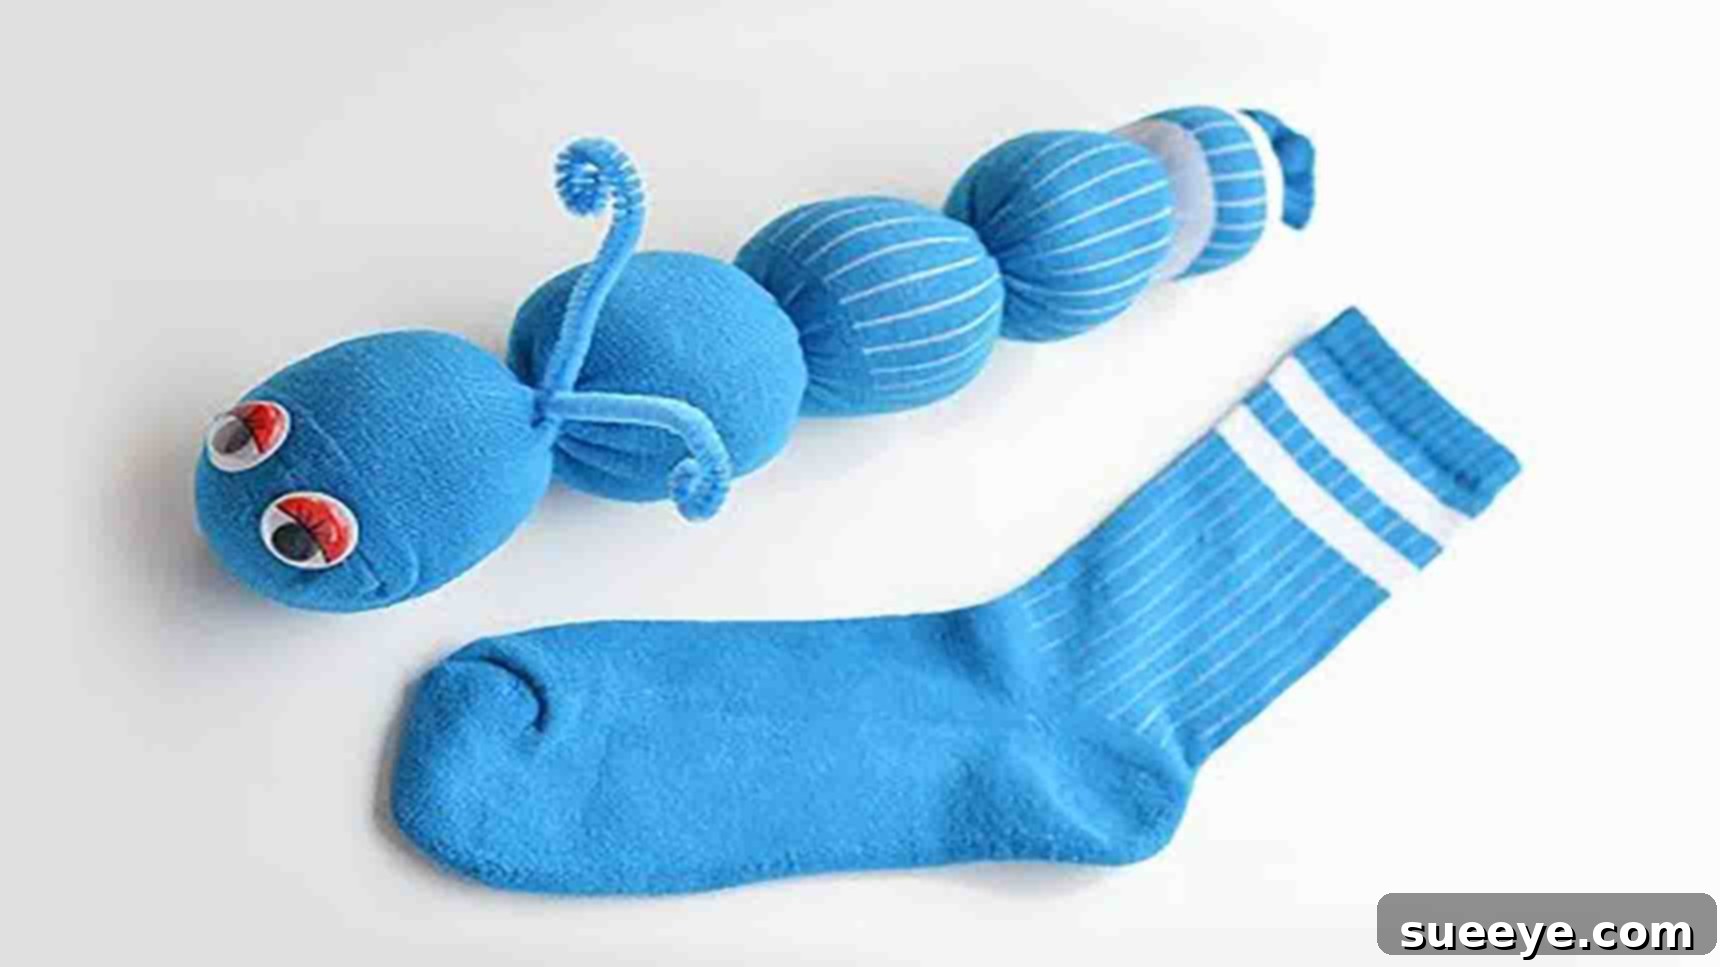
Easy DIY No-Sew Sock Worms: A Fun Upcycling Craft for Everyone
Are you searching for a super easy, incredibly fun, and eco-friendly craft project to brighten your weekend? Look no further! This delightful no-sew sock worm tutorial, inspired by the creative minds at One Little Project on YouTube, is the perfect activity to spark joy and unleash your inner crafter. It’s an ingenious way to breathe new life into those lonely, mismatched socks that often accumulate in laundry baskets, transforming them into irresistibly adorable toy worms.
Forget about complicated patterns or intimidating sewing machines; this project requires just a handful of inexpensive items, many of which you might already have around your home or can easily pick up from a dollar store or a local supermarket. Not only is it a fantastic way to engage in sustainable crafting by upcycling textiles, but these charming little sock worms also make wonderful, heartfelt gifts for children, party favors, or even unique decorative accents for your desk or shelves. Get ready to dive into a creative adventure that promises big smiles with minimal effort!
Materials You’ll Need for Your Sock Worm Project
Gathering your materials is the first exciting step in creating your lovable sock worm. The beauty of this craft lies in its simplicity and accessibility. You won’t need any specialized tools or expensive supplies. Here’s a detailed list of what you’ll need, along with some helpful tips for choosing the best items:
- Old Socks: This is the star of our project! Raid your drawers for any single socks, socks with holes, or those that have lost their match. Brightly colored socks, striped patterns, or even textured socks can add a unique personality to your worm. The size of the sock will determine the final size of your worm, so consider different lengths for a family of worms.
- Elastics: Regular rubber bands or small hair ties work perfectly. You’ll need several to create the segmented body of your worm. Ensure they are strong enough to hold the stuffing securely but not so tight that they damage the sock.
- Googly Eyes: These instantly bring your worm to life! You can find them in various sizes at any craft store or dollar store. Opt for self-adhesive ones for ease, or have a small tube of craft glue ready if yours are not sticky.
- Pipe Cleaner: One or two pipe cleaners will be used to create the worm’s cute antennae. Choose a color that complements your sock, or go for a contrasting shade for a fun pop. Fuzzy pipe cleaners add extra character.
- Stuffing: Polyester fiberfill, often used for pillows and stuffed animals, is ideal because it’s soft, pliable, and easy to work with. However, you can also upcycle other materials for stuffing, such as old pillow stuffing, fabric scraps, cotton balls, or even plastic grocery bags for a firmer texture.
- Craft Glue (Optional but Recommended): While googly eyes often come with adhesive, having a reliable craft glue or fabric glue on hand ensures everything stays put. A hot glue gun can be used by adults for quick and strong adhesion, but always exercise caution.
Step-by-Step Guide: Crafting Your No-Sew Sock Worm
Creating your sock worm is a straightforward process that’s enjoyable for all ages. Follow these easy steps to bring your charming little creature to life.
Step 1: Stuffing and Segmenting the Body
Begin by laying out all your collected materials on a clean, flat surface. This helps keep everything organized and within reach as you work. Next, take your chosen sock and prepare it for stuffing. If it’s a very long sock, you might consider trimming it slightly, though longer socks can make wonderfully whimsical worms.
Now, take a generous portion of your chosen stuffing material. Roll it into a relatively firm ball that fits snugly into the toe of the sock. The amount of stuffing will determine the plumpness of your worm’s head. Insert this ball into the very bottom (toe end) of the sock, pushing it in firmly to create a well-rounded head shape. Once you’re happy with the shape and fullness, secure this section tightly with one of your elastics, just above the stuffing ball. This forms the first segment and the head of your worm.
Continue this process: grab another portion of stuffing, shape it into a ball (or an elongated oval, depending on your desired worm shape), insert it into the sock directly above the first elastic, and then secure it with another elastic. Aim for consistent sizing for each segment, but feel free to vary the length and plumpness to give your worm a unique look. The joy of this DIY project is that there’s no right or wrong way – creativity is key! Keep going, adding stuffing and elastics, working your way up the sock. Ensure each elastic is tied firmly to prevent the stuffing from shifting. If you’re working with younger children, adult supervision is recommended, especially when handling elastics to avoid accidental snaps.
Step 2: Adding Personality and Finishing Touches
You’ll continue the stuffing and segmenting process until you have reached your desired worm length. Typically, a charming worm will have around five distinct sections, but you are absolutely free to customize the number of segments to your preferred length and look. Once you’ve created the last segment and secured it with an elastic, you can either trim any excess sock material or, if there’s enough, tuck it neatly into the last segment for a clean finish.
Now it’s time to add the defining features that will bring your sock worm to life! Take your pipe cleaner. Gently push one end into the stuffing of the first segment (the head), just behind where the first elastic is tied. You want it to be securely anchored. Loop the pipe cleaner over the top of the head and push the other end into the stuffing on the opposite side. Adjust it so it forms a graceful arch over the worm’s head, resembling antennae. Once positioned, you can playfully roll down the tips of each pipe cleaner end to create charming, curled antennae. This adds a whimsical touch and makes your worm instantly recognizable.
Finally, grab your googly eyes. Peel off their protective backing if they are self-adhesive. If not, apply a small dot of craft glue to the back of each eye. Carefully position the two googly eyes onto the “face” of your worm, typically on the first segment. Press them gently but firmly to ensure they adhere well. Allow the glue to dry completely if you used liquid glue. And just like that, your adorable, no-sew DIY sock worm is now complete and ready for playtime, display, or gifting!
Why You’ll Love This No-Sew Sock Worm Craft
Beyond being a simple and quick project, making sock worms offers a multitude of benefits, making it an ideal activity for individuals and families alike:
- Unleash Creativity: With endless possibilities for sock patterns, colors, and embellishments, each worm can be a unique expression of imagination. Kids love customizing their worms with different eye sizes or even adding mouths with fabric markers.
- Promotes Fine Motor Skills: The act of stuffing, rolling, and securing elastics helps children develop their fine motor skills and hand-eye coordination in a fun, engaging way.
- Eco-Friendly Upcycling: This craft is a fantastic way to teach about recycling and repurposing. Instead of discarding old socks, you’re transforming them into something new and useful, reducing waste.
- Budget-Friendly Fun: Most of the materials can be found around the house or purchased very cheaply, making it an accessible craft for everyone, regardless of budget.
- No Sewing Required: The “no-sew” aspect makes this project incredibly approachable for beginners and those intimidated by needles and thread. It’s instant gratification with minimal fuss.
- Great for All Ages: While simple enough for preschoolers with adult assistance, older children and even adults will find joy and relaxation in creating these charming critters.
- Perfect Handmade Gift: A handmade sock worm makes a thoughtful and personal gift for birthdays, holidays, or just because.
Creative Variations and Personalization Tips
Once you’ve mastered the basic sock worm, don’s stop there! Here are some ideas to add even more flair and personality to your creations:
- Vary Sock Types: Experiment with different sock materials. Fuzzy socks make extra cuddly worms, while patterned athletic socks can give a sporty vibe. Knee-high socks make wonderfully long, slithery worms!
- Add More Embellishments:
- Mouths: Use a permanent marker, fabric paint, or a small piece of felt to give your worm a smiling or surprised mouth.
- Spots & Stripes: Fabric markers or small felt cutouts can add polka dots, stripes, or other patterns to the worm’s body.
- Bows & Hats: Tie tiny ribbons around the neck or attach small felt hats for extra character.
- Cheeks: A tiny bit of blush or pink marker can give your worm rosy cheeks.
- Different Antennae: Instead of pipe cleaners, try using thin strips of felt, braided yarn, or even small buttons sewn onto thin wire for unique antennae.
- Family of Worms: Make worms of various sizes using baby socks, regular ankle socks, and knee-high socks.
- Theme Worms: Create worms for holidays (e.g., green for St. Patrick’s Day, red and green for Christmas) or specific interests (e.g., a “superhero worm” with a tiny felt cape).
- Weighted Worms: For a sensory toy, you can include a small bag of rice or beans in the very first segment (head) before adding stuffing.
Beyond the Craft: What to Do With Your Sock Worms
Once your adorable sock worms are complete, the fun doesn’t have to end! Here are some creative ways to enjoy your new companions:
- Imaginative Play: Kids will love incorporating their sock worms into imaginative games. They can become characters in puppet shows, garden friends, or even secret agents on exciting missions.
- Decorative Accents: These charming creatures make cute decorations for bookshelves, windowsills, or desks. A row of colorful worms can add a whimsical touch to any room.
- Thoughtful Gifts: Handmade gifts always carry a special charm. Package your sock worms nicely for birthdays, baby showers, or as thank-you presents.
- Fidget Toys: The segmented body and soft stuffing make them pleasant to hold and manipulate, offering a calming tactile experience for some.
- Party Favors: Hosting a party? Send guests home with a unique, handmade sock worm as a memorable party favor.
Safety Considerations and Troubleshooting Tips
While this is a very safe craft, a few pointers can ensure an even smoother and more enjoyable experience:
- Small Parts: Googly eyes and elastics can be choking hazards for very young children. Always supervise toddlers and ensure parts are securely attached if the worm is intended for a young child. Consider embroidering eyes for babies.
- Glue Gun Safety: If using a hot glue gun, adult supervision is crucial. Ensure children are aware of the hot tip and glue. Use low-temperature glue guns if possible.
- Worm Not Holding Shape: If your worm feels too floppy, you might not have used enough stuffing or secured the elastics tightly enough. Gently add more stuffing between segments and re-tie the elastics.
- Eyes Falling Off: If googly eyes aren’t sticking, try using a stronger craft glue or a small dot of hot glue (adults only) to secure them permanently.
- Antennae Drooping: If your pipe cleaner antennae aren’t holding their shape, try twisting two pipe cleaners together for extra stiffness, or anchor them deeper into the stuffing.
There you have it! A wonderfully simple, eco-conscious, and incredibly fun craft that transforms forgotten socks into endearing little friends. This no-sew sock worm tutorial is more than just a craft; it’s an invitation to creativity, a lesson in upcycling, and a gateway to imaginative play. We hope you have as much fun making these charming creatures as we did sharing this guide. Don’t forget to share your unique sock worm creations with us – we’d love to see them wiggle their way into your hearts!