
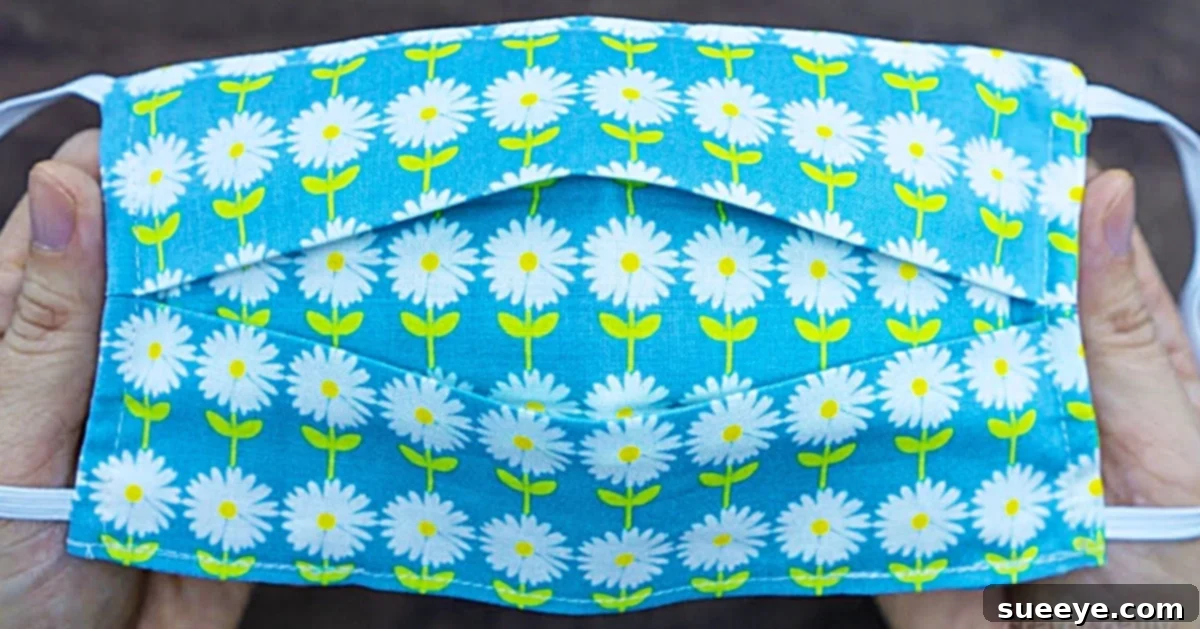
Sew Your Own Professional-Looking Face Mask with a Filter Pocket: An Easy Guide for Beginners
In today’s world, personal protection has become an undeniable part of our daily lives. The ability to craft your own reusable face masks not only provides a practical solution but also offers a sense of accomplishment and creative freedom. This comprehensive guide will walk you through the process of creating a beautifully designed, double-thickness fabric face mask that includes a discreet internal filter pocket. Even if you’re new to the world of sewing, the straightforward approach detailed here—inspired by an excellent mask video tutorial by Crafty Daily on YouTube—is designed to ensure a successful and rewarding project.
The particular design we’ve chosen for this tutorial stands out due to its thoughtful and functional construction. It features elegant pleats that allow the mask to comfortably conform to various face shapes, ensuring a snug and secure fit. Furthermore, its double-layered fabric not only enhances the mask’s durability but also ingeniously creates an integrated internal pocket, perfect for inserting an optional filter layer. This thoughtful combination results in a mask that is both comfortable for extended wear and highly functional for daily use. Say goodbye to overly complicated patterns; this method simplifies the entire process, making it incredibly accessible for even absolute beginners to achieve a polished, professional finish that you’ll be proud to wear and share.
Important Disclaimer Regarding Homemade Masks: While homemade fabric masks can offer a degree of personal protection and play a role in reducing the spread of respiratory droplets from the wearer, it is absolutely crucial to understand that they are not medical-grade Personal Protective Equipment (PPE). They are neither designed nor proven to provide the same level of protection against viruses like COVID-19 as specialized medical devices such as N95 respirators or surgical masks. Always prioritize and adhere to official health guidelines provided by reputable organizations. For the most current, comprehensive, and in-depth information regarding how to protect yourself against COVID-19 and to learn about all recommended safe practices during outbreaks, please refer to authoritative sources such as the CDC Website. Homemade masks are best utilized as a supplemental measure, in conjunction with other widely recommended safety practices, including maintaining social distancing, practicing frequent hand washing, and adhering to vaccination schedules when available.
Why Choose to Sew Your Own Reusable Fabric Mask?
There are numerous compelling and beneficial reasons to embark on a DIY mask-making project. Firstly, homemade masks offer unparalleled opportunities for personalization. You have the freedom to select fabrics that genuinely reflect your individual style, complement your wardrobe, or simply bring a touch of joy and personality to what has become an essential accessory. From vibrant, eye-catching patterns to subtle, elegant solids, the creative possibilities are truly boundless. Secondly, choosing reusable fabric masks is a more environmentally conscious decision compared to relying solely on disposable options, significantly reducing waste over time. Thirdly, from an economic standpoint, crafting your own masks can prove to be a more cost-effective solution in the long run. Lastly, and perhaps most profoundly, there’s a unique and deep sense of satisfaction and accomplishment that comes from creating something useful, protective, and beautiful with your own hands. This particular tutorial focuses on a design that strikes an ideal balance between simplicity and effectiveness, making it an excellent starting point for anyone looking to develop fundamental sewing skills while making a tangible difference in their daily life.
Understanding the Mask’s Design: The Advantages of Pleats and Filter Pockets
The pleated design incorporated into this mask is much more than a mere aesthetic detail; it serves a crucial functional purpose. Pleats enable the mask to expand and contract dynamically, providing a flexible and adaptable fit that can comfortably conform to a wide variety of face shapes and sizes. This inherent adaptability is key to ensuring better coverage around critical areas such as the nose and chin, thereby minimizing potential gaps where particles could enter or exit. The double-thickness construction is absolutely pivotal for the creation of the integrated filter pocket. This pocket is a brilliantly simple yet ingenious feature, offering the wearer the option to insert an additional layer of material for enhanced filtration, should they choose to do so. Common materials considered for supplemental filters include non-woven fabrics like certain types of interfacing, specialized vacuum cleaner bags (it is vital to use these with extreme caution and after thorough research to ensure they are safe and non-toxic for breathing), or even multiple layers of tightly woven paper towels or coffee filters. When considering any material for use as a filter, always conduct thorough research into its safety, breathability, and actual filtration effectiveness.
Essential Materials You’ll Need for Your DIY Face Mask Project
To ensure a smooth and enjoyable sewing experience, it’s highly recommended to gather all your necessary materials before you begin the project. Here’s a detailed list of what you’ll need to craft one stylish and functional mask:
- Fabric: You will need two pieces of tightly woven cotton fabric. Each piece should measure approximately 8.3 inches (21 cm) in length by 7.5 inches (19 cm) in width. Excellent choices for fabric include high-quality quilting cotton or even high-thread-count cotton sheets, primarily due to their dense weave, which offers better filtration, and their breathability. For best results and to prevent any potential shrinkage or distortion after your mask is completed, always pre-wash and thoroughly iron your fabric before you begin cutting.
- Matching Thread: Select a high-quality polyester or cotton thread that either perfectly matches or beautifully complements the color and pattern of your chosen fabric. Using strong, durable thread is essential to ensure the longevity and structural integrity of your finished mask.
- An Iron and Ironing Board: These are indispensable tools for this project. An iron is crucial for pressing seams flat as you go, which results in a much neater and more professional finish. It’s also vital for creating the crisp, well-defined pleats that give this mask its distinctive shape and fit.
- A Sewing Machine: Any basic home sewing machine capable of performing a straight stitch will work perfectly for this project. Before you start, ensure your machine is correctly threaded with your chosen thread, that the bobbin is wound, and that you have a fresh, sharp needle installed to prevent skipped stitches or fabric snags.
- Elastic: You will need two pieces of soft, comfortable elastic. Each piece should measure approximately 6-7 inches (15-18 cm) in length. Flat elastic, typically 1/4 inch (6mm) wide, is generally preferred for ear loops because it is less likely to dig into the skin and provides more comfort during prolonged wear. As an alternative, if elastic is unavailable or causes discomfort, you can opt to use fabric ties, shoelaces, or even strips cut from an old, stretchy T-shirt for the ear loops.
- Fabric Scissors or Rotary Cutter: For achieving clean, precise cuts when preparing your fabric pieces. A rotary cutter with a cutting mat is especially useful for straight lines.
- Pins or Fabric Clips: These are invaluable for holding multiple layers of fabric together securely and for keeping your carefully pressed pleats in place before you begin sewing.
- Measuring Tape or Ruler: Essential for taking accurate measurements of your fabric and elastic, ensuring your mask turns out correctly sized.
- Fabric Marker or Chalk (Optional): Useful for making temporary marks on your fabric, such as guiding lines for pleats or cutting boundaries, which can be easily removed later.
Step-by-Step Directions: Crafting Your Pleated Filter Pocket Mask
This tutorial meticulously breaks down the mask-making process into easily manageable and understandable steps. It is particularly important to pay close attention to the ironing instructions, as proper and precise pressing throughout the project is the ultimate key to achieving a crisp, professional-looking, and beautifully finished mask.
Step 1: Fabric Preparation and Initial Pleat Folding
Begin by laying out your two pre-washed and thoroughly ironed pieces of fabric flat on your clean work surface. Place one fabric piece directly on top of the other, ensuring that the “right sides” (these are the sides of the fabric that you wish to be visible on your finished mask) are perfectly aligned and facing each other. This means the “wrong sides” of the fabric will be facing outwards. Carefully align all the edges of both fabric pieces to ensure they are perfectly flush. The first and arguably most critical step, as vividly demonstrated and emphasized in the inspiring video tutorial, involves precise folding and subsequent ironing of the fabric to establish the foundational pleats *before* any stitching even begins. This innovative pre-ironing method is exceptionally effective because it creates incredibly clear and well-defined guides for your stitching lines, making the entire sewing process much more intuitive and significantly easier, even for those who are absolute beginners. Carefully follow the specific and detailed folding instructions provided in the Crafty Daily YouTube tutorial to meticulously create the initial pleats on both of the longer sides of your stacked fabric pieces. Once folded, use your hot iron to press these folds sharply and firmly, creating lasting creases. This meticulous step is absolutely non-negotiable for achieving that neat, tailored, and professional appearance, and it fundamentally ensures that the mask will expand correctly and comfortably to fit the wearer’s face.
Step 2: Sewing the Main Mask Body
With your fabric pieces now neatly pleated and thoroughly ironed, it’s time to move to the sewing machine and stitch them together. With the right sides of the fabric still facing each other, carefully pin the edges all around the perimeter of the mask. Take extra care to ensure that the pleats you just created remain flat, secure, and perfectly aligned as you pin. You will sew around the entire perimeter of the mask, but it is crucial to remember to leave a small opening—approximately 2 to 3 inches (5 to 7 cm) long—along one of the longer, unpleated edges. This strategically placed opening is absolutely essential as it will allow you to turn the mask right side out once all the main sewing is completed. Using a straight stitch on your sewing machine, maintain a consistent seam allowance of about 1/4 inch (6mm) from the edge. Make sure to backstitch firmly at both the beginning and the end of your seams, particularly around the opening, to reinforce the stitching and prevent any potential unraveling. To achieve a neater finish, especially at the corners, carefully trim any excess fabric from the corners close to the seam line (being careful not to cut through the actual stitching itself). This step helps to reduce bulk, which will make turning the corners out much sharper and smoother.
Step 3: Preparing and Attaching the Elastic Ear Loops
Before you proceed to turn the mask right side out, you will need to prepare and attach the elastic loops. Take your two pre-cut pieces of elastic. At each of the short ends of the mask (the sides where the pleats are), you will insert one end of an elastic loop in between the two fabric layers. Position it approximately 1/2 inch (1.25 cm) from the corner. Pin the elastic securely in place, making sure that the main bulk of the elastic loop is tucked entirely inside the mask, well away from the seam you are about to sew. Repeat this process for the other end of the mask, inserting the second elastic loop in the same manner. While it is possible to sew the elastic onto the outside corners after the mask has been turned right side out, inserting them now creates a much cleaner, fully enclosed finish that looks more professional. If you choose to insert them now, carefully stitch across the ends of the mask where the elastic is embedded. Reinforce these stitches with several backstitches to ensure the elastic is firmly secured within the seam. This action effectively creates strong channels or anchors for the elastic, preventing them from pulling out during use.
Step 4: Turning the Mask Right Side Out and Finishing Touches
Once you have sewn around the entire perimeter of the mask and securely attached the elastic loops (if you followed the enclosed method), carefully reach into the opening you left earlier and gently pull the entire mask right side out. Take your time with this step to avoid straining the seams. Use a blunt tool, such as a chopstick, a specialized turning tool, or even a pen cap, to meticulously push out all the corners neatly and precisely. Ensure that all seams are fully pushed out and lie smoothly. Once turned, return to your ironing board and press the entire mask again with your iron. Pay particular attention to flattening all the seams and crisping up the pleats once more; this re-pressing stage is vital for a truly professional appearance. At this point, the elastic ear pieces should be securely attached and ready for any minor adjustments to fit. Finally, close the small opening that you used for turning the mask. You can do this by hand-stitching it closed with an invisible ladder stitch for a seamless look, or by topstitching very close to the edge on your sewing machine for a more durable finish. Many sewers prefer to topstitch around the entire perimeter of the mask as a final step. This not only provides a more professional and crisp finish but also adds an extra layer of durability and helps to keep the pleats perfectly defined and the filter pocket stable over time.
Step 5: Effectively Utilizing Your New Filter Pocket
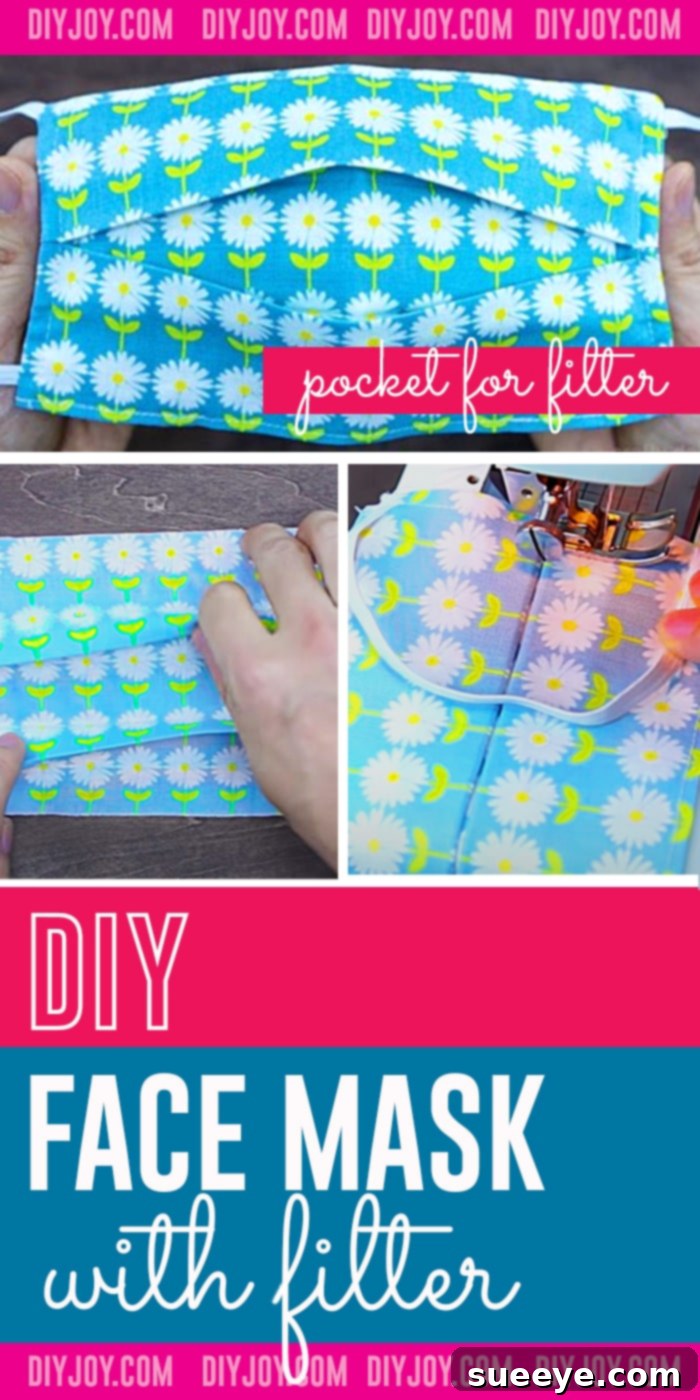
Congratulations! Your beautifully crafted pleated face mask with an integrated filter pocket is now complete and ready for use. The true genius and versatility of this mask design lie in its easily accessible internal pocket. This pocket, ingeniously formed by the double layers of fabric, can be accessed through the side openings of the mask. You now have the option to insert an additional filter material of your choice, enhancing the mask’s filtration capabilities. Popular materials often considered for supplemental filtration include non-woven polypropylene fabric (often found in reusable shopping bags, but always ensure it is breathable and safe for this purpose), certain types of furnace filters (exercise extreme caution, thorough research, and ensure non-toxicity), or even multiple layers of facial tissue or paper towels. It is imperative to remember to remove and replace any disposable filter materials after each use, or at least daily, depending on the material’s nature and your frequency of use. Always prioritize safety, breathability, and conduct thorough research on any material you intend to use as an internal filter.
Care and Maintenance for Your Reusable Fabric Mask
To ensure that your homemade fabric mask remains both effective and hygienic for as long as possible, proper care and regular maintenance are absolutely essential. It is highly recommended to wash your mask thoroughly after each single use, or at the very least, on a daily basis if you wear it frequently. You can easily wash fabric masks in a washing machine along with your regular laundry, using hot water and a standard laundry detergent. For the best results, to help maintain its original shape, and to prevent any potential damage, it is advisable to either tumble dry your mask on a low heat setting or, even better, allow it to air dry completely. When washing, avoid the use of bleach, as it can severely damage the fabric fibers and potentially weaken the mask’s structure. Similarly, it’s best to avoid fabric softeners, as they can sometimes leave residues that might reduce the mask’s filtration efficiency. Once clean and thoroughly dry, store your mask in a breathable bag or a clean container to keep it free from any contaminants until its next use, ensuring it remains as effective as possible.
Final Thoughts and an Important Safety Reiteration
Crafting your own face mask is a deeply rewarding endeavor that significantly contributes to both your personal well-being and the collective health of your community. This specific pleated design, thoughtfully equipped with a filter pocket, offers a practical, comfortable, and stylish solution for everyday use. We sincerely hope that this expanded and detailed tutorial has provided you with all the confidence, clear instructions, and inspiration you need to successfully create your own beautiful and functional masks. Please always remember that while these DIY masks are incredibly useful and beneficial, they serve as a valuable supplement to, not a replacement for, established public health guidelines. These guidelines include crucial practices such as maintaining appropriate social distancing, diligent hand hygiene, and adhering to vaccination schedules when they become available to you. Stay informed, prioritize your safety and the safety of others, and most importantly, enjoy the fulfilling process of creating something meaningful with your own hands!
If you found this comprehensive tutorial helpful and informative, we encourage you to share it widely with your friends, family, and anyone else who might also benefit from learning the empowering skill of sewing their own protective masks. Happy sewing!