
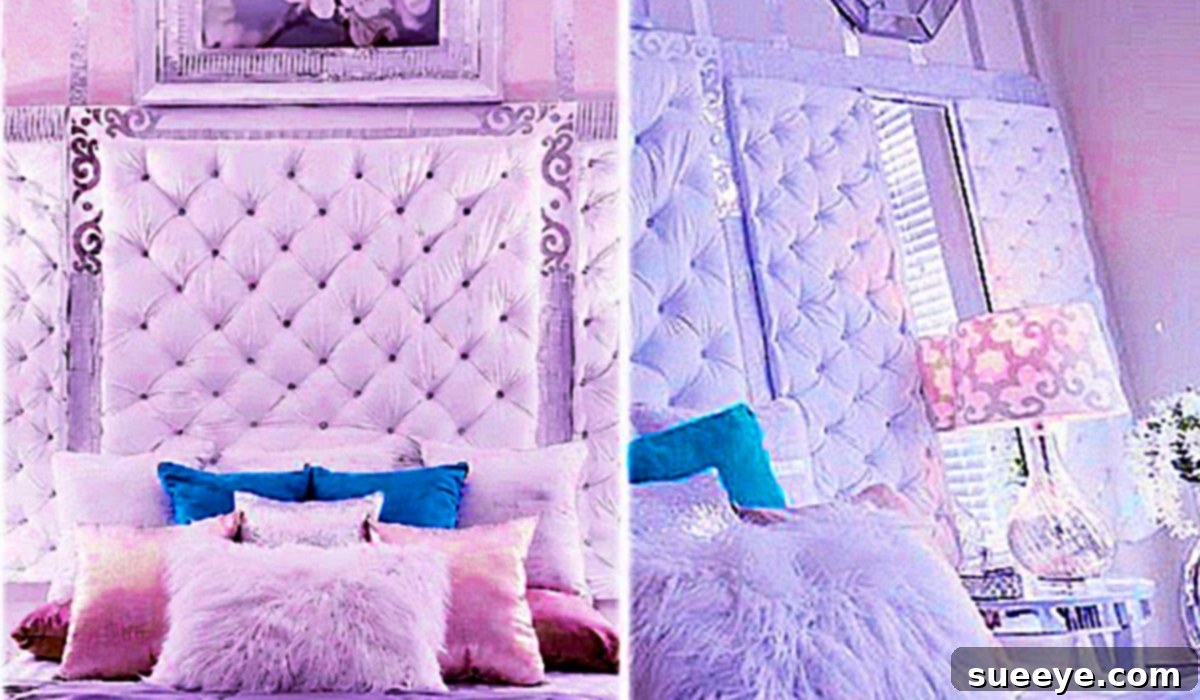
Every now and then, a bedroom craves a fresh start. After four delightful years living with a charming farmhouse aesthetic, my personal space was calling for a dramatic transformation. I adored the cozy, rustic feel, but recently, I began to feel a distinct urge for something new, something with a touch more sparkle and sophistication. Let’s just say, the line between quaint farmhouse and rustic bar atmosphere started to blur a little too often for my liking! This desire for change sent me on an exciting quest across the internet, sifting through countless DIY headboard ideas and modern decorating styles. My goal was clear: find an inspiring project that promised a significant visual upgrade without demanding a significant financial outlay or permanent alterations.
That’s when I stumbled upon a truly brilliant video tutorial by Yoduvh Essentials on YouTube. Their guide for a DIY high-end headboard wall instantly captivated me. It was everything I had been searching for – elegant, stylish, and incredibly clever. What truly sealed the deal was the revelation that this stunning bedroom centerpiece could be crafted almost entirely from materials found at my local Dollar Tree. Imagine achieving a luxurious, custom look using items that are incredibly budget-friendly! But the genius of this project doesn’t stop at affordability. For anyone living in a rental property, the “renter-friendly” aspect is a dream come true. This headboard wall design requires no drilling, no permanent fixtures, and leaves your walls completely intact, making it the perfect solution for apartment dwellers or anyone looking for a temporary yet impactful decor upgrade.
Renter Friendly DIY High-End Headboard Wall: Achieve Glamour on a Budget
The allure of a high-end aesthetic is undeniable, but often, the price tag associated with luxury decor can be daunting. This innovative DIY project beautifully bridges that gap, allowing you to infuse your bedroom with a sense of opulence and grandeur without depleting your savings. It’s a testament to the power of creative thinking and smart sourcing, proving that truly impactful home transformations don’t require designer budgets. Instead of settling for less, you can craft a focal point that rivals custom-made pieces, all while enjoying the satisfaction of having created it yourself.
For renters, the concept of personalizing a space often comes with a unique set of challenges. Landlord restrictions, the fear of losing a security deposit, and the transient nature of renting can make investing in permanent decor feel impractical. This is precisely where the “renter-friendly” aspect of this DIY headboard wall shines. Constructed as a freestanding or easily removable unit, it allows you to express your personal style boldly without leaving a single mark on the walls. When it’s time to move, simply disassemble and take your masterpiece with you, ensuring your deposit remains safe and your beautiful decor can adorn your next home. This freedom to decorate without consequence is truly a game-changer for anyone seeking to make their temporary living space feel truly their own.
Essential Materials for Your Glamorous DIY Headboard Wall
One of the most exciting aspects of this project is the accessibility of its materials. The majority of what you need can be found at a Dollar Tree, making this an incredibly cost-effective way to achieve a high-impact look. Before you begin, gather these key components:
- 25 (11″ x 14″) Picture Frames: These frames form the structural base of your headboard. Look for simple, inexpensive frames that can be easily modified. The Dollar Tree often carries suitable options, usually made from plastic or lightweight wood, perfect for this project.
- 13 Large Silver Gift Bags: These gift bags are the secret to achieving that rich, tufted, high-end texture. Their metallic finish adds a touch of sophistication, and when manipulated correctly, they create a plush, upholstered look. Consider exploring other metallic colors if silver doesn’t fit your desired color scheme, or even textured paper.
- 8 Poster Size Foam Boards or Plywood: These will serve as the sturdy backing for your headboard modules. Foam boards are lighter and easier to cut, ideal for renter-friendly installations, while plywood offers more durability if you prefer a more permanent solution. Ensure they are large enough to accommodate your frame arrangement.
- 25 Pieces of Self-Adhesive Glitter Paper: This adds a sparkling, luxurious accent to each frame. You can choose silver to match your gift bags, or opt for a contrasting color to introduce another dimension of visual interest. Make sure it’s self-adhesive for ease of application.
- Silver Spray Paint: Essential for unifying the look of your frames and any other elements you wish to give a coordinated metallic finish. Choose a good quality, fast-drying spray paint for the best results.
- E6000 or Gorilla Glue: A strong adhesive is crucial for securely attaching the various components. These industrial-strength glues provide a long-lasting bond, ensuring your headboard remains intact.
- Hot Glue Gun & Glue Sticks: For quick, initial bonds and attaching lighter elements. A hot glue gun is invaluable for its speed and versatility in DIY projects.
- Scissors: For cutting gift bags, glitter paper, and any other materials that need precise shaping.
Remember, while the Dollar Tree is a fantastic resource for many of these items, always check for sales and clearance items at other craft or discount stores. Sometimes, you can find even more unique options or bulk deals that further enhance the budget-friendly nature of this project.
Step-by-Step Directions for Your Luxurious Headboard Creation
Embarking on this DIY high-end headboard wall project is an exciting journey, and with the clear guidance from Yoduvh Essentials on YouTube, you’ll find the process remarkably straightforward. While the video offers comprehensive visual instructions, here’s a detailed breakdown of the general steps involved to help you visualize your glamorous transformation:
Phase 1: Preparing Your Frames and Tufting Elements
- Frame Preparation: Begin by removing the glass and backing from all 25 picture frames. You will primarily be using the frame itself. If the frames are not already silver or your desired metallic color, now is the time to spray paint them. Ensure you work in a well-ventilated area and apply several thin coats for a smooth, even finish. Let them dry completely.
- Glitter Paper Application: Take your self-adhesive glitter paper and carefully apply one piece to the inside backing of each frame. This step adds a shimmering accent that catches the light beautifully, enhancing the high-end appeal. Precision is key here to avoid bubbles or wrinkles.
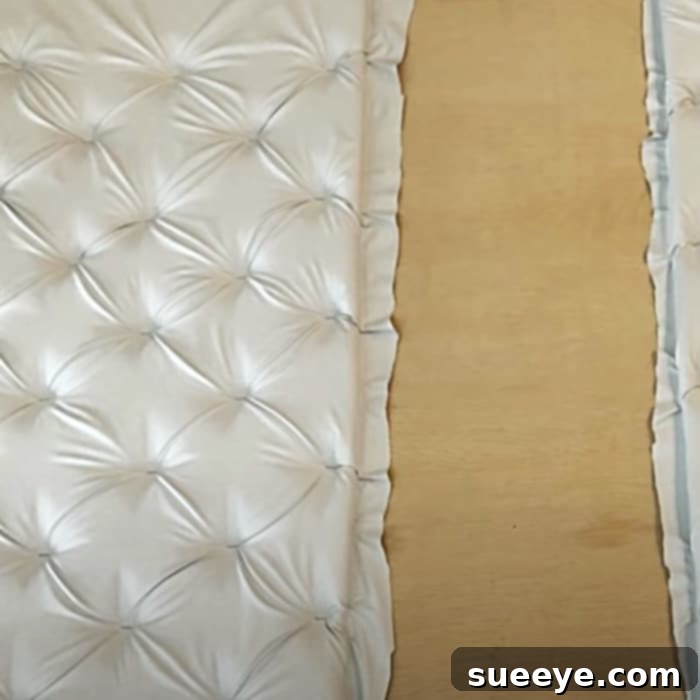
- Crafting the “Tufts”: This is where the magic of the gift bags comes in. Following the specific instructions in the Yoduvh Essentials video, you will manipulate and fold the large silver gift bags to create individual “tufted” elements. This often involves crumpling, folding, and securing the bags into plush, three-dimensional shapes that mimic upholstered tufting. The video tutorial provides the exact technique for achieving the perfect look.
Phase 2: Assembling Your Headboard Modules
- Attaching Tufts to Frames: Once your tufted elements are prepared, use your E6000 or Gorilla Glue (for a strong, permanent bond) and hot glue (for immediate hold) to securely attach one tuft to the center of each glitter-backed frame. Ensure they are centered and firmly adhered.
- Creating Panels with Foam Boards: Arrange your foam boards (or plywood) on a flat surface to form the overall size of your desired headboard. You’ll likely create several modular panels that will later be assembled into the full headboard. This makes it easier to handle and install, especially for renters.
- Arranging and Attaching Frames to Panels: On each foam board panel, meticulously arrange your prepared frames in a grid pattern. Experiment with the spacing until you achieve a visually pleasing layout. Once satisfied, use your strong adhesive (E6000/Gorilla Glue) to attach the frames securely to the foam board. Allow ample drying time for the glue to cure completely.
Phase 3: Final Installation and Enjoyment
- Mounting the Panels: The beauty of this renter-friendly design is its flexibility. You can lean the assembled foam board panels against the wall behind your bed, securing them with furniture pads to prevent slipping. For a slightly more secure, yet still temporary, installation, consider using heavy-duty command strips or velcro strips on the back of the foam boards and the wall. This allows for easy removal without paint damage. If using plywood, you might opt for small, strategically placed hooks that can be filled later if necessary.
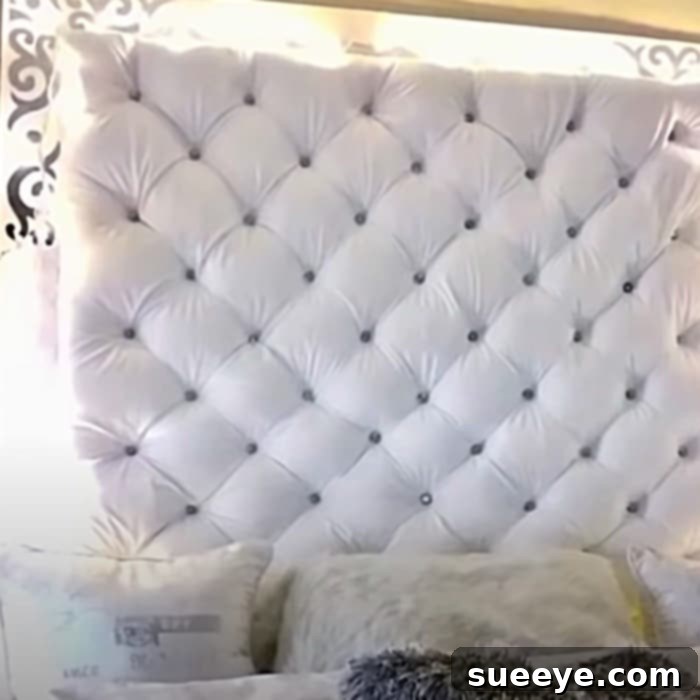
- Seamless Integration: Once all panels are in place, step back and admire your new, glamorous headboard wall! Ensure the seams between panels are as minimal as possible for a cohesive, professional look.
This is such a wonderful project because it offers a truly transformative experience for your bedroom. The resulting aesthetic is undeniably luxurious and makes a powerful statement. The combination of metallic sheen from the silver elements and the soft, dimensional tufts creates a dynamic visual interest that elevates the entire room.
Customization and Personalization: Make It Uniquely Yours
While the silver and glitter combination offers a classic high-end look, don’t hesitate to personalize this project to perfectly match your unique style. Consider using gift bags in different metallic shades like gold, rose gold, or even pearlescent white for a softer touch. The glitter paper could also be swapped for textured wallpaper scraps, fabric, or even a different color to create a dramatic contrast. You could even alternate frame colors or use frames of varying sizes to introduce a more eclectic vibe. This DIY headboard is a blank canvas, inviting your creativity to truly shine, allowing you to tailor it to your existing decor or inspire an entirely new bedroom theme.
Beyond the Headboard: Extending the Glamour
Once your stunning new headboard wall is in place, consider how you can carry this fresh, glamorous aesthetic throughout the rest of your bedroom. Introduce throw pillows with metallic accents or velvet textures, add a plush faux fur rug, or incorporate elegant lighting fixtures. Small decorative items in silver, chrome, or crystal can further amplify the luxurious feel, creating a cohesive and beautifully coordinated sanctuary that reflects your newly elevated style.
In conclusion, this renter-friendly DIY high-end headboard wall is more than just a decor project; it’s an ingenious solution for anyone yearning for a bedroom refresh that is both stunning and sensible. It triumphantly proves that luxurious design doesn’t have to come with an exorbitant price tag or the commitment of permanent fixtures. By leveraging affordable materials from stores like Dollar Tree and following simple yet effective instructions, you can dramatically enhance your living space, creating a focal point that exudes glamour and sophistication. Say goodbye to dull walls and hello to a personalized, elegant bedroom that truly feels like your own high-end retreat. Embark on this rewarding DIY journey today, and prepare to be amazed by the stunning transformation!