
Comprehensive Guide: How to Find and Eliminate Ant Nests Indoors for Lasting Relief
Ant infestations can transform your peaceful home into a persistent battleground against tiny invaders. One moment, your spaces are clear; the next, you find relentless lines of ants marching across kitchen counters, scaling walls, or even appearing in the most unexpected places like your bedroom. Beyond their sheer annoyance, their bites can range from irritating to surprisingly painful. Many homeowners, in their frustration, resort to spraying every visible ant, only to discover them reappearing days or weeks later. This common approach, while offering temporary satisfaction, often fails to address the core of the problem: the hidden ant colony itself. To truly reclaim your home from these persistent pests, a strategic shift is essential – one that focuses on locating and neutralizing the ant nest.
Understanding the intricate structure and resilience of an ant colony is paramount for effective elimination. The visible worker ants, which you typically encounter foraging for food and water, represent merely a small fraction of the entire population. Deep within the protected confines of the nest resides the queen, the singular reproductive member responsible for continuously laying eggs and ensuring the colony’s growth and survival. Consequently, merely eliminating worker ants is akin to pruning a plant without addressing its roots; new growth, or in this case, new ants, will inevitably emerge. The definitive and sustainable solution lies in meticulously locating these hidden nests and eradicating the entire colony. This comprehensive guide will equip you with proven techniques to identify and eliminate indoor ant nests, paving the way for long-term relief and a pest-free living environment.
RELATED: The Secret to Eliminate Little Black Ants
For those who benefit from visual instructions, the methods detailed in this guide draw inspiration from practical, expert tips, such as those shared by tsbrownie on YouTube, which offer valuable insights into tracking ant trails. It’s crucial to remember that while a single ant colony can be problematic, it is not uncommon for multiple nests to exist within or around a property, especially in larger homes or those with numerous entry points. A thorough and persistent investigation is vital to ensure all colonies are identified and treated, which is key to preventing future re-infestations and maintaining a genuinely ant-free home.
Here’s another helpful resource you might want to try for specific ant challenges: How to Get Rid of Flying Ants
Why Finding the Ant Nest Is Your Ultimate Solution for Pest Control
Many homeowners often express frustration when their initial attempts at ant control yield only temporary results. The underlying reason for this common struggle lies in the sophisticated and highly resilient nature of an ant colony. At the very core of every thriving ant colony is the queen, the ultimate source of all life within the nest, solely responsible for laying every egg. The worker ants, which are sterile females, are the visible soldiers and laborers. Their duties are diverse: foraging for sustenance and water, meticulously caring for the young (larvae and pupae), expanding the intricate network of tunnels that constitute the nest, and fiercely defending the colony against perceived threats. Male ants, on the other hand, exist primarily for reproduction with new queens, a role typically short-lived.
When you merely spray or crush the worker ants you see, you are effectively dealing with only the tip of the iceberg – a few scouts or foragers. The vast majority of the colony, including the critical queen and thousands of developing larvae and pupae, remain hidden, safe, and undisturbed deep within their protective sanctuary. This explains why infestations seem to persist despite your best efforts. By contrast, locating and directly treating the nest represents a strategic, decisive strike at the heart of the problem. Eliminating the queen means no new eggs are laid, effectively halting the colony’s future generations. Without a queen, the colony’s workforce eventually dwindles, leading to its complete collapse. This targeted approach is profoundly more effective and sustainable than the superficial treatment of surface ants.
Furthermore, pinpointing where ants are nesting provides invaluable information for long-term prevention. Once the nest is neutralized, you can identify and seal off the specific entry points that allowed these pests into your home in the first place, establishing a more robust, impenetrable barrier against future invasions. Whether the nest is subtly hidden within your walls, tucked away under floorboards, nestled behind heavy appliances, concealed within kitchen cabinets, behind baseboards, or even just outside your home’s foundation, discovering its precise location is the indispensable first step towards achieving permanent and effective ant control.
What You Need to Find and Treat Indoor Ant Nests
Successfully detecting and eliminating an ant nest doesn’t require a sophisticated arsenal of specialized tools. In fact, a few common household items, combined with a healthy dose of patience and acute observation skills, are all you need to commence your ant eradication mission. Here’s a comprehensive breakdown of the essential supplies:
- Sugar (or other ant attractant): Granulated table sugar is an exceptionally effective and readily available choice, as many common indoor ant species, particularly the nuisance house ants, are strongly drawn to sweets. For variations, you could also use a dab of honey, a few drops of maple syrup, or even a small, ripe piece of fruit. The primary objective is to provide an irresistible, easily accessible food source that encourages the worker ants to establish a clear, well-defined foraging trail back to their nest.
- Ant Killer (Spray or Bait – A Strategic Choice):
- Ant Killer Spray: This option is most suitable for direct application once the ant nest has been precisely located and is physically accessible. When choosing a spray, opt for products specifically formulated for indoor use, as these are often designed to be less toxic to humans and pets while still being potent against ants. Always prioritize safety by reading and strictly adhering to all manufacturer’s instructions and warnings before use.
- Ant Baits: Often considered a safer and more subtly effective option for indoor ant control, especially when the nest’s exact location is inaccessible (e.g., deep within walls or under floors). Ant baits work through a clever mechanism: worker ants are attracted to the bait, consume the poisoned food, and then carry it back to the colony. There, they share it with the queen, larvae, and other ants, resulting in the gradual but complete elimination of the entire colony from within. Baits are particularly valuable for nests that are out of reach of direct sprays. For optimal results, consider a combined approach: use sugar as the initial attractant to establish the trail, and then deploy ant baits along that trail or near the suspected nest entrance for a more thorough colony eradication.
- Small Container or Dish: A simple bottle cap, a small piece of aluminum foil, or a shallow, non-porous dish works perfectly for holding the sugar bait. Its small size makes it less intrusive and allows ants to easily access the bait.
- Flashlight: An indispensable tool for any ant detective. A powerful flashlight will help illuminate dark corners, narrow crevices, and the subtle trails ants follow in dimly lit areas like under cabinets, behind appliances, or along baseboards.
- Magnifying Glass (Optional but Highly Recommended): For the truly meticulous, a magnifying glass can be incredibly helpful. It allows for closer observation of individual ants, aiding in species identification (which can inform treatment strategies) and making faint pheromone trails more visible.
- Caulk or Spackle: Once an ant nest has been treated and eliminated, it’s crucial to seal any entry points or holes through which the ants were accessing your home. Caulk or spackle can effectively patch up these cracks and crevices, preventing future re-infestations by denying new ants access.
How to Find an Ant Nest: A Step-by-Step Guide for Effective Elimination
Locating a hidden ant nest is a methodical process that demands both patience and a keen eye for detail. By systematically following these steps, you can successfully track down the source of your ant problem and implement targeted solutions for lasting relief:
Step 1: Set the Bait and Establish a Clear Ant Trail
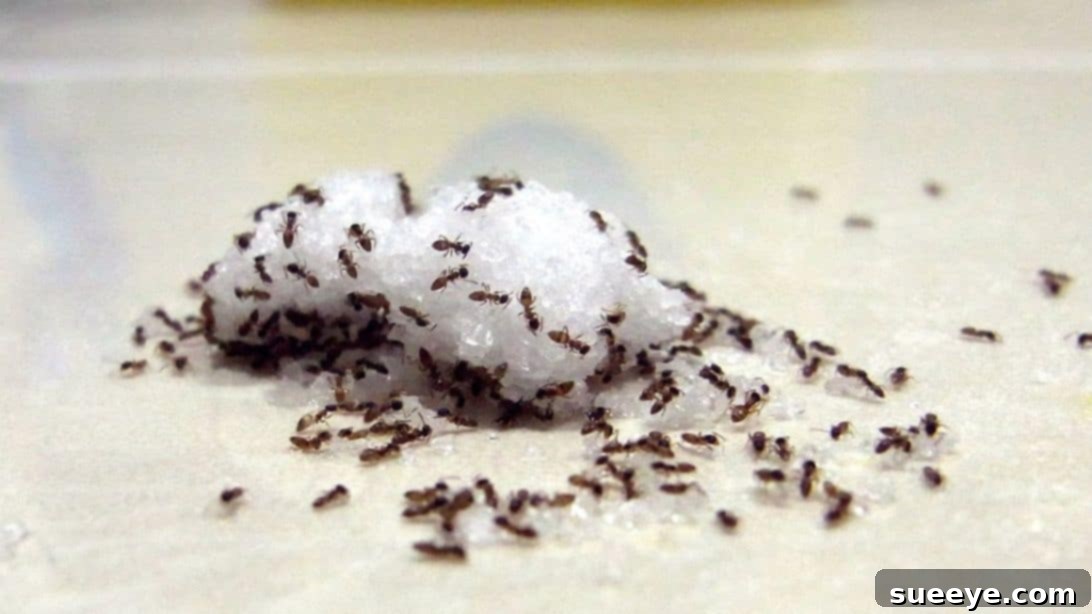
The initial and most critical step is to strategically encourage the ants to reveal their travel routes. Begin by selecting a small, easily accessible container – a bottle cap, a small piece of foil, or a shallow dish will suffice. Place a modest amount of sugar (a teaspoon or two is typically ample) into this container. Position this sugary bait in an area where you have frequently observed ant activity, ensuring it’s an undisturbed spot, away from areas of high foot traffic, and safely out of reach of children and pets. Highly effective locations often include forgotten corners of kitchen counters, along baseboards, beneath sinks, or within pantry shelves. Once the bait is in place, it’s vital to leave it completely undisturbed. The primary objective here is to allow the worker ants to naturally discover this enticing food source and, in doing so, establish a clear, consistent ant trail – a chemical highway of pheromones – leading directly from the bait back to their hidden nest. This observation period can vary, taking anywhere from a mere few minutes to several hours, depending on the existing ant population density and how quickly they locate the bait.
Step 2: Follow the Ant Trail – The Detective’s Persistent Pursuit
Once a steady and visible stream of ants has formed between your sugar bait and their point of entry, it’s time to embark on the detective work of tracing their path. This phase demands extreme patience and acute observational skills. Begin by meticulously following the line of ants backward from the bait. Pay close attention as they navigate around obstacles, make sharp turns, and seemingly vanish into minuscule crevices or under appliances. Ants predominantly follow invisible pheromone trails laid down by their scout ants, meaning their path can often be quite direct. However, trails can become challenging to follow if they are sparse, fragmented, or if the ants appear to be moving erratically. If you find the trail too faint or the ants too scattered, try gently blowing a soft puff of air directly onto the group. This sudden, harmless disturbance will typically trigger a panic response, causing them to scurry back to the perceived safety of their nest in a much more concentrated, urgent line, which makes their path significantly easier to discern and follow. Utilize your flashlight to thoroughly illuminate dark, concealed areas such as underneath cabinets, behind heavy kitchen appliances, along the perimeter of baseboards, and any potential cracks or holes in walls. Common indoor nesting locations can include hidden spaces behind walls, beneath floorboards, within insulation, under concrete slabs (especially in basements), or even inside damaged wooden structures. Be persistent and thorough; the ant nest might be located much further away or in a more obscure spot than you initially anticipate.
Step 3: Nest Neutralization – Targeted Treatment for Colony Eradication
Once your diligent detective work has successfully pinpointed the ant nest, it’s time for precise, targeted action. If the nest is readily accessible – for instance, located within a visible crack, an exposed opening, or a hollow space – you can directly apply an ant killer spray. Ensure you follow the product’s instructions meticulously, making sure the spray penetrates deeply into the nest to reach the queen, larvae, and other colony members. If the nest entrance is a small hole within a wall or foundation, aim the spray directly into the opening for maximum impact. Following this initial treatment, it is highly recommended to immediately patch up any holes or cracks that served as access points to the nest or through which ants were entering your home. Using caulk or spackle to thoroughly seal these openings serves a dual purpose: it prevents any surviving ants from rebuilding in the same location and acts as a crucial preventative measure against future infestations by sealing off potential entry points for other pests. For nests that are inaccessible, such as those deeply embedded within walls, floors, or insulation, utilizing ant baits is often a more effective and safer strategy for indoor environments. Position these bait stations strategically near the nest’s opening or directly along the established ant trail. The worker ants, attracted to the bait, will carry the slow-acting poison back to the heart of the colony, effectively eliminating it from the inside out without requiring direct physical access to the nest itself.
Step 4: Verify and Persistent Follow-Up for Complete Eradication
Never assume your work is complete after treating what appears to be a single nest. It is absolutely crucial to verify the success of your initial efforts and remain prepared for the potential discovery of additional colonies. To do this, replace or refresh some sugar bait in the same area or in nearby spots where you previously observed ant activity. Carefully monitor for any new signs of ant movement. If you continue to observe ants foraging, it is a strong indication that either the initial treatment was not entirely successful, or more commonly, that you haven’t yet located all existing nests. Ant colonies can sometimes be interconnected, or they may establish “satellite nests” in various locations to expand their territory. In such cases, you must repeat the entire process: set fresh bait, allow a new trail to form, diligently follow it back to its source, and treat the newly discovered nest. This could lead you to a nest outdoors near your home’s foundation, under a patio, or in another section of your house. Persistence is paramount in achieving complete eradication; continue this cycle of detection and treatment until all signs of ant activity have entirely ceased. Thoroughness and perseverance are the keys to long-term success against ant infestations.
Tips and Tricks for Finding Ant Nests and Preventing Re-Infestations
Beyond the core four-step process, several additional tips, clever tricks, and preventative measures can significantly enhance your chances of successfully finding and eliminating ant nests, as well as crucial strategies for keeping them from returning to your home:
- Observe During Peak Activity: Ants are often most active and visible during specific times, such as the warmer parts of the day or immediately following rainfall. Observing their behavior during these periods can reveal more robust and easier-to-follow trails.
- Follow Water Trails Too: While sugar is an excellent attractant, ants also require water for survival. Inspect areas prone to moisture, such as bathrooms, near leaky pipes, under sinks, or around condensation points (like refrigerator drip pans), as these can also lead you directly to hidden nests.
- Look for Ant Frass or Wood Shavings: Particularly if you suspect carpenter ants, look for small piles of sawdust-like material, known as “frass,” often accompanied by dead ant body parts. This material is expelled from their tunnels within wooden structures and is a definitive indicator of a carpenter ant nest nearby.
- Seal Entry Points Proactively: After successfully treating and eliminating a nest, conduct a systematic inspection of both your home’s exterior and interior for any potential ant entry points. Use caulk to seal cracks in your foundation, fill gaps around window and door frames, and repair any damaged screens. This proactive measure is a vital preventative step to block future access.
- Maintain Impeccable Cleanliness: Regular and thorough cleaning is your first line of defense. Promptly wipe up any spills, sweep up crumbs, store all food items in airtight containers, and empty trash cans regularly. Removing accessible food sources makes your home far less attractive to foraging ants.
- Trim Back Vegetation: Ensure that bushes, shrubs, and tree branches are trimmed and kept away from the exterior walls and roofline of your house. Overhanging vegetation can serve as natural bridges, allowing ants (and other pests) easy access to your home.
- Consider Natural Deterrents: While not direct killers of colonies, certain natural substances like peppermint oil, cinnamon, lemon juice, or white vinegar can act as effective deterrents. These can be used to wipe down surfaces or applied near potential entry points to discourage ants from entering specific areas. These are best used as supplementary measures.
- Strategic Bait Placement is Key: If you are using ant baits, place them directly along the established ant trails you’ve observed, or as close as possible to the suspected nest entrance. The closer the bait is to the main ant traffic, the more efficiently the poisoned food will be carried back to the colony.
- Do Not Disturb Baits or Foraging Ants: Once baits are deployed, resist the strong urge to spray or otherwise disturb the ants feeding on them. The entire efficacy of the bait strategy hinges on the ants being able to safely transport the poisoned food back to their nest for the queen and other colony members to consume.
- When to Call a Professional: If, despite diligently following all these methods, you continue to face a persistent, widespread, or particularly severe ant problem – especially with aggressive or wood-damaging species like carpenter ants or fire ants – it might be time to consult a professional pest control service. They possess specialized knowledge, access to stronger, commercial-grade treatments, and expertise in identifying complex, hard-to-find nesting patterns that may be beyond DIY capabilities.
Conclusion: Reclaim Your Home From Ants
Dealing with an ant infestation can indeed feel like an endless and disheartening battle, but by understanding their intricate behavior and adopting a strategic approach that targets their hidden nests, you can achieve lasting relief and restore peace to your home. The fundamental key to success lies in moving beyond the reactive measure of simply eliminating visible worker ants. Instead, embrace a proactive and methodical strategy: cleverly luring them out with bait, diligently following their established trails, and then precisely treating their concealed colonies. Remember that unwavering patience, persistent effort, and vigilant proactive prevention are your most powerful allies in this ongoing fight against household pests. By diligently implementing the detailed steps and invaluable tips outlined in this guide, you will be exceptionally well-equipped to not only find and eradicate existing ant nests but also to robustly safeguard your home against any future invasions, ultimately ensuring a cleaner, healthier, and permanently pest-free living environment.