
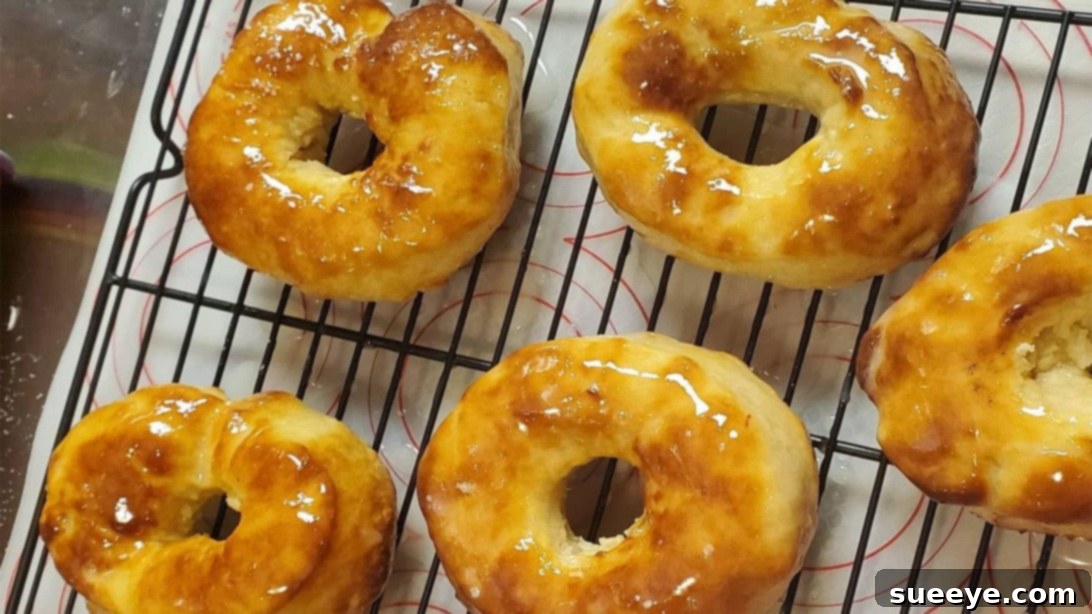
Imagine biting into a perfectly golden, delightfully fluffy doughnut, warm and coated in a sweet glaze, knowing you made it from scratch in minutes. Sounds like a dream, right? Well, it’s not! Thanks to the magic of the air fryer, achieving these heavenly treats at home has never been easier or quicker. Forget the mess and excessive oil of traditional deep-frying; this method delivers airy, tender doughnuts with significantly less fuss. Inspired by the brilliant recipe shared by Emmymade on YouTube, we’re going to dive into making homemade air-fried doughnuts that are not only irresistibly tasty but also surprisingly simple to whip up in just 3 minutes of cooking time!
This comprehensive guide will walk you through every step, from gathering your ingredients to perfecting the signature glaze. Whether you’re a seasoned baker or a complete novice, you’ll find this air fryer doughnut recipe a game-changer for satisfying your sweet cravings. Prepare to impress your family and friends with these quick, easy, and utterly delicious homemade doughnuts!
Why Air Fryer Doughnuts Are a Game-Changer
In recent years, the air fryer has revolutionized home cooking, offering a healthier and more convenient alternative to deep-frying. When it comes to doughnuts, this appliance truly shines. Here’s why air-fried doughnuts are a superior choice:
- Reduced Oil: Traditional doughnuts are typically submerged in hot oil, absorbing a significant amount of fat. Air frying uses very little oil, often just a light spray, resulting in a lighter doughnut that you can enjoy without guilt.
- Quicker Cooking Time: Once proofed, air fryer doughnuts cook incredibly fast – typically just 3 minutes per batch! This means you can enjoy fresh, warm doughnuts in a fraction of the time it takes to heat up a vat of oil.
- Less Mess: Say goodbye to splattering oil and the lingering smell of fried food in your kitchen. Air frying is a much cleaner process, making cleanup a breeze.
- Consistent Results: Air fryers circulate hot air evenly, ensuring your doughnuts cook uniformly and achieve that beautiful golden-brown exterior and fluffy interior every time.
- Healthier Indulgence: While still a treat, air-fried doughnuts offer a slightly healthier way to indulge your sweet tooth, allowing you to enjoy homemade goodness more often.
Ingredients You’ll Need for the Perfect Fluffy Doughnuts
The beauty of this recipe lies in its simplicity, requiring common pantry staples. Gathering all your ingredients beforehand, and ensuring they are at the correct temperature, will make the baking process smooth and enjoyable.
Dough Ingredients:
- 3 cups all-purpose flour: The foundation of our dough, providing structure. Sifted flour can lead to an even lighter texture.
- 1/2 cup granulated sugar: Sweetens the dough and helps activate the yeast.
- 2 teaspoons instant yeast: The magical ingredient responsible for the doughnut’s airy rise. Instant yeast is convenient as it doesn’t require proofing in liquid beforehand.
- 1/2 teaspoon salt: Balances the sweetness and enhances the overall flavor of the doughnuts.
- 1 cup whole milk: Adds richness and moisture to the dough. Ensure it’s lukewarm (around 105-115°F or 40-46°C) to properly activate the yeast.
- 2 tablespoons melted unsalted butter: Contributes to the tender crumb and buttery flavor. Let it cool slightly after melting.
- 1 large egg: Provides structure, richness, and helps bind the ingredients, contributing to a soft texture.
- 1/2 teaspoon vanilla extract: A touch of vanilla enhances the sweet flavor profile of the doughnuts.
Glaze Ingredients (for a classic sugary coating):
- 1/2 stick (4 tablespoons) unsalted butter: Forms the rich base of our glaze.
- 2 cups powdered sugar (confectioners’ sugar): Creates a smooth, sweet glaze.
- 3 tablespoons milk or heavy cream: Adjusts the consistency of the glaze to your liking – use more for a thinner glaze, less for a thicker one.
Step-by-Step Directions to Heavenly Air Fried Doughnuts
Let’s get baking! Follow these detailed instructions to create your own batch of irresistible air fryer doughnuts.
Step 1: Preparing Your Dry Ingredients
Begin by setting up your mixing station. In a large stand mixer bowl, or a spacious regular mixing bowl if mixing by hand, combine your dry ingredients: the flour, granulated sugar, instant yeast, and salt. If using a stand mixer, attach the paddle attachment. If mixing by hand, grab a sturdy whisk or a hand mixer. Mix these dry components together thoroughly until they are uniformly distributed. This ensures that the yeast and salt are evenly incorporated throughout the dough, leading to a consistent rise and flavor.
Step 2: Crafting the Wet Mixture
In a separate measuring cup or a small bowl, combine your wet ingredients: the lukewarm whole milk, melted butter (ensure it’s not hot, just warm), the egg, and the vanilla extract. Whisk these ingredients together until they are well combined and smooth. The lukewarm milk is crucial here as it helps activate the yeast without “killing” it with excessive heat. Ensure the egg and butter are incorporated seamlessly into the milk and vanilla.
Step 3: Combining Wet and Dry to Form the Dough
With your stand mixer running on low speed (or while continuously mixing by hand), gradually pour the wet ingredient mixture into the dry ingredients. As the dough begins to form, make sure to scrape down the sides of the bowl with a spatula. This ensures all the flour is incorporated and prevents dry pockets. Continue mixing until a cohesive, somewhat shaggy dough forms. Don’t worry if it looks a bit rough at this stage.
Step 4: The Art of Kneading for Elasticity
Once the ingredients are mostly combined, it’s time for kneading. Let the dough rest in the bowl for about 5 minutes. This short rest allows the flour to fully hydrate, making the dough easier to knead. After resting, knead the dough using a machine (with a dough hook attachment) or manually on a lightly floured surface for approximately six to eight minutes. Kneading is essential as it develops the gluten in the flour, which gives the doughnuts their characteristic chewy yet airy texture. You’ll know the dough is properly kneaded when it becomes smooth, elastic, and less sticky.
Step 5: The First Proof – Allowing the Dough to Rise
Lightly grease a clean bowl with a little oil. Transfer the kneaded dough into this bowl, turning it once to coat all sides with oil. Cover the bowl tightly with plastic wrap or a clean kitchen towel. Place the bowl in a warm, draft-free spot in your kitchen. Allow the dough to proof (rise) for about an hour and a half to two hours, or until it has doubled in size and looks nice and “poofy.” This first rise develops flavor and creates the airy texture.
Step 6: Shaping Your Perfect Doughnuts
Once your dough has completed its first rise, gently punch it down to release the air. Lightly flour your work surface to prevent the dough from sticking. Place the dough onto the floured surface and use a rolling pin to roll it out evenly to about one-third of an inch in thickness. Using a large round cookie cutter (or a doughnut cutter), press firmly into the dough to cut out your doughnut shapes. Then, use a smaller round cutter to cut out the centers, forming the classic doughnut hole. Carefully transfer each shaped doughnut dough to a baking sheet lined with parchment paper, leaving some space between them. You can gather and re-roll the dough scraps to make more doughnuts, but be aware that these may be slightly tougher.
Step 7: The Second Proof – Building Puffiness
After shaping, these little dough circles need one more rest. Cover the baking sheet with the shaped doughnuts loosely with plastic wrap or a clean kitchen towel. Let them rise again in a warm, draft-free place for another 30 to 40 minutes, or until they look noticeably puffy and light. This second proof is crucial for achieving that delightful, airy texture after cooking. Do not rush this step!
Step 8: Air Frying Magic – Cooking in Minutes!
Now for the quick cooking part! Lightly grease the bottom of your air fryer basket with a little oil or a non-stick cooking spray. Preheat your air fryer to 350°F (175°C) for a few minutes. Carefully place 2-3 doughnuts in the air fryer basket, ensuring they are not overcrowded and have space around them for air circulation. Close the air fryer and let the doughnuts bake for just 3 minutes. The exact time may vary slightly depending on your air fryer model, so keep an eye on them. They should turn a beautiful golden brown. Cook in batches until all your doughnuts are done.
Step 9: Cooling Down
Once cooked, carefully remove the air-fried doughnuts from the basket and place them on a wire rack set over a baking tray. Allow them to cool for a few minutes. It’s best to glaze them while they are still warm, but not piping hot, as this helps the glaze adhere beautifully.
For the Traditionalists: Deep-Frying Option
While the air fryer offers a fantastic, healthier alternative, some prefer the classic taste and texture of deep-fried doughnuts. If you wish to cook your doughnuts the traditional way, here’s how:
In a heavy-bottomed pot or deep fryer, heat about 2-3 inches of vegetable oil (such as canola or peanut oil) to 350-360°F (175-182°C). Use a candy thermometer to monitor the temperature; maintaining a consistent heat is key to perfectly fried doughnuts. Carefully slide 2-3 proofed doughnuts into the hot oil using a slotted spoon or spider. Do not overcrowd the pan. Fry for about 1-2 minutes per side, or until they puff up and turn a beautiful golden brown. Flip them once during cooking. Once golden, remove the doughnuts from the oil and place them on a wire rack lined with paper towels to drain any excess oil.
Crafting the Perfect Sweet Glaze
A classic sugary glaze is the perfect finishing touch for your homemade doughnuts. Here’s how to make it:
In a medium-sized bowl, melt half a stick (4 tablespoons) of unsalted butter. Once melted, add 2 cups of powdered sugar (confectioners’ sugar) and 3 tablespoons of milk or heavy cream. Whisk vigorously until the mixture is smooth and lump-free. If the glaze is too thick, add more milk or cream a teaspoon at a time until you reach your desired consistency. If it’s too thin, add a little more powdered sugar.
When your doughnuts are still warm (but not hot to the touch), dip each one into the glaze mixture, ensuring both sides are coated. You can also drizzle the glaze over the doughnuts using a spoon. Place the glazed doughnuts back on the wire rack and allow the glaze to set and dry. As it dries, it will form a beautiful, slightly crusted-up shell, which is characteristic of classic doughnuts.
Tips for Doughnut Success
- Measure Accurately: Baking is a science. Use proper measuring cups and spoons, and for flour, spoon it into the cup and level it off.
- Don’t Overmix: After combining wet and dry ingredients, mix just until combined before kneading. Overmixing can lead to tough doughnuts.
- Ensure Yeast is Fresh: If your yeast is old, your dough won’t rise. Test it if unsure by mixing a tiny bit with warm water and sugar – it should bubble.
- Proof in a Warm Place: A warm, draft-free environment is crucial for proper dough rising. A slightly warm oven (turned off) or a sunny spot can work wonders.
- Don’t Overcrowd the Air Fryer: Cook doughnuts in batches to ensure even cooking and air circulation.
- Handle Gently: Once proofed, handle the dough and shaped doughnuts very gently to avoid deflating them.
- Experiment with Toppings: While the classic glaze is delicious, don’t hesitate to experiment! Try cinnamon sugar (toss warm doughnuts in a mix of sugar and cinnamon), chocolate glaze, or sprinkles.
Variations and Customization Ideas
Once you’ve mastered the basic air-fried doughnut, the possibilities for customization are endless!
- Cinnamon Sugar Doughnuts: Immediately after air frying, toss the warm doughnuts in a mixture of granulated sugar and ground cinnamon.
- Chocolate Glaze: Melt 1/2 cup chocolate chips with 2 tablespoons milk or cream, then dip.
- Powdered Sugar Doughnuts: Simply dust generously with powdered sugar for a classic, lighter option.
- Filled Doughnuts: Once cooled, use a piping bag with a long, thin nozzle to inject your doughnuts with jelly, custard, or cream fillings.
- Nutty Toppings: Sprinkle chopped nuts (like pecans or walnuts) onto the wet glaze for added texture and flavor.
Conclusion: Your New Favorite Homemade Treat
There you have it – a simple, quick, and incredibly delicious recipe for homemade air-fried doughnuts. This recipe truly brings the joy of freshly baked goods to your kitchen without the usual fuss associated with deep-frying. With their airy texture, delightful sweetness, and easy preparation, these doughnuts are perfect for a special breakfast, an afternoon treat, or a comforting dessert.
So, preheat your air fryer, gather your ingredients, and get ready to create a batch of these amazing 3-minute doughnuts. You’ll be amazed at how effortlessly you can achieve bakery-quality results right in your own home. Don’t forget to share your creations and enjoy every fluffy, glazed bite!