
How to Make an Easy String Quilt: Your Ultimate Scrappy Project Guide
Embarking on a quilting journey is a truly rewarding experience, transforming simple fabric scraps into cherished heirlooms. For many, the art of quilting can seem daunting, but thankfully, there are patterns and instructors that make the process wonderfully accessible. One of the very first online quilters whose engaging tutorials captivated me was Prairie Point Quilt And Fabric Shop, on YouTube. Their clear, encouraging instruction guided me through some of my earliest quilting projects, building my confidence with every stitch.
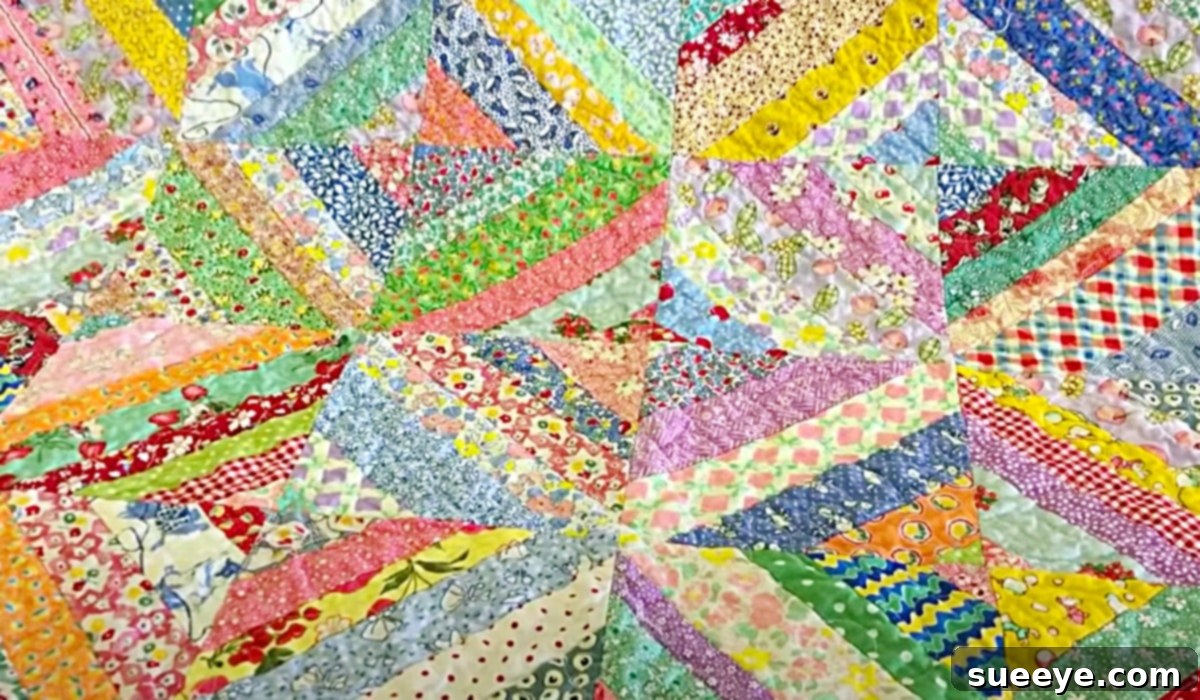
It was with immense delight that I recently stumbled upon their exceptional “one-day scrappy quilt” video tutorial. This particular project resonates deeply with my love for creating unique, scrappy designs, offering an ingenious way to utilize even the smallest remnants of fabric. What sets Prairie Point’s videos apart is their unique approach to teaching; at the conclusion of each block tutorial, they thoughtfully demonstrate numerous ways the completed patterns can be arranged, revealing how dramatically different the final quilt can appear. This might not seem like a significant detail, but believe me, the visual impact of varied layouts is truly remarkable, inspiring endless creative possibilities beyond a single representation.
This specific one-day quilt project is brilliantly designed for efficiency and scrap utilization. The entire quilt is constructed as one continuous, gigantic square. You begin with a modest scrappy square at its heart, then progressively add fabric strips to its perimeter. This clever method allows your quilt to expand outward, growing larger and larger with each new strip added. This amazing string quilt technique is not only satisfying but also an incredibly effective and beautiful way to declutter your craft room, transforming tiny scraps into a magnificent work of art.
What is a String Quilt and Why Should You Make One?
A string quilt is a style of quilt made by sewing narrow strips, or “strings,” of fabric onto a foundation piece or directly onto each other. This method is celebrated for its ability to transform an eclectic collection of fabric scraps into a cohesive and visually dynamic design. String quilts have a rich history, often born out of necessity during times when frugality was paramount, making use of every last piece of fabric. Today, they are cherished for their sustainable approach to crafting, their unique aesthetic, and their beginner-friendly nature.
Choosing to create a string quilt, especially a one-day scrappy project like the one from Prairie Point, offers a multitude of benefits:
- Ultimate Scrap Buster: This is arguably the biggest appeal. Forget about tiny fabric pieces accumulating in your bins; string quilts thrive on variety, making them the perfect solution for using up those leftover bits from previous projects.
- Beginner-Friendly: The technique of sewing strips is straightforward and repetitive, allowing newcomers to quilting to quickly master the process without complex piecing or intricate patterns.
- Quick Gratification: True to its name, a “one-day” quilt offers the satisfaction of seeing a significant project come together rapidly, perfect for those who love instant results.
- Creative Freedom: There are no strict rules for color or pattern arrangement in a scrappy string quilt. This allows for immense creative expression, letting your personality shine through your fabric choices.
- Unique Aesthetic: Each string quilt is a one-of-a-kind creation, reflecting the unique combination of fabrics and the hand of the maker. The random yet structured appearance is inherently charming.
- Versatility in Size: While this tutorial focuses on a large square, the string technique can be adapted to make anything from placemats and table runners to baby quilts, lap quilts, and full-sized bedspreads.
Materials For The Easy String Quilt: Gathering Your Supplies
Before you dive into the joyful process of sewing, ensuring you have all the necessary tools and materials at hand will make your quilting experience smooth and enjoyable. This string quilt project doesn’t require an extensive list of specialized equipment, making it even more accessible. Here’s what you’ll need:
- Any Scrap Fabric (jelly rolls will work as well): This is the star of the show! Gather all those colorful remnants, fat quarters, or even pre-cut jelly rolls. The beauty of a scrappy quilt is that there’s no need for perfectly matching fabrics; variety truly adds to its charm. Consider different textures and prints for added visual interest.
- A Sewing Machine: A reliable sewing machine is essential for stitching your strips together efficiently and consistently.
- Thread: Choose a good quality thread that complements your fabrics. A neutral color like white, gray, or ecru is often versatile for scrappy projects, as it blends in with various fabric tones.
- A Pair of Scissors: For snipping threads and minor fabric adjustments.
- A Rotary Cutter: This tool is a quilter’s best friend, allowing for quick, precise, and straight cuts of fabric, which is especially helpful when dealing with numerous strips.
- A Cutting Mat: A self-healing cutting mat protects your work surface and provides a stable base for accurate rotary cutting.
- A Quilter’s Ruler: Essential for squaring up your blocks and ensuring all your fabric strips are cut to the desired width and length. Look for transparent rulers with clear markings.
- An Iron: Pressing seams flat is a critical step in quilting, ensuring your blocks lie flat and your finished quilt looks professional.
- An Ironing Board: Provides a stable and heat-resistant surface for efficient pressing.
Step-by-Step Directions: Crafting Your Easy String Quilt
The beauty of this particular string quilt lies in its deceptively simple construction, allowing you to create a large, impressive piece with minimal fuss. While the best way to grasp the visual nuances is through the comprehensive video tutorial by Prairie Point Quilt And Fabric Shop, on YouTube, here’s an overview of the process to prepare you for the steps involved in making this gorgeous string quilt:
1. Preparing Your Scraps and Foundation
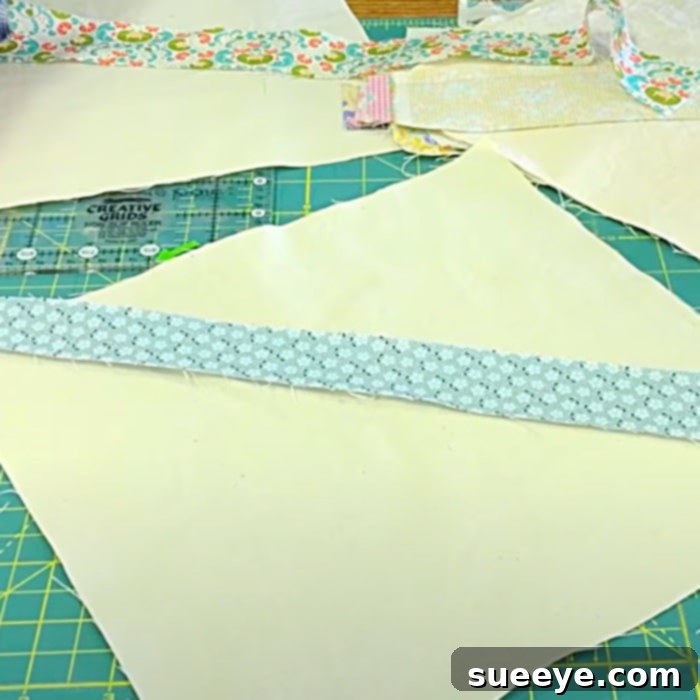
The first step involves gathering your fabric scraps. Don’t be shy about mixing colors, patterns, and even small variations in fabric type (though stick mostly to cotton for consistency). For this “growing square” method, you’ll start with a central square, which will be the heart of your quilt. You may also choose to use a lightweight fabric or even paper as a foundation to sew your strips onto, which adds stability and helps with squaring up. If using paper, you’ll tear it away later.
2. Starting Your Central Block
Begin by taking your initial small scrappy square. This will be your starting point. You’ll then select your first fabric strip. With right sides together, place this strip along one edge of your central square. Stitch it down with a consistent seam allowance (typically 1/4 inch is standard for quilting).
3. The “Sew and Flip” Method
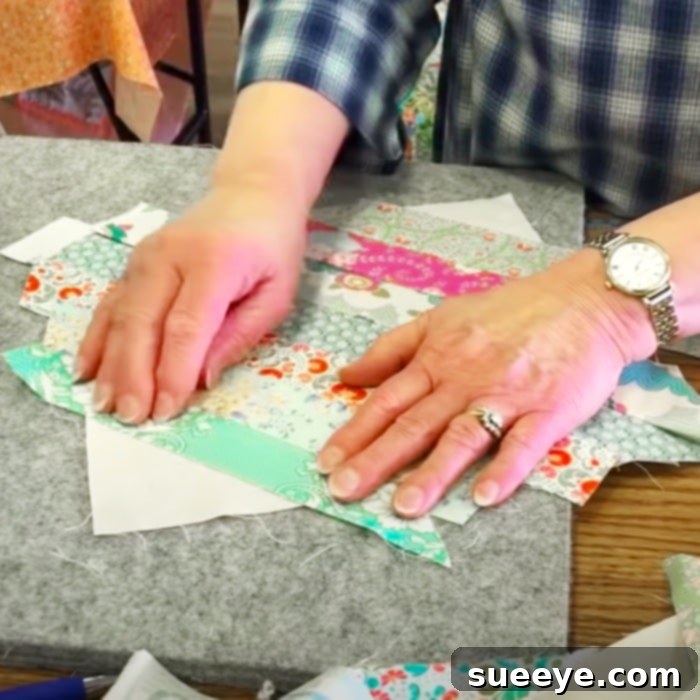
Once you’ve sewn the first strip, press the seam open or to one side. Then, flip the strip over so the right side is now facing up, extending away from your central square. This “sew and flip” method is fundamental to string quilting. You will then select your next fabric strip and sew it onto an adjacent (or opposite, depending on your desired look) edge of your growing block, repeating the pressing and flipping process.
4. Continuously Adding Strips
The core of this design involves continuously adding strips around the perimeter of your ever-expanding square. Think of it like building rings around a central point. Each time you add a strip, you’re making your overall quilt block larger. You can vary the width of your strips for added visual interest, or keep them consistent for a more uniform look. The key is to keep sewing, pressing, and flipping, always aligning the raw edges before stitching.
5. Trimming and Squaring Up
As your quilt block grows, it’s crucial to periodically trim and square up your edges. Use your rotary cutter, cutting mat, and quilter’s ruler to ensure your block remains square and tidy. This step is vital for maintaining the integrity of your design and ensuring a professional finish. Irregularities can quickly compound, so a quick trim after adding a few rounds of strips will save you headaches later.
6. The Grand Finale: Building Your Entire Quilt
For this specific Prairie Point design, the entire quilt is essentially one large, continuously growing string block. You will simply continue adding strips until your quilt reaches your desired dimensions. This method eliminates the need to join multiple blocks together, simplifying the assembly process considerably. It’s an incredibly satisfying way to see a large project come to life before your eyes, strip by colorful strip.
Tips for Success with Your String Quilt
To ensure your string quilting experience is as enjoyable and successful as possible, consider these helpful tips:
- Vary Your Scraps: While using similar colors can create a cohesive look, don’t be afraid to throw in unexpected pops of color or contrasting patterns. This is what gives a scrappy quilt its unique character and depth.
- Press, Press, Press: Good pressing habits are paramount in quilting. Each time you sew a strip, take the time to press the seam. This flattens your fabric, makes subsequent seams easier to align, and prevents bulkiness.
- Consistent Seam Allowance: Strive for a consistent 1/4-inch seam allowance. This accuracy ensures your strips line up correctly and your finished block remains square.
- Use a Longer Stitch Length: Especially if you’re sewing on a paper foundation that will be removed, a slightly longer stitch length (e.g., 2.5-3.0 mm) makes the paper easier to tear away later.
- Embrace Imperfection: Scrappy quilts are meant to be a little bit whimsical. Don’t stress over absolute perfection; the handmade charm is part of its appeal.
- Listen to the Experts: The Prairie Point Quilt And Fabric Shop tutorial is a fantastic resource. Watch it thoroughly, pause, rewind, and rewatch sections as needed. Visual learning is incredibly effective for quilting techniques.
Finishing Your Gorgeous String Quilt
Once your large string quilt top has reached its desired size, the next steps involve preparing it for use and enjoyment. This typically includes basting, quilting, and binding:
- Basting: This is the process of temporarily holding the three layers of your quilt (the quilt top, batting, and backing fabric) together. You can baste with safety pins, spray adhesive, or long basting stitches.
- Quilting: This is where you stitch through all three layers to secure them permanently and add texture to your quilt. For a scrappy string quilt, simple straight-line quilting, stitch-in-the-ditch (quilting along the seam lines), or even a free-motion meandering pattern can look stunning without overshadowing the piecing.
- Binding: The final step involves creating and attaching the binding, which is a strip of fabric sewn around the outer edge of the quilt to finish and protect it. This provides a neat and durable border.
This quilt is truly so gorgeous, and the satisfaction of creating it from your own collection of fabric remnants is immense. Not only will you have a stunning, functional piece of art, but you’ll also have the pride of knowing you made it with your own hands, guided by the clear and friendly instruction of quilters like Prairie Point. So, gather your scraps, set up your sewing machine, and prepare to create something beautiful and uniquely yours. Happy quilting!