
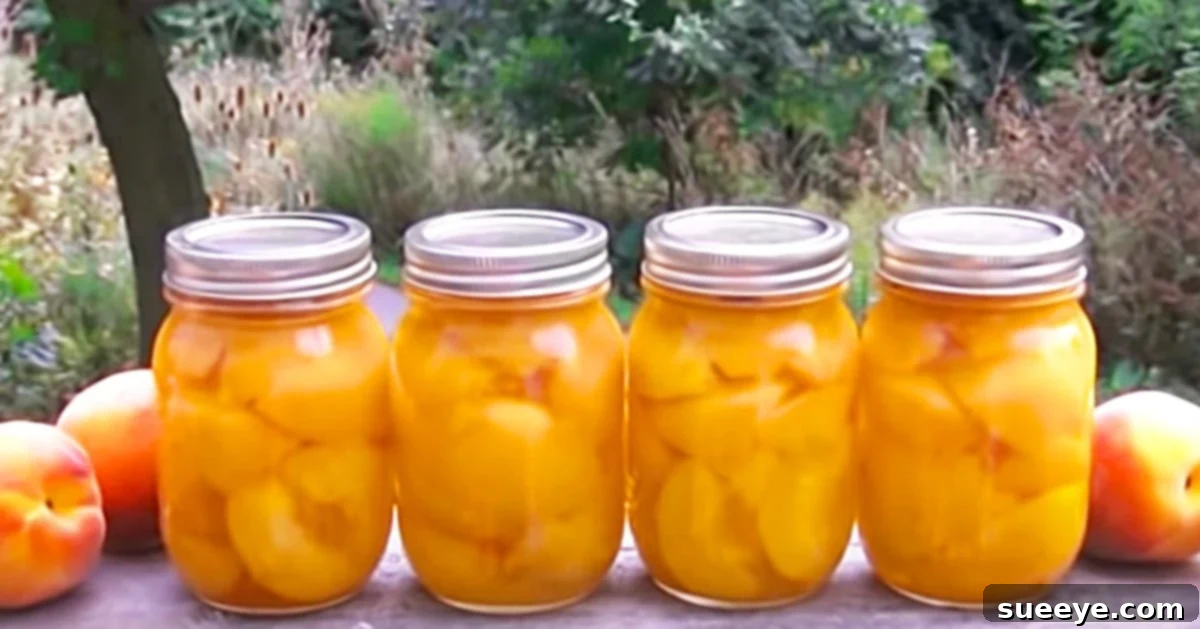
Mastering the Art of Canning Peaches: A Comprehensive Guide to Preserving Freshness
There’s an undeniable joy that comes with the peak of peach season, especially in regions renowned for their luscious produce, like the sun-drenched Texas Hill Country. Every year, a bountiful harvest of these incredibly sweet and juicy peaches arrives, bringing with it the delightful challenge of enjoying them all before their short shelf life expires. For many home cooks and culinary enthusiasts, this seasonal abundance often sparks a desire to capture that fresh-from-the-orchard flavor, extending its availability long past the summer months. This quest for preservation naturally leads to the rewarding practice of home canning.
The struggle with an overflowing basket of rapidly ripening peaches is a familiar one. It was this very dilemma that ignited my own passion for learning to can. I wanted a reliable, easy-to-follow method to ensure not a single precious peach went to waste. My journey led me to a fantastic resource: a canned peaches video recipe tutorial by I Cook And Paint on YouTube. This tutorial proved to be an invaluable step-by-step guide, simplifying the canning process and making it approachable for anyone, regardless of their prior experience.
Embarking on your own peach canning adventure requires just a few essential supplies, most of which are readily available at major retailers such as Walmart, Dollar Tree, Michael’s craft store, or Hobby Lobby. You’ll need items like a water bath canner, Mason jars, a wide-mouth funnel, and jar tongs – basic tools that empower you to transform fresh fruit into shelf-stable pantry treasures. This comprehensive guide is designed to empower you with all the knowledge needed to successfully preserve the vibrant flavor, tender texture, and natural goodness of fresh peaches, allowing you to savor the taste of summer all year long. Get ready to fill your pantry with homemade goodness and experience the immense satisfaction of DIY food preservation!
Why Embrace Home Canning? The Irresistible Benefits of Preserving Peaches
Beyond the simple act of extending shelf life, home canning offers a multitude of advantages:
- Season Extension: Enjoy the exquisite taste of ripe peaches long after their harvest season has ended. Imagine fresh peach cobbler in December!
- Cost Savings: Capitalize on seasonal sales or bulk purchases during peak harvest, significantly reducing your grocery bill in the long run.
- Ingredient Control: When you can at home, you dictate what goes into your jars. Say goodbye to artificial preservatives, high-fructose corn syrup, and unknown additives often found in commercial canned goods.
- Superior Flavor and Quality: Home-canned peaches retain a fresher, more authentic flavor and often a better texture than their store-bought counterparts.
- Self-Sufficiency and Skill Building: Canning is a valuable life skill that fosters a sense of accomplishment and contributes to a more self-reliant household.
- Thoughtful Gifts: Jars of homemade canned peaches make wonderful, personal gifts for friends and family.
- Reduce Food Waste: Preserve your harvest and prevent delicious fruit from going bad, contributing to a more sustainable kitchen.
Essential Ingredients for Your Perfect Canned Peaches
Success in canning begins with selecting the right ingredients. This recipe is typically scaled for approximately 40 medium-sized peaches, which will yield about 7-9 quart jars or 14-18 pint jars. Always feel free to adjust quantities based on the size of your harvest.
- Peaches (Approx. 40 Medium):
- Variety: Freestone varieties are ideal for canning as the pit easily separates from the flesh. Popular choices include Elberta, Reliance, Redhaven, and Contender.
- Ripeness: Choose firm, ripe peaches that are free from blemishes, soft spots, or bruises. Slightly under-ripe peaches are often preferred for canning, as they maintain their shape and texture better during processing. Avoid overly ripe or mushy peaches.
- Filtered Water (2 Quarts / 8 Cups): Used as the base for your sugar syrup. Using filtered water can help maintain the purity of flavor, especially if your tap water has a strong mineral content.
- Granulated Sugar (1 Cup): This creates the syrup that enhances the peaches’ natural sweetness and contributes to their preservation. Cane sugar is often recommended for its pure taste, but standard granulated sugar works perfectly.
- Syrup Strength Options: You can customize the sweetness! See Step 3 for details on light, medium, heavy syrup, or even sugar-free alternatives like fruit juice or plain water.
- Optional: Lemon Juice or Ascorbic Acid: A splash of lemon juice (about 1 tablespoon per quart of water) or a commercial ascorbic acid product (like Fruit-Fresh) can be added to your water bath for peeled and sliced peaches. This prevents enzymatic browning (oxidation), keeping your peaches looking vibrant and appealing.
Must-Have Canning Equipment: Gearing Up for Success
Having the correct tools is crucial for a safe, efficient, and successful canning experience. While the original tutorial highlights core items, a complete set will ensure the best possible results and adherence to safety guidelines.
- Water Bath Canner with Rack: This is a large stockpot specifically designed for canning, deep enough to fully submerge your jars in boiling water by at least 1-2 inches. The rack prevents jars from directly touching the bottom, ensuring even heat distribution and preventing breakage.
- Mason Jars (Pint or Quart): Always use jars specifically manufactured for home canning (e.g., Ball, Kerr, Weck). Inspect each jar carefully for any chips, cracks, or imperfections, especially around the rim, as these can prevent a proper seal.
- New Lids and Bands: Canning lids are designed for single use only. Their sealing compound hardens after processing, making them ineffective for re-use. Bands (the screw tops) can be reused indefinitely, provided they are clean, rust-free, and not bent or damaged.
- Wide-Mouth Funnel: An invaluable tool that fits snugly into the mouth of your canning jars, making it easy to fill them with peaches and syrup without spilling or messing the jar rims.
- Jar Lifter: This specialized tong allows you to safely and securely grasp hot jars, making it easy to place them into and remove them from boiling water without burning your hands.
- Headspace Tool and Bubble Remover: This non-metallic utensil is essential for two key tasks: removing trapped air bubbles from packed jars and accurately measuring the crucial headspace (the empty space between the food/liquid and the jar rim).
- Large Pot for Syrup: A separate saucepan for preparing your sugar syrup and keeping it hot.
- Large Stockpot for Blanching: Needed for the initial step of blanching peaches to easily remove their skins.
- Large Bowl with Ice Water: An ice bath is critical for cooling blanched peaches rapidly, stopping the cooking process and facilitating easy peeling.
- Clean Kitchen Towels: Several clean towels are needed for wiping jar rims, drying jars, and providing a stable surface for cooling.
Step-by-Step Guide to Canning Peaches: From Orchard to Pantry
This comprehensive guide details each stage of the canning process, building upon the clear instructions provided in the I Cook And Paint video tutorial to ensure your success.
Step 1: Prepare Your Canning Environment and Equipment
Thorough preparation is the foundation of safe and effective canning. Start by ensuring all your equipment is spotless and ready.
- Clean and Sterilize Jars: Wash your canning jars thoroughly in hot, soapy water, or run them through a dishwasher on a hot cycle. Rinse them well. For processing times of 10 minutes or more (which is typical for peaches), simply ensure jars are clean and kept hot until use. If your recipe had a shorter processing time, you would need to sterilize jars by boiling them for 10 minutes.
- Prepare Lids: Place new canning lids in a small saucepan with enough water to cover them. Bring the water to a simmer (do not boil). Keeping lids hot helps soften the sealing compound, promoting a better seal. Keep the screw bands nearby.
- Set Up Canner: Fill your water bath canner about halfway with water. Place it on your stovetop over high heat and bring the water to a strong simmer (around 180°F / 82°C) or a gentle boil. This ensures the canner is hot and ready when your packed jars are.
Step 2: Prepare the Peaches: Blanching, Peeling, and Slicing with Care
This is a crucial stage where the peaches are readied for their journey into the jar. The blanching technique, as shown in the YouTube tutorial, makes peeling effortless.
- Wash Peaches: Gently wash all your fresh peaches under cool running water to remove any dirt or residue.
- Blanch Peaches for Easy Peeling: Bring a large pot of water to a rolling boil. Carefully lower 4-5 peaches at a time into the boiling water using a slotted spoon or a blanching basket. Allow them to blanch for 30-60 seconds, or until you notice the skin starting to wrinkle or split.
- Rapid Cooling (Ice Bath): Immediately transfer the blanched peaches into a large bowl filled with ice water. This “shocking” process stops the cooking and makes the skins much easier to remove. Let them cool for a few minutes until they are comfortable to handle.
- Peel, Pit, and Slice: Once cooled, the skins should slip off with minimal effort. Use a small paring knife for any stubborn spots. Cut each peach in half, carefully remove the pit, and then slice the halves into quarters or desired uniform slices.
- Prevent Browning (Highly Recommended): To maintain the beautiful golden color of your peaches and prevent oxidation, place the peeled and sliced peach pieces into a large bowl containing a solution of water and lemon juice (about 1 tablespoon of lemon juice per quart of water) or a commercial ascorbic acid mixture. Keep them submerged until you’re ready to pack them into jars.
Step 3: Prepare the Sugar Syrup: Customizing Your Sweetness
The sugar syrup not only adds sweetness but also contributes to the preservation of the peaches’ texture and color. You have options for different syrup strengths.
- Light Syrup (Most Common for Peaches): In a large saucepan, combine 2 quarts (8 cups) of filtered water with 1 cup of granulated sugar. This ratio offers a subtle sweetness that complements the natural flavor of the peaches.
- Medium Syrup: For a slightly sweeter result, use 2 cups of sugar per 8 cups of water.
- Heavy Syrup: If you prefer very sweet peaches, combine 3 cups of sugar with 8 cups of water.
- Sugar-Free Options: For those avoiding sugar, you can also use plain hot water, hot apple juice, or hot white grape juice as your packing liquid. Be aware that this may slightly alter the texture and flavor compared to using sugar syrup.
- Heat the Syrup: Bring your chosen syrup mixture to a boil, stirring constantly until the sugar is completely dissolved. Reduce the heat to a simmer and keep the syrup hot until you are ready to fill your jars.
Step 4: Pack the Jars: Precision for Perfect Preservation
Careful packing is essential for proper processing and optimal long-term storage.
- Fill Hot Jars: Using your wide-mouth funnel, carefully pack the hot, prepared peach slices or halves into the hot, clean Mason jars. Pack them as snugly as possible without crushing the fruit, leaving adequate space for the hot syrup to circulate.
- Add Hot Syrup: Pour the hot sugar syrup over the packed peaches, ensuring they are completely submerged.
- Remove Air Bubbles: Insert your headspace tool or a non-metallic spatula along the inside edge of the jar, gently moving it up and down to release any trapped air bubbles. Air bubbles can lead to discoloration or improper seals.
- Check Headspace: Re-check the headspace. You need to leave 1/2 inch of headspace (the empty space from the top of the syrup to the rim of the jar). If needed, add more hot syrup to reach this mark. Correct headspace is critical for creating a strong vacuum seal.
- Wipe Jar Rims: Using a clean, damp cloth, meticulously wipe the rims of each jar. Any food residue or syrup on the rim can prevent the lid from sealing properly.
- Apply Lids and Bands: Center a heated, new canning lid onto each jar. Then, screw on a clean band fingertip tight. This means screwing it on just until you feel resistance, then giving it a slight additional turn. Do not overtighten, as this can prevent air from escaping and compromise the seal.
Step 5: Process in a Water Bath Canner: The Key to Safety and Preservation
This critical step creates the vacuum seal and ensures the peaches are safely preserved for long-term storage. Pay close attention to processing times.
- Load Canner: Carefully place the filled and sealed jars onto the rack in your preheated water bath canner using a jar lifter. Ensure the jars are not touching each other or the sides of the canner, allowing water to circulate freely.
- Cover Jars with Water: Add more boiling water to the canner if necessary, ensuring that the water level covers the tops of the jars by at least 1-2 inches. This is crucial for even heat penetration.
- Bring to a Rolling Boil: Cover the canner with its lid. Turn up the heat to high and bring the water in the canner to a vigorous, rolling boil.
- Process (Boil) for Recommended Time: Once the water reaches a full, steady boil, start your timer immediately.
- Pint Jars: Process for 20 minutes.
- Quart Jars: Process for 25 minutes.
- Altitude Adjustments: These times are for altitudes up to 1,000 feet above sea level. If you live at a higher altitude, you must adjust your processing time according to USDA guidelines to ensure safety. Consult a reliable canning resource like the USDA National Center for Home Food Preservation for specific adjustments.
- Cool Down Period: After the processing time is complete, turn off the heat. Carefully remove the canner lid and allow the jars to rest in the hot water for 5 minutes. This helps prevent “siphoning” (liquid loss from the jars) and promotes a more reliable seal.
Step 6: Cool, Check Seals, and Store Your Homemade Peach Treasures
The final steps involve ensuring proper sealing and preparing your jars for long-term storage.
- Remove Jars and Cool: Using the jar lifter, carefully remove the hot jars from the canner. Place them upright on a clean kitchen towel or a wire rack on your countertop. Ensure there’s space between each jar for air circulation, and keep them away from cold drafts.
- Cool Undisturbed (12-24 Hours): Allow the jars to cool naturally and undisturbed for 12 to 24 hours. During this time, you’ll often hear a satisfying “ping!” sound as the lids seal.
- Check Seals: After the jars have completely cooled, remove the screw bands. Press firmly on the center of each lid. A properly sealed lid will be concave (curved inwards) and will not flex or pop up when pressed. If a lid springs up, it indicates a failed seal.
- Handle Unsealed Jars: Any jars that did not seal must be refrigerated immediately and consumed within a week. Alternatively, if processed within 24 hours, you can reprocess them with a brand-new lid, following all steps meticulously.
- Clean, Label, and Store: Once you’ve confirmed a proper seal, wipe the jars clean. Label each jar clearly with its contents (e.g., “Canned Peaches”) and the date it was processed. Store your beautifully preserved peaches in a cool, dark, dry place, ideally between 50-70°F (10-21°C). Properly canned peaches can maintain excellent quality for up to 1 year, though they are often safe to eat beyond that if the seal remains intact.
Troubleshooting Common Canning Issues and How to Fix Them
Even experienced canners encounter minor issues. Here are some common challenges and their solutions:
- Jars Not Sealing: This is the most common problem. Possible causes include chipped jar rims, old or faulty lids, inadequate headspace, or overtightened bands. Always use new lids and carefully inspect jar rims.
- Loss of Liquid (Siphoning): If some liquid is lost from the jars during processing, it might be due to rapid temperature changes, overfilling the jars, or removing them too quickly from the canner. Allowing jars to rest in the canner for 5 minutes after processing can help stabilize them.
- Cloudy Liquid: Cloudy liquid is often caused by starch in the fruit or minerals in your water. It doesn’t necessarily indicate spoilage if the lid is sealed and there are no other signs of spoilage (like an off smell or mold).
- Floating Fruit: It’s common for peaches to float in the jar, especially if they are packed loosely or if a heavy syrup is used. This is generally not a safety concern.
The Enduring Joy and Versatility of Homemade Canned Peaches
There is profound satisfaction in gazing upon a pantry shelf lined with jars of glistening, golden peaches, knowing that you’ve personally captured and preserved the very essence of summer’s bounty. These homemade canned peaches are truly a cut above their commercially produced counterparts, offering a purer, fresher taste profile unmarred by artificial preservatives or excessive high-fructose corn syrup. Each jar is a testament to your efforts, delivering a burst of sunshine and natural sweetness.
The versatility of home-canned peaches is endless. Enjoy them straight from the jar for a simple, refreshing snack. Spoon them generously over a scoop of vanilla ice cream or a dollop of yogurt for an instant dessert. They are magnificent when baked into classic treats like pies, crumbles, cobblers, or tarts. You can even blend them into smoothies or use them as a topping for pancakes and waffles. With these delicious treasures at your fingertips, the vibrant flavor of fresh peaches is available year-round, adding a touch of summer to any meal or moment.
Embrace this incredibly rewarding skill and make the most of your local peach abundance. With a little practice, patience, and attention to the detailed steps outlined in this guide and inspired by resources like the I Cook And Paint tutorial, you’ll soon be canning like a seasoned pro. Ensure that the delicious taste of those cherished Texas Hill Country peaches, or any sweet peaches you find, can be savored through every season. Happy canning, and enjoy the sweet rewards of your labor!