
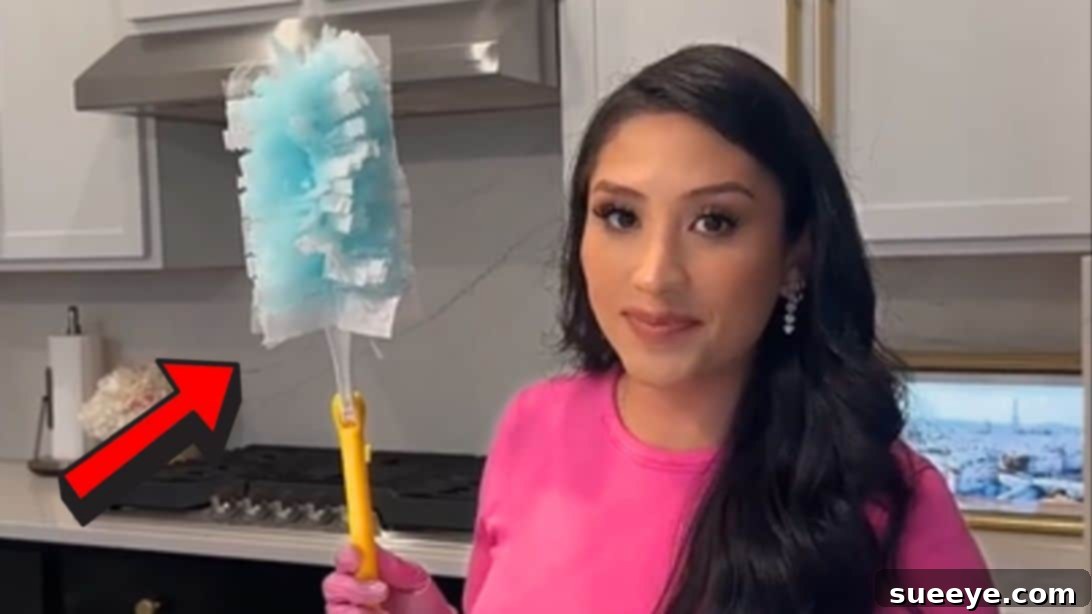
Unlock Your Swiffer Duster’s Full Potential: The Ultimate Dusting Hack You Need to Know
For many households, the Swiffer duster has become an indispensable cleaning tool. Its convenience and effectiveness in capturing dust, hair, and allergens have revolutionized the way we approach routine cleaning. Gone are the days of constantly washing dusty rags or struggling with paper towels that merely push dust around. The Swiffer duster promises a cleaner, residue-free finish, and for good reason, it’s earned its spot as a favorite cleaning accessory.
However, what if we told you there’s a specific, often overlooked method to using your Swiffer duster that dramatically enhances its performance? Like many, I initially believed I was using mine correctly, only to discover a simple but profound technique that transforms its dust-trapping capabilities. This isn’t just about picking up visible dust; it’s about maximizing efficiency and ensuring your home is truly free from unseen particles.
Why Effective Dusting is Crucial for a Healthy Home
Before diving into the hack itself, let’s briefly consider why diligent dusting is more important than just maintaining a tidy appearance. Dust is far more than just annoying debris; it’s a complex mix of dead skin cells, pet dander, pollen, fabric fibers, soil particles, and even microscopic bugs like dust mites. This cocktail of particles can significantly impact your indoor air quality and, consequently, your family’s health.
Regular accumulation of dust can trigger a range of issues. For allergy sufferers, dust is a major irritant, leading to symptoms like sneezing, itchy eyes, runny nose, and even asthma attacks. Even for those without allergies, prolonged exposure to dusty environments can cause respiratory discomfort, headaches, and general malaise. Common culprits for excessive dust in homes include carpets, open windows, pets, and infrequent bedding changes. That’s where an effective duster, like the Swiffer, becomes a vital ally in maintaining a healthy, comfortable living space by removing these unwelcome particles from various surfaces, including those hard-to-reach spots.
RELATED: 8 Life-Changing Cleaning Hacks You Must Know!
The Swiffer Duster: A Closer Look at Its Design and Benefits
The genius of the Swiffer duster lies in its unique design. Each duster head features thousands of fluffy fibers designed to create an electrostatic charge when moved, attracting and trapping dust particles rather than just scattering them. This innovative approach makes it superior to traditional feather dusters or cloth rags that often simply redistribute dust. The flexible handle and disposable pads also contribute to its user-friendly nature, making cleaning quicker and less messy.
Despite its intuitive design, many users, myself included, were missing a crucial step that optimizes this dust-grabbing technology. You might think you just attach the pad and start wiping, but there’s more to it if you want to lock up every last speck. If you’ve ever wondered why your duster doesn’t seem to pick up as much as it should, or if you’ve been using it flat against surfaces, then this tip from cleaning expert Vanesa Amaro is about to change your cleaning routine forever.
Unlocking Your Swiffer’s Full Potential: The Secret Dusting Tip
The key to maximizing your Swiffer duster’s effectiveness lies in a simple preparation step that most people unknowingly skip. This trick will not only save you time but also ensure your duster performs at its peak, grabbing significantly more dust, hair, and allergens. It’s all about creating the optimal surface area and charge for superior dust capture. Here’s how to do it properly:
How to Properly Use a Swiffer Duster to Remove Dust at Home
Step 1: Assemble Your Swiffer Duster
This initial step might seem obvious, but proper assembly is the foundation for everything that follows. Connect the ergonomic handle securely to the pad head. Ensure it’s firmly attached, as a wobbly connection can hinder smooth dusting motions and reduce efficiency. While basic, this solid setup ensures control and stability during use.
Step 2: Attach a Clean Duster Pad
Once the handle and head are ready, carefully insert a fresh, clean duster pad onto the head of your Swiffer. Make sure the pad is fully seated and evenly distributed around the head. This prepares the duster for action, but don’t stop here, as this is where most people make their crucial mistake. The next step is vital for activating the duster’s full dust-catching potential.
Step 3: The Game-Changing Fluff
This is the secret sauce! After attaching the clean pad, don’t just start dusting. Instead, grab the handle and gently but firmly shake the Swiffer duster for a few seconds. A common technique demonstrated by cleaning experts is to gently smack the handle against your palm a few times. This simple action causes the thousands of fibers on the duster pad to separate and fluff out. This isn’t just for aesthetics; it dramatically increases the surface area of the duster, allowing it to pick up and trap significantly more dust. The increased friction from fluffing also helps generate an electrostatic charge, which is key to attracting those stubborn dust particles. After a few shakes, you’ll notice the pad looks much fuller and more voluminous – it’s now properly activated and ready to tackle any dusty surface with maximum efficiency. You’ll instantly see why a flat, unfluffed pad pales in comparison for dust pickup.
Trying this simple fluffing technique will demonstrate a night-and-day difference in how effectively your Swiffer duster cleans. You’ll be amazed at the amount of dust and debris it captures compared to using it straight out of the box without this crucial preparation.
Maximizing Your Cleaning Routine with Swiffer
With your Swiffer duster now properly fluffed and ready, you can truly unleash its full potential across your home. This enhanced dust-grabbing power makes it ideal for a multitude of surfaces and hard-to-reach areas:
Beyond Flat Surfaces: Where Swiffer Excels
- Delicate Items: The soft, fluffy fibers are perfect for cleaning glass lampshades, intricate figurines, and delicate electronic screens without scratching or leaving residue.
- Underneath Furniture: The slim profile of the Swiffer, combined with its improved fluffiness, allows it to effortlessly glide underneath sofa edges, bed frames, and low-standing cabinets, reaching dust bunnies that other tools miss.
- High and Hard-to-Reach Spots: Attach it to an extendable handle to dust ceiling fan blades, high shelves, door frames, and even the tops of blinds and curtain rods. The fluffed duster clings to dust even when working overhead.
- Electronics: Safely dust computer monitors, keyboards, TVs, and stereo equipment. The electrostatic charge effectively lifts dust from crevices and screens without requiring sprays or chemicals.
- Baseboards and Crown Molding: The flexible head can conform to various angles, making quick work of dust accumulation on baseboards and intricate crown molding.
- Vent Covers and Registers: The fluffy fibers can get into the slats of air vents, removing trapped dust and improving air quality.
Complementary Dusting Practices
While the fluffed Swiffer duster is incredibly effective, it works best as part of a comprehensive cleaning strategy. Remember these tips for an even cleaner home:
- Dust from Top to Bottom: Always start dusting from the highest points in a room (e.g., ceiling fans, light fixtures) and work your way down. This ensures any falling dust lands on surfaces you haven’t cleaned yet.
- Vacuum Regularly: A good vacuum cleaner with a HEPA filter is essential for removing dust from carpets, rugs, and upholstery that the Swiffer cannot reach. Vacuum after dusting to pick up any residual particles that may have settled on the floor.
- Clean or Change Air Filters: Regularly cleaning or replacing your HVAC system’s air filters can significantly reduce the amount of dust circulating in your home.
- Declutter: Fewer items on surfaces mean fewer places for dust to settle and fewer things to move when dusting.
Maintaining a Dust-Free Environment
Integrating this Swiffer duster tip into your regular cleaning schedule will make a noticeable difference in your home’s cleanliness and your overall cleaning efficiency. My own experience has shown that this simple hack makes dusting so much better and faster, leaving surfaces genuinely clean. By adopting this technique, you’re not just dusting; you’re actively engaging with the tool to ensure it performs at its absolute best, capturing more dust and allergens with every swipe.
Embrace this improved method, and watch your cleaning routine transform. You’ll wonder how you ever managed without it!
Conclusion
The Swiffer duster is undoubtedly a powerful ally in the fight against household dust. However, its true potential is often untapped due to a simple, missed step. By taking a few extra seconds to properly fluff your duster pad, you activate its full dust-grabbing capabilities, ensuring a more thorough, efficient, and ultimately cleaner home. This small adjustment makes a monumental difference, proving that sometimes, the simplest hacks yield the most significant results. So, next time you reach for your Swiffer, remember to fluff it up and experience the unparalleled difference for yourself.
Swiffer Duster Tip You Probably Don’t Know