
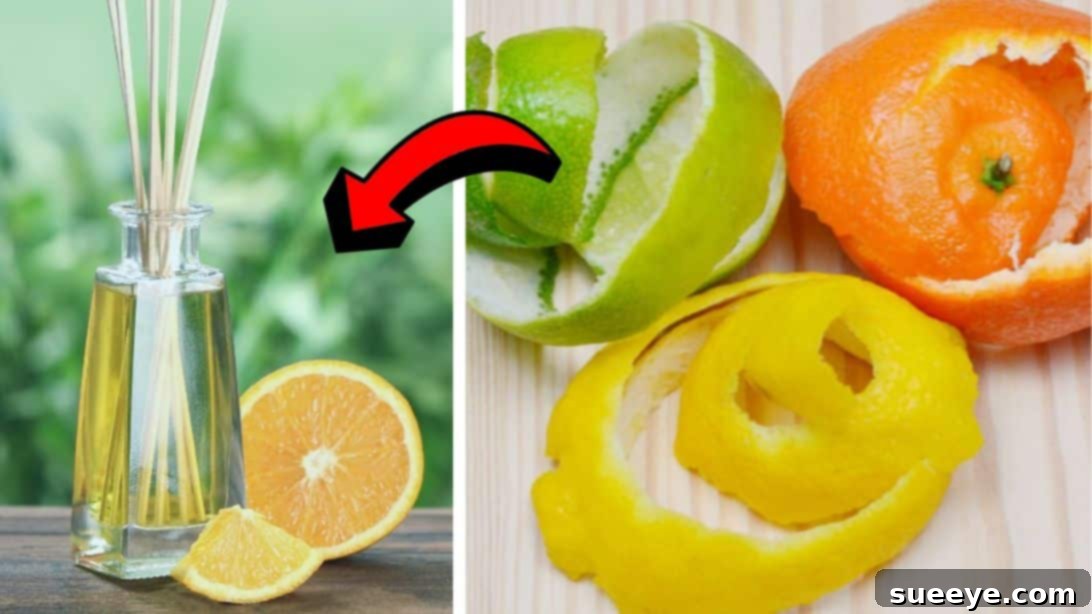
Creating a welcoming and pleasant atmosphere in your home is incredibly important, especially when you enjoy entertaining guests or simply wish to relax in a serene environment. A beautifully scented home doesn’t just uplift your mood; it also leaves a lasting positive impression on anyone who visits. While store shelves are brimming with various air freshener options, the truth is, homemade versions often prove to be superior in many aspects. They offer a healthier, more customizable, and surprisingly simple alternative to commercially produced products. If you’re ready to transform your living space with natural aromas, join us as we explore the art of crafting your own DIY air freshener, inspired by fantastic tutorials like the one from Natural Cures on YouTube.
RELATED: Discover the Secrets to Maintaining a Consistently Fresh-Smelling Home!
The Allure of a Fresh Home: Why DIY Air Fresheners Are Your Best Bet
The power of scent is undeniable; it can evoke memories, alter moods, and significantly influence how we perceive our surroundings. A foul or even neutral smell can make a home feel less inviting, while a clean, fresh aroma can instantly make it feel more comfortable and luxurious. Many people turn to commercial air fresheners for a quick fix, but these often come with a hidden cost. Packed with synthetic fragrances, phthalates, parabens, and other chemicals, conventional air fresheners can contribute to indoor air pollution, potentially triggering allergies, headaches, or even more serious health concerns over time. Furthermore, the constant need to repurchase these products can become quite expensive.
This is where homemade air fresheners shine as an excellent solution. By taking a DIY approach, you gain complete control over the ingredients, ensuring that what you’re diffusing into your home is safe, natural, and non-toxic. Beyond the health benefits, homemade air fresheners are remarkably cost-effective, utilizing everyday items and simple essential oils. They are incredibly easy to prepare and refill, allowing you to effortlessly switch up scents to match your mood, the season, or a special occasion. Imagine filling your home with the invigorating scent of citrus in the morning, a calming lavender in the evening, or a festive cinnamon blend during the holidays – all with minimal effort and maximum peace of mind. Moreover, creating multiple diffusers allows you to strategically place them in various corners of your house, ensuring an even and pervasive pleasant aroma throughout your entire living space.
Unlocking the Benefits: Why Choose Homemade Over Store-Bought?
Opting for a DIY air freshener over its commercial counterpart offers a plethora of advantages that extend beyond just a pleasant smell:
- Health and Wellness: The most significant benefit is the elimination of harmful chemicals. Commercial air fresheners often contain volatile organic compounds (VOCs), artificial fragrances, and phthalates, which have been linked to respiratory issues, headaches, and endocrine disruption. By using natural ingredients like fruit peels and pure essential oils, you create a healthier indoor environment for yourself, your family, and your pets.
- Cost-Effectiveness: Once you have a few basic supplies, the cost of making your own air fresheners is incredibly low. You’re utilizing natural by-products like citrus peels and only need small amounts of other readily available ingredients, saving you money in the long run compared to constantly buying expensive commercial sprays or plug-ins.
- Environmental Friendliness: Reducing plastic waste is another major plus. Most store-bought air fresheners come in non-recyclable plastic containers or aerosols. DIY diffusers typically use reusable glass containers, significantly cutting down on your ecological footprint. Plus, you’re using natural, biodegradable ingredients.
- Unrivaled Customization: The creative possibilities are endless! You’re not limited to a few generic scents. You can mix and match essential oils to create unique blends that perfectly match your personal preference or the ambiance you wish to create. Want a calming bedroom scent? Try lavender and chamomile. Need an energizing kitchen aroma? Lemon and peppermint are perfect.
- Simplicity and Replenishment: The process is incredibly straightforward and quick. Refilling your diffuser is a breeze, making it a sustainable and hassle-free solution for continuous freshness in your home.
Essential Ingredients for Your Natural Air Freshener
Crafting your own natural air freshener is surprisingly simple and requires just a few common household ingredients. Each component plays a crucial role in creating an effective and long-lasting scent:
- Lemon, orange, or mandarin peels
- ¼ cup of rubbing alcohol
- ¾ cup of water
- 20 drops of your favorite essential oil
Let’s delve deeper into why these specific ingredients are chosen:
Citrus Peels: Nature’s Refreshing Essence
The peels of citrus fruits like lemon, orange, and mandarin are packed with natural essential oils that are highly aromatic and incredibly refreshing. These oils are known for their uplifting and purifying properties, making them perfect for invigorating any space. Using the peels is also a fantastic way to utilize what would otherwise be food waste, adding an eco-friendly dimension to your DIY project. The natural acidity in citrus can also act as a mild deodorizer, breaking down unpleasant odors rather than just masking them.
Rubbing Alcohol: The Scent Carrier and Preservative
Rubbing alcohol (isopropyl alcohol) serves several vital functions in your DIY air freshener. Firstly, it acts as an excellent solvent, helping to extract and carry the essential oils from the citrus peels and any added essential oils, ensuring they disperse effectively into the air. Secondly, alcohol evaporates quickly, which aids in the diffusion of the scent. Lastly, its antimicrobial properties help prevent the growth of mold or bacteria in your diffuser liquid, extending the life and safety of your homemade concoction. Ensure you use at least 70% isopropyl alcohol for best results.
Water: The Gentle Base
Water forms the primary base of your diffuser liquid, diluting the alcohol and essential oils to an appropriate concentration. It’s important to use clean, distilled, or filtered water to avoid introducing impurities or minerals that could affect the clarity or longevity of your air freshener. Water helps to create a gentle, steady diffusion, ensuring your home smells fresh without being overpowering.
Essential Oils: Concentrated Aroma and Therapeutic Benefits
While citrus peels provide a wonderful base scent, adding essential oils allows for enhanced fragrance and endless customization. Essential oils are highly concentrated plant extracts that carry the natural scent and therapeutic properties of their source. Twenty drops provide a significant boost to the aroma, allowing you to tailor the scent profile precisely to your liking. Popular choices include lavender for relaxation, peppermint for invigoration, eucalyptus for clarity, or cinnamon for warmth. Experimenting with different blends can create unique atmospheres – think lemon and rosemary for focus, or orange and clove for a cozy autumnal feel.
Gathering Your Materials: Simple Tools for Scent Creation
Beyond the liquid ingredients, you’ll need a couple of key materials to assemble your effective and aesthetically pleasing diffuser:
- 1 glass container with a small opening
- Wooden sticks
Glass Container: The Vessel of Fragrance
A glass container is the ideal choice for your DIY air freshener for several reasons. Glass is non-reactive, meaning it won’t leach chemicals into your diffuser liquid or absorb scents over time, ensuring the purity of your fragrance. Its transparency also allows you to see the beautiful citrus peels and monitor the liquid level. A container with a small opening is crucial as it helps control the rate of evaporation, allowing for a slower, more consistent release of scent into the air. Mason jars, decorative bottles, or even repurposed small vases work perfectly.
Wooden Sticks: The Diffusing Powerhouse
Wooden sticks are the heart of a reed diffuser. Their porous nature allows them to absorb the scented liquid through capillary action, drawing it up and releasing the aroma into the air as the liquid evaporates from the exposed surfaces. Rattan or bamboo sticks are commonly used for this purpose because they have many tiny channels that facilitate efficient wicking. The number of sticks you use will directly impact the intensity of the scent; more sticks mean a stronger aroma. They are also a sustainable and natural way to disperse fragrance, adding a rustic touch to your home decor.
Crafting Your Own Diffuser: A Step-by-Step Guide
Now that you have all your ingredients and materials ready, let’s embark on the simple and rewarding process of making your very own natural air freshener. Follow these easy steps to bring delightful aromas into your home:
- Prepare Your Ingredients: Start by carefully peeling your chosen citrus fruits. Ensure the peels are clean and free from any fruit flesh that might cause the mixture to spoil faster. The fresher the peels, the more potent their natural oils will be.
- Combine Liquids: Take your glass container and pour in ¾ cup of clean water. Next, add ¼ cup of rubbing alcohol. The alcohol will help in the extraction of oils and ensure proper diffusion.
- Add Citrus Peels and Essential Oils: Gently place the citrus peels into the liquid mixture within the glass container. You can tear them into smaller pieces if they are too large. Then, add approximately 20 drops of your chosen essential oil. Feel free to adjust the quantity based on your desired scent strength and the specific essential oil’s potency.
- Mix Thoroughly: Secure the lid tightly onto your glass container. Gently shake the container for about 30 seconds to a minute, ensuring all the ingredients are well combined. This step helps the alcohol begin to extract the fragrant oils from the citrus peels and thoroughly integrates the essential oils into the solution.
- Insert Wooden Sticks: Remove the lid and carefully insert the wooden diffuser sticks into the container. Arrange them evenly so they can absorb the liquid effectively. The sticks will begin to soak up the scented mixture and diffuse the aroma into the surrounding air over time. For an immediate scent boost, you can flip the sticks after about an hour to expose the saturated ends to the air.
- Strategize Placement: Place your newly crafted diffuser in your desired location. Consider areas where air circulates naturally but avoid direct drafts, which can cause the liquid to evaporate too quickly. Hallways, living rooms, bathrooms, and kitchens are excellent spots to introduce a continuous, subtle fragrance.
Maximizing Scent and Longevity: Tips for Your DIY Air Freshener
To ensure your homemade air freshener performs optimally and keeps your home smelling wonderful for longer, consider these valuable tips:
Optimal Placement for Best Diffusion
Where you place your diffuser significantly impacts its effectiveness. For the best scent distribution, choose a central location in a room, ideally on a surface where air can circulate freely around it. Avoid placing it near open windows, air conditioning vents, or direct sunlight, as excessive airflow or heat can cause the liquid to evaporate too rapidly, shortening its lifespan. Conversely, placing it in a low-traffic corner might result in a less noticeable scent. Experiment with different spots to find the sweet spot for your home’s layout.
Maintenance for Lasting Freshness and Preventing Issues
To prevent mold from forming and to maintain the potency of your diffuser, it’s crucial to replace the liquid approximately every 30 days. Over time, the citrus peels may break down, and the essential oils will evaporate. When replenishing, thoroughly clean the glass container and replace the wooden sticks if they appear saturated or clogged, as this can impede their wicking ability. If you notice the scent fading before the 30-day mark, try flipping the wooden sticks or adding a few more drops of essential oil to revitalize the aroma. Ensure the lid is kept on when shaking to avoid spills, and store any excess mixture in a cool, dark place.
Customization and Experimentation for Unique Scents
The beauty of DIY is the freedom to customize. Don’t limit yourself to just citrus and one essential oil! Once you’re comfortable with the basic recipe, explore different scent combinations. For example, add a sprig of fresh rosemary or a few cinnamon sticks along with your citrus peels for a more complex and inviting aroma. During the festive season, try orange peels with clove and a touch of vanilla essential oil. In the summer, mint leaves with lemon peels can create a wonderfully refreshing scent. The possibilities are endless, allowing you to create seasonal fragrances or bespoke blends that perfectly match your preferences and mood.
Troubleshooting Scent Intensity
If you find the scent isn’t strong enough, try adding a few more drops of essential oil or increasing the number of wooden sticks. If the scent is too overpowering, remove a stick or two. Flipping the sticks every few days can also help refresh the aroma. Remember, the strength of the scent will depend on the size of your room and the amount of airflow.
Beyond the Diffuser: Holistic Approaches to a Fragrant Home
While your homemade diffuser will work wonders, a truly fragrant home benefits from a holistic approach. Regular cleaning, especially in areas prone to odors like kitchens and bathrooms, forms the foundation. Adequate ventilation by opening windows daily can air out stale smells and bring in fresh air. Incorporating indoor plants known for their air-purifying qualities can also naturally enhance your home’s atmosphere. Sometimes, the simple act of baking cookies or simmering potpourri on the stove can provide an instant, delightful aroma. Combining these practices with your natural DIY air fresheners will ensure your home is consistently a haven of fresh, inviting scents.
Making your own natural air freshener is a simple yet incredibly impactful way to enhance your living space. It’s an eco-friendly, cost-effective, and healthier alternative to commercial products, offering endless possibilities for customization. Give this easy tutorial a try and experience the joy of a home filled with delightful, natural aromas. A huge thank you to Natural Cures via YouTube for inspiring this guide and for all the wonderful images used here. If you enjoyed this tutorial, be sure to visit their channel and subscribe for more fantastic natural remedies and DIY ideas!