
Transforming cherished T-shirts into a cozy, custom quilt is a deeply rewarding project that captures a lifetime of memories. A T-shirt quilt isn’t just a blanket; it’s a tangible timeline of your life’s adventures, passions, and milestones. Imagine snuggling under a quilt featuring your favorite band tees, high school sports jerseys, college club shirts, vacation souvenirs, or race finishes – each square a vivid flashback. This guide will take you on an inspiring journey, showing you exactly how to craft a beautiful and durable T-shirt quilt, even if you’re a beginner sewer. It’s an ideal way to repurpose old, sentimental garments that might otherwise be forgotten in a drawer, turning them into a functional work of art that can be enjoyed for years to come. Whether you’re creating a unique gift for a loved one, celebrating your own journey, or simply decluttering with a purpose, learning how to make a T-shirt quilt is a valuable skill that brings immense satisfaction.
Why Create a T-Shirt Memory Quilt?
Beyond being a cozy cover, a T-shirt quilt serves as an incredible keepsake. It’s a fantastic way to:
- Preserve Memories: Each T-shirt tells a story – a concert attended, a team played on, a marathon run, a favorite vacation spot. A quilt brings these stories together into one narrative.
- Declutter with Purpose: Instead of letting beloved but unworn T-shirts take up closet space, give them a new life and purpose.
- Create a Personalized Gift: A T-shirt quilt makes an incredibly thoughtful and unique gift for graduations, birthdays, anniversaries, or moving-away presents. It shows immense care and effort.
- Embrace Sustainability: Repurposing old clothing is an eco-friendly approach to crafting.
- Develop Sewing Skills: This project is perfect for honing your quilting and sewing techniques, from cutting and piecing to binding and quilting.
Essential Materials for Your T-Shirt Quilt Project
Before you dive into cutting and stitching, gather all your necessary supplies. Having everything on hand will ensure a smooth and enjoyable crafting experience. Here’s a detailed list of what you’ll need to make your memory quilt:
- T-shirts: The stars of your quilt! Select shirts with sentimental value, choosing a variety of colors, designs, and textures for visual interest. The number of shirts will depend on your desired quilt size.
- Fusible Interfacing (Light to Medium Weight): This is crucial for stabilizing stretchy T-shirt fabric, preventing distortion and making it easier to cut and sew. Look for interfacing specifically designed for knit fabrics.
- Fabric for the Backing: Choose a comfortable, durable fabric that complements your T-shirt designs. Options include wide-back quilting cotton, flannel, minky, or even pieced cotton prints.
- Batting: The middle layer of your quilt, providing warmth, loft, and structure. Common types include cotton, polyester, or blends, available in various thicknesses.
- Sewing Machine: A reliable sewing machine with a good straight stitch is essential.
- High-Quality Thread: All-purpose polyester or cotton thread in a neutral color (like grey or beige) that blends with most of your T-shirts. You’ll also need thread for quilting, which can be decorative or matching.
- Rotary Cutter and Self-Healing Mat: These tools provide precise and efficient cutting, especially for straight lines and consistent block sizes.
- Long Quilting Ruler: A clear, sturdy ruler (e.g., 6″ x 24″) is indispensable for accurate cutting and trimming.
- Iron and Ironing Board: Crucial for pressing seams, applying fusible interfacing, and ensuring flat, crisp quilt blocks.
- Quilting Pins or Wonder Clips: For holding fabric layers together securely while sewing.
- Fabric Scissors: Sharp scissors for general fabric cutting.
- Optional but Recommended: Seam ripper (for inevitable mistakes!), fabric marker or chalk, design wall or large flat surface, walking foot for your sewing machine (for quilting).
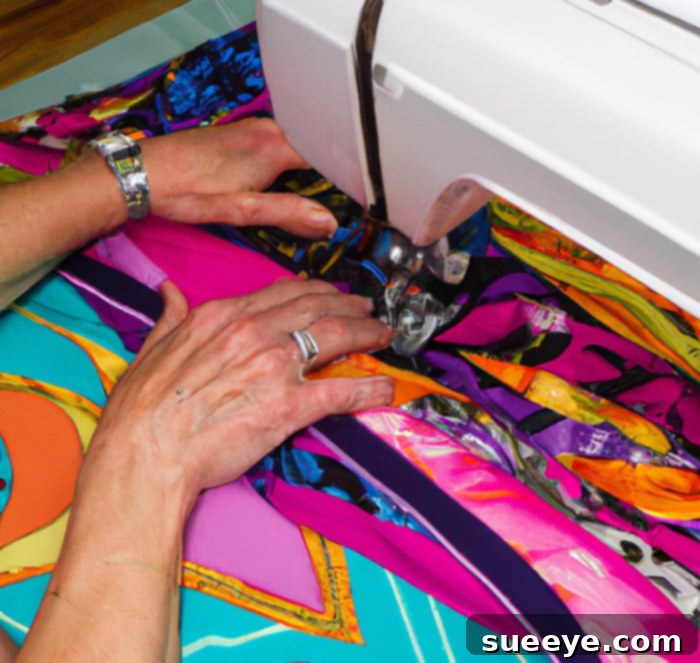
How to Make a T-Shirt Quilt: A Comprehensive Step-by-Step Tutorial
Step 1: Gathering and Preparing Your Treasured T-Shirts
This initial phase is where the magic begins, as you select the T-shirts that will form the heart of your quilt. Carefully choose shirts that hold special meaning – perhaps from memorable concerts, sporting events, academic achievements, family vacations, or significant milestones. Consider the overall size of the quilt you wish to create. For a throw quilt, you might need 15-25 shirts; a twin-size could require 30-40 shirts, and a queen or king size upwards of 45-60 shirts, depending on the block size you choose. Lay them out to visualize the potential color palette and design flow.
Once selected, thoroughly wash and dry all your T-shirts. This prevents any future shrinking or color bleeding once the quilt is finished. Avoid using fabric softener, as it can sometimes interfere with the fusible interfacing bonding process. After washing, gently press out any major wrinkles. Now, you’ll prepare them for cutting. Carefully cut out the desired designs or logos from each T-shirt. Aim to cut generous squares or rectangles around the graphic, leaving at least 1-2 inches of fabric margin on all sides. This gives you room to trim them to a consistent size later. Don’t worry about perfect squares just yet; focus on getting the central design intact. For T-shirts with smaller designs, you might opt to include more of the shirt fabric, or combine multiple smaller designs into one block.
Step 2: Stabilizing Your T-Shirt Blocks with Fusible Interfacing
T-shirt fabric, being knit, is inherently stretchy, which can make it challenging to cut and sew accurately alongside non-stretchy quilting cotton. Fusible interfacing is your best friend here! It provides stability to the T-shirt blocks, preventing stretching, warping, and sagging, ensuring your finished quilt lays flat and square. It essentially transforms the knit fabric into a more stable, woven-like material, making it much easier to work with.
To apply, first, determine the final cut size for your T-shirt blocks. A common size is 12.5″ x 12.5″ (yielding a 12″ finished block with a 1/4″ seam allowance). Cut your fusible interfacing into squares slightly larger than your chosen finished block size (e.g., 13″ x 13″). Lay each T-shirt graphic piece face down on your ironing board. Place a corresponding piece of fusible interfacing, adhesive side down, onto the back of the T-shirt fabric, centering it over the design. Using a dry iron (no steam!) set to the recommended temperature for your interfacing, press firmly for the time specified by the manufacturer (usually 10-15 seconds per section). Do not slide the iron; lift and press to avoid distorting the fabric. Allow each piece to cool completely before moving it, as this ensures a strong bond. Once all your T-shirt pieces have interfacing applied, use your rotary cutter and quilting ruler to trim each block to a uniform size (e.g., 12.5″ x 12.5″), ensuring the graphic is perfectly centered within the block. This precise trimming is critical for achieving a professional-looking quilt top.
Step 3: Designing Your Layout and Piecing the Quilt Top
Now comes the creative fun of arranging your T-shirt blocks! Lay out all your stabilized and trimmed T-shirt blocks on a large flat surface – a design wall, the floor, or a large table works perfectly. Experiment with different arrangements until you achieve a visually pleasing design. Consider color balance, the distribution of large and small graphics, and the overall flow of the quilt. Take a photo of your favorite layout to reference as you sew. This step is crucial for visualizing your finished quilt and making any adjustments before committing to stitching.
Many quilters choose to add “sashing,” which are narrow strips of coordinating fabric sewn between the T-shirt blocks. Sashing can help to separate busy designs, create a uniform look, and even adjust the overall size of your quilt. If you opt for sashing, cut strips of your chosen fabric (e.g., 2.5″ wide) to the length of your T-shirt blocks. You can also add “cornerstones” – small squares of fabric sewn at the intersections of sashing strips – for added visual interest. Once your layout is finalized, begin sewing the blocks together, row by row. Use a 1/4-inch seam allowance throughout the entire quilting process. This consistent seam allowance is vital for all your blocks and rows to line up correctly. Sew each block to its neighboring block within a row, then press the seams. For T-shirt quilts, it’s often best to press seams open to reduce bulk. Once all your rows are complete, sew the rows together, carefully matching seam intersections and pinning thoroughly to prevent shifting. Press these horizontal seams as well.
Step 4: Creating the Quilt Sandwich: Batting and Backing
With your T-shirt quilt top complete, it’s time to add the cozy layers that make a quilt warm and inviting: the batting and the backing. This process creates what quilters call the “quilt sandwich.”
First, select your batting. Consider the desired warmth, weight, and drape. Cotton batting is breathable and gives a classic crinkly look after washing. Polyester batting is lightweight and warm. Blends offer a combination of benefits. Cut your batting slightly larger than your quilt top (e.g., 3-4 inches larger on all sides). Do the same for your backing fabric. If your backing fabric isn’t wide enough, you’ll need to piece two or more lengths together, using a 1/2-inch seam allowance and pressing the seam open for a flat finish.
Now, prepare your layering surface. A large, clean floor or table is ideal. Begin by laying the backing fabric face down, ensuring it is smooth and completely flat, without any wrinkles. Tape the edges to the floor or use clamps to keep it taut. Next, carefully lay the batting on top of the backing, smoothing it out completely to remove any bumps or wrinkles. Finally, place your T-shirt quilt top face up on top of the batting, centering it as best as possible and smoothing it from the center outwards. Once all three layers are perfectly aligned and smooth, you need to “baste” them together. Basting temporarily holds the layers in place for quilting. Common basting methods include safety pin basting (using curved safety pins placed every 4-6 inches across the quilt), or spray basting (using a temporary fabric adhesive). Whichever method you choose, ensure the layers are securely held together to prevent shifting during quilting.
Step 5: Quilting Your Masterpiece and Adding the Binding
Quilting is the process of stitching through all three layers of your quilt sandwich – the top, batting, and backing – to secure them together and add texture and durability. There are various quilting techniques, from simple to intricate. For a beginner-friendly T-shirt quilt, “stitch-in-the-ditch” (quilting along the seam lines of your T-shirt blocks) or straight-line quilting (creating parallel lines across the quilt) are excellent choices. You can use your sewing machine for this, perhaps with a walking foot, which helps feed all layers evenly. Alternatively, you can hand-quilt for a more traditional look. Choose a thread color that either blends with your T-shirt blocks or provides a subtle contrast. Start quilting from the center of the quilt and work your way outwards to avoid trapping fabric or creating puckers.
Once your quilting is complete, it’s time for the final, polished touch: adding the binding. Binding creates a clean, durable edge for your quilt, protecting it from wear and tear. First, trim the excess batting and backing so they are flush with the raw edges of your quilt top. To make the binding, cut several strips of coordinating fabric (e.g., 2.5″ wide) on the straight grain of the fabric. Sew these strips together end-to-end at a 45-degree angle to create one long continuous strip. Press the seams open, then fold the entire strip in half lengthwise and press, creating a double-fold binding. Starting on one side of your quilt, align the raw edge of your folded binding with the raw edge of your quilt top. Using a 1/4-inch seam allowance, sew the binding to the front of the quilt, mitering the corners for a neat finish. Once sewn to the front, wrap the folded edge of the binding around to the back of the quilt, covering the raw seam. You can then hand-stitch the binding in place on the back for an invisible finish, or machine-stitch it from the front, catching the binding on the back. Take your time with this step, as a well-finished binding significantly enhances the overall look of your T-shirt quilt.
Expert Tips and Tricks for a Stunning T-Shirt Quilt
Making a T-shirt quilt is a journey, and these additional tips can help you achieve professional results and enhance your experience:
- Plan Your Layout Meticulously: Before cutting or sewing, take the time to arrange your T-shirt blocks in various configurations. Consider color balance, theme, and the visual impact of each shirt. Take photos of your preferred layouts to review before you commit.
- Consistency is Key: Use a consistent 1/4-inch seam allowance throughout the entire project. This is the golden rule of quilting and ensures all your pieces fit together accurately. Invest in a 1/4-inch presser foot for your sewing machine if you don’t have one.
- Press, Don’t Iron: When working with fabric, especially knit T-shirts, “pressing” involves lifting and placing the iron, rather than “ironing,” which involves sliding. This prevents stretching and distortion.
- Choose a Complementary Sashing and Backing Fabric: While your T-shirts are the stars, a well-chosen sashing and backing fabric can elevate the entire quilt. Consider colors that appear in your T-shirt designs or a neutral that allows the T-shirts to pop. Flannel or minky can make for an extra cozy backing.
- Don’t Be Afraid of Imperfections: Especially for your first quilt, embrace the handmade charm! Every stitch tells a story, and slight variations add to its unique character.
- Label Your Quilt: Consider adding a fabric label to the back of your quilt with the date it was made, who it’s for, and any other special notes. This adds to its heirloom quality.
- Care for Your Finished Quilt: Provide care instructions if giving as a gift. Generally, T-shirt quilts can be machine washed on a gentle cycle with cold water and tumble dried on low heat, or air-dried, especially if using a delicate backing like minky.
- Consider Non-T-shirt Items: Don’t limit yourself to just T-shirts! You can incorporate other sentimental fabrics like baby clothes, old jeans, bandanas, or even patches from uniforms. Just remember to stabilize any stretchy fabrics with interfacing.
- Start Small: If you’re new to quilting, consider making a smaller quilt first, like a baby quilt or a wall hanging, to get comfortable with the process before tackling a large bed-sized quilt.
Making a T-shirt quilt is more than just a sewing project; it’s a labor of love that transforms cherished memories into a functional piece of art. The journey from a pile of old shirts to a beautiful, personalized quilt is incredibly rewarding, offering a unique blend of nostalgia, creativity, and the joy of crafting. Enjoy every step of the process, and soon you’ll have a timeless keepsake to treasure or to give as a truly unforgettable gift.