
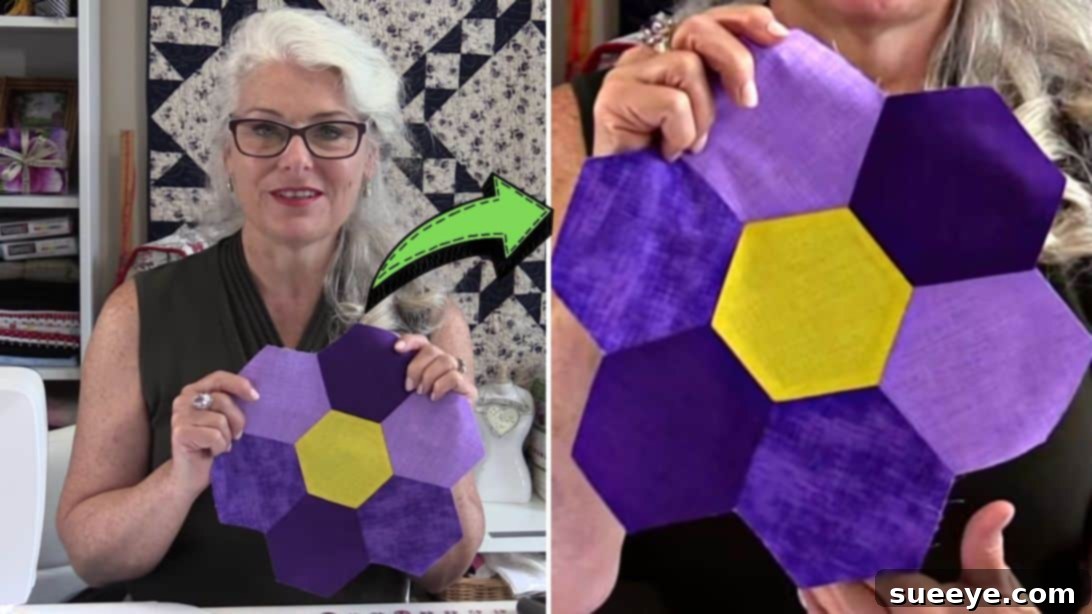
Are you yearning to infuse your quilting projects with a touch of timeless elegance and intricate design? If you’ve grown weary of repetitive quilt blocks and conventional construction methods, then prepare to be captivated by the charm of the Grandmother’s Flower Garden Quilt Block. This iconic pattern, celebrated for its beautiful hexagon shape that blossoms into a delicate floral motif, offers a refreshing challenge and immense satisfaction. Whether you’re a seasoned quilter seeking a new adventure or a passionate beginner ready to expand your skills, this detailed guide will walk you through creating this stunning block with ease. Inspired by the clear and simple instructions from SewVeryEasy on YouTube, we’ll delve into every step, ensuring you have all the knowledge to craft your very own heirloom-quality hexagon quilt. Get ready to transform fabric squares into a vibrant garden of textile artistry!
The Timeless Appeal of the Grandmother’s Flower Garden Quilt
The Grandmother’s Flower Garden quilt stands as a testament to enduring beauty and traditional craftsmanship in the world of quilting. Originating in the early 19th century, this pattern gained immense popularity during the Victorian era and has remained a cherished design ever since. Its allure lies in the ingenious arrangement of hexagonal fabric pieces, which, when meticulously joined, form intricate floral clusters. Each cluster typically features a contrasting center hexagon surrounded by six “petal” hexagons, creating a vibrant, tessellating garden across the quilt surface. This pattern evokes a sense of nostalgia, often reminding us of cozy homes and cherished memories. It’s not just a quilt; it’s a canvas for storytelling, where each fabric scrap can hold a personal memory or a design intention. The visual depth and texture created by the precise geometric shapes make it a true masterpiece, appealing to those who appreciate both traditional aesthetics and the challenge of precise piecing.
What You’ll Need: Gathering Your Quilting Supplies
Before embarking on your Grandmother’s Flower Garden journey, ensure you have all the necessary tools and materials at hand. Preparation is key to a smooth and enjoyable quilting experience, especially when working with precise shapes like hexagons. Here’s a comprehensive list to get you started:
Essential Materials for Your Hexagon Quilt Project
- Charm Pack: These pre-cut 5-inch fabric squares are ideal for this project, offering a coordinated collection of fabrics that eliminate much of the fabric cutting and decision-making process. They are perfect for achieving a scrappy yet harmonious “garden” look. Consider selecting a pack with a good mix of lights, mediums, and darks to create visual interest and dimension in your flowers.
- Scissors or Rotary Cutter and a Cutting Mat: Precision is paramount when working with hexagons. A sharp rotary cutter paired with a self-healing cutting mat and an acrylic ruler will ensure accurate, clean cuts. If you prefer, sharp fabric scissors can also be used, though they may require more careful attention to detail.
- Needle and Thread: For machine piecing, an all-purpose polyester or cotton thread in a neutral color (like white, grey, or ecru) is recommended. Ensure your machine needle is sharp and suitable for the fabric type you are using, typically a universal 80/12 or 90/14. If you opt for some hand-basting or even English Paper Piecing (EPP) elements, fine hand-sewing needles will be essential.
- Iron, for Pressing: A good quality iron and an ironing board are indispensable. Pressing seams correctly is crucial for achieving flat blocks and precise joins, which significantly impacts the overall appearance and success of your quilt.
- Sewing Machine: A standard sewing machine capable of sewing a consistent 1/4-inch seam allowance is all you need. Familiarize yourself with your machine’s 1/4-inch foot or marking to ensure accuracy.
- Hexagon Template: This is a critical tool for creating uniform hexagons. You can purchase acrylic templates or, as recommended by SewVeryEasy, download a printable pattern. Click here to download your hexagon pattern. Using a template ensures all your hexagons are the same size, which is vital for seamless piecing.
- Temporary Fabric Adhesive (Optional but Recommended): A fabric glue stick or basting spray can be incredibly helpful for temporarily adhering your paper templates to the fabric, preventing shifting during cutting and prep.
- Fabric Marking Tool (Optional): A fabric pencil or disappearing ink pen can be useful for marking stitching lines if you are hand-sewing or need extra guides.
Step-by-Step Instructions: Crafting Your Grandmother’s Flower Garden Block
Now that you have all your supplies ready, let’s dive into the fascinating process of constructing the Grandmother’s Flower Garden quilt block. Follow these detailed steps to ensure beautiful, precise results.
Preparing Your Hexagon Templates and Fabrics
- Download and Prepare the Hexagon Template: Start by downloading the provided hexagon pattern from SewForever.com. Print it accurately, ensuring it prints at 100% scale. Carefully cut out each paper hexagon template along the printed lines. These templates will serve as your guides for creating perfectly uniform fabric hexagons.
- Cutting Your Fabric Squares: If you’re not using a charm pack, cut your chosen fabrics into 5-inch squares. This gives you ample room for adhering the hexagon template and cutting with a seam allowance. With a charm pack, this step is already done for you, allowing you to move straight to the next phase of preparation.
Precisely Cutting and Preparing Hexagon Pieces
- Adhering Templates to Fabric: Take one of your cut paper hexagon templates and position it on the wrong side of a fabric charm square. Ensure there’s enough fabric around all sides for your seam allowance. For stability, you can temporarily adhere the template to the fabric using a fabric glue stick or a small pin. This prevents the template from shifting while you cut.
- Cutting Fabric Hexagons with Seam Allowance: With the paper template securely in place, carefully cut around the template, leaving a precise 1/4-inch seam allowance on all six sides. This seam allowance is crucial for accurate machine piecing later. Repeat this process for all the hexagons you’ll need for your flower block, as well as for the contrasting center piece. Remember, each flower unit requires seven hexagons: one center and six petals.
- Selecting Your Center Fabric: Choose a fabric of a distinctly different color or pattern for the center of your flower. This contrast will make your floral design pop and add visual interest to each block.
Assembling Your Hexagon Flower Units
- Shaping Your Hexagon Edges: This step is critical for achieving crisp, uniform edges. With the paper template still attached to the wrong side of your fabric hexagon, carefully fold the 1/4-inch seam allowance over the edges of the paper template. You can use a pressing iron to create sharp creases, or if you prefer a more secure method, you can baste the folded edges down with a running stitch. This process creates clean, straight lines that will make machine piecing much easier and more accurate.
- Joining Hexagon Petals: Begin assembling your flower. Take two prepared hexagon “petal” pieces. Align them right sides together, making sure the folded edges are perfectly matched. Stitch them together using a precise 1/4-inch seam allowance. If you’re using a machine, sew slowly and carefully, perhaps even shortening your stitch length slightly for added durability and precision. Continue adding the remaining five “petal” hexagons in the same manner, forming a ring.
- Attaching the Center Hexagon: Once your ring of six petals is complete, it’s time to add the contrasting center hexagon. Align the center hexagon right sides together with one of the petals in the ring. Stitch it in place with a 1/4-inch seam allowance. Continue attaching the center to the adjacent petals, rotating your work and carefully easing in the seams where multiple hexagons meet at the center point. This process might feel a little intricate, but patience will yield beautiful results. Refer to the SewVeryEasy video for a visual demonstration of this crucial step.
Perfecting Your Quilt Block: Pressing and Finishing
- Pressing Your Seams: Once your flower unit is assembled, flip it over so the wrong side of the patchwork is facing up. The seams in the center of the block will be bulky where all six petals and the center hexagon meet. To ensure your block lies perfectly flat, carefully notch the inner corners of these seam allowances. This means making small clips into the seam allowance, just up to but not through the stitch line. This releases tension and allows the seams to be pressed open or to one side very flatly. Give the entire block a good press with a hot iron, ensuring all seams are flat and smooth. This step is often overlooked but is absolutely vital for a professional finish.
- Creating More Blocks: The beauty of the Grandmother’s Flower Garden quilt lies in its repetition. Create as many flower blocks as needed to achieve your desired quilt size. Experiment with different color combinations for each flower, or maintain a consistent palette for a more uniform look.
- Joining Blocks and Completing Your Quilt Top: Once you have a collection of individual flower blocks, you can begin piecing them together. Traditionally, Grandmother’s Flower Garden blocks are joined point-to-point, creating a secondary diamond pattern in the negative space. You might also choose to add sashing strips between your blocks for a different effect. Once your quilt top is assembled, proceed with the final stages of quilting: basting, quilting (either by hand or machine), and binding the edges to complete your beautiful, handmade quilt.
Tips for a Flawless Grandmother’s Flower Garden Quilt
Crafting a hexagon quilt requires patience and attention to detail. Here are some extra tips to help you achieve exceptional results:
- Precision is Key: Invest in a good quality rotary cutter and ruler. Even a slight inaccuracy in cutting can lead to points not matching up perfectly later.
- Finger Press Before Ironing: Gently finger press seams open or to one side before taking them to the iron. This helps set the stitches and allows for a flatter press.
- Consistent Seam Allowance: Always use a consistent 1/4-inch seam allowance. A quarter-inch foot on your sewing machine is highly recommended.
- Press, Don’t Iron: When pressing, lift and place the iron rather than sliding it across the fabric. This prevents stretching and distortion of your fabric and blocks.
- Chain Piecing: To save time when joining multiple petals, use chain piecing. Sew one seam, then without lifting the needle, feed the next two pieces under to sew their seam, and so on. Cut them apart later.
- Watch the Video: For visual learners, the SewVeryEasy tutorial on YouTube is an invaluable resource. Watching the steps demonstrated can clarify any uncertainties.
Beyond the Block: Customizing Your Quilt
While the traditional Grandmother’s Flower Garden layout is stunning on its own, don’t hesitate to personalize your project. Consider:
- Varying Hexagon Sizes: Once comfortable with the basic block, explore patterns that use different-sized hexagons to create more complex designs.
- Alternative Layouts: Instead of joining flower to flower, you could introduce solid fabric strips (sashing) between your blocks to create a lattice effect, or rotate blocks to form new secondary patterns.
- Fabric Choices: Go beyond charm packs! Dive into your scrap bin for a truly eclectic garden, or choose a specific color scheme for a modern interpretation of this classic.
Why Choose the Grandmother’s Flower Garden Quilt?
Embarking on a quilting journey, especially with a pattern as rich in history and beauty as the Grandmother’s Flower Garden, offers more than just a finished textile. It provides a unique opportunity for creative expression, a therapeutic escape from daily stresses, and the immense satisfaction of creating something truly beautiful with your own hands. Each stitch contributes to a tangible legacy, an heirloom that can be passed down through generations, telling a story of dedication and artistry. This project hones your precision, improves your fabric handling skills, and deepens your understanding of quilt construction. The intricate geometry of the hexagons, transforming into vibrant flowers, is a rewarding challenge that culminates in a truly spectacular work of art.
Watch the Full Tutorial from SewVeryEasy
While this written guide provides comprehensive instructions, seeing the techniques in action can be incredibly beneficial. We highly recommend watching the full video tutorial by SewVeryEasy on YouTube. Nancy’s clear explanations and visual demonstrations will help solidify your understanding and guide you through any tricky spots. Don’t forget to give her channel a visit and subscribe for more inspiring quilting projects!
Creating the Grandmother’s Flower Garden quilt block is a journey of precision, creativity, and immense satisfaction. By following these detailed steps and embracing the process, you’ll soon have a collection of beautiful floral blocks ready to be assembled into a cherished quilt. Happy quilting, and may your garden bloom with vibrant colors and joyful stitches!