
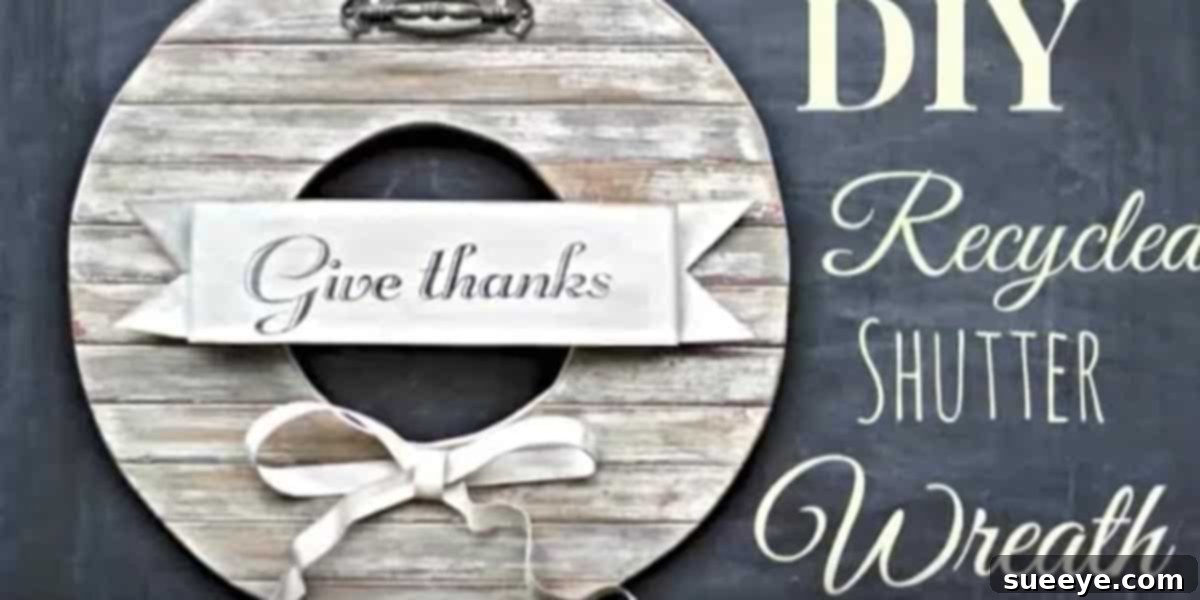
Craft Your Own Timeless DIY Vintage Shutter Wreath
There’s an undeniable allure to home decor that tells a story, pieces that exude a sense of history and warmth. A vintage shutter wreath perfectly encapsulates this charm, offering a unique blend of rustic elegance and personalized touch that truly transforms any space. Imagine the welcoming embrace it brings to your front door or the focal point it creates in your living room. With its distinctive weathered appeal and customizability, a handmade shutter wreath is more than just a decoration; it’s a statement of style and a testament to the beauty of repurposed items.
For those who appreciate the cozy, lived-in aesthetic of farmhouse or cottage-style decor, or simply love the character of vintage finds, this project is an absolute delight. It’s an opportunity to infuse your home with an authentic, handcrafted vibe, making it feel more inviting and uniquely yours. Whether you’re preparing for the holidays, looking for a year-round decorative piece, or simply seeking a rewarding DIY challenge, crafting a vintage shutter wreath is an incredibly satisfying endeavor that yields beautiful, lasting results.
Why a Shutter Wreath? Embracing Rustic Elegance and Sustainability
Shutters possess a unique architectural beauty, and when repurposed, they bring an incredible amount of character to decor. There’s something inherently appealing about giving new life to an old object, transforming it from a forgotten fixture into a cherished decorative item. A shutter wreath is not just visually striking; it’s also a wonderfully sustainable project, promoting creativity through upcycling and reducing waste. Instead of discarding old shutters, you can transform them into a stunning focal point that garners compliments and sparks conversation.
The versatility of a shutter wreath is another compelling reason to choose this project. Unlike traditional wreaths that often feel seasonal, a well-designed shutter wreath can adapt to various themes and holidays simply by changing out small embellishments. Its robust structure and timeless aesthetic make it a versatile backdrop for different styles, from classic farmhouse to coastal chic, industrial, or even minimalist. Moreover, the inherent rustic texture of wood, especially distressed wood, adds a layer of warmth and authenticity that is hard to replicate with mass-produced items. Each knot, grain, and weathered mark tells a part of its previous life, adding depth and narrative to your decor.
Materials You’ll Need: Gathering Your Creative Toolkit
To embark on this rewarding DIY journey, you’ll need a selection of materials that will help you bring your vision to life. The beauty of this project lies in its flexibility, allowing you to substitute items based on availability and personal preference. Here’s a comprehensive list of what you might need:
- An Old Shutter: The star of the show! Look for one with good structural integrity, even if it’s chipped or faded – that adds to the vintage appeal.
- Thin Craft Wood: For crafting your message banner. Balsa wood, basswood, or even thin plywood sheets from a craft store’s model section work well.
- Laminate Veneer or Craft Foam: For creating decorative ribbons. Wood veneer sheets or thicker craft foam can provide a similar texture and hold a shape.
- Vintage Handle/Pull: An old dresser pull, cabinet handle, or even a sturdy piece of rope for hanging.
- Paints: Chalk paint (for its matte, distressed finish), acrylic paints, or spray paint suitable for wood. Choose colors that complement your home decor.
- Wood Glue: A strong adhesive specifically designed for wood.
- Screws: To attach the handle securely.
- Sandpaper: Various grits for distressing and smoothing.
- Paint Brushes/Rollers: For applying paint evenly.
- Clothespins/Clips: Essential for shaping the thin wood banner.
- Water Basin: For soaking the thin wood.
- Stencils/Carbon Paper: For transferring your chosen message (optional, if you’re not freehanding).
- Protective Sealant: Matte or satin clear coat to protect your paint and design (especially if used outdoors).
- Optional Embellishments: Faux greenery, berries, burlap, twine, small bells, decorative ribbon, dried flowers – anything to personalize your wreath.
Step-by-Step Guide: Crafting Your Masterpiece
Now, let’s delve into the detailed process of transforming these simple materials into a magnificent vintage shutter wreath. Each step is designed to be clear and achievable, guiding you through the creation of a truly unique piece.
1. Preparing Your Shutter: The Foundation of Your Wreath
The first step is to prepare your shutter. Begin by cleaning it thoroughly to remove any dirt, dust, or loose paint. A damp cloth with mild soap usually does the trick. Once clean and dry, it’s time to give it that coveted weathered look. If your shutter is already beautifully distressed, you might only need a light cleaning. However, for a more intentional vintage appeal, consider painting it with chalk paint in a neutral shade like off-white, cream, or a soft gray. Once the paint is dry, gently sand certain areas – edges, corners, and raised sections – to reveal the underlying wood or previous paint color. This technique, known as distressing, creates an authentic aged appearance. You can also experiment with dry brushing a darker or lighter shade over your base coat for added depth, or apply a clear wax and then a dark wax for a rich, antique patina. The goal is to make it look like it has naturally aged over time.
2. Crafting the Personalized Message Banner
The message banner is a key feature that allows for personalization. Start with a piece of ultra-thin wood, commonly found in the model or craft section of hobby stores. These thin sheets are remarkably flexible when treated properly. To achieve the elegant curved shape reminiscent of a flowing ribbon, carefully soak the wood in warm water for several minutes. This makes the wood pliable. Once flexible, gently form it into the desired ribbon-like curve. You can use clothespins or binder clips to hold the shape against a curved object, like a large can or a rounded bottle, until it dries completely. This drying process might take several hours or even overnight, depending on the thickness of your wood.
Once the wood banner is thoroughly dry and has retained its curved shape, it’s ready for painting. Choose a contrasting color that will make your message pop – perhaps a dark charcoal grey or black on a lighter shutter, or a soft cream on a darker one. Apply a thin, even coat of paint and let it dry. Now comes the exciting part: transferring your message. You can use stencils for a precise look, carbon paper to trace a printed design, or if you’re confident in your freehand abilities, paint it directly. Popular messages include “Welcome,” “Gather,” “Home,” or seasonal greetings like “Merry Christmas” or “Happy Fall.” Ensure the paint for the message is crisp and clear, adding another layer of visual interest to your wreath.
3. Creating the Decorative Ribbon Element
To complement the message banner, you can create a secondary decorative ribbon. The original concept used laminate veneer, which is excellent for mimicking the look of wood while being more flexible. If veneer isn’t readily available, thick craft foam or even a strip of rigid fabric like burlap can work. Cut your chosen material into a strip and shape it into a smaller ribbon or scroll that will sit just below your main message banner. Once shaped, paint it to match or complement your existing color scheme. For example, if your banner is cream with black lettering, this ribbon could be black or a metallic accent color. This adds depth and a layered effect to your design. Once painted and dry, position it carefully beneath your main message banner and secure it with strong wood glue. Apply firm pressure and allow ample time for the glue to set, ensuring a lasting bond.
4. Attaching the Handle: The Finishing Touch for Hanging
A vintage handle or pull not only serves a practical purpose for hanging but also significantly enhances the antique aesthetic of your shutter wreath. Source an old dresser pull, a cabinet handle, or even a robust piece of architectural salvage. Clean it if necessary to maintain its rustic appeal. Position the handle at the top center of your shutter wreath. Using small screws appropriate for the handle and shutter material, carefully attach it. Pre-drilling pilot holes can prevent the wood from splitting, especially if your shutter is old or made of softer wood. Ensure it is securely fastened, as this handle will bear the weight of your entire wreath when hung.
5. Assembly and Final Embellishments
With all your individual components prepared, it’s time for final assembly. Carefully position your main message banner and the decorative ribbon on the front of the shutter. Once you’re happy with the placement, use a generous amount of wood glue to firmly attach them. Press down gently but firmly, and consider using clamps or heavy books to hold them in place while the glue cures completely. This is crucial for durability. After the glue has dried, step back and admire your creation. This is also the perfect time to add any optional embellishments. Consider draping some faux eucalyptus or pine branches around the top, tying a burlap bow, or adding a cluster of faux berries for a pop of color. Twine, small metal bells, or even tiny fairy lights can add extra charm, adapting your wreath for different seasons or occasions.
Design Variations and Personalization: Make It Uniquely Yours
The beauty of DIY lies in customization. While the core elements remain, you can easily adapt this project to suit your personal style and the current season. For a festive holiday wreath, incorporate traditional red and green hues, add mini ornaments, pinecones, or artificial snow. For a spring-themed wreath, use pastel paints, faux florals like lavender or cherry blossoms, and a message like “Bloom.” A patriotic theme could feature red, white, and blue elements with stars. Consider different paint finishes – a high gloss for a more modern take, or a crackle finish for extreme antiquing. You can also experiment with different types of handles, from cast iron pulls for an industrial look to rope for a nautical feel. The possibilities are endless, allowing your shutter wreath to evolve with your home’s aesthetic.
Where to Display Your Shutter Wreath: Placement Ideas
Once your magnificent vintage shutter wreath is complete, finding the perfect spot to display it is the final step. It’s a versatile piece that can adorn various areas of your home. The most obvious place is your front door, offering a warm and inviting welcome to guests. Indoors, it can become a captivating focal point above a mantelpiece, serving as a rustic art piece. Hang it in an entryway to greet visitors, or incorporate it into a gallery wall for added texture and dimension. It also looks fantastic on a porch wall, adding curb appeal, or even leaning against a wall on a console table. Its unique structure means it can stand alone as a significant decorative statement.
The Rewards of DIY: More Than Just a Decoration
Engaging in DIY projects like creating a vintage shutter wreath offers numerous benefits beyond simply acquiring a new decoration. It’s a therapeutic process that allows for creative expression and provides a sense of accomplishment. The satisfaction of transforming old materials into something beautiful and functional is immense. Moreover, handmade items carry a unique story and personal touch that mass-produced goods often lack. You’ll not only save money compared to purchasing a similar high-end piece but also create a conversation starter that proudly reflects your style and craftsmanship. It’s an investment of time and effort that yields invaluable dividends in personal pride and home aesthetic.
Maintenance Tips for Lasting Beauty
To ensure your vintage shutter wreath maintains its charm for years to come, a little care goes a long way. If your wreath is displayed outdoors, especially in areas exposed to direct sunlight or harsh weather, consider applying a UV-resistant, outdoor-grade sealant to protect the paint and wood. Periodically dust your wreath with a soft cloth or a feather duster. If it gets dirty, a slightly damp cloth can be used for gentle cleaning. Avoid using harsh chemical cleaners, which can strip paint or damage finishes. Store it carefully during off-seasons to prevent damage, perhaps wrapped in tissue paper and placed in a sturdy box, ensuring your timeless creation remains pristine.
Conclusion: Embrace the Charm of Handmade Decor
The journey of creating a DIY vintage shutter wreath is an immensely rewarding one, culminating in a beautiful, personalized piece of home decor that radiates character and warmth. From the initial hunt for the perfect shutter to the intricate process of distressing, shaping, and personalizing, each step contributes to a masterpiece that is uniquely yours. This project embodies the spirit of repurposing, adds a touch of rustic elegance, and allows your creativity to flourish. So, gather your materials, embrace the process, and soon you’ll have a stunning, SEO-friendly vintage shutter wreath adorning your home, ready to welcome guests and charm all who behold it. Dive into this delightful craft and transform your living space with a touch of handmade artistry!