
Transform Your Walls: DIY Nature-Inspired Art with a Midas Touch
Are you searching for an extraordinary way to infuse beauty and personality into your living space without breaking the bank? Look no further! The world of DIY home decor is constantly evolving, and sometimes, the most brilliant ideas come from the simplest sources. We’ve discovered a truly ingenious method to create stunning, high-end looking wall art using elements straight from nature and a little bit of spray paint. This project redefines budget-friendly elegance, proving that you don’t need a hefty budget to achieve a sophisticated aesthetic.
Imagine transforming a humble leaf, a delicate feather, or a rustic branch into a captivating piece of art that looks like it belongs in an exclusive gallery. This innovative approach to wall decoration is not only incredibly cheap but also remarkably effective in elevating the ambiance of any room. It’s a testament to human creativity and an inspiration for all of us to tap into our inner artists.
The Genius Behind Nature’s Canvas: Simple Steps to Stunning Art
The core concept of this project is nothing short of brilliant in its simplicity. The process begins with gathering a few select items from the natural world – perhaps a distinct leaf, an elegantly shaped feather, or a small, intriguing branch. These seemingly ordinary finds are then given a magical transformation with a coat of metallic spray paint, typically gold or silver, though other colors can be explored. Once painted and thoroughly dried, these resplendent natural elements are carefully arranged on a background of your choice, often a nicely colored piece of cardstock or fabric, and finally framed. The result? A custom, visually arresting piece of art that exudes luxury.
When encountering these creations for the first time, many are convinced they are observing meticulously crafted gold-leafed or bronze sculptures. The revelation that simple spray paint is the secret ingredient often elicits surprise and admiration. This technique truly possesses the “Midas Touch,” turning everyday objects into treasures that appear far more expensive than their humble origins suggest. It’s a fantastic solution for anyone decorating a new space or refreshing an existing one on a tight budget, offering an unparalleled opportunity for personalized decor.
Why Choose This DIY Wall Art Project?
Beyond its aesthetic appeal, this DIY project offers a multitude of benefits that make it an ideal choice for any home decorator:
- Unbeatable Cost-Effectiveness: The primary materials – natural elements – are free! A can of spray paint and an inexpensive frame are the only significant purchases, making this one of the most budget-friendly ways to add significant impact to your decor.
- Unique & Personalized Decor: Since no two leaves or branches are exactly alike, every piece of art you create will be truly unique. This allows for deep personalization, reflecting your local environment, your personal style, and even the season.
- Simplicity & Accessibility: You don’t need to be an experienced artist or have specialized tools. The steps are straightforward, making this project accessible to crafters of all skill levels, from beginners to seasoned DIY enthusiasts.
- Versatile Design Potential: Whether your home style is modern minimalist, rustic farmhouse, bohemian chic, or classic elegance, this project can be adapted. The choice of natural elements, paint colors, backgrounds, and frames allows for endless customization to match any interior design theme.
- Sustainable and Eco-Friendly: By utilizing natural, readily available elements, you’re embracing a more sustainable approach to home decoration, reducing the need for mass-produced items and celebrating the beauty of our planet.
- Therapeutic and Rewarding: The process of foraging for materials, transforming them, and assembling your art can be a wonderfully calming and satisfying creative outlet. The pride of displaying your handmade masterpiece is an added bonus!
Gathering Your Treasures: A Forager’s Guide to Natural Elements
The adventure begins with a simple stroll. Your backyard, a local park, or a nearby nature trail are perfect hunting grounds for your artistic components. Here’s what to look for and how to prepare your findings:
- Leaves: Seek out leaves with interesting shapes, prominent veins, or unique textures. Oak, maple, fern, and ginkgo leaves are popular choices due to their distinctive forms. Ensure they are relatively flat and intact.
- Feathers: If you find feathers, ensure they are ethically sourced. Never take feathers from live birds or disturb nests. Look for naturally shed feathers that are clean and well-formed. Feathers from various bird species offer different textures and sizes.
- Branches and Twigs: Small, delicate twigs or sections of branches can add a sculptural dimension. Look for pieces with interesting bends or knots.
- Other Elements: Don’t limit yourself! Consider seed pods (like magnolia or poppy pods), small pinecones, dried flowers, or even pressed flowers for added variety.
Preparation Tips: Once collected, clean your natural elements gently to remove any dirt or debris. For leaves, especially if they are fresh, you might want to press them between heavy books for a few days to ensure they dry flat and maintain their shape before painting. Allow all items to air dry completely to prevent moisture from affecting the paint adherence.
The Transformation: Mastering Spray Painting Techniques
This is where the magic truly happens, turning ordinary natural items into shimmering works of art. Proper technique ensures a smooth, even, and professional-looking finish.
- Materials Needed:
- Selected natural elements (leaves, feathers, branches).
- Metallic spray paint (gold, silver, copper, rose gold are popular; matte black or stark white can offer modern appeal).
- Protective cover (cardboard, old newspaper, or a tarp).
- Gloves and a face mask (for safety and ventilation).
- Tweezer or small clips (optional, for handling delicate items while painting).
- Safety First: Always work in a well-ventilated area, preferably outdoors. Wear gloves to protect your hands and a face mask to avoid inhaling paint fumes.
- The Painting Process:
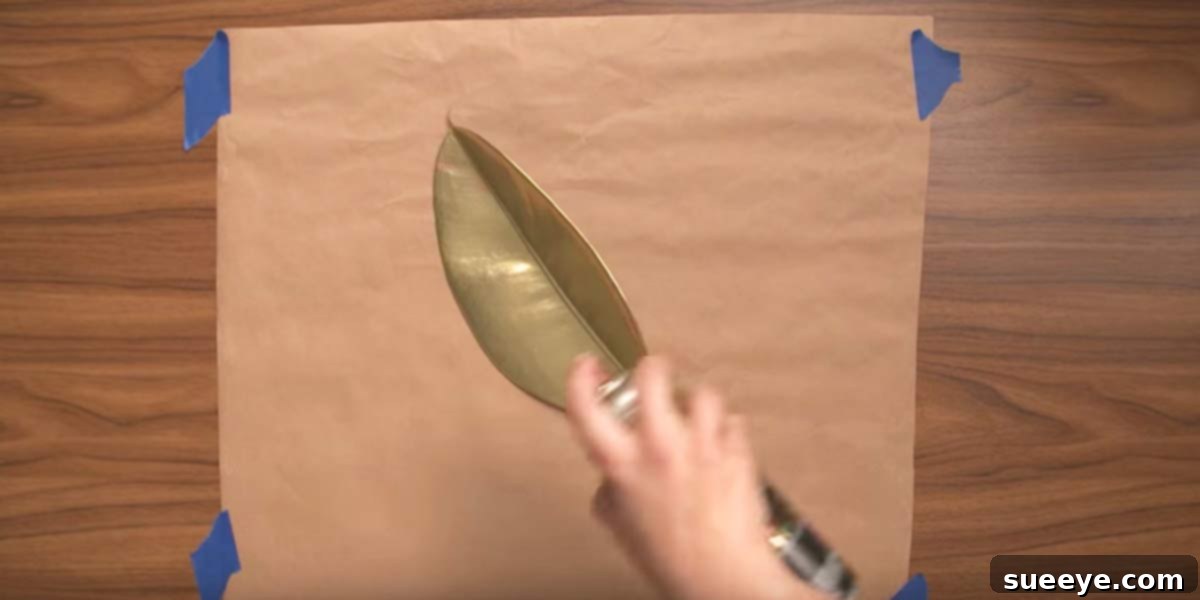
- Lay your natural elements out on your protective cover, ensuring they are spaced apart to avoid sticking.
- Hold the spray paint can about 8-12 inches away from the items.
- Apply thin, even coats using a sweeping motion. It’s better to apply multiple light coats than one thick coat, which can lead to drips and uneven coverage.
- Allow each coat to dry to the touch (check the paint can instructions) before applying the next. This typically takes 15-30 minutes.
- Carefully flip the items and paint the other side, following the same technique.
- Once fully painted and dry, let them cure for several hours or even overnight to ensure the paint is completely hardened and won’t smudge.
- Experiment with Colors and Finishes: While gold and silver offer classic elegance, consider matte black for a dramatic, contemporary look, or stark white for minimalist appeal. Rose gold and copper provide a trendy, warm metallic touch.
Curating Your Canvas: Backgrounds and Framing Your Masterpiece
Once your painted elements are dry and gleaming, the next step is to arrange and frame them, turning them into a cohesive piece of art.
- Background Choices: The background plays a crucial role in enhancing your artwork.
- Colored Cardstock: Choose colors that complement your metallic elements and your room’s decor. Deep blues, forest greens, charcoal grays, or even a subtle cream can provide stunning contrast.
- Fabric Scraps: Linen, burlap, or velvet can add texture and a unique feel.
- Watercolor Paper: Offers a slightly textured, artistic base.
- Painted Canvas: For a more substantial piece, paint a small canvas a solid color.
- Distressed Wood: For a rustic or bohemian vibe, consider mounting your elements directly onto a piece of distressed wood.
- Mounting Techniques:
- Acid-Free Glue Dots or Spray Adhesive: Ideal for delicate items like feathers or thin leaves, ensuring they lay flat without damaging the artwork over time.
- Small Amounts of Craft Glue: Apply sparingly to the back of larger, sturdier elements.
- Floating Effect: For a more dramatic look, you can use tiny foam dots to lift the elements slightly off the background, creating a subtle shadow and dimension.
- Frame Selection: The right frame can significantly impact the final presentation.
- Matching Metallics: A gold frame for gold elements or a silver frame for silver elements creates a cohesive, luxurious look.
- Contrasting Colors: A sleek black or white frame can make metallic elements pop, offering a modern contrast.
- Vintage Finds: Upcycled vintage frames add character and charm. You can even spray paint the frame itself to match your aesthetic.
- Matting: Adding a white or colored mat can draw the eye inward and give your piece a professional, finished appearance.
- Arrangement Tips: Experiment with different layouts before permanently adhering your elements. Consider the rule of thirds, creating asymmetrical balance, or a simple, single focal point. You can arrange multiple elements in a harmonious cluster or spread them out for a minimalist effect.
Beyond the Basics: Creative Variations and Display Ideas
Once you master the basic technique, the possibilities for customization are truly endless. Let your creativity soar!
- Seasonal Decor: Tailor your creations to the seasons. Use vibrant autumn leaves for fall, delicate white-painted branches for winter, and fresh green elements for spring.
- Themed Collections: Create themed sets for different rooms. Think coastal decor with spray-painted shells and small pieces of driftwood, or a woodland theme with various leaf types and small pinecones.
- Mixed Media Art: Combine your painted natural elements with other artistic mediums. You could layer them over abstract watercolor washes, pressed flowers, or even small handwritten quotes.
- Beyond Frames: Don’t limit yourself to traditional frames. Mount your painted elements onto decorative wooden boxes, serving trays, plain canvases without frames, or even create unique garlands.
- Thoughtful Gifts: Handmade art makes for incredibly personal and cherished gifts. Present a framed piece to a friend or family member, customized to their taste and home decor.
Showcasing Your Masterpiece
Your unique creation deserves a prime spot! Display your nature-inspired art as a standalone statement piece on a prominent wall, incorporate it into a larger gallery wall arrangement, or use it to add a touch of elegance to a bookshelf, mantelpiece, or desk. These pieces are versatile enough to enhance any room, from a cozy bedroom to a formal living area or even a sophisticated home office.
Unleash Your Inner Artist
This remarkable DIY project is more than just a craft; it’s an invitation to see the beauty in the everyday and to transform it with your own hands. It offers an accessible path to luxurious-looking decor, allowing you to infuse your home with unique personality and a touch of nature’s artistry. So, gather your natural treasures, pick up that can of spray paint, and get ready to create breathtaking wall art that will undoubtedly impress and inspire. The satisfaction of crafting something so beautiful and distinctly your own from such humble beginnings is truly unparalleled.
Photo Credit: Paulina’s Passions