
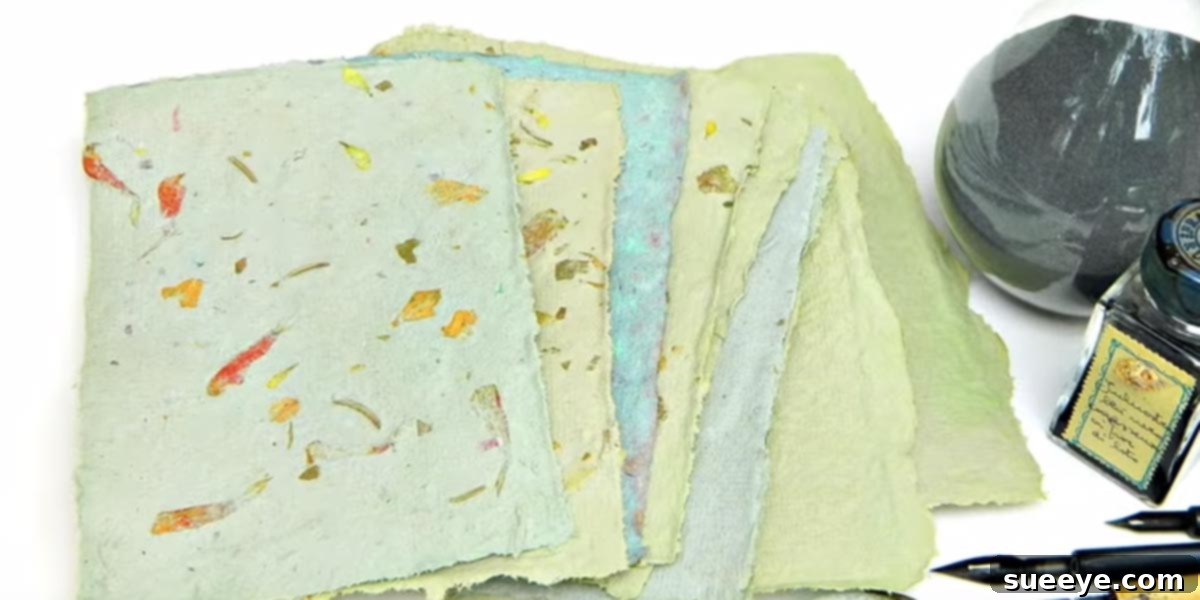
The Ultimate Guide to Making Beautiful Handmade Paper from Recycled Materials
Embark on a truly rewarding journey into the ancient art of papermaking, transforming ordinary household waste into exquisite, custom-made sheets of paper. This surprisingly simple process not only offers a fantastic way to repurpose old newspapers, receipts, scrap papers, and junk mail that would otherwise end up in the recycling bin, but it also allows you to create items of glorious handmade beauty. Imagine crafting unique stationery, one-of-a-kind art pieces, or heartfelt gifts, all while contributing to a more sustainable planet.
With just a few basic supplies and a willingness to get a little messy, you’re well on your way to mastering handmade paper and making a tangible difference in reducing waste. This guide will walk you through every step, from preparing your pulp to drying your finished sheets, and inspire you with countless creative possibilities.
Why Dive into Handmade Papermaking? A Blend of Creativity and Sustainability
Paper, first invented in China around the 1st or 2nd century A.D., has become so universal that it has achieved near-invisibility in our modern world. It’s an item we use daily without a second thought. Yet, the environmental footprint of paper production is significant, and the sheer volume of paper waste, such as the average American household receiving over 100 pounds of unwanted junk mail each year, is staggering. Creating a handmade sheet of paper can remind anyone of this everyday object’s noble origins and its potential for renewal.
Embrace Eco-Friendly Crafting
One of the most compelling reasons to make your own paper is its profound environmental benefit. By using recycled materials, you directly reduce the demand for virgin pulp, saving trees and conserving vital natural resources. This process also lessens the energy and water consumption associated with industrial paper recycling, as you’re giving paper a new life right at home. It’s a powerful act of upcycling, turning what’s perceived as waste into a valuable, beautiful resource.
Unleash Your Creative Potential
Handmade paper offers an unparalleled canvas for creative expression. Unlike mass-produced paper, each sheet you create will possess a unique texture, character, and story. The possibilities for customization are virtually limitless:
- Add Sparkle: For a feminine touch or festive flair, mix glitter directly into your pulp.
- Infuse Nature: If you have an overabundance of herbs from your garden, dried flowers, or even small leaves, incorporate them into the pulp for exquisite botanical papers.
- Experiment with Texture: Threads, fabric scraps, coffee grounds, or tea leaves can add fascinating visual and tactile dimensions.
- Play with Color: Tint your pulp with natural dyes, food coloring, or even a tiny amount of acrylic paint to create a rainbow of hues.
- Introduce Scent: A few drops of essential oil can make your paper fragrant, perfect for special letters or drawer liners.
These personalized papers are magnificent, boasting a unique and beautiful texture that machine-made paper simply cannot replicate. Each sheet becomes a mini-masterpiece, reflecting your personal aesthetic.
Mindfulness and Therapeutic Benefits
Beyond its environmental and creative advantages, the process of making handmade paper can be wonderfully therapeutic. It’s a tactile, hands-on activity that encourages focus and patience. The rhythmic tearing of paper, the whirring of the blender, and the delicate process of forming a new sheet can be a calming, meditative experience, offering a much-needed break from the digital world.
A Glimpse into Paper’s Noble Past
Before the advent of widespread literacy and modern printing, paper was a precious commodity, painstakingly crafted by artisans. The earliest forms of paper were developed in China, attributed to Cai Lun in the Eastern Han Dynasty. His method involved using mulberry bark, hemp, old rags, and fishing nets to create a pulp, which was then pressed and dried. This revolutionary invention gradually spread across Asia, through the Islamic world, and eventually to Europe, profoundly impacting the dissemination of knowledge and culture.
For centuries, papermaking remained a skilled craft, passed down through generations. The industrial revolution mechanized the process, making paper affordable and accessible to the masses, a development that fueled education and communication but also led to increased resource consumption. By rediscovering this ancient, oh-so-easy art form, we connect with a rich history of craftsmanship and honor the material in a way that modern industrial processes often overlook.
Gathering Your Essential Supplies for Papermaking
One of the beauties of handmade papermaking is that most of the supplies are inexpensive, readily available, or even found around your home. Here’s what you’ll need:
- Recycled Paper: The main ingredient! Good sources include newspapers (avoid glossy ads), junk mail, old receipts, copy paper, printer paper, cardboard egg cartons, and even paper towels.
- Water: Abundant for soaking and blending.
- Blender: A standard kitchen blender (a dedicated one for crafts is recommended, or thoroughly clean after use).
- Mould and Deckle: This is the frame and screen used to form your paper sheet. You can buy one or easily make your own from old picture frames and window screen material.
- Large Plastic Tubs or Trays: At least two, large enough to submerge your mould and deckle.
- Sponges: Large, absorbent sponges for pressing out water.
- Couching Material: Felt, old towels, or non-woven fabric squares (like Pellon interfacing) for transferring the wet paper.
- Pressing Surface: A flat, rigid surface like a cutting board or a stack of newspapers and a heavy book for pressing.
- Drying Screens: Window screens or mesh racks for air drying.
- Optional Additions: Glitter, dried flowers, herbs, threads, food coloring, essential oils, etc.
Step-by-Step Guide to Crafting Your Own Paper
Ready to transform your paper waste into unique treasures? Follow these simple steps:
Step 1: Prepare Your Paper Pulp
- Tear the Paper: Shred your recycled paper into small pieces (about 1-inch squares or smaller). This makes it easier for the blender.
- Soak the Paper: Place the torn paper into a large bowl or tub and cover it completely with warm water. Let it soak for at least a few hours, or preferably overnight, to soften the fibers.
- Blend the Pulp: Transfer a handful of the soaked paper into your blender. Add enough water to cover the paper and allow the blades to move freely (usually about a 2:1 water to paper ratio). Blend until you have a smooth, consistent pulp, resembling a thick oatmeal or a smoothie. Avoid over-blending, which can shorten fibers too much. Repeat until all your soaked paper is turned into pulp.
Step 2: Set Up Your Workspace
- Fill Your Vat: Pour your blended pulp into one of your large plastic tubs (this is your ‘vat’). Add more water to the vat so the pulp mixture is thin enough for the fibres to float freely. The consistency should be like a thin soup.
- Prepare Couching Station: Place your couching material (felt, towel) on your pressing surface. Have a sponge and another clean couching material ready.
Step 3: Forming Your Sheet with the Mould and Deckle
- Assemble Mould and Deckle: Place the deckle (the top frame) firmly on top of the mould (the screen frame).
- Dip and Scoop: Hold the mould and deckle together, dip it vertically into the pulp vat, then scoop it up horizontally, level with the water’s surface. Allow the water to drain through the screen, leaving a thin, even layer of pulp on the mould.
- Shake Gently: While the water drains, gently shake the mould from side to side and front to back. This helps the fibers interlock and creates a stronger, more even sheet.
- Remove Deckle: Once most of the water has drained, carefully remove the deckle, leaving the wet pulp sheet on the mould.
Step 4: Couching the Sheet (Transferring the Pulp)
- Prepare for Transfer: Place your first couching material (felt or towel) on your pressing surface.
- Invert the Mould: Carefully flip the mould (with the wet paper sheet still on it) onto the couching material. Position it exactly where you want your paper to be.
- Press and Lift: Gently press down on the back of the mould with a sponge to absorb excess water and help the paper release. Slowly and carefully lift the mould, leaving your freshly formed sheet of paper on the couching material. If it doesn’t release, gently coax it off with your fingers or a little more pressure.
Step 5: Pressing for Perfection
To remove as much water as possible and create a smoother sheet:
- Sponge Press: Place another piece of couching material or a clean towel over your wet paper sheet. Press firmly and evenly with a large sponge, soaking up as much water as you can. Repeat, squeezing out the sponge, until no more water comes out.
- Weight Press (Optional but Recommended): For flatter, denser paper, stack several sheets with couching material in between. Place a flat board or cutting board on top, and then apply heavy weights (books, bricks) or use a hydraulic press if you have one. Leave under pressure for several hours or overnight.
Step 6: Drying Your Handmade Paper
- Air Dry: Carefully peel your semi-dry paper from the couching material. Lay it flat on a clean, dry screen or mesh rack. Air dry in a well-ventilated area, away from direct sunlight, which can cause warping.
- Smooth While Drying (Optional): If you want a very flat sheet, you can place a clean, smooth cloth over the paper and iron it on a low setting once it’s mostly dry, or place it between blotter papers under weight.
- Patience is Key: Drying can take anywhere from a few hours to a day or more, depending on thickness and humidity.
Elevate Your Handmade Paper: Creative Customizations
Once you’ve mastered the basic process, the real fun begins with experimentation. Here are more ideas to make your paper truly unique:
- Botanical Inclusions: Beyond herbs, consider small dried flower petals (rose, lavender), small leaves, or even tiny grass clippings for a natural, rustic look.
- Textural Fibers: Shredded denim, cotton lint, thin yarn scraps, or even tea bags can add intriguing texture and strengthen your paper.
- Seeds for Plantable Paper: For an incredibly unique and eco-conscious creation, mix small, flat seeds (like poppy, wildflower, or herb seeds) into your pulp. When the paper is discarded, it can be planted, bringing forth new life. This is perfect for gift tags or special invitations.
- Natural Dyes: Experiment with natural pigments from onion skins, avocado pits, turmeric, or tea to create subtle, earthy tones.
- Scented Paper: Before blending, add a few drops of essential oils like lavender, peppermint, or cedarwood to the soaking paper for beautifully fragrant sheets.
- Varied Shapes: Construct custom mould and deckle frames in different shapes – hearts, stars, or intricate geometric designs – to create shaped paper.
What Can You Do with Your Magnificent Handmade Paper?
The applications for your beautiful, bespoke paper are endless. Here are just a few ideas to spark your imagination:
- Personalized Stationery: Craft unique greeting cards, wedding invitations, thank-you notes, or personalized letterhead.
- Artistic Medium: Use it for drawing, painting, printmaking, or as a textured background for collages and mixed-media art.
- Bookmarks: Create unique, personalized bookmarks for yourself or as gifts.
- Gift Tags and Wrappings: Add a touch of handmade elegance to your presents.
- Scrapbooking and Journals: Incorporate textured pages into your scrapbooks or bind them into custom journals.
- Home Decor: Use thicker sheets as unique coasters, decorative elements, or even framed art.
- Special Occasions: Perfect for announcements, birth certificates, or unique certificates of achievement.
Tips for Success & Troubleshooting
- Pulp Consistency: The ideal pulp consistency in your vat is crucial. Too thick, and your paper will be lumpy; too thin, and it will be fragile. Adjust with water until it resembles thin oatmeal.
- Even Dipping: Practice a smooth, consistent scoop with your mould and deckle to ensure even fiber distribution and uniform paper thickness.
- Gentle Couching: Be patient and gentle when couching your paper. If it sticks, apply a little more pressure with the sponge or try a different couching material.
- Thorough Pressing: The more water you press out, the faster your paper will dry and the flatter it will be. Don’t rush this step.
- Patience in Drying: Allow your paper to dry completely. Removing it too early can lead to warping or tearing.
- Preventing Mold: If drying in a humid environment, ensure good airflow and consider adding a tiny amount of bleach to your pulp water if you’re concerned, though thorough drying is usually sufficient.
Conclusion: Transform Waste into Art
Making paper by hand is more than just a craft; it’s a statement. It’s an opportunity to recycle and repurpose your unwanted papers, reducing waste and embracing a sustainable practice. It’s a chance to rediscover an ancient art form that is both incredibly easy and profoundly rewarding. Each sheet you create will carry the unique imprint of your hands, making it a truly special object.
So gather your recycled papers, a few simple tools, and get ready to transform what others might discard into a beautiful, textured, and truly one-of-a-kind creation. The joy of turning trash into treasure, while nurturing your creativity and respecting our planet, is an experience not to be missed. Start your papermaking adventure today and make your mark!