
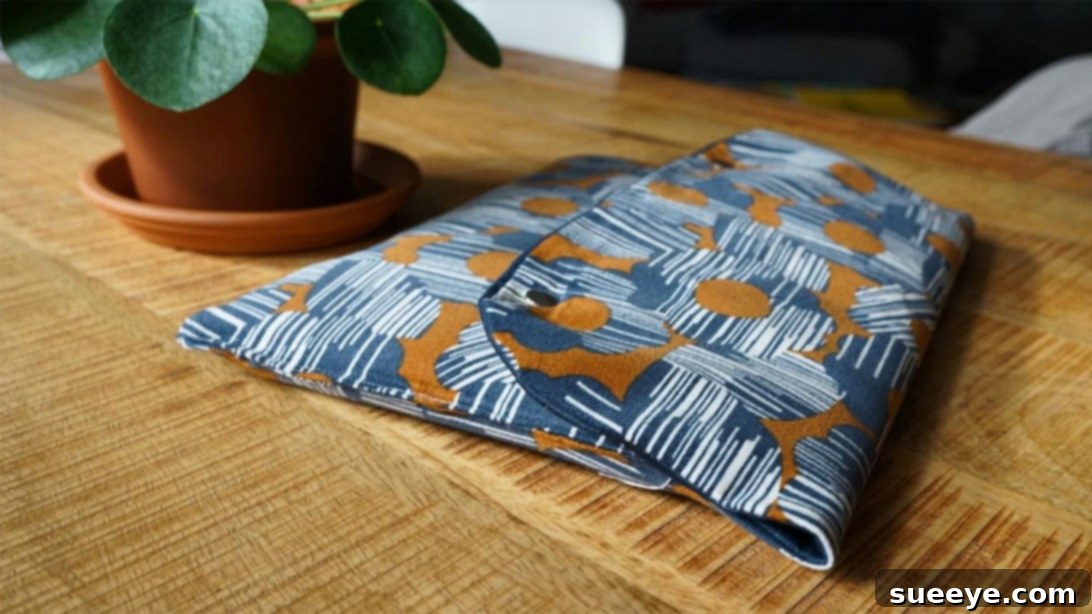
Are you looking to escape the annual holiday shopping frenzy and instead create meaningful, personalized gifts for your loved ones? Or perhaps you simply enjoy the therapeutic process of crafting something beautiful with your own hands? Look no further than the wonderful world of DIY sewing! Making handsewn gifts not only allows you to avoid crowded stores but also imbues each present with a unique touch of care and thoughtfulness that store-bought items simply can’t match.
For anyone new to sewing or those looking for quick and satisfying projects, Rosery Apparel’s sewing project tutorials are an absolute treasure. Her channel is a fantastic resource, presenting a delightful variety of crafts that are surprisingly easy to finish, many in under 30 minutes! What’s more, these projects are designed to utilize materials you likely already have on hand – those cherished scraps of fabric tucked away in your cabinet. It’s a wonderful way to give new life to forgotten textiles and embrace sustainable crafting.
Rosery Apparel’s inspiring list includes versatile items such as a stylish fabric laptop case, a practical lined tote bag, a charming ruffled cushion cover, and a handy waist apron. Each of these projects is not only lovely but also serves a practical purpose, making them perfect gifts that will undoubtedly be appreciated and cherished by the recipients. Let’s dive into one of her standout tutorials: the DIY Fabric Laptop Case, a project that combines functionality with personalized style.
Create a Stylish DIY Fabric Laptop Case
A handmade laptop case offers both protection and a unique personal statement. It’s a fantastic project for beginners to learn essential sewing techniques while creating something truly useful. Imagine gifting a custom-made laptop sleeve to a friend or family member, tailored to their favorite colors or patterns! Here’s a detailed guide to crafting your very own.
Materials You’ll Need:
- Main Fabric: Choose a durable and aesthetically pleasing fabric for the exterior of your laptop case. Consider canvas, denim, or even a sturdy cotton print.
- Lining Fabric: A softer fabric like quilting cotton or broadcloth works well for the interior, providing a gentle surface for your laptop.
- Contrasting Fabric (Optional): For accents like a pocket or trim, adding a contrasting fabric can elevate the design.
- Felt Fabric or Batting: This is crucial for structure and padding. It will protect your laptop from bumps and scratches. Ensure it’s thick enough for adequate cushioning.
- Zipper: A closed-end zipper measuring approximately 35 centimeters (14 inches) is ideal for most standard laptops. Adjust the length based on your laptop’s dimensions.
- Basic Sewing Supplies: Sewing machine, thread (matching your fabric), scissors, pins, an iron, and a ruler or measuring tape.
Step-by-Step Directions for Your Laptop Case:
1. Prepare and Cut Your Fabric Pieces
Begin by placing your laptop directly onto your felt fabric. Using a ruler, measure and cut out two rectangular pieces of felt that are about one inch larger than your laptop on all sides. This extra inch accounts for seam allowances and a comfortable fit. Next, cut out two pieces each from your main fabric and your lining fabric, ensuring they are the exact same size as your felt pieces. By the end of this step, you should have two identical rectangles from each material: main fabric, lining fabric, and felt.
2. Design and Create the Front Pocket
To add a functional and stylish pocket to the front of your laptop case, cut out a rectangle from your main fabric (or contrasting fabric, if desired) that has the same width as your other fabric rectangles. The height of this pocket piece is entirely up to your preference – decide how deep you want the pocket to be to hold accessories like a charger, mouse, or notebook.
Take your pocket rectangle, fold and press the top edge inward by approximately half an inch. Repeat this fold once more, creating a neat, double-folded hem. Stitch this folded edge firmly in place, close to the inner fold, to secure the top of your pocket.
3. Attaching the Zipper – The First Side
Now, let’s assemble the layers for the zipper. Lay one of your main fabric rectangles face up on a flat surface. Position one felt piece directly underneath the main fabric, aligning all edges. Next, with its right side (the side with the zipper teeth facing up) facing down, place your zipper along the top edge of the main fabric, ensuring the zipper pull is towards the left. Finally, layer one piece of your lining fabric on top, with its right side facing down. Make sure that the raw edges of the main fabric, zipper tape, and lining fabric are all perfectly aligned along the top edge.
Carefully pin all these layers together to prevent shifting. Using your sewing machine’s zipper foot, stitch along the pinned edge. The goal here is to enclose half of the zipper tape between the main fabric and the lining fabric. When you open up these layers, the zipper should be neatly integrated between the main and lining fabrics.
4. Attaching the Zipper – The Second Side and Pocket Integration
Take your remaining main fabric rectangle and place it right side up on your working surface, with the second felt piece underneath. Lay your prepared pocket rectangle on top of this main fabric, aligning its bottom and side edges. This forms the front panel of your laptop case with the pocket.
Now, take the zipper assembly you just created (main fabric, zipper, lining). With the zipper open slightly, place the remaining side of the zipper tape along the top edge of the newly created main fabric-pocket-felt assembly. Ensure the zipper is aligned correctly so that when closed, it will form a continuous top for the case. Layer the remaining lining fabric on top of this, right side down. Pin all layers together and stitch along this edge, just as you did for the first side. You now have both main fabric/felt/pocket units attached to the zipper, with the lining pieces also connected.
5. Assembling the Entire Case
With the zipper still slightly open (this is crucial for turning the case right side out later), lay your work flat. Carefully align the two main fabric rectangles (each with its felt layer and one having the pocket) so that their right sides are facing each other. Pin them together around the three unstitched sides (bottom and two sides). Simultaneously, align the two lining fabric rectangles so their right sides are facing each other. Pin them together around their three unstitched sides.
Stitch around the perimeter of the main fabric/felt layers, securing them together. Repeat this for the lining fabric layers, but remember to leave a substantial opening (about 4-5 inches) along the bottom edge of the lining. This opening will be used to turn the entire case right side out. After stitching, trim away any excess fabric from the corners of both the main case and the lining – this helps create crisp corners when turned.
6. The Finishing Touches
Using the opening you left in the lining, carefully turn the entire laptop case right side out. Take your time to gently push out all the corners so they are crisp and well-defined. Once turned, give the entire case a good press with an iron to smooth out any wrinkles and set the seams. Now, close the opening in the lining by folding in the raw edges and stitching it closed either by hand with an invisible stitch or by machine with a topstitch close to the edge. Finally, tuck the lining back inside the main case, ensuring it sits neatly. Zip it up, and marvel at your beautifully finished, personalized laptop case!
Beyond the Laptop Case: More Quick & Charming Sewing Projects
While the laptop case is an incredibly satisfying project, Rosery Apparel’s channel is brimming with other fast and fabulous ideas. These projects are perfect for expanding your sewing skills, using up more fabric scraps, and creating an array of thoughtful gifts.
The Lined Tote Bag
A lined tote bag is a fantastic project for beginners, teaching you how to create a clean, professional finish with an interior lining. This project is incredibly versatile, allowing you to choose fabrics that reflect the recipient’s style. Whether for groceries, books, or everyday essentials, a handmade tote bag is a gift that offers both utility and charm. It’s an excellent way to practice sewing straight lines and constructing a sturdy bag that will stand the test of time.
Ruffled Cushion Covers
Adding a ruffled cushion cover to a plain pillow can instantly transform a room’s decor. This project is surprisingly simple but yields a high-impact result. You can experiment with different fabric textures and colors, or even mix and match scraps to create a bohemian look. The ruffle adds a touch of elegance and playfulness, making it a wonderful gift for anyone who loves home decor or wants to add a cozy touch to their living space.
The Practical Waist Apron
For the home chef, gardener, or crafter, a waist apron is an invaluable accessory. Rosery Apparel’s tutorial for this item demonstrates how to create a functional and stylish apron with pockets – perfect for holding tools, utensils, or even a phone. This project is straightforward, involves minimal fabric, and can be easily customized with embroidery or fabric paint for an extra personal touch. It’s a gift that combines practicality with a sweet, homemade feel.
Why Choose Scrap Fabric Projects?
One of the most appealing aspects of Rosery Apparel’s tutorials is their emphasis on utilizing scrap fabric. This approach offers numerous benefits:
- Sustainability: Reduces textile waste by repurposing fabric scraps that might otherwise be discarded.
- Cost-Effective: You don’t need to buy new materials for every project, making crafting more affordable.
- Creative Challenge: Working with limited quantities of fabric can spark creativity and lead to unique, unexpected designs.
- Personalization: Mixing and matching various scraps can create truly one-of-a-kind items, each with its own story.
Start Your Sewing Journey Today!
Handmade gifts carry an incomparable warmth and personal sentiment. They communicate effort, love, and thoughtfulness in a way that mass-produced items cannot. Rosery Apparel’s tutorials provide an accessible and enjoyable pathway into the world of DIY sewing, proving that beautiful, functional crafts don’t require hours of dedication or advanced skills. So, gather your fabric scraps, fire up your sewing machine, and start creating meaningful gifts that will be cherished for years to come.
To explore more of these fantastic, quick DIY projects and learn how to make the other charming items mentioned (the lined tote bag, ruffled cushion cover, and waist apron), be sure to watch the rest of Rosery Apparel’s inspiring tutorials on her YouTube channel. Happy sewing!