
Effortless Homemade Sandwich Bread: Unleashing the Magic of Your Bread Machine
Imagine waking up to the irresistible aroma of freshly baked bread filling your home. Picture a perfectly golden, soft, and fluffy loaf, sliced just right for your morning toast or a hearty sandwich. For many, the idea of baking bread from scratch seems like a daunting, time-consuming task, reserved only for seasoned bakers. However, with the advent of the humble bread machine, this culinary dream has become an effortless reality for everyone.
Bread machines are, without a doubt, one of the most remarkable kitchen appliances to grace modern countertops. They demystify the bread-making process, transforming a complex art into a simple, automated sequence. My own journey into the world of bread machines began with a simple curiosity, a desire to experience that fresh-baked magic without the traditional fuss. I embarked on a quest for knowledge, delving into online resources, and it wasn’t long before I stumbled upon an illuminating video by Ken Click. His meticulous, step-by-step demonstration of making bread in a bread machine, ingredient by ingredient, culminated in the most beautiful loaf imaginable. That video alone was enough to convince me of the sheer brilliance and necessity of this device.
Why Every Modern Kitchen Needs a Bread Machine
The allure of a bread machine extends far beyond mere convenience. It’s an investment in freshness, health, and a return to simpler, more wholesome eating. Here’s why this ingenious appliance deserves a permanent spot in your kitchen:
- Time-Saving Convenience: This is arguably the biggest selling point. A bread machine handles all the laborious steps – mixing, kneading, rising, and baking – entirely on its own. You simply add the ingredients, select a program, and walk away. Hours later, you return to a warm, fragrant loaf.
- Consistent Perfection: Forget about under-kneaded dough or loaves that don’t rise. Bread machines are engineered for precision, maintaining optimal temperatures and mixing times for consistently perfect results every single time.
- Unmatched Freshness and Flavor: There’s no substitute for the taste and texture of bread baked minutes ago. Homemade bread is free from the preservatives and artificial additives often found in commercial loaves, offering a purer, richer flavor profile.
- Control Over Ingredients: For those with dietary restrictions, allergies, or a preference for organic or specific flours, a bread machine offers complete control. You know exactly what goes into your bread, allowing you to tailor recipes to your health needs and taste preferences.
- Cost-Effective Baking: While the initial investment in a bread machine might seem like an outlay, it quickly pays for itself. The cost of ingredients for a homemade loaf is significantly less than buying artisan bread from a bakery or even premium store-bought brands.
- Versatility Beyond Loaves: Many bread machines come with settings for making dough for pizza, pasta, rolls, or even jams and cakes. It’s a multi-functional workhorse that expands your culinary repertoire.
Demystifying Your Bread Machine: How It Works
The magic of a bread machine lies in its sophisticated yet user-friendly automation. At its core, it replicates the traditional bread-making process through a series of timed cycles:
- Mixing: A paddle at the bottom of the bread pan rotates, thoroughly combining all the ingredients.
- Kneading: The paddle continues to work the dough, developing the gluten which gives bread its structure and chewiness.
- Rising (Proofing): The machine provides a warm, consistent environment, ideal for yeast activation and dough expansion. This cycle usually involves one or more rises.
- Punch Down: After the first rise, the machine often performs a brief punch down to release gases, promoting a finer crumb.
- Baking: Finally, the pan heats up, baking the dough into a golden, crusty loaf.
- Keep Warm: Some machines include a ‘keep warm’ cycle to maintain the bread’s temperature after baking, though it’s often best to remove the loaf promptly.
Modern bread machines typically offer various program settings like “Basic,” “Whole Wheat,” “French,” “Sweet Bread,” “Dough,” “Jam,” and “Gluten-Free,” allowing you to explore a vast array of bread types with minimal effort. This automated process truly makes bread baking incredibly easy – you quite literally just put the ingredients in, and the bread machine handles the rest.
Mastering the Perfect Sandwich Loaf: A Step-by-Step Guide
For newcomers to bread machine baking, starting with a classic sandwich bread recipe is highly recommended. It’s forgiving, delicious, and perfectly showcases the machine’s capabilities. This recipe is designed to yield a consistently beautiful and incredibly tasty loaf, perfect for sandwiches, toast, or simply enjoyed with butter.
Essential Ingredients for Your Bread Machine Sandwich Bread
Precision in measuring ingredients is crucial for bread machine success. Always use fresh ingredients, especially your yeast.
- 1 1/3 cups lukewarm water (approx. 105-115°F / 40-46°C): This is the liquid base. Lukewarm water helps activate the yeast without killing it.
- 4 Tablespoons Granulated Sugar: Sugar feeds the yeast, aiding in the rise, and contributes to the golden-brown crust and a subtle sweetness.
- 2 Tablespoons Powdered Milk (dry milk): Enhances the bread’s tenderness, adds nutrients, and improves crust color and texture.
- 4 1/4 cups All-Purpose Flour or Bread Flour: Bread flour has higher protein content, leading to a chewier, more structured loaf. All-purpose flour works well for a softer crumb.
- 3 Tablespoons Unsalted Butter (softened or melted): Adds richness, flavor, and helps tenderize the crumb.
- 2 1/2 tsp Bread Machine Yeast (or Active Dry Yeast): The leavening agent. Ensure your yeast is fresh and active. Bread machine yeast is formulated for optimal performance in these appliances.
- 2 tsp Salt: Crucial for flavor development and also helps regulate yeast activity, preventing over-proofing.
Directions for Baking Your Loaf
While bread machines are user-friendly, the order of adding ingredients is vital for optimal results. Generally, liquids go first, followed by dry ingredients, with yeast placed last, carefully separated from salt and liquids to prevent premature activation or inhibition.
- Add Liquids First: Pour the lukewarm water into the bread machine pan.
- Layer Wet and Dry: Add the softened or melted butter to the water.
- Introduce Dry Ingredients: Carefully spoon in the sugar, powdered milk, and then the flour, creating a small mound.
- Create a Well for Yeast: Using your finger, create a small indentation or “well” in the center of the flour mound.
- Add Yeast and Salt: Place the bread machine yeast directly into this well. Sprinkle the salt around the perimeter of the flour mound, ensuring it doesn’t directly touch the yeast or water initially. This separation is key to proper yeast activation.
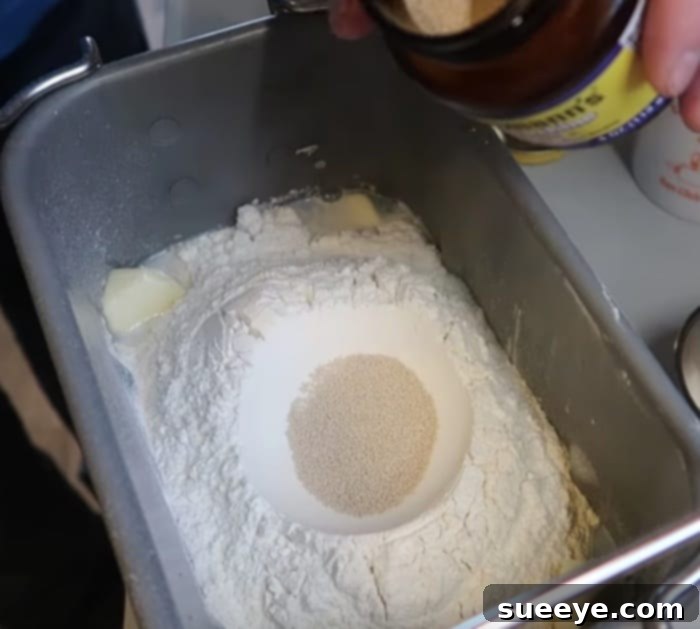
Once all your ingredients are meticulously placed in the pan, it’s time to let the machine take over. Close the lid securely. Select the “Basic” or “White Bread” cycle on your bread machine, choose your desired crust setting (light, medium, dark), and loaf size if applicable (this recipe is generally for a 1.5 lb or 2 lb loaf depending on your machine). Press start, and then the waiting game begins.
During the initial mixing and kneading cycles, occasionally peek (without opening the lid too much) to check the dough consistency. It should form a smooth, elastic ball. If it appears too dry and crumbly, add water one teaspoon at a time. If it’s too wet and sticky, add flour one teaspoon at a time. This small adjustment can make a big difference in the final texture.
Resist the urge to open the lid during the rising and baking cycles. The internal temperature and humidity are precisely controlled, and opening the lid can cause the bread to collapse or bake unevenly. At the end of the bread machine’s cycle, a delightful aroma will signal its completion. You will then open the lid to behold a beautiful, perfectly baked loaf of bread, golden brown and magnificent.
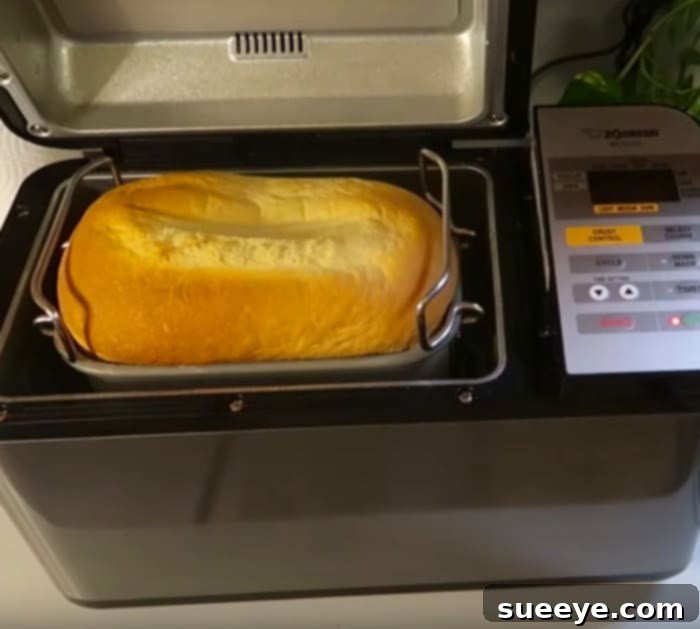
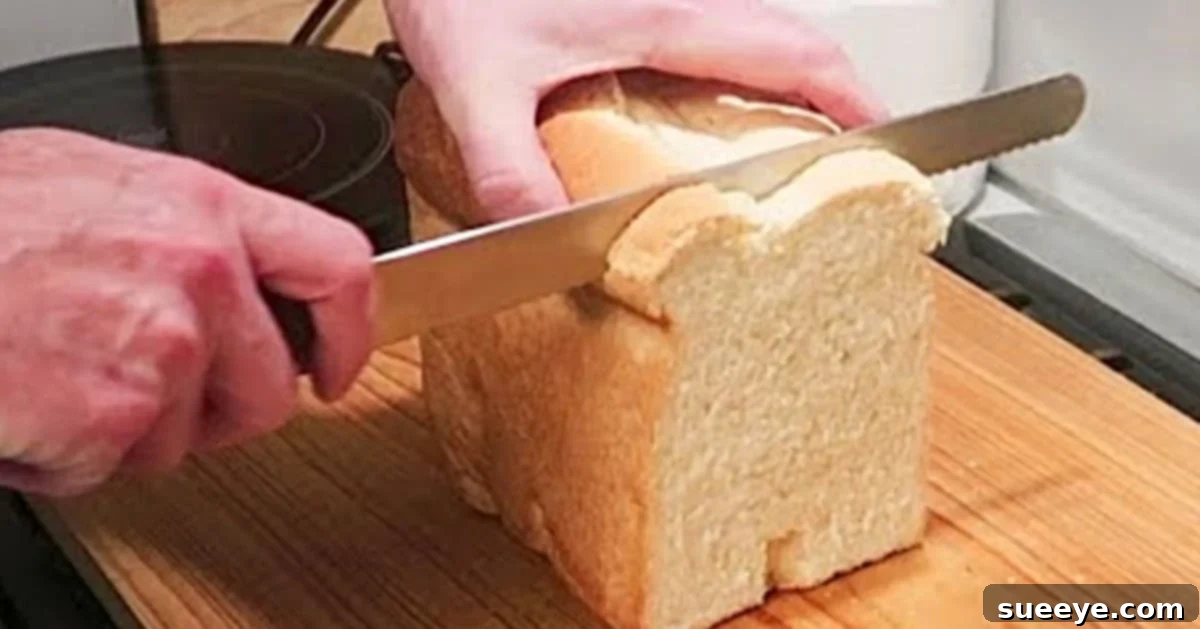
Carefully remove the bread pan from the machine (using oven mitts as it will be hot). Immediately invert the pan onto a wire rack to remove the loaf. If the kneading paddle is stuck in the bread, gently dislodge it with a non-stick utensil. Allow the bread to cool completely on the wire rack before slicing. Slicing hot bread can lead to a gummy texture. Once cooled, slice and enjoy! Store any leftover bread in an airtight container or bread bag at room temperature for up to 3-4 days, or freeze for longer storage.
Common Bread Machine Troubleshooting Tips
Even with the most automated appliance, occasional hiccups can occur. Don’t be discouraged; most issues are easily remedied:
- Bread Didn’t Rise or Collapsed:
- Issue: Flat, dense bread or a sunken top.
- Possible Causes: Expired or inactive yeast, water too hot (killed the yeast) or too cold (didn’t activate it), too much salt (inhibits yeast), insufficient sugar (no food for yeast), or too much liquid (weak gluten structure).
- Solution: Check yeast expiration date, ensure water temperature is correct (105-115°F), accurately measure salt and sugar, reduce liquid slightly if constantly collapsing.
- Dense or Heavy Loaf:
- Issue: Bread is heavy, not fluffy.
- Possible Causes: Too much flour, not enough liquid, old yeast, or incorrect flour type for the recipe.
- Solution: Accurately measure flour by spooning it into a measuring cup and leveling off, ensure proper liquid ratios, use fresh yeast.
- Crumbly Texture:
- Issue: Bread falls apart easily.
- Possible Causes: Too much flour, not enough liquid, or too much whole wheat flour without sufficient gluten development.
- Solution: Adjust flour/liquid ratio, consider adding a tablespoon of vital wheat gluten when using high proportions of whole wheat flour.
- Sticking to the Pan:
- Issue: Loaf is difficult to remove from the pan.
- Possible Causes: Worn non-stick coating on the pan, or not allowing the bread to cool slightly before removal.
- Solution: Ensure your bread pan’s non-stick coating is intact. If it’s worn, consider a new pan. Lightly grease the pan with butter or cooking spray before adding ingredients, especially if your pan is older. Remove the loaf promptly after baking.
Beyond Basic White Bread: Exploring Bread Machine Versatility
Once you’ve mastered the basic sandwich loaf, your bread machine opens up a world of culinary exploration. Don’t limit yourself to just one type of bread:
- Whole Wheat Wonders: Experiment with whole wheat flour for a healthier, nuttier loaf. Remember that whole wheat absorbs more liquid, so recipes might require slight adjustments.
- Sweet Breads: Delight in cinnamon raisin bread, cranberry orange bread, or even brioche.
- Savory Creations: Add herbs like rosemary and thyme, sun-dried tomatoes, olives, or cheese to your dough for a savory twist.
- Dough for Other Recipes: Use the “Dough” cycle to prepare perfect pizza dough, dinner rolls, cinnamon buns, or foccacia, which you can then shape and bake in a conventional oven.
- Gluten-Free Options: Many modern bread machines have specific gluten-free cycles and recipes tailored for gluten-free flours.
Maintaining Your Bread Machine for Lasting Performance
To ensure your bread machine continues to deliver perfect loaves for years to come, a little care goes a long way:
- Clean Promptly: After each use, allow the pan and kneading paddle to cool. Wash them with warm, soapy water and a soft sponge. Avoid abrasive cleaners or scouring pads that can damage the non-stick coating.
- Wipe Down Exterior: Use a damp cloth to wipe down the exterior of the machine, removing any flour dust or spills.
- Check for Residue: Ensure no dough or ingredients are stuck in the heating element area inside the machine.
- Proper Storage: Store your bread machine in a clean, dry place when not in use.
Embrace the Joy of Homemade Bread
The bread machine is truly a magical invention, transforming the art of baking into an accessible and incredibly rewarding experience. It eliminates the mess, the guesswork, and the lengthy manual labor, leaving you with nothing but the pure joy of fresh, homemade bread. From the initial moment I discovered its capabilities, through the guidance of demonstrations like Ken Click’s, my perspective on home baking was forever changed. I wholeheartedly recommend embracing this appliance; it’s not just a convenience, but a gateway to healthier eating, culinary creativity, and the comforting aroma that turns a house into a home. Prepare to fall in love with your bread machine, because once you taste your own perfectly baked sandwich bread, you’ll wonder how you ever lived without one.