
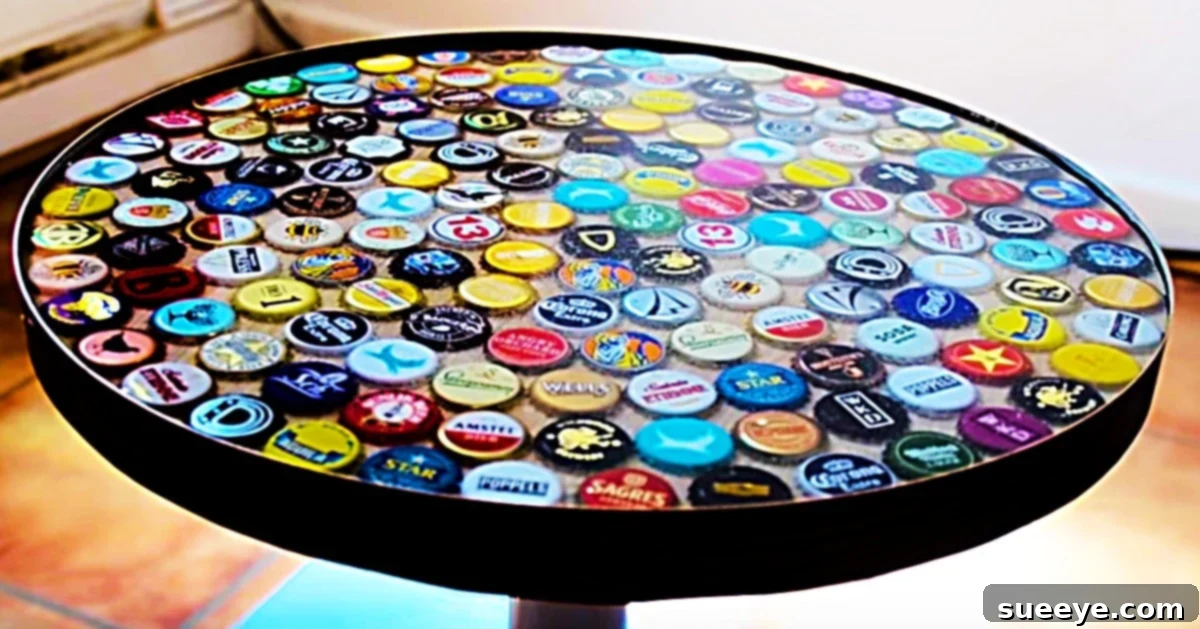
DIY Beer Bottle Cap Table: Crafting a Unique Conversation Starter
Every home tells a story, and sometimes, the most captivating tales are found in the pieces we create ourselves. Recently, our home gained an extraordinary new chapter in the form of a stunning beer bottle cap table, a project brought to life by my talented husband. For what felt like ages, he meticulously collected bottle caps, a colorful assortment that hinted at a grand creative vision. While I knew something exciting was brewing, the final masterpiece exceeded all expectations, transforming these humble metallic disks into an elegant, functional piece of art.
The journey began with the careful selection of a sturdy, small round table base, which he ingeniously sourced from a reputable DIY furniture company known for its adaptable designs. This provided the perfect foundation for his growing collection of caps. To give the table a professional and robust finish, he opted for kitchen work surface counter edging, providing a clean boundary for the caps. The magic truly happened with GlassCast epoxy resin, chosen for its crystal-clear finish and remarkable durability, creating a smooth, glossy topcoat that encapsulates the caps perfectly.
Over an incredibly productive weekend, the vision materialized. By Monday morning, this exquisite table was not just complete but ready to become a focal point in our home. The process, while seemingly intricate, proved surprisingly straightforward, involving careful assembly of the table, precise application of the counter edging, and the artful arrangement of each individual bottle cap. The final pour of epoxy sealed the deal, resulting in a piece that looks incredibly sophisticated yet was created with accessible materials and a good dose of DIY spirit.
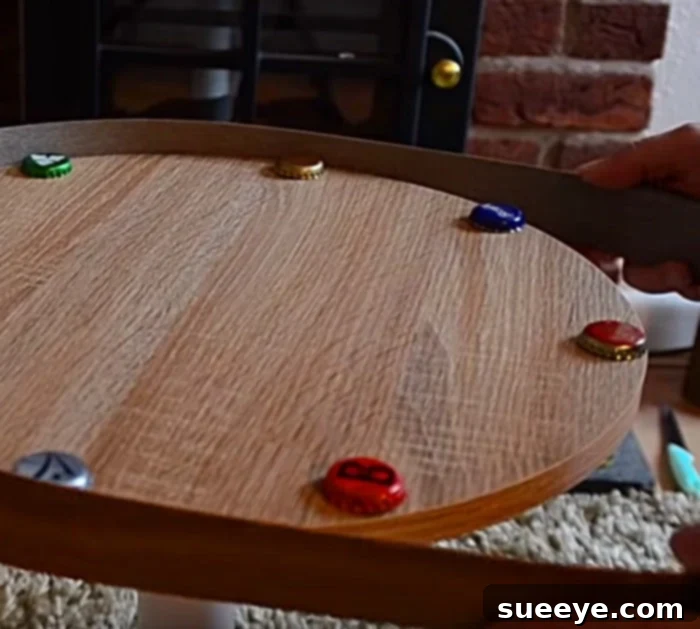
The Art of Arrangement: Laying the Foundation for Your Bottle Cap Masterpiece
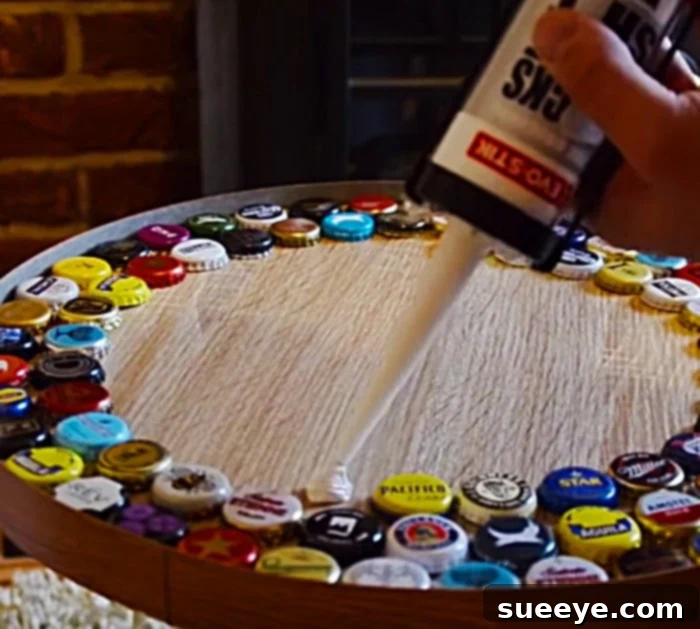
Once the table base was assembled and edged, the creative phase truly began: arranging the beer bottle caps. This step is where personalization shines, allowing for endless design possibilities. My husband chose a seemingly random, yet artfully placed, mosaic, letting the diverse colors and logos of the caps create a vibrant tapestry. Each cap was carefully cleaned and dried beforehand, ensuring a perfect bond. With a strong, clear adhesive, he meticulously glued each cap onto the tabletop, ensuring they were snugly fitted against one another and flush with the counter edging. This careful attention to detail in the laying process is crucial, as it forms the visual bedrock of your finished table.
Consider the patterns you could create:
- **Random Mosaic:** A vibrant, eclectic look that celebrates the diversity of bottle caps.
- **Color Gradients:** Arranging caps from light to dark or by color families for a cohesive flow.
- **Logo Showcase:** Strategically placing caps to highlight specific brands or designs.
- **Geometric Patterns:** Creating rows, circles, or other shapes for a more structured appearance.
- **Themed Collections:** Using caps from specific breweries, regions, or events for a personal touch.
No matter your chosen design, ensure each cap is flat, clean, and securely glued before moving on to the epoxy stage. This prevents any caps from shifting or creating air pockets once the resin is poured, guaranteeing a smooth and professional finish.
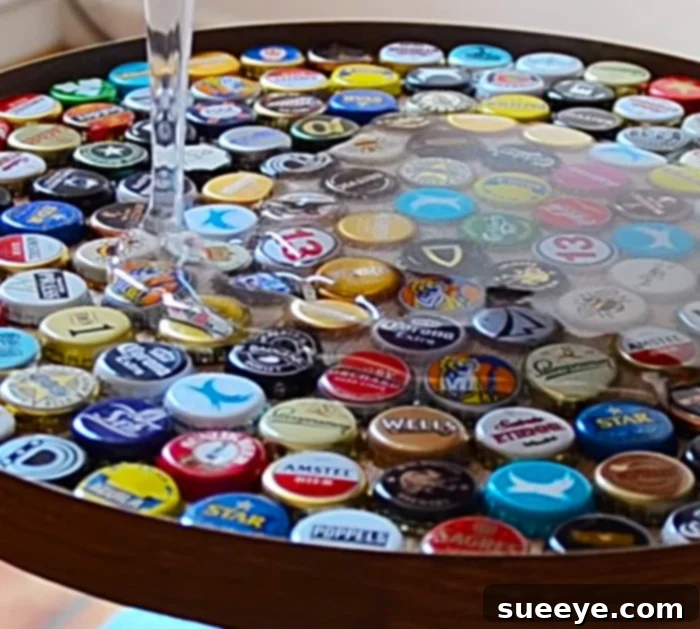
The Magic of Epoxy: Sealing Your Craft Beer Vision
With all the beer caps firmly in place, the next and most transformative step was the application of the epoxy resin. This is the stage where the individual caps are unified and protected, creating that smooth, glassy surface. My husband used GlassCast epoxy, a popular choice for its clarity, self-leveling properties, and robust finish. The process itself is straightforward but requires precision and patience. He carefully mixed the two-part epoxy resin according to the manufacturer’s instructions, ensuring the exact ratio for proper curing. Any deviation here can lead to a sticky, soft, or cloudy finish.
Once mixed, the epoxy was slowly and evenly poured over the entire surface of the tabletop, allowing it to naturally self-level and flow into all the gaps between the caps. It’s mesmerizing to watch as the resin encapsulates each cap, bringing out the vibrancy of their colors and protecting them for years to come. After the initial pour, tiny air bubbles inevitably rise to the surface. These were meticulously removed using a small heat gun, gently wafted over the surface to pop them, leaving behind a perfectly clear, bubble-free layer. This crucial step ensures a flawless, professional-grade finish.
The table was then left to cure in a dust-free environment for a full 24 hours, giving the epoxy ample time to harden completely. The anticipation during this waiting period was immense, but the result was truly worth it. I genuinely couldn’t believe how easy it was to transform a collection of bottle caps into such an elegant and durable DIY table. This project truly embodies the spirit of upcycling, turning everyday items into something extraordinary.
Bringing the “King Chair” to Life: Our Table’s Debut
The true test of any new piece of furniture comes with its integration into daily life, and for our beer bottle cap table, its debut was nothing short of legendary. When we hosted our next game night, we proudly placed it on the patio, designated as an individual coffee table for the highly coveted “king chair”—a large, plush armchair that invariably becomes the subject of playful disputes. With its own dedicated table, the king chair’s reign was solidified, and the new beer cap table immediately became a star.
You wouldn’t believe the amusing chaos that ensued. Every time someone would momentarily vacate the king chair to grab a fresh drink or snack, another cunning guest would swoop in, eager to claim its luxurious embrace. The little beer cap table, holding drinks and snacks, became an indispensable accessory to the throne. It wasn’t just functional; it was a constant conversation starter, prompting delighted exclamations and curious questions about its creation. Its unique design perfectly complemented the relaxed, social atmosphere of our gatherings, showcasing both our love for craft beer and our passion for unique, handmade decor.
The Inspiration Continues: Expanding Our Upcycled Furniture Collection
The instant success and undeniable charm of our first DIY beer bottle cap table sparked a delightful revelation: we were in dire need of more upcycled furniture! The sheer joy and unique character this small table brought to our patio made it clear that this was just the beginning. The conversation around the table quickly shifted from admiration to ambitious future plans. We envision a whole fleet of bottle cap creations to adorn our home, each one carrying the same distinctive charm and storytelling potential.
Our grand plans now include a larger coffee table for the living room, perhaps featuring a more intricate cap pattern or even a specific color scheme. We’re also eyeing new end tables to flank our sofas, offering convenient surfaces for drinks and books, all while showcasing the vibrant beauty of encapsulated bottle caps. And the most exciting prospect? A built-in beer cap bar! Imagine a custom bar top adorned with thousands of caps, a true tribute to the art of craft brewing and sustainable design. This technique is incredibly versatile, lending itself to a variety of applications beyond just tables. Think about bottle cap coasters, wall art, or even custom trays.
This initial project has truly highlighted the immense potential of upcycling and the satisfaction of creating something beautiful and functional from discarded items. It’s more than just a table; it’s a testament to creativity, resourcefulness, and the power of a good DIY project. It’s a fantastic conversation piece that continuously sparks joy and inspires new ideas for transforming our living space into a truly unique and personalized haven. So, if you’ve been collecting bottle caps, or just looking for a rewarding DIY adventure, consider embarking on your own beer bottle cap table journey. The results, as we’ve discovered, are truly remarkable.