
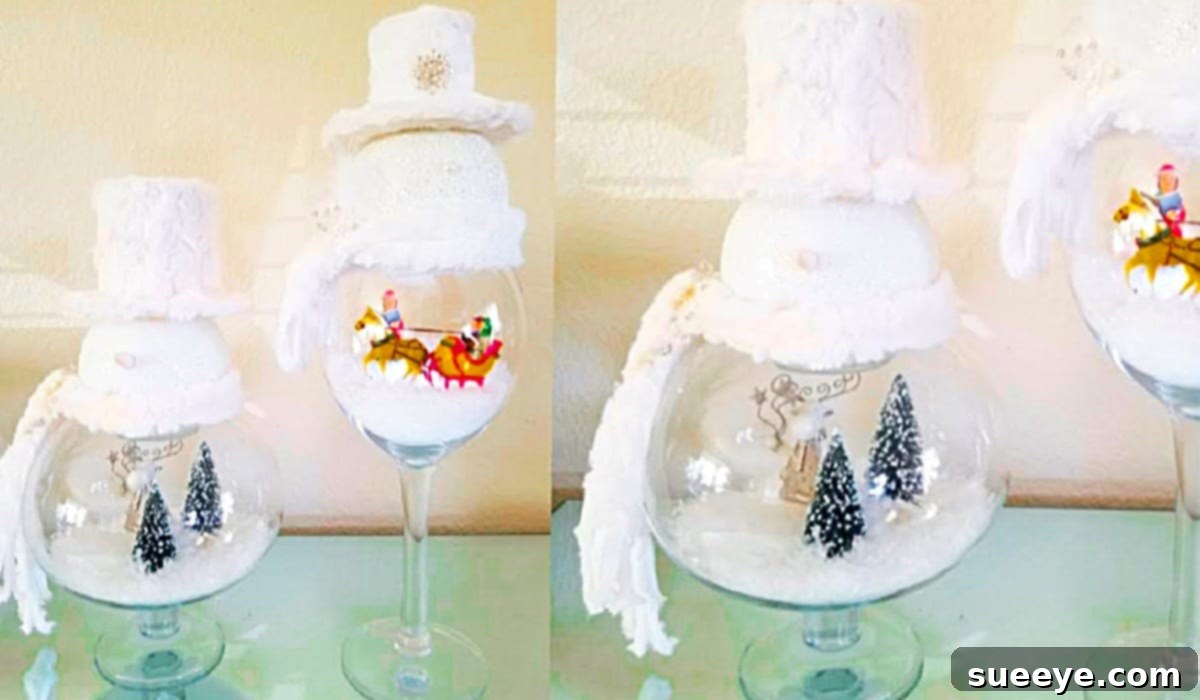
Craft Your Own Enchanting Light-Up Glass Snowman Scene: A DIY Winter Wonderland
As the holiday season draws near, there’s nothing quite like the warmth and charm of handmade decorations to transform your home into a festive sanctuary. If you’re searching for a unique and captivating piece that truly embodies the spirit of Christmas, look no further than this delightful light-up glass snowman scene. Inspired by the creative genius of Elegance On A Budget on YouTube, this project offers an elegant yet affordable way to bring a miniature winter wonderland to your mantelpiece or tabletop.
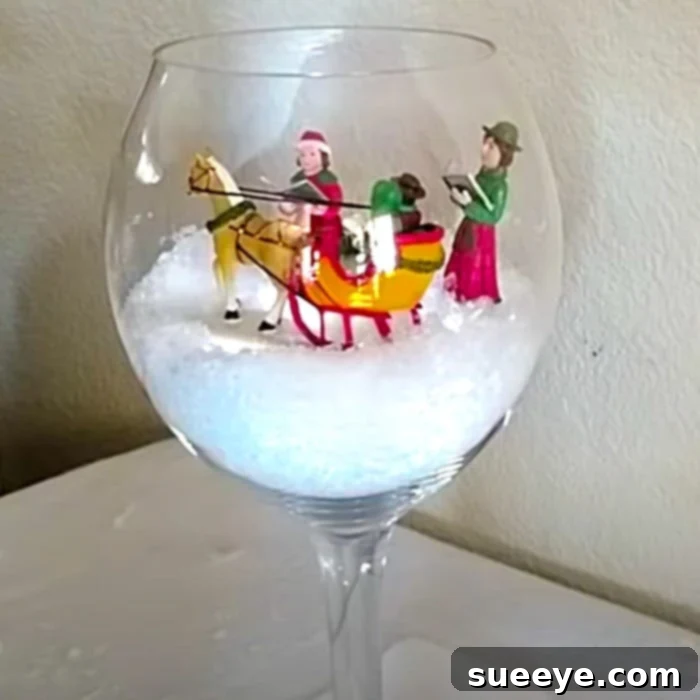
Imagine a serene glass dome, sparkling with faux snow, where tiny carolers sing beneath frosted miniature trees, all illuminated by a gentle, inviting glow. Perched atop this magical scene, a charming snowman, crafted from simple glass items, stands guard, adding a touch of whimsy and joy. The best part? This entire enchanting display can be brought to life using readily available materials, many of which you can find at budget-friendly stores like Dollar Tree and craft outlets such as Michael’s. With the smart use of coupons, you can significantly reduce your expenditure, making this an ideal project for anyone looking to create stunning DIY Christmas decor without breaking the bank.
Creating your own holiday decor isn’t just about saving money; it’s about infusing your home with personal touches and making cherished memories. This project is not only easy to follow but also incredibly rewarding, allowing you to showcase your creativity and spread festive cheer. Get ready to dive into the world of holiday crafting and construct a breathtaking glass snowman scene that will captivate your guests and become a cherished part of your seasonal traditions for years to come.
Essential Materials for Your DIY Light-Up Glass Snowman Scene
One of the beauties of this craft project is its accessibility. Most of the items required are simple, versatile, and easily sourced from common craft and dollar stores. Before you begin, gather these essentials:
- 10-inch glass candy dish (for the snowman’s body)
- 1 wine glass (for the snowman’s head)
- Faux fur material (for the snowman’s hat and accents)
- Gift box (3 pack, often useful for decorative bases or risers)
- Wood circle block piece (for the snowman’s hat base)
- Jumbo packet of white glitter (for a snowy effect)
- Mouse figurine (or other small animal figurines for the scene)
- Carol singing figurines (or other miniature people for the scene)
- 2 miniature Christmas trees (for the winter landscape)
- Carrot nose (a small orange piece for the snowman’s face)
- White craft paint (for snowman details and base)
- 2 (5-inch) fish bowls (these will house your light-up winter scenes)
- Styrofoam (for creating elevated terrain within the scene)
- Mod Podge (an all-in-one glue, sealer, and finish)
- Hot glue gun (essential for secure and quick bonding)
- Glue sticks (plenty for the hot glue gun)
- Battery-operated LED fairy lights (small string lights to create the “light-up” effect for the scenes)
Step-by-Step Guide to Crafting Your Light-Up Glass Snowman Scene
This enchanting project is divided into several manageable stages, allowing you to build your winter wonderland one captivating detail at a time. Follow these detailed instructions to create your stunning DIY holiday decor.
Phase 1: Preparing Your Scenic Glass Domes
The foundation of your light-up display will be the miniature winter scenes housed within the fish bowls. This is where the magic truly begins to take shape.
- Clean Your Glass: Start by thoroughly cleaning and drying your two 5-inch fish bowls. A clear, streak-free surface is crucial for the best visual effect.
- Create the Snowy Base: Inside each fish bowl, apply a thin, even layer of Mod Podge to the bottom and slightly up the sides. While the Mod Podge is still wet, generously sprinkle white glitter over the entire coated area. Gently shake off any excess. This will create a shimmering, snow-covered ground for your scene. Allow it to dry completely. For added texture, you can also use faux snow flakes alongside or instead of glitter.
- Build the Terrain: Once the glitter base is dry, cut small pieces of Styrofoam and hot glue them to the bottom of the bowls. These will serve as subtle risers, creating varying elevations for your figurines and trees, adding depth and interest to your winter landscape.
- Integrate Lighting: Carefully arrange a string of battery-operated LED fairy lights within each bowl. You can weave them around the Styrofoam pieces or simply place them at the bottom, ensuring the battery pack is easily accessible but hidden. These lights are key to the “light-up” effect, casting a warm, inviting glow over your miniature world.
- Position Your Miniatures: Now for the fun part! Begin placing your miniature Christmas trees, securing them with hot glue onto the Styrofoam or the glittered base. Then, arrange your mouse figurine, carol singing figurines, and any other small animals or decorative elements you’ve chosen. Play with their placement until you create a harmonious and engaging scene. Ensure they are firmly glued down to prevent shifting.
Phase 2: Constructing Your Glass Snowman
With your captivating winter scenes ready, it’s time to bring your glass snowman to life. This friendly figure will stand proudly atop one of your illuminated domes, tying the entire display together.
- Assemble the Snowman’s Body: Take your 10-inch glass candy dish. This will form the main body of your snowman.
- Attach the Head: Carefully hot glue the base of the wine glass (which will serve as the snowman’s head) onto the top of the candy dish. Ensure it’s centered and securely bonded. Allow the glue to set completely.
- Paint the Snowman: Once the structure is stable, you can optionally paint the exterior of the candy dish and wine glass with white craft paint. This will give your snowman a more opaque, traditional appearance. Apply multiple thin coats if necessary, allowing each to dry thoroughly.
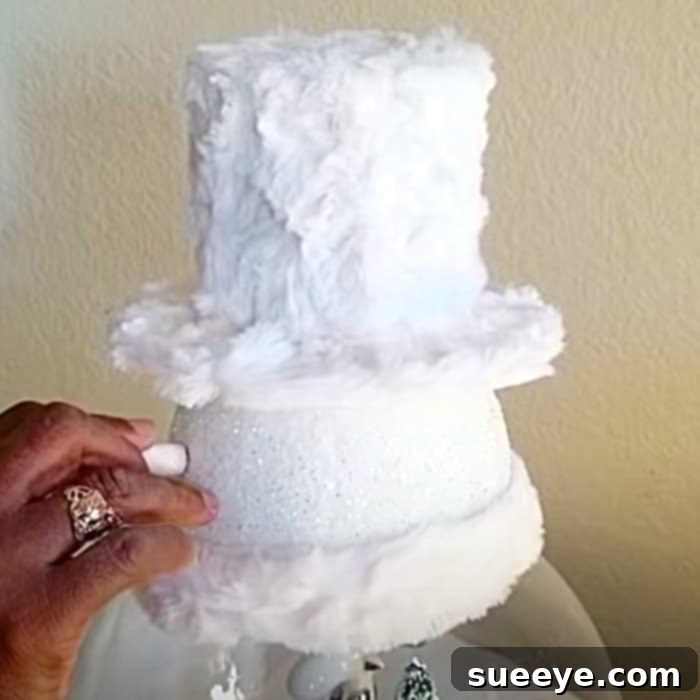
- Craft the Fur Hat: Measure and cut a circular piece of faux fur, slightly larger than the wood circle block. Hot glue the faux fur onto the wood circle block, pulling the edges underneath and securing them. This creates the brim of the hat.
- Attach the Hat: Hot glue this fur-covered wood circle onto the top of the wine glass, forming the snowman’s cozy hat. You can gather additional faux fur and wrap it around the base of the hat or neck of the snowman for added texture and a scarf-like effect.
- Add Facial Features: Carefully hot glue the carrot nose onto the center of the wine glass (the snowman’s face). Using a permanent marker or black craft paint and a fine brush, draw two friendly eyes and a dotted smile onto the glass. You can also use small black beads or buttons for the eyes for a more dimensional look.
Phase 3: Final Assembly and Display
With all your individual components complete, it’s time to bring them together into one glorious display.
- Combine Snowman and Scene: Carefully place your finished glass snowman atop one of the light-up fish bowl scenes. You can secure it with a small amount of hot glue if you want a permanent fixture, or simply let it rest there if you prefer to change out the scene beneath it.
- Arrange the Gift Boxes: Use the gift boxes as varying pedestals or risers. You can stack them or arrange them next to each other to create an interesting display height for your other light-up scene. Wrap them in festive paper for an extra touch of holiday cheer.
- Position the Second Scene: Place the second light-up fish bowl scene on one of the gift box risers or directly beside the main snowman display. This creates a cohesive “winter village” effect.
- Final Touches: Sprinkle a bit more loose glitter or faux snow around the base of the entire display to unify all the elements. Turn on the LED fairy lights within your glass domes to illuminate your exquisite handmade winter wonderland.
Tips for Success and Creative Customization
Making this light-up glass snowman scene is not just a craft; it’s an opportunity to express your unique holiday style. Here are some tips to help you succeed and inspire your creativity:
- Embrace Variety: Don’t feel limited by the specific figurines mentioned. Look for mini reindeer, polar bears, small houses, or even tiny lampposts to add to your scenes. The more diverse your elements, the richer your winter wonderland will appear.
- Lighting Options: While fairy lights are recommended for their delicate glow, explore other battery-operated LED options like small tea lights or puck lights for different effects. Just ensure they fit safely and don’t generate excessive heat.
- Snow Alternatives: Besides glitter, consider using iridescent flakes, tiny white beads, or even cotton batting for a different kind of snow texture. A mix of textures can add more realism to your scene.
- Personalize Your Snowman: Give your snowman a tiny scarf made from felt or ribbon, or small twig arms to hold a mini broom. You could even use blush for rosy cheeks!
- Seasonal Versatility: While perfect for Christmas, consider adapting this concept for other seasons. Imagine a spring scene with tiny flowers and bunnies, or an autumn scene with miniature pumpkins and fall leaves.
- Gift-Giving: This handmade light-up scene makes an incredibly thoughtful and personal gift for friends, family, or teachers. Package it in a clear cello bag with a big festive bow.
- Safety First: Always use caution when working with a hot glue gun. Ensure good ventilation when using Mod Podge or paints.
- Display Power: Place your finished masterpiece where it can be admired by all. A fireplace mantel, a dining table centerpiece, a entryway console, or even a child’s bedroom can be perfect spots to showcase its enchanting glow.
The Joy and Benefits of DIY Christmas Decor
Opting for handmade Christmas decorations like this light-up glass snowman scene offers a wealth of benefits that extend beyond mere aesthetics:
- Uniqueness and Personal Touch: Unlike mass-produced items, your DIY decor will be truly one-of-a-kind. It reflects your personality, creativity, and effort, making your home feel more personal and inviting during the holidays.
- Cost-Effectiveness: As demonstrated by this project, crafting often allows you to create stunning decorations for a fraction of the cost of store-bought alternatives. Utilizing dollar store finds and coupons helps your holiday budget go further.
- Family Activity: Crafting can be a wonderful activity for the whole family. Involving children (with appropriate supervision for hot glue and small parts) in making holiday decorations fosters creativity, develops fine motor skills, and creates cherished memories of time spent together.
- Sense of Accomplishment: There’s immense satisfaction in stepping back and admiring something beautiful you’ve created with your own hands. This sense of achievement can boost your holiday spirit and pride in your home.
- Eco-Friendly: By repurposing items and choosing sustainable materials, DIY projects can be a more environmentally conscious way to decorate, reducing waste compared to constantly buying new plastic decorations.
- Stress Reduction: For many, crafting is a meditative and relaxing activity. Focusing on a creative project can be a wonderful way to de-stress during the often-hectic holiday season.
This project is a testament to how simple materials, combined with a touch of imagination, can result in breathtaking holiday decor. It’s an invitation to pause, create, and imbue your home with a sense of wonder and warmth that only handmade items can provide. So, gather your supplies, put on some festive music, and embark on this delightful journey to create a truly magical light-up glass snowman scene that will enchant all who behold it.