
Illuminate Your Home: Easy DIY Mason Jar Prism Candles – The Perfect Homemade Gift Idea
Are you searching for an enchanting yet incredibly simple DIY decor idea that will transform any space, or perhaps a thoughtful, last-minute Christmas gift that truly impresses? Look no further! The DIY Mason Jar Prism Candle, also affectionately known as a scatter candle or jewel-encrusted jar, has taken social media by storm, and for good reason. This captivating craft casts light in breathtaking shapes and patterns, creating an almost magical ambiance. The best part? It demands very little effort and boasts truly stunning results, making it one of the most popular DIY projects circulating today.
Why You’ll Fall in Love with This Creative Project
Beyond its dazzling aesthetic, there are numerous compelling reasons why crafting your own prism candles is a project you absolutely must try:
- Effortless Elegance: Despite its sophisticated appearance, this project is remarkably easy, even for beginners. You don’t need specialized skills or tools to achieve a professional-looking finish.
- Stunning Visual Impact: The primary appeal of these jars lies in their unique ability to scatter light. Each small glass gem acts as a tiny prism, refracting the candle’s glow into a mesmerizing display of colors and patterns across your walls and surfaces. It’s an instant mood enhancer.
- The Ultimate Handmade Gift: In a world filled with mass-produced items, a handmade gift carries immense sentimental value. A DIY Mason Jar Prism Candle is not just a gift; it’s a personalized token of effort and affection, perfect for birthdays, anniversaries, housewarmings, or especially Christmas presents.
- Budget-Friendly Decor: Achieve high-end decor looks without breaking the bank. The main components are inexpensive and readily available, allowing you to create multiple beautiful pieces for a fraction of the cost of store-bought alternatives.
- Versatile for Any Occasion: While often associated with festive occasions like Christmas, these prism candles are perfect for year-round decor. Use them to set a relaxing mood for a quiet evening, add a romantic touch to a dinner party, or brighten up any room in your home.
Gather Your Materials: What You’ll Need for Your Mason Jar Prism Candle
The beauty of this project lies in its simplicity and the accessibility of its materials. Here’s a detailed list of what you’ll need to create your own radiant scatter candles:
1. Mason Jars
- Type: Standard glass mason jars are ideal. You can use various sizes depending on your preference – pint (16 oz) jars are very popular, but quart (32 oz) jars create an even larger display of light.
- Condition: Ensure your jars are clean and dry before you begin. A quick wash with soap and water, followed by a thorough drying, is usually sufficient. You can also wipe the outside with rubbing alcohol to remove any oils or residues that might prevent good adhesion.
2. Glass Gems or Glass Rocks
- Crucial Detail: This is the key ingredient! Look for bags of colored glass rocks or glass gems. The most important tip for achieving the best prism effect is to choose smaller glass stones with one flat side. These are specifically designed for crafts and provide an excellent surface for adhesion while allowing light to scatter beautifully from their faceted tops.
- Where to Find Them: You can easily find these at your local craft store (such as Michaels, Hobby Lobby, Jo-Ann Fabrics) or online retailers like Amazon. They are often sold in the floral or mosaic sections.
- Color Selection: These gems come in a vast array of colors: clear, gold, blue, red, pink, green, amber, purple, and multi-color mixes. For Christmas decorations, red and green are classic choices, but clear or iridescent gems create a stunning, universal sparkle. My teenage daughter and I made ten last year in both red and blue, and the effect was truly impressive!
- What to Avoid: While the original example mentioned large ones, we strongly advise against using very large, irregularly shaped glass rocks. They are harder to adhere evenly and may not produce the same delicate light scattering effect as the smaller, flat-backed gems.
3. Strong Adhesive
- Recommendations: A strong, clear-drying adhesive is essential.
- E6000 Craft Adhesive: This is highly recommended for its powerful bond and clear finish. It’s durable and waterproof, ensuring your gems stay put for years. However, it does require good ventilation and takes a few hours to fully cure.
- Clear Silicone Adhesive: Another excellent option, similar to E6000. Look for craft-specific or general-purpose clear silicone.
- Hot Glue (with caution): While hot glue is fast and convenient, it may not provide the same long-term durability, especially if the jars are exposed to heat from real candles over time. If using hot glue, ensure it’s a strong, high-temp type and use it generously. This might be a good option for a quick, temporary project, but for lasting gifts or decor, E6000 or silicone is superior.
4. Candles or LED Lights
- Votive Candles or Tea Lights: Traditional candles offer a warm, flickering glow. Always place them inside a glass votive holder or directly on the bottom of the jar (if using a wider jar) to ensure stability and safety.
- LED Tea Lights or Fairy Lights: For a safer, flameless alternative, LED tea lights or battery-operated fairy lights (string lights) are fantastic. They eliminate fire risk, last longer, and are perfect for homes with pets or children. They still produce a beautiful, scattered light effect without the heat.
5. Optional Supplies for Finishing Touches
- Rubbing Alcohol & Paper Towels: For cleaning your jars.
- Tweezers or Small Spatula: Helpful for precise placement of gems, especially smaller ones.
- Ribbons, Twine, or Labels: To decorate the finished candle or add a personalized gift tag.
Step-by-Step Guide: Crafting Your Dazzling Prism Candle
Creating these homemade candles is a straightforward and enjoyable process. Here’s how you can make your own:
Step 1: Prepare Your Mason Jar
Start by ensuring your mason jar is sparkling clean and completely dry. Any dust, fingerprints, or residue can interfere with the adhesive’s bond. A quick wipe down with rubbing alcohol can help achieve a pristine surface.
Step 2: Plan Your Design (Optional but Recommended)
While you can simply start gluing, it might be helpful to roughly plan your pattern. Do you want full coverage, or do you prefer to leave some gaps? Consider if you want specific color arrangements or a random mix. Most commonly, crafters cover the entire exterior surface of the jar with gems, leaving small spaces between each for light to peek through.
Step 3: Begin Attaching the Glass Gems
This is where the magic happens!
- Apply Adhesive: Working in small sections, apply a thin, even layer of your chosen adhesive (like E6000 or clear silicone) to the exterior surface of the mason jar. Avoid applying too much glue at once, as it might start to dry or become messy before you can place the gems.
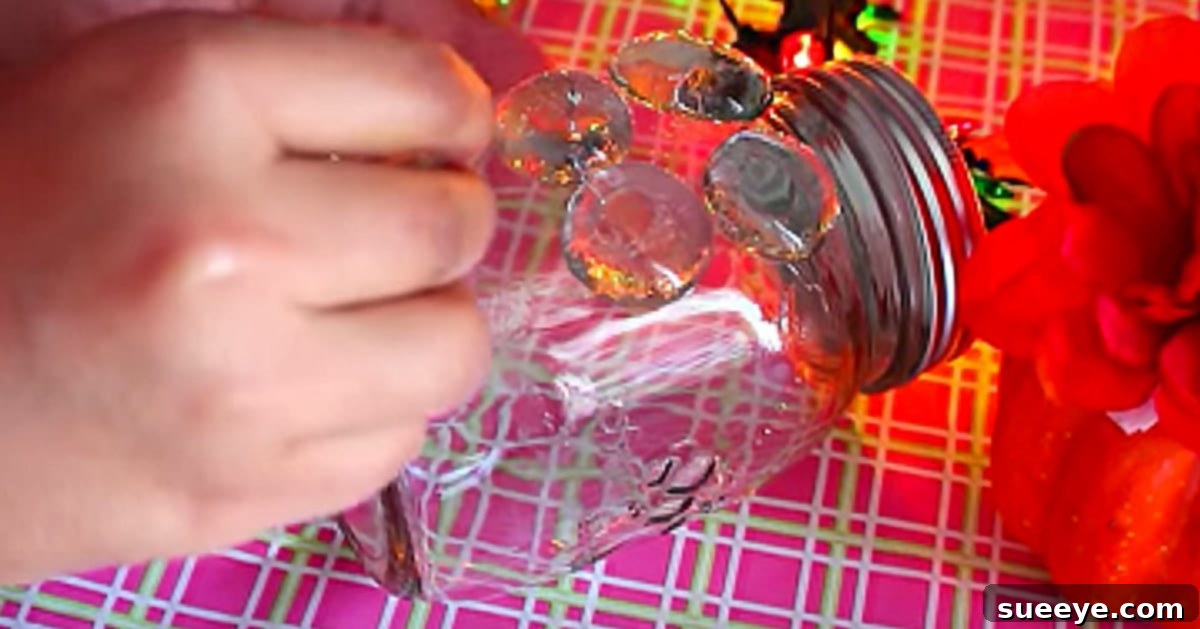
- Place the Gems: Take your glass gems (flat side down, against the jar) and firmly press them onto the glued section. Arrange them close together, leaving small, deliberate gaps in between. These gaps are crucial as they allow the candle’s light to escape and create the unique scattered patterns. If you cover the jar too densely, the light effect will be diminished.
- Work in Rows or Spirals: Many find it easiest to work either from the bottom of the jar upwards in circular rows, or in a gentle spiral pattern. This helps maintain an even distribution.
- Be Mindful of the Opening: Ensure you don’t place gems too close to the rim of the jar, as this might interfere with placing a candle or handling the jar. Leave a small, clean edge around the opening.
Step 4: Allow for Sufficient Drying Time
Once all your gems are in place, set the jar aside in a well-ventilated area to dry completely. This step is vital to ensure the gems are securely attached and won’t fall off. Drying times vary depending on the adhesive you use:
- E6000/Silicone: Typically, allow at least 24-48 hours for a full, strong cure. While it might be touch-dry sooner, full strength takes longer.
- Hot Glue: Dries almost instantly, but as noted, might not be as durable long-term.
Resist the urge to move or handle the jar excessively during the drying process to prevent gems from shifting.
Step 5: Insert Your Candle or LED Light
Once the adhesive is fully cured and the gems are firmly in place, your beautiful prism candle jar is ready for its light source! Carefully place a votive candle, tea light, or LED alternative inside. If using a real flame, always ensure it is centered and stable. Never leave a burning candle unattended.
Pro Tips for a Flawless and Radiant Finish
To ensure your DIY Mason Jar Prism Candles turn out perfectly every time, keep these expert tips in mind:
- Choose the Right Gems: As mentioned, the flat-backed glass stones are your best friends for this project. Their consistent shape makes them easier to work with and maximizes the light-scattering effect.
- Patience with Adhesive: While it might be tempting to rush, allowing adequate drying time for your adhesive is non-negotiable for durability.
- Don’t Over-Glue: A thin, even layer of adhesive is all you need. Too much glue can squeeze out from under the gems, creating a cloudy or messy appearance.
- Leave Strategic Gaps: Remember, the gaps between the gems are what allow the light to sparkle and create those incredible patterns. Don’t try to cover every square millimeter of the jar; embrace the small spaces.
- Experiment with Lighting: Try your finished candle in different rooms and lighting conditions to see how the scattered light transforms the atmosphere.
- Safety First with Real Flames: If using traditional candles, always ensure they are placed on a heat-safe surface and never leave them unattended. Consider using LED candles for ultimate safety and longevity.
Creative Variations & Customization Ideas
The beauty of this DIY project lies in its adaptability. You can easily customize your prism candles to suit any theme, occasion, or recipient:
- Color Themes:
- Holiday Magic: Use red and green gems for Christmas crafts, oranges and browns for autumn, or pastel shades for spring.
- Seasonal Ambiance: Clear and blue gems evoke a winter wonderland, while bright yellows and oranges bring summer warmth.
- Room Decor Match: Choose gem colors that complement your existing home decor for a cohesive look.
- Different Jar Sizes: Don’t limit yourself to pint jars! Use smaller jelly jars for mini votives or larger quart jars for a more dramatic lighting display.
- Mixed Textures: Combine glass gems with other small embellishments like glitter, small beads (carefully!), or even tiny artificial flowers (adhered externally and away from flame).
- Alternative Uses: Once you master the technique, these beautiful jars aren’t just for candles! They can be repurposed as:
- Stunning flower vases (place a smaller glass inside for water)
- Unique pen or brush holders for a creative workspace
- Decorative storage for small items like jewelry or craft supplies
- Elegant centerpieces for events
- Personalized Touches: Add a festive ribbon around the neck of the jar, attach a handwritten tag with a personal message, or even paint the inside of the jar with transparent glass paint for an added color layer before applying gems (ensure paint is dry).
Giving the Gift of Light: Presentation Ideas
These DIY Mason Jar Prism Candles make truly memorable gifts. Here are some ideas for presenting them:
- Simply Elegant: Tie a rustic twine or a satin ribbon around the neck of the jar and attach a small, handwritten gift tag.
- Paired with a Candle: If you’re giving the jar without a light source, include a small pack of tea lights or a high-quality LED candle alongside it, so the recipient can use it right away.
- Gift Basket Inclusion: Incorporate the prism candle into a larger themed gift basket – perhaps a “Relaxation Kit” with bath salts and a good book, or a “Cozy Night In” basket with hot cocoa mix and fuzzy socks.
- Personalized Message: Attach a note sharing the story of how you made it, or simply a heartfelt message. My family and friends were genuinely impressed and touched when they received these last year!
The Joy of DIY: More Than Just a Craft
Engaging in DIY projects like creating these beautiful prism candles offers more than just a decorative item. It’s a therapeutic and rewarding experience. There’s an immense sense of satisfaction that comes from transforming simple materials into something beautiful and functional with your own hands. It’s a wonderful way to unwind, tap into your creativity, and even bond with loved ones. My teenage daughter and I had so much fun making them together, turning craft time into cherished memories. This crafty do-it-yourself project truly comes with my highest recommendation!
Start Crafting Today!
So, why wait? Gather your supplies, unleash your creativity, and embark on the delightful journey of creating your own DIY Mason Jar Prism Candles. Whether you’re enhancing your own home decor or crafting a special handmade gift, you’ll be amazed by the stunning results and the warm, inviting ambiance they bring. Get ready to cast some beautiful light into your world!