
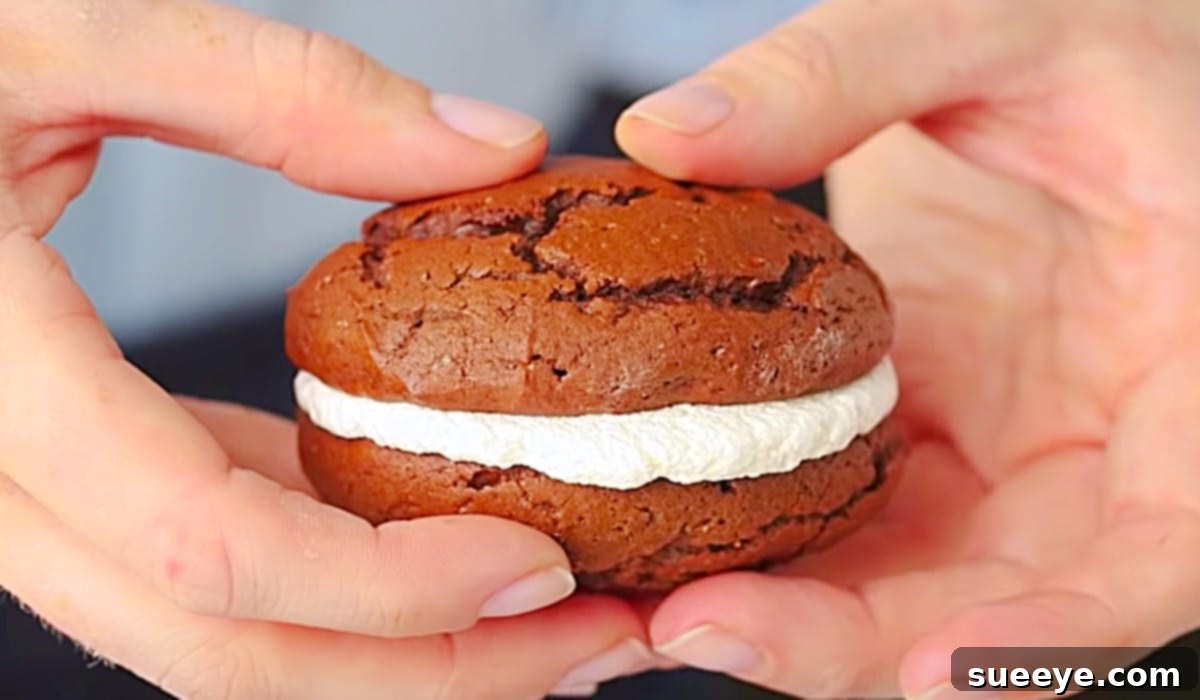
Decadent Homemade Chocolate Whoopie Pies: An Irresistible Recipe
Step into the delightful world of homemade treats with this incredible recipe for chocolate whoopie pies. Often described as a perfect hybrid of a cookie and a cake, these iconic confections feature two soft, pillowy chocolate cookies embracing a luscious, creamy vanilla buttercream filling. They are a beloved classic, reminiscent of childhood fairs and cozy kitchens, offering a perfect balance of rich cocoa flavor and sweet, smooth cream. While readily available in bakeries and stores, nothing quite compares to the warmth, freshness, and irresistible taste of a batch made right in your own kitchen.
Inspired by the fantastic guide from Everyday Food on YouTube, this recipe simplifies the process, making it accessible for bakers of all skill levels. You’ll be amazed at how easily you can create these show-stopping desserts that are not only gorgeously presented but also incredibly delicious. The deep, dark chocolate flavor of the cookie perfectly complements the sweet, airy vanilla buttercream, creating a harmonious symphony of textures and tastes. Whether you’re planning a special gathering, looking for a comforting treat, or seeking the perfect homemade gift, these chocolate whoopie pies are guaranteed to impress and delight everyone who takes a bite.
Why You’ll Adore This Homemade Chocolate Whoopie Pie Recipe
There are countless reasons to make these homemade chocolate whoopie pies a staple in your baking repertoire:
- Unforgettable Flavor: A flawless blend of rich, deep chocolate and smooth, sweet vanilla buttercream creates an unparalleled taste experience that will satisfy any sweet tooth.
- Perfectly Moist Texture: The cookies are wonderfully soft, tender, and cake-like, ensuring a delightful mouthfeel with every bite – never dry or crumbly.
- Surprisingly Simple: Despite their impressive appearance, this recipe uses straightforward ingredients and easy-to-follow steps, making it achievable for novice and experienced bakers alike.
- Versatile for Any Occasion: These whoopie pies are perfect for a wide range of events, from elegant dessert tables at parties and comforting additions to lunchboxes to a delightful coffee break treat or a thoughtful, homemade gift for friends and family.
- Customization Friendly: The base recipe is fantastic as is, but it also serves as an excellent canvas for your creative additions, allowing for various flavor modifications and decorative touches.
- Nostalgic Appeal: With their classic charm, these whoopie pies evoke a sense of warmth and nostalgia, reminiscent of classic American bake sales, grandmas’ kitchens, and simpler times.
Essential Ingredients for Your Decadent Chocolate Whoopie Pies
Crafting the perfect whoopie pie begins with a carefully selected list of ingredients. Here’s what you’ll need to create both the soft, chocolatey cookie shells and the velvety smooth vanilla buttercream filling.
For The Whoopie Cookies:
These ingredients come together to form the signature soft, cake-like chocolate cookies that are the foundation of your whoopie pies.
- 1 & 3/4 cups of all-purpose flour: This provides the primary structure for our cake-like cookies. For best results, measure by spooning flour into the measuring cup and leveling off.
- 1/2 teaspoon of Kosher salt: A crucial ingredient that balances the sweetness and significantly enhances the depth of the chocolate flavor.
- 3/4 cup of unsweetened cocoa powder: The star ingredient for that rich chocolate taste. Opt for a good quality cocoa powder; Dutch-processed cocoa will yield a darker color and a slightly milder flavor, while natural cocoa will be fruitier.
- 1 & 1/2 teaspoon of baking powder: Our primary leavening agent, ensuring those perfect domed tops and a wonderfully soft, airy texture in the cookies.
- 1/2 stick (4 tablespoons) of unsalted butter: Crucial for richness and moisture. Ensure it is at room temperature for optimal creaming with sugar.
- 1/2 cup of granulated sugar: Sweetens the cookies and contributes to their tenderness and moist texture.
- 1 large egg: Acts as a binder, adding structure and moisture to the cookie batter. Using a room temperature egg allows for better emulsification with other ingredients.
- 1 cup buttermilk: Adds a delightful tanginess and incredible tenderness to the cookies, reacting with the baking powder to create a light crumb. Again, room temperature is ideal.
- 1 teaspoon vanilla extract: A must-have flavor enhancer that beautifully complements and deepens the chocolate notes.
For The Vanilla Buttercream Filling:
This classic, creamy filling is the heart and soul of any whoopie pie. It’s simple to prepare and perfectly complements the rich chocolate cookies.
- 1 stick (8 tablespoons) of unsalted butter: Absolutely essential for a rich, flavorful buttercream. Ensure it’s at room temperature for a smooth, lump-free consistency.
- 3 to 4 cups of powdered sugar: Also known as confectioners’ sugar or icing sugar, it dissolves beautifully to create a silky-smooth and stable buttercream. Adjust the quantity to achieve your desired sweetness and thickness.
- 1/4 cup of milk: Helps achieve the perfect creamy, spreadable consistency for your filling. Whole milk is often preferred for its richness.
- 1/2 teaspoon of vanilla extract: Provides that timeless, comforting vanilla flavor that pairs so wonderfully with chocolate.
Step-by-Step Guide to Baking Your Perfect Chocolate Whoopie Pies
Get ready to create some kitchen magic! Follow these detailed steps to bake beautiful, soft chocolate whoopie pies and fill them with decadent vanilla buttercream, guaranteeing a delightful result every time.
Part 1: Preparing and Baking the Whoopie Cookies
- Preheat and Prepare Your Baking Sheets: Begin by preheating your oven to 400°F (200°C). Line two large baking sheets with parchment paper. This crucial step prevents sticking, ensures even baking, and makes cleanup incredibly easy.
- Combine the Dry Ingredients: In a medium-sized bowl, whisk together the measured all-purpose flour, Kosher salt, unsweetened cocoa powder, and baking powder. Whisking thoroughly ensures all leavening and flavoring agents are evenly distributed. Make sure to break up any lumps in the cocoa powder for a consistently smooth batter. Set this mixture aside.
- Cream Butter and Sugar: In a separate, larger mixing bowl, using an electric mixer (either hand-held or stand mixer), cream together the softened unsalted butter and granulated sugar. Beat on medium-high speed until the mixture becomes light, fluffy, and notably pale in color. This process is vital as it incorporates air, contributing significantly to the cookies’ characteristic soft, cake-like texture.
- Incorporate Egg and Vanilla: Beat in the large room temperature egg until it is fully combined and the mixture is smooth. Then, stir in the vanilla extract, ensuring its flavor is evenly distributed. Don’t forget to scrape down the sides of the bowl with a spatula to ensure all ingredients are thoroughly incorporated.
- Alternate Wet and Dry Ingredients: With the mixer on low speed, gradually add the dry ingredients mixture to the wet ingredients, alternating with the room temperature buttermilk. Begin and end with the dry ingredients (e.g., dry, wet, dry, wet, dry). Mix just until the ingredients are combined and no streaks of flour remain. Be careful not to overmix, as overdeveloping the gluten can lead to tough cookies. A few small lumps in the batter are perfectly acceptable.
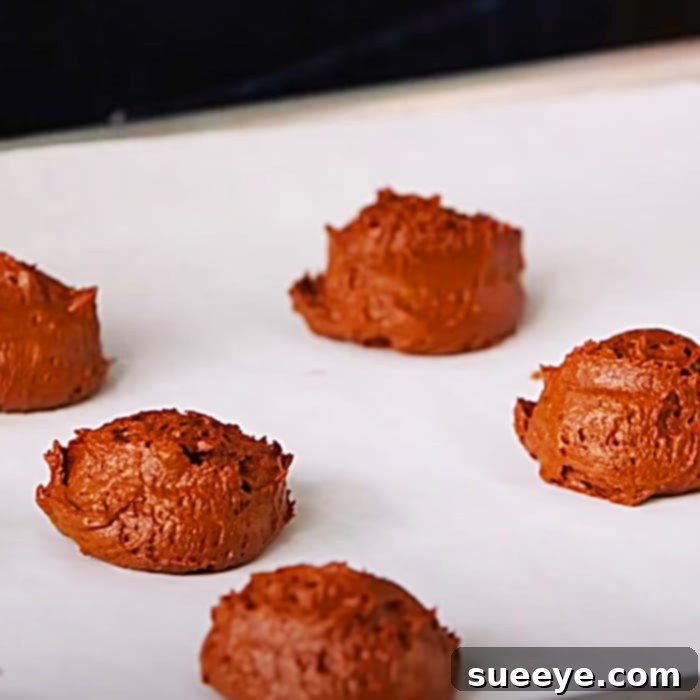
- Scoop the Batter onto Sheets: Using a spoon or a small ice cream scoop (approximately 1.5 to 2 tablespoons), drop uniform dollops of batter onto the prepared parchment-lined baking sheets. Leave about 2 inches of space between each mound, as the cookies will spread slightly during baking. Consistent sizing will help them bake evenly and pair up nicely later.
- Bake to Golden Perfection: Place the baking sheets in the preheated oven and bake for 10 to 12 minutes. The cookies are done when they spring back lightly when gently touched in the center and their edges appear set. Avoid the temptation to overbake, as this will result in dry whoopie pies.
- Cool Completely: Carefully remove the baking sheets from the oven and let the cookies cool on the sheets for a few minutes to firm up. Then, gently transfer them to a wire rack to cool completely to room temperature. This step is crucial; attempting to fill warm cookies will cause your beautiful buttercream to melt, creating a messy situation.
Part 2: Crafting the Creamy Vanilla Buttercream Filling
While your chocolate cookies are cooling, pivot to creating the simple yet utterly decadent vanilla buttercream that forms the sweet, creamy heart of your whoopie pies.
- Cream the Butter: In a large mixing bowl, beat the softened unsalted butter with an electric mixer on medium-high speed. Continue beating for about 2-3 minutes until the butter is noticeably light, fluffy, and pale. This aeration is key to a light, airy buttercream.
- Gradually Add Powdered Sugar: With the mixer on low speed, slowly add the powdered sugar (confectioners’ sugar), one cup at a time, beating thoroughly after each addition until fully incorporated. The mixture will initially be very thick and crumbly.
- Achieve Creamy Consistency: Pour in the milk and vanilla extract. Increase the mixer speed to medium-high and continue to beat for another 2-3 minutes until the buttercream becomes beautifully smooth, creamy, and light. If the filling seems too thick for spreading or piping, add a tiny bit more milk, one teaspoon at a time. If it’s too thin, incorporate a bit more powdered sugar until you reach your ideal pipeable yet firm consistency.
Part 3: Assembling Your Delicious Whoopie Pies
Now for the most satisfying part – transforming those cooled chocolate cookies and creamy filling into delightful, irresistible whoopie pie sandwiches!
- Pair the Cookies: Once the cookies are completely cool, carefully match them up into similarly sized pairs. This ensures even sandwiches and a pleasing aesthetic.
- Fill with Buttercream: You have a couple of excellent options for applying the creamy filling:
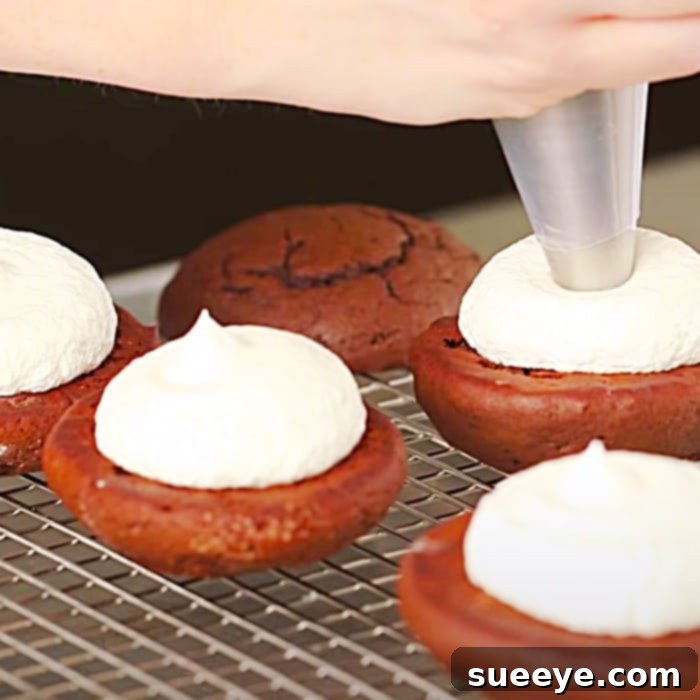
- Piping Bag Method: For a neat and professional appearance, spoon your prepared buttercream into a pastry bag fitted with a round tip. Alternatively, you can use a large ziplock bag and simply snip off one corner. Pipe a generous amount of filling onto the flat, underside of one cookie half.
- Spoon/Knife Method: If you prefer a more rustic and equally delicious approach, simply use a butter knife or a small offset spatula to spread a good, thick dollop of buttercream onto the flat side of one cookie. Ensure you use a generous amount of filling – a thick layer is key to the classic whoopie pie experience!
- Create the Sandwich: Gently take the second cookie from its matched pair and place it flat side down on top of the piped or spread filling. Lightly press down to create a perfect sandwich. The filling should just peek out slightly from the sides, signaling a well-filled whoopie pie.
- Serve and Enjoy: Your homemade chocolate whoopie pies are now complete and ready to be devoured! Arrange them on a platter and watch them disappear.
Expert Tips for Perfect Homemade Whoopie Pies Every Time
Achieving bakery-quality whoopie pies is simpler than you think with these expert tips and tricks:
- Utilize Room Temperature Ingredients: This tip is paramount, especially for butter, eggs, and buttermilk. Room temperature ingredients emulsify far better, resulting in a smoother, more uniform batter and ultimately a lighter, airier texture in both your cookies and your buttercream.
- Avoid Overmixing the Batter: When combining the wet and dry ingredients for your cookies, mix only until the flour streaks disappear. Overmixing develops the gluten in the flour, which can lead to tough, chewy cookies instead of the desired soft, cake-like consistency.
- Measure Ingredients Accurately: Baking is a precise science. Always use proper measuring cups and spoons. For flour, spoon it lightly into the measuring cup and then level it off with a straight edge (like a knife) rather than scooping directly from the bag, which can compact the flour and lead to too much being added.
- Ensure Consistent Cookie Size: Employing a cookie scoop or a consistent measuring spoon for your batter dollops will help ensure all your cookie halves are roughly the same size. This consistency makes pairing them up much easier and ensures even baking.
- Resist Overbaking: Keep a very close eye on your cookies as they bake. They should be just set and spring back lightly when touched. Overbaking is the quickest way to end up with dry, less enjoyable whoopie pies.
- Allow Cookies to Cool Completely: This step cannot be stressed enough. It’s incredibly tempting to fill the cookies while they’re still warm, but doing so will cause your beautiful, firm buttercream to melt and seep out, creating a messy situation. Patience here will be rewarded!
- Be Generous with the Filling: Do not skimp on the buttercream! A thick, creamy layer of filling is what truly defines a whoopie pie and provides that irresistible contrast to the chocolate cookie.
- Choose Quality Cocoa Powder: Since the chocolate flavor is a central component, investing in a good quality unsweetened cocoa powder will significantly impact the final taste. Experiment with natural or Dutch-processed cocoa to find your preferred depth of flavor.
Creative Variations and Customizations for Your Whoopie Pies
While the classic chocolate and vanilla combination is undeniably divine, feel free to unleash your creativity and personalize your whoopie pies with these exciting variations:
- Flavorful Extracts: Experiment with different extracts in your buttercream to introduce new flavor dimensions. Almond extract offers a sophisticated nutty note, peppermint extract transforms them into a festive mint chocolate treat, or a touch of orange zest can provide a bright, citrusy hint.
- Coffee Kick: For an even deeper chocolate flavor that’s subtly enhanced, add a teaspoon of instant espresso powder or finely ground coffee to the cookie batter. Coffee naturally brings out the richness of chocolate.
- Alternate Fillings: While vanilla buttercream is classic, consider a tangy, rich cream cheese frosting for a delightful twist, or a peanut butter frosting for a popular flavor pairing.
- Mini Whoopie Pies: Create bite-sized versions by using a smaller cookie scoop (about 1 tablespoon of batter per cookie). These mini whoopie pies are perfect for parties, dessert platters, or as delicate treats.
- Decorative Touches: Elevate the visual appeal by rolling the edges of the filled whoopie pies in colorful sprinkles, mini chocolate chips, toasted shredded coconut, or a dusting of extra cocoa powder.
- Seasonal Inspirations: Adapt your whoopie pies to the seasons! Incorporate a teaspoon of pumpkin spice into the cookie batter or filling for a cozy autumn-inspired treat, or swap vanilla extract for a hint of cinnamon during the holidays.
Storage and Serving Suggestions for Optimal Enjoyment
Proper storage is key to keeping your homemade whoopie pies fresh, moist, and delicious for as long as possible:
- At Room Temperature: Whoopie pies can be stored in an airtight container at room temperature for up to 2-3 days. This method is ideal if your home environment isn’t overly warm.
- Refrigeration: For extended freshness, or if your kitchen tends to be warm, store your whoopie pies in an airtight container in the refrigerator for up to a week. For the best texture and flavor, allow them to come to room temperature for about 15-30 minutes before serving.
- Freezing: Both unfrosted cookies and fully assembled whoopie pies can be frozen.
- Unfrosted Cookies: Place cooled cookie halves in an airtight container with parchment paper between layers and freeze for up to 3 months. Thaw them at room temperature before filling.
- Filled Whoopie Pies: Individually wrap each filled whoopie pie tightly in plastic wrap, then place them in an airtight freezer-safe container or bag. They can be frozen for up to a month. Thaw them in the refrigerator overnight or at room temperature for a few hours before serving.
Serve these delightful whoopie pies alongside a tall glass of cold milk, a warm cup of coffee or tea, or as a standalone dessert at any gathering. They are truly perfect for birthdays, potlucks, bake sales, holiday parties, or simply as a well-deserved, comforting treat after a long day.
This comprehensive recipe for homemade chocolate whoopie pies promises a truly satisfying baking experience and an even more delightful eating experience. With their soft, cake-like texture and luscious, creamy filling, they are destined to become a beloved staple in your recipe collection. Don’t hesitate – gather your ingredients and embark on the journey of baking these irresistible treats today!