
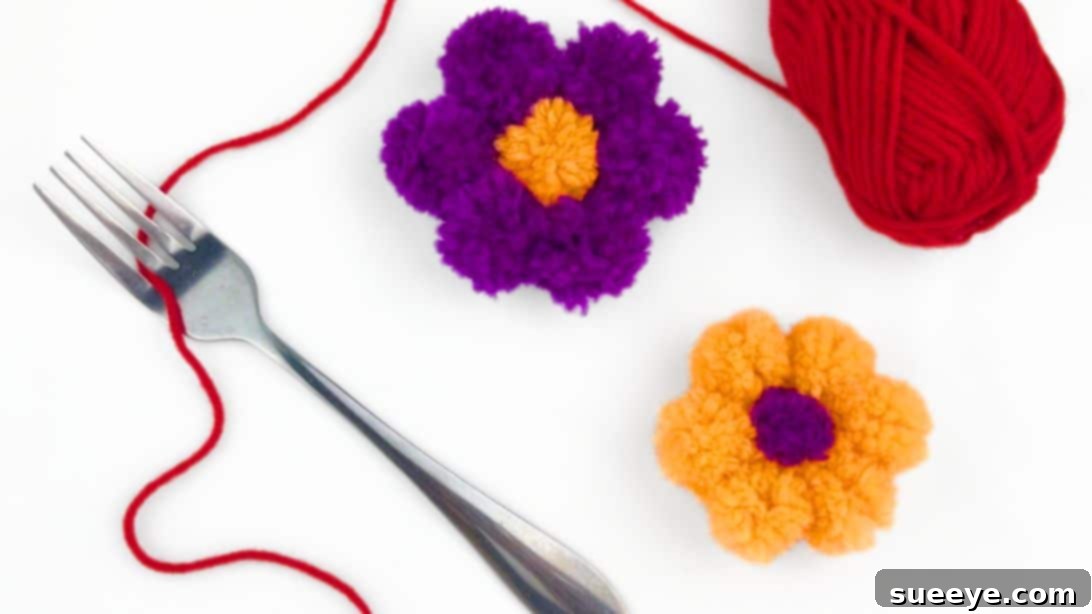
Welcome to the wonderful world of easy DIY projects! If you’ve been searching for cute, incredibly simple, and rewarding yarn craft ideas, then look no further. This charming pom pom flower project is precisely what you’ve been waiting for. Forget about complicated tools or expensive supplies; this delightful DIY only requires items you likely already have tucked away in your kitchen drawer and stationery box: a simple fork and an ordinary paper clip. We’re about to embark on a creative journey where I’ll guide you through making vibrant, colorful pom pom flowers that are perfect for adding a touch of handmade beauty to any space.
This craft is not only exceptionally cheap to make but also incredibly fun and perfect for crafters of all skill levels. If you’re a complete beginner and have never picked up a crochet hook, there’s absolutely no need to worry! This project is entirely crochet-free, focusing on straightforward wrapping and tying techniques. It’s a fantastic way to introduce yourself to yarn crafts or to enjoy a relaxing, meditative activity. Our detailed video tutorial, linked further down, provides clear, step-by-step instructions, ensuring your crafting experience is smooth and enjoyable from start to finish. Get ready to transform basic yarn into beautiful floral creations!
RELATED: Cute Jellyfish Yarn DIY: Another Adorable Yarn Project
Before we dive into making these lovely flowers, let’s briefly celebrate the star of our show: the humble pom pom. Pom poms are those wonderfully fluffy, spherical balls made from yarn, renowned for their incredible versatility and charm. They are much more than just decorative accents; they are a gateway to endless creative possibilities! From adding a playful touch to home decor to personalizing accessories and creating unique gifts, pom poms can do it all. Imagine using them to decorate your throw pillows, adding texture and color to rugs, creating whimsical curtain tie-backs, or embellishing hats, bags, and even children’s toys. The potential for these small, fuzzy wonders is truly limitless.
Beyond simple embellishments, pom poms are ideal for crafting larger items like adorable stuffed animals, intricate flowers (like the ones we’re making today!), or festive garlands that can brighten any celebration. They’re fantastic for seasonal decor, party backdrops, or adding a handmade touch to nursery rooms. Their soft texture and vibrant colors make them appealing to all ages, encouraging creativity and imaginative play. With just a little yarn and a few simple techniques, you can transform these versatile little balls into stunning works of art and practical, charming items for your home and wardrobe.
Essential Materials for Crafting Beautiful Pom Pom Flowers
Gathering your materials is the first exciting step in any crafting adventure. For this easy pom pom flower DIY, you’ll be pleased to know that the supply list is short, inexpensive, and readily available. Here’s what you’ll need to create your vibrant yarn blossoms:
- Fork: Any standard dinner fork will do! This kitchen utensil will serve as your primary tool for wrapping the yarn and forming the initial pom pom shape. The tines provide the perfect guide for consistent loops.
- Yarn (2 colors): We recommend using two complementary or contrasting colors to create a visually appealing flower, with one color for the petals and another for the center. Acrylic yarn is an excellent choice for beginners as it’s affordable, comes in a vast array of colors, and is easy to work with. Experiment with different yarn weights for varied pom pom sizes and textures.
- Tape: A small piece of adhesive tape will be used to secure your DIY yarn needle, making the assembly process much smoother. Standard Scotch tape or masking tape works perfectly.
- Paper Clip: A regular metal paper clip will be ingeniously transformed into a flexible yarn needle, allowing you to easily thread and connect your pom poms.
- Scissors: A sharp pair of scissors is crucial for cutting yarn cleanly, trimming your pom poms into perfect spheres, and tidying up any loose ends. Crafting scissors are ideal, but any sharp pair will suffice.
That’s it! With these simple items, you’re all set to begin creating your gorgeous handmade pom pom flowers. It’s a testament to how creative you can be with everyday objects!
Step-by-Step DIY Pom Pom Flower Tutorial: Crafting Your Yarn Blooms
Follow these easy steps to craft your beautiful pom pom flowers. We’ve broken down each part of the process to ensure a smooth and enjoyable crafting experience, even for absolute beginners. Let’s get started!
Step 1: Prepare Your Fork for Yarn Wrapping
Begin by taking your chosen yarn color for the petals. Carefully insert the end of the yarn between the two middle tines of your fork. This initial placement is important as it will help secure the yarn and provide a starting point for your wrapping, ensuring the subsequent steps are simpler and more efficient. Make sure to leave a tail of a few inches hanging from the back.
Step 2: Wrap the Yarn for Pom Pom Volume
Now, meticulously wrap the yarn around all four tines of the fork. Aim for approximately 30 repetitions. The key here is to maintain an even tension and consistent wrapping. A tighter wrap will result in a denser, fuller pom pom, while a looser wrap might create a sparser effect. Counting your wraps ensures uniformity across all your pom poms, leading to beautifully consistent flower petals.
Step 3: Secure the Wrapped Yarn
Once you’ve completed your 30 wraps, carefully cut the working yarn, leaving another tail. Then, take the initial tail you left in Step 1 and the tail from the cut yarn. Tie these two ends together securely over the wrapped yarn, creating a snug knot. This action begins to define the center of your future pom pom, holding all the loops in place. A double knot is recommended for extra security.
Step 4: Create the Pom Pom’s Core Tie
Gently slide the wrapped yarn slightly down the fork tines, creating a small gap. Take a separate, smaller piece of yarn (about 6-8 inches long) and carefully thread it between the middle two fork tines, underneath the main wrapped section. Bring the ends of this small piece of yarn up and tie them tightly around the center of the wrapped loops, as shown in the accompanying photo. This central tie is crucial for holding all the individual strands together, forming the core of your pom pom.
Step 5: Release from the Fork
With the center tie firmly in place, you can now carefully slide the entire yarn assembly off the fork. It should resemble a figure-eight shape with a tight knot in the middle. At this stage, it doesn’t look like a pom pom yet, but the foundation is complete. Ensure the central tie remains secure.
Step 6: Cut the Yarn Loops
Now comes the satisfying part where your pom pom starts to take shape! Using your sharp scissors, carefully cut through all the yarn loops on both sides of the central tie. Take your time with this step to ensure all loops are cut. This action releases the individual strands, allowing them to fan out and create the characteristic fluffy texture of a pom pom.
Step 7: Fluff and Shape Your Pom Pom
Once all the loops are cut, it’s time to fluff your pom pom! Gently use the tines of your fork, or even your fingers, to separate and fluff out all the yarn strands. This helps create a full, round, and bouncy pom pom. Don’t be shy; really work those strands to maximize the fluffiness. The more you fluff, the denser and more appealing your pom pom will be.
Step 8: Trim for a Perfect Sphere
To achieve a perfectly round and uniform pom pom, hold it gently and use your scissors to trim any uneven or excessively long strands. Rotate the pom pom as you trim, aiming for a consistent spherical shape. This step allows you to refine its appearance, making it look professional and neat. Don’t worry if you cut off quite a bit – that’s often necessary for a perfectly dense and tidy pom pom.
Step 9: Create All Your Pom Pom Elements
For each pom pom flower, you will need a total of seven pom poms: one for the center (preferably in a contrasting color) and six for the surrounding petals. Repeat Steps 1 through 8 to create all seven pom poms. Ensure they are all roughly the same size for a balanced flower, with the center pom pom being slightly smaller if you desire a distinct look. Consistency in size and fluffiness will result in a more attractive final product.
Step 10: Fashion Your DIY Yarn Needle
Now, let’s create a clever tool for assembly! Take your paper clip and straighten it out as much as you can, forming a long, thin wire. Then, create a small loop at one end and secure it with a piece of tape. This loop will act as the eye of your makeshift yarn needle. This DIY needle will be flexible yet sturdy enough to thread through your pom poms, making the next steps incredibly simple.
Step 11: Thread the Petal Pom Poms
Take your six petal pom poms. Thread a long piece of yarn (approximately 12-18 inches) through the eye of your DIY paperclip needle. Then, carefully pierce the needle through the center of each of the six petal pom poms, one by one. Arrange them in a circular pattern as you thread them, making sure they sit snugly next to each other, forming the outer layer of your flower. Leave generous tails of yarn on both ends of your threaded string.
Step 12: Secure the Petal Ring
Once all six petal pom poms are threaded onto the yarn, bring the two ends of the yarn together and tie them tightly. This will cinch the pom poms into a circular shape, forming the outer ring of your flower. Secure with a double knot to prevent unraveling. After tying, trim any excessively long yarn tails, but leave enough to work with if you need to make further adjustments or attach your flower to something else. This creates a solid foundation for your flower.
Step 13: Attach the Center Pom Pom
Finally, take your seventh pom pom, the one designated for the center, and carefully place it into the middle of your petal ring. Use a new piece of yarn, thread it through the center pom pom with your DIY needle, and then pass the ends through the gaps in the petal ring to secure it to the other pom poms. Tie these ends firmly at the back of the flower. This final step brings all the elements together, completing your beautiful, fluffy pom pom flower. Trim any remaining excess yarn, and admire your handmade creation!

Expert Crafting Tips for Perfect Pom Pom Flowers
Achieving the perfect pom pom is key to beautiful yarn flowers. Always wrap the yarn tightly and evenly around the fork. This consistent tension will create a fuller, denser, and more uniform pom pom, giving your flowers a plush, professional look. Don’t be afraid to over-wrap slightly, as this helps compensate for any trimming.
For an even fluffier result, gently comb through your finished pom pom with a fine-toothed comb or brush before the final trim. This helps separate the individual strands and enhances their volume. When trimming, hold the pom pom firmly and use sharp scissors to make precise cuts, rotating the pom pom constantly to ensure a perfectly round shape. Experiment with different yarn weights and textures, such as chunky or variegated yarns, to create unique and interesting flower variations.
Consider using different fork sizes for varied pom pom diameters. A smaller dessert fork will yield tiny, delicate pom poms, while a larger serving fork can create grander blooms. Play with contrasting colors not just for the center and petals, but also by mixing two colors within the same pom pom by wrapping them together. The possibilities are truly endless once you master the basic technique!
Watch the Full Fork Pom Pom Flowers Tutorial | YouTube
For a comprehensive visual guide, make sure to watch our detailed YouTube tutorial. It provides real-time demonstrations of each step, ensuring you can follow along with confidence and create stunning pom pom flowers with ease. Simply click the link or embedded video to start crafting!
Beyond the Basics: Creative Uses for Your Handmade Yarn Flowers
Once you’ve mastered the art of crafting these delightful pom pom flowers, you’ll find that their applications are incredibly diverse. They are perfect for adding a burst of color and charm to countless items and spaces. Consider creating a beautiful garland by stringing multiple flowers together, ideal for decorating a nursery, a party, or simply brightening a plain wall. Attach them to hair clips or headbands for a unique, personalized accessory, or transform them into adorable brooches to adorn jackets, bags, or scarves. Your DIY pom pom flowers can also serve as fantastic gift toppers, making any present feel extra special and thoughtful.
For home decor, these flowers can be glued onto picture frames, woven into wreaths, or used to embellish cushions and throw pillows, instantly elevating their aesthetic. They are also wonderful for seasonal decorations; imagine an autumn-themed wreath with orange and yellow pom pom flowers or a festive holiday display with red and green ones. Children will especially love these soft, playful flowers, whether as part of a craft project or as a charming addition to their play space. Let your imagination guide you, and explore all the creative ways you can incorporate these easy yarn crafts into your life and home!
Embracing the Joy of Easy Yarn Crafts
Crafting, especially with accessible materials like yarn, offers a multitude of benefits beyond just creating beautiful objects. Engaging in simple DIY projects like these pom pom flowers can be incredibly therapeutic, providing a mindful escape from daily stresses. The repetitive motion of wrapping yarn and the satisfaction of seeing a project come to life can significantly reduce anxiety and promote relaxation. It’s also a fantastic way to boost your creativity, encouraging you to experiment with colors, textures, and designs.
Moreover, these beginner-friendly crafts are excellent for developing fine motor skills and hand-eye coordination, making them ideal activities for both children and adults. There’s an immense sense of accomplishment that comes with making something beautiful with your own hands, and this project provides that satisfaction without a steep learning curve. So, whether you’re looking for a new hobby, a fun activity to do with kids, or simply a way to add a personal touch to your surroundings, diving into the world of easy yarn crafts, starting with these charming pom pom flowers, is a wonderful choice. Happy crafting!