
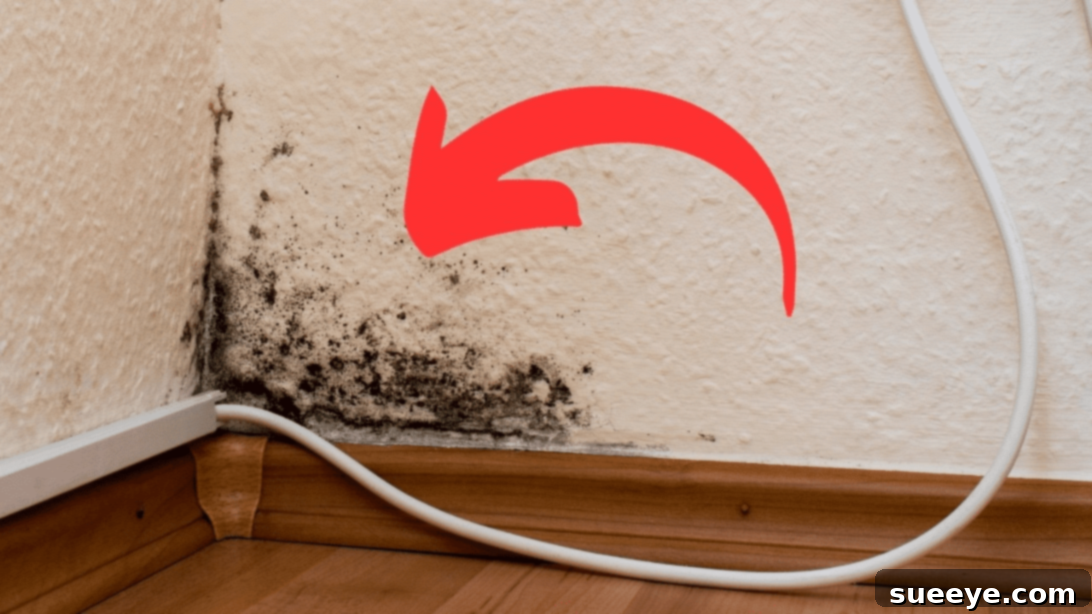
Mold is far more than just an unsightly stain on your walls or ceilings. This unwelcome guest in your home can pose significant health risks, ranging from respiratory issues and allergies to more severe conditions. Therefore, addressing mold growth as soon as it appears is not just about aesthetics; it’s about safeguarding your health and preserving the structural integrity of your home. While the thought of tackling mold might seem daunting, especially if you’re concerned about using harsh chemicals, the good news is that many mold infestations can be effectively managed with simple, natural, and homemade solutions. Maintaining a consistent cleaning routine and knowing which ingredients to use can empower you to keep your living spaces clean and healthy.
RELATED: A Quick & Permanent Solution for Recurring Mold
The market is flooded with commercial mold removal products, all promising quick and effective results. However, these solutions often come with a hefty price tag, and some may not live up to their claims, leaving you frustrated and still dealing with the problem. Moreover, many commercial cleaners contain strong chemicals that can be harmful to your health and the environment if not used properly. Fortunately, there’s a growing movement towards natural, DIY alternatives that are not only budget-friendly but also incredibly potent against mold. This comprehensive guide, inspired by the innovative methods shared by Clever Hacks on YouTube, will walk you through creating your own powerful mold removal solutions right at home, using everyday ingredients you likely already have in your pantry.
Understanding Mold: Why Early Intervention is Key
Mold is a type of fungus that thrives in damp, dark, and humid environments. It reproduces by releasing microscopic spores into the air, which can then settle on surfaces and begin to grow if conditions are favorable. Common culprits for mold growth include leaky pipes, excessive humidity, poor ventilation, and water damage. Beyond its visual unpleasantness, mold can trigger a range of health problems:
- Allergies and Asthma: Mold spores are common allergens, causing symptoms like sneezing, runny nose, red eyes, skin rash, and even asthma attacks in sensitive individuals.
- Respiratory Issues: Prolonged exposure to mold can lead to coughing, wheezing, and difficulty breathing, particularly in infants, elderly individuals, and those with compromised immune systems.
- Irritation: Direct contact or airborne spores can irritate the eyes, skin, nose, throat, and lungs.
- Mycotoxins: Some molds produce toxic substances called mycotoxins, which can lead to more severe health effects, though this is less common with typical household mold growth.
Given these risks, acting swiftly at the first sign of mold is crucial. Small patches of mold are much easier to tackle than widespread infestations, which might require professional remediation.
Your Essential DIY Mold Removal Arsenal: Natural Ingredients
Before diving into the methods, let’s gather the powerful natural ingredients that will form the backbone of your homemade mold removal solutions. These items are readily available and boast impressive antimicrobial and antifungal properties:
- Lemon: A natural acid and disinfectant with a refreshing scent.
- Vinegar (White Distilled): Highly acidic, known to kill 82% of mold species.
- Cloves: While not listed in the methods provided in the original content, cloves are known for their powerful antifungal properties, and could potentially be used as an additive in some DIY solutions for an extra punch. However, for the methods described here, we will focus on the ingredients explicitly mentioned.
- Granulated Garlic: Contains allicin, a compound with strong antifungal and antibacterial properties.
- Hydrogen Peroxide (3% solution): A powerful oxidizer that kills mold and lightens stains.
- Tea Tree Oil: A potent natural fungicide and antibacterial agent, excellent for preventing mold regrowth.
- Salt: Useful for cleaning tools and as a mild abrasive.
- Boiling Water: An effective sterilizer for cleaning tools.
Safety First: Preparing for Mold Remediation
Even when using natural solutions, it’s essential to protect yourself during mold removal. Mold spores can become airborne during cleaning, and direct contact can cause irritation. Always follow these safety guidelines:
- Ventilation: Open windows and doors to ensure good airflow. If possible, use a fan to direct air outwards.
- Personal Protective Equipment (PPE):
- Gloves: Wear rubber or nitrile gloves to protect your hands.
- Mask: Use an N95 respirator mask to prevent inhaling mold spores.
- Eye Protection: Safety goggles will protect your eyes from splashes and airborne spores.
- Protect Surrounding Areas: Cover nearby furniture or surfaces with plastic sheeting if you’re concerned about splashes or drips.
- Test Spot: Always test any new cleaning solution on an inconspicuous area first to ensure it doesn’t damage or discolor the surface.
Effective DIY Hacks for Removing Harmful Mold
Method #1: The Lemon & Garlic Power Blend (For Lighter Mold)
This ingenious combination harnesses the natural acidity of lemons and the potent antifungal properties of garlic to create a surprisingly effective mold-fighting spray. It’s particularly great for lighter mold growth and leaves a fresh citrus scent.
Ingredients:
- 2-3 fresh lemons
- 1 teaspoon granulated garlic
- Spray bottle
- Fine mesh strainer
Step-by-Step Instructions:
- Prepare the Lemons: Take 2 to 3 fresh lemons. To maximize juice extraction, firmly roll each lemon back and forth on a hard surface with the palm of your hand for about 30 seconds. This action breaks down the internal membranes, making it easier to squeeze out more juice.
- Extract Juice: Cut the lemons in half and squeeze out all the juice into a clean bowl or container. Ensure no seeds fall into the juice.
- Add Garlic: Stir in a teaspoon of granulated garlic into the lemon juice. The granulated form ensures even distribution and prevents clogging the spray bottle, while still releasing its active compounds.
- Mix Thoroughly: Whisk the lemon juice and granulated garlic together until well combined. Allow it to sit for a few minutes to let the garlic infuse into the lemon juice.
- Strain the Mixture: Carefully strain the mixture through a fine mesh strainer directly into your spray bottle. This step is crucial to remove any garlic particles or lemon pulp that could clog the spray nozzle.
- Apply the Solution: Generously spray this natural solution onto areas affected by mold or fungi. Ensure the mold is completely saturated.
- Dwell Time: Allow the solution to sit for at least 15-30 minutes, or even longer for more stubborn mold. The acids and active compounds need time to penetrate and break down the mold.
- Scrub and Wipe: Using a stiff brush or an old toothbrush, scrub the treated area thoroughly. Once the mold has loosened, wipe the surface clean with a damp cloth. For heavily soiled areas, you may need to repeat the application and scrubbing process.
This method is ideal for bathroom tiles, kitchen counters, and other non-porous surfaces with mild mold growth.
Method #2: The Triple Threat: Vinegar, Hydrogen Peroxide & Tea Tree Oil (For Moderate to Stubborn Mold)
This powerful combination brings together three formidable natural agents, creating a robust solution capable of tackling more persistent mold growth. Each ingredient plays a crucial role in eradicating mold and inhibiting its return.
Ingredients:
- White distilled vinegar
- 3% hydrogen peroxide solution
- Tea tree oil
- Spray bottle
- Optional: Dish soap
Step-by-Step Instructions:
- Prepare the Base Solution: In a clean spray bottle, mix equal amounts of white distilled vinegar and 3% hydrogen peroxide. For example, if you use 1 cup of vinegar, add 1 cup of hydrogen peroxide. Avoid mixing these two ingredients and storing them for long periods, as their effectiveness can diminish, and in some rare cases, they can react. It’s best to mix fresh batches as needed.
- Add Tea Tree Oil: Incorporate a few drops (around 10-15 drops per cup of solution) of tea tree oil. Tea tree oil is a powerful natural antifungal, antibacterial, and antiviral agent, making it an excellent addition for both killing mold and preventing its regrowth.
- Shake Well: Secure the spray bottle cap and shake well to ensure all ingredients are thoroughly mixed.
- Apply to Moldy Areas: Spray the solution liberally onto the mold-affected surfaces, ensuring complete saturation.
- Allow to Dwell: Let the solution sit on the mold for at least 30 minutes to an hour. For very stubborn mold, you can leave it even longer, up to a few hours. The longer dwell time allows the active ingredients to penetrate the mold spores and kill them.
- Scrub and Clean: After the dwell time, scrub the area with a brush or sponge to remove the dead mold. Wipe the surface clean with a damp cloth and then dry thoroughly to prevent new mold growth.
Alternative within Method #2: Vinegar & Dish Soap Boost (For Surface Mold)
For surface mold that needs a little extra lifting power, combining vinegar with dish soap is an excellent, gentler option. The dish soap helps to break down the mold’s surface tension, allowing the vinegar to penetrate more effectively.
- Mix Solution: In a spray bottle, combine white distilled vinegar with a few squirts of dish soap (about 1 part dish soap to 4-5 parts vinegar).
- Apply and Leave: Spray this mixture onto the moldy area. Instead of immediately scrubbing, leave it on for several days. This extended contact time allows the vinegar to work deeply and the soap to loosen the grime.
- Brush and Rinse: After several days, brush the area vigorously. You’ll find the mold is much easier to remove. Rinse the surface clean with water or simply wipe it thoroughly with a damp cloth until all residue is gone. Dry the area completely.
This method is particularly effective for larger, but not deeply ingrained, mold spots on surfaces that can tolerate longer exposure to the solution.
Bonus Tip: Sanitizing Your Cleaning Tools (The Key to Preventing Cross-Contamination)
Once you’ve finished battling mold, don’t neglect your cleaning tools! Sponges, brushes, and scrubbers can harbor mold spores and bacteria, leading to cross-contamination or rendering your tools ineffective for future use. This simple sanitization hack ensures your tools are clean and ready for their next task.
Ingredients:
- Generous amount of salt
- Boiling water
- Bowl or container
Step-by-Step Instructions:
- Gather Tools: Collect all the sponges, scrubbers, and brushes you’ve used for mold removal.
- Place in Bowl: Put all the cleaning tools into a heat-resistant bowl or container.
- Add Salt: Sprinkle a generous amount of salt over the tools. Salt acts as an abrasive and helps to draw out moisture and debris.
- Pour Boiling Water: Carefully pour boiling water into the bowl until all the cleaning tools are fully submerged. The high temperature of the water will kill most bacteria and mold spores.
- Soak Time: Leave the tools to soak in the hot, salty water for a few minutes. This allows the heat and salt to thoroughly sanitize them.
- Squeeze and Discard: Once the water has cooled enough to handle safely, carefully squeeze out the liquid from each tool. You’ll notice the water is dirty, indicating the cleaning process has worked. Discard the dirty water.
- Dry Thoroughly: Rinse the tools under clean running water, then allow them to air dry completely. Ensuring they are fully dry before storing prevents new mold or mildew from forming on the tools themselves.
Your cleaning tools will now be hygienic and ready for future use, preventing the spread of mold to other areas of your home.
Beyond Removal: Proactive Mold Prevention Strategies
Removing existing mold is only half the battle. To truly keep your home healthy and mold-free, you must address the underlying causes of mold growth. Implementing consistent prevention strategies will save you time, effort, and potential health issues in the long run.
1. Control Moisture and Humidity
- Fix Leaks Promptly: Inspect pipes, roofs, windows, and foundations regularly for leaks. Even small drips can create perfect breeding grounds for mold. Address any water damage immediately.
- Use Dehumidifiers: In naturally damp areas like basements, crawl spaces, and certain bathrooms, use a dehumidifier to keep humidity levels below 60%. An ideal range is between 30-50%.
- Ensure Proper Ventilation:
- Bathrooms: Always use exhaust fans during showers or baths and leave them running for at least 15-20 minutes afterward. If you don’t have an exhaust fan, open a window.
- Kitchens: Use exhaust fans when cooking, especially when boiling water or using a dishwasher, to vent steam and moisture.
- Laundry Rooms: Ensure your dryer vents outside, not into an attic or crawl space, and clean the vent regularly.
- Dry Wet Areas Immediately: Wipe down shower walls and doors after use. Clean up spills and dry wet floors or carpets within 24-48 hours.
2. Improve Air Circulation
- Open Windows: Regularly open windows and doors, especially on dry days, to allow fresh air to circulate and reduce indoor humidity.
- Rearrange Furniture: Avoid pushing furniture directly against cold outer walls, as this can trap moisture and create condensation, leading to mold growth behind items.
- Fans: Use ceiling fans or portable fans to improve air movement, especially in rooms prone to stuffiness.
3. Regular Cleaning and Maintenance
- Routine Cleaning: Clean bathrooms, kitchens, and other mold-prone areas regularly using your natural DIY solutions or a mild disinfectant. Pay special attention to grout lines, shower curtains, and sink areas.
- Clean Gutters: Ensure your exterior gutters are clear and functioning correctly to direct rainwater away from your foundation.
- Trim Outdoor Plants: Keep bushes and trees trimmed away from your home’s foundation to allow sunlight to reach the walls and promote airflow, discouraging moisture buildup.
4. Address Building Materials and Insulation
- Mold-Resistant Products: When undertaking renovations, consider using mold-resistant drywall, paint, and insulation in areas susceptible to moisture, such as bathrooms and basements.
- Proper Insulation: Ensure adequate insulation in walls and attics to prevent condensation, which occurs when warm, moist air meets cold surfaces.
Final Thoughts: Empowering Your Home Against Mold
Tackling mold doesn’t have to be a scary or expensive endeavor. By understanding the nature of mold, prioritizing safety, and utilizing these clever DIY hacks from Clever Hacks, you can effectively eliminate existing mold and put robust prevention strategies in place. Remember, consistency is key—regular checks and proactive measures are your best defense against this common household nuisance. While these natural solutions are incredibly effective for small to moderate mold problems, always remember to consult a professional if you encounter extensive mold growth (an area larger than 10 square feet), suspect hidden mold, or if anyone in your household experiences persistent health issues related to mold exposure.
Empower yourself with these simple yet powerful techniques, and enjoy a cleaner, healthier, and mold-free home!
*All image credit belongs to Clever Hacks via YouTube. Follow and subscribe to their channel for more!