
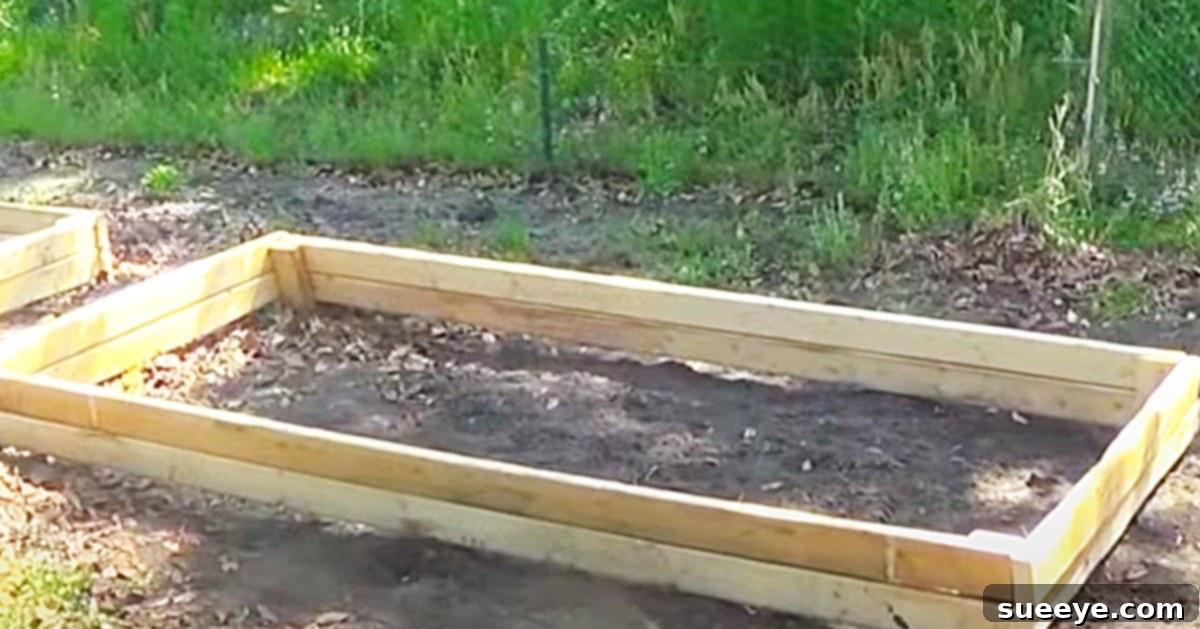
How To Make A $15 Raised Garden Bed: Your Ultimate Guide to Affordable DIY Gardening
Embarking on a gardening journey is a profoundly rewarding experience, transforming a simple patch of earth into a vibrant source of fresh produce and a peaceful retreat. As more people discover the joy of growing their own food, the popularity of home vegetable gardens continues to soar. Among the myriad ways to cultivate a garden, building a raised bed stands out as a favored method, offering numerous advantages from improved soil control to easier accessibility. While many assume that creating a beautiful and functional raised garden bed requires a significant investment, this couldn’t be further from the truth. With a clever approach and a few readily available materials, you can construct an attractive and highly efficient raised bed for as little as $15.
My own gardening adventures have led me down various paths, exploring different designs and materials. I recently completed a cinder block raised bed, an incredibly straightforward project that yielded a sturdy and visually appealing structure. However, my yard still called for a wooden bed, specifically to nestle into a sunny spot between the house and the fence – a perfect location for sun-loving vegetables. Driven by a desire to keep costs low without compromising on quality or aesthetics, I began searching online for budget-friendly ideas. It was during this quest that I stumbled upon an ingenious solution: a wooden raised garden bed video tutorial by The Crafty Gemini on YouTube. This tutorial promised a robust and charming raised bed for an astonishingly low price of just $15, making it an irresistible project for any aspiring or seasoned gardener on a budget.
Why Choose a Raised Garden Bed for Your Home Garden?
Raised garden beds have become a cornerstone of modern home gardening for several compelling reasons, making them an excellent choice for both beginners and experienced cultivators alike. Understanding these benefits can help you appreciate why investing a little time into building one, especially an affordable option like this $15 bed, is a decision you won’t regret:
- Superior Soil Control: Unlike in-ground gardens, raised beds allow you to create the perfect soil mix tailored to your plants’ needs. You can fill them with a rich blend of compost, topsoil, and amendments, ensuring optimal drainage and nutrient availability right from the start.
- Improved Drainage: Raised beds naturally offer better drainage than traditional in-ground plots, which is crucial for preventing root rot and promoting healthy plant growth, especially in areas with heavy clay soil.
- Extended Growing Season: The soil in raised beds tends to warm up faster in the spring and stay warmer longer into the fall, effectively extending your growing season and allowing for earlier planting and later harvests.
- Reduced Pests and Weeds: The elevated nature of raised beds makes it more difficult for ground-dwelling pests to access your plants. Additionally, the contained environment helps to minimize weed seeds from blowing in, significantly reducing weeding chores.
- Ergonomic Gardening: The height of a raised bed reduces the need for bending and kneeling, making gardening more comfortable and accessible, especially for individuals with mobility challenges.
- Defined Garden Space: Raised beds provide clear boundaries for your garden, creating a neat and organized appearance in your yard. They also help prevent soil compaction from foot traffic.
- Versatility and Mobility: While this particular design is meant to be somewhat permanent, many raised beds offer a degree of versatility. You can often expand them or even relocate them if your garden needs change over time.
Considering these advantages, it’s clear why raised beds are a popular choice. And when you can build one for a mere $15, the barriers to entry for starting your own thriving home garden become virtually nonexistent.
Materials For Your $15 Raised Garden Bed: Simplicity and Affordability
The beauty of this project lies in its simplicity and the minimal materials required. The Crafty Gemini’s design is brilliant in its cost-effectiveness, proving that you don’t need expensive lumber or complicated joinery to create a sturdy and attractive raised bed. Here’s what you’ll need to gather:
- Two (2) 2x8x8 Footboards: These are the main components of your raised bed. When selecting your lumber, opt for untreated wood if you plan to grow edible plants, as treated wood can leach chemicals into the soil. Pine or fir are common, affordable options. The “2×8” refers to the dimensions (approximately 1.5 inches thick by 7.25 inches wide when milled), and “8 foot” is the length. These two boards will form the perimeter of your garden bed.
- Four (4) Wood Chunks of 2×4 (cut to the width of your board): These 2×4 pieces will serve as corner braces, providing structural integrity and a strong point for fastening the sides. You can buy a single 8-foot 2×4 and cut it into four smaller pieces. Each chunk should be cut to approximately the width of your 2×8 boards (around 7.25 inches). Make sure they are uniform in length for a square and sturdy bed.
- Exterior-Grade Wood Screws: You’ll need screws that are long enough to pass through the 2×8 board and securely into the 2×4 corner brace (at least 2.5 to 3 inches long). Choose exterior-grade screws (e.g., galvanized, ceramic coated, or stainless steel) to resist rust and corrosion, ensuring the longevity of your raised bed, especially since it will be exposed to moisture.
- A Drill: An electric drill is essential for driving the screws quickly and efficiently. Make sure your drill battery is charged if it’s cordless.
- Screwdriver Drill Bit: You’ll need a bit that matches the head type of your wood screws (e.g., Phillips, square, or Torx). Using the correct bit prevents stripping the screw heads.
Additional Recommended Tools and Materials (not included in the $15 estimate but highly useful):
- Measuring Tape: For accurate cutting and placement of boards.
- Pencil: For marking cut lines and screw locations.
- Saw: If your lumber store doesn’t cut the 2x4s for you, you’ll need a hand saw, circular saw, or miter saw to cut them to size.
- Safety Glasses and Gloves: Always prioritize safety when working with power tools and lumber.
Directions: Constructing Your Inexpensive Raised Garden Bed
The construction process for this $15 raised garden bed is remarkably straightforward, making it an ideal project for DIY enthusiasts of all skill levels. While the core instructions are brilliantly demonstrated in The Crafty Gemini’s video tutorial on YouTube, we can outline the key steps to give you a clear understanding of the process:
Step 1: Prepare Your Materials
Before you begin assembly, ensure all your materials are ready. If you purchased an 8-foot 2×4, you’ll need to cut it into four equal 2×4 chunks, each roughly 7.25 inches long (the width of your 2×8 boards). If your lumber supplier did this for you, great! Lay out your two 8-foot 2×8 boards on a flat, stable surface, preferably where you plan to build the bed or a workshop with ample space.
Step 2: Form the Perimeter
The design utilizes the two 8-foot 2×8 boards to create a simple rectangular frame. You will essentially cut one of the 8-foot boards into two 4-foot sections. This will give you two 8-foot pieces and two 4-foot pieces. These four pieces will form the four sides of your raised bed. Arrange them into a rectangle on the ground. Ensure the corners meet squarely. If you want a different size bed, you can adjust the cuts accordingly, but for a simple 8×4 foot bed, this is the most straightforward approach.
Step 3: Position the Corner Braces
Take one of your pre-cut 2×4 wood chunks and place it vertically in one of the inside corners of your rectangular frame. The 2×4 chunk should be flush with the top edge of the 2×8 boards and positioned snugly into the corner, providing a solid anchor point for both adjacent boards. Repeat this for all four corners.
Step 4: Bolt the Garden Bed Together with Screws
Once the 2×4 corner braces are in place, it’s time to secure the frame. Using your drill and the appropriate screwdriver bit, drive the exterior-grade wood screws through the 2×8 boards and into the 2×4 corner braces. It’s recommended to pre-drill pilot holes if you are concerned about splitting the wood, especially with softer woods like pine. Aim for at least two screws per board per corner brace, one near the top and one near the bottom, to ensure maximum stability. This process effectively “bolts” the garden bed together, creating a strong and durable structure.
Step 5: Choose Your Location
With the basic frame assembled, carefully move your raised bed to its desired permanent location in your yard. When choosing a spot, consider these vital factors:
- Sunlight: Most vegetables require at least 6-8 hours of direct sunlight per day. Observe your yard throughout the day to find the sunniest spot.
- Water Access: Position your bed close enough to a water source (like a hose spigot) for easy irrigation.
- Level Ground: While raised beds can help with uneven ground, starting on a relatively level surface will make the bed more stable and prevent soil from washing out.
- Accessibility: Ensure you can easily walk around the bed for planting, weeding, and harvesting without stepping on the soil within the bed.
Step 6: Prepare and Fill Your Raised Bed
Now comes the exciting part – filling your raised bed! This is where you lay the foundation for a flourishing garden. Here’s a recommended layering strategy:
- Bottom Layer (Drainage & Weed Barrier): Place a layer of cardboard or several sheets of newspaper at the bottom of your bed. This will suppress weeds and grass underneath while slowly breaking down, adding organic matter. Avoid glossy or heavily dyed cardboard.
- “Hugelkultur” Layer (Optional but Recommended): For even better drainage and long-term fertility, you can add a layer of twigs, small branches, and leaves. This mimics a natural decomposition process and helps retain moisture.
- Compost and Organic Matter: Add a generous layer of finished compost, kitchen scraps, grass clippings (untreated), or aged manure. This provides essential nutrients.
- Topsoil Mix: Fill the remaining space with a high-quality raised bed mix or a blend of garden soil, compost, and perlite/vermiculite for aeration. Aim for a mix that is rich in organic matter and drains well. Leave about an inch or two from the top edge to prevent soil from washing out when watering.
Cultivating Success: Tips for Your New Raised Garden Bed
Once your $15 raised bed is built and filled, you’re ready to plant! To ensure your garden thrives, consider these additional tips:
- Choose the Right Plants: Select vegetables, herbs, or flowers that are well-suited to your local climate and sunlight conditions. Consider companion planting for natural pest deterrence and improved growth.
- Watering Wisely: Raised beds can dry out faster than in-ground gardens. Monitor soil moisture regularly and water deeply, especially during dry spells. Drip irrigation or soaker hoses can be very efficient.
- Regular Feeding: As plants grow, they deplete soil nutrients. Supplement with organic fertilizers, compost tea, or regular top-dressings of compost to keep your soil rich and productive.
- Pest and Disease Management: Regularly inspect your plants for signs of pests or diseases. Address issues promptly using organic methods whenever possible, such as hand-picking pests, using neem oil, or introducing beneficial insects.
- Crop Rotation: If you plan to grow multiple seasons, rotate your crops each year to prevent nutrient depletion and reduce the buildup of soil-borne diseases.
The Enduring Appeal of DIY Gardening
This garden bed is not only easy and cute but also incredibly functional. Its simplicity means you can quickly build one or even several, expanding your gardening space without breaking the bank. The satisfaction of building something with your own hands, especially something that brings fresh food to your table, is immeasurable. The Crafty Gemini’s $15 raised garden bed tutorial exemplifies how accessible and enjoyable gardening can be, proving that a thriving vegetable garden doesn’t require a hefty investment or advanced carpentry skills. It merely requires a little ingenuity, a few basic materials, and the desire to cultivate something wonderful. I truly can’t wait to make one for myself and experience the bounty it promises.
Embrace the spirit of DIY, save money, and enjoy the incredible benefits of growing your own food in your very own, handmade raised garden bed!