
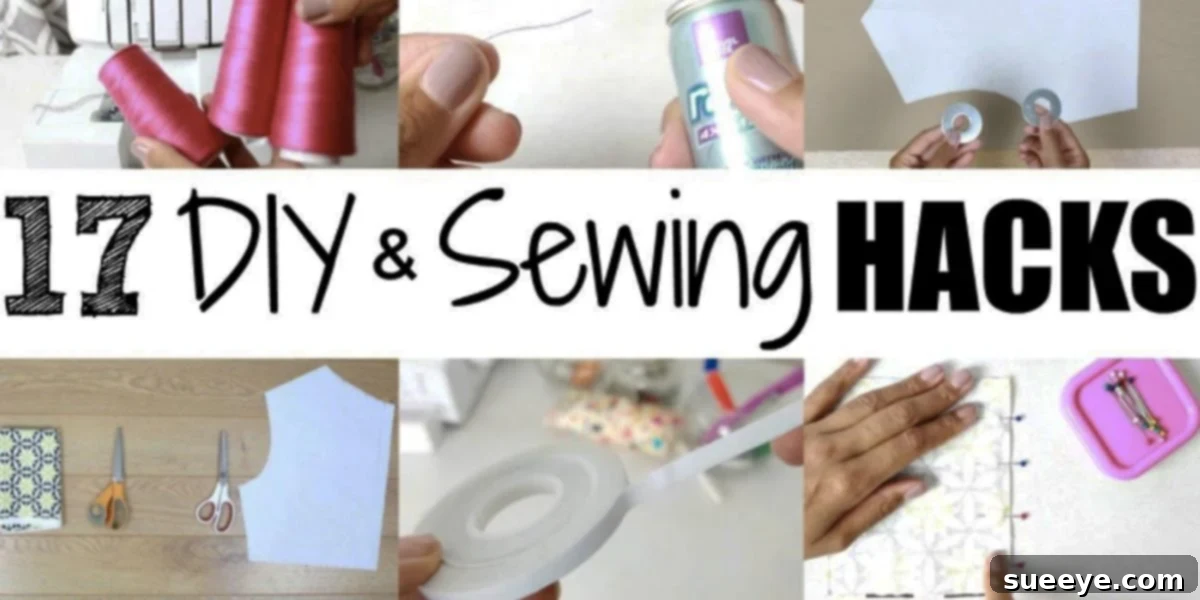
Master Your Sewing: Essential Hacks & Time-Saving Tips for Every Sewist
Every sewist, regardless of their experience level, shares a common goal: to make the creative process as smooth, efficient, and enjoyable as possible. We’re all constantly on the lookout for ingenious shortcuts and smart solutions that transform challenging tasks into effortless achievements. If you’re eager to enhance your sewing efficiency, minimize frustration, and elevate the quality of your finished projects, then you’ve arrived at the perfect destination. This comprehensive guide compiles an incredible collection of sewing hacks, many inspired by the brilliant insights shared by Nadira037, alongside additional tried-and-true techniques designed to get you from point A to point B with unparalleled speed and precision.
Nadira037 has generously unveiled some truly game-changing ideas that promise to save you precious time and effort in your sewing room, helping you sew smarter, not harder. Beyond these foundational tips, we will delve into a broader spectrum of practical advice, ensuring your entire sewing journey is as rewarding and hassle-free as possible. Prepare to discover practical, easy-to-implement strategies that will not only sharpen your craft but also reignite your passion for creating beautiful textiles. These clever solutions are poised to become indispensable staples in your sewing repertoire, empowering you to tackle any project with newfound confidence and skill. Let’s explore the secrets to smarter sewing!
Revolutionary Sewing Hacks to Transform Your Projects
1. Secure Leather & Delicate Fabrics with Clips, Not Pins
Working with premium or delicate materials like genuine leather, sleek vinyl, faux leather, or even water-resistant laminated fabrics presents a unique challenge: traditional sewing pins can be detrimental. The sharp puncture of a pin leaves permanent, unsightly holes that can irrevocably damage the fabric’s integrity, diminish its aesthetic appeal, and compromise the durability of your finished piece. This is precisely where the simple yet incredibly effective solution of using clips becomes an absolute game-changer. Rather than risking your exquisite materials, opt for tools that gently but firmly hold fabric pieces together without any penetration.
- The Pitfalls of Pins on Special Fabrics: Unlike woven cotton, materials like leather and vinyl have a distinct structure that does not “heal” or close up after being pierced. Once punctured, the hole remains, visibly marring the material. This issue also extends to waterproof fabrics where pinholes can compromise their protective barrier.
- The Superiority of Clips: Common office supplies like paper clips and binder clips, or specialized notions such as “Wonder Clips” (a favorite among quilters and sewists), are perfect alternatives. They exert gentle, consistent pressure, holding multiple layers securely without any piercing. This method is particularly crucial for edges that will remain visible in the finished garment or item, ensuring a pristine appearance.
- Versatility Beyond Leather: While clips are indispensable for leather, their utility extends to a wide range of challenging fabrics. They are invaluable for delicate silks and satins that might pucker with pins, bulky layers of fleece or canvas where pins struggle to penetrate, and even stretchy knits that can be distorted by traditional pinning.
- Added Benefits for Precision: Clips often provide a stronger, more even hold across a wider area compared to individual pins. This consistent grip is especially beneficial when dealing with thicker seams, binding multiple layers, or attaching trims, ensuring your fabric pieces remain perfectly aligned until you’re ready to stitch, leading to much more accurate sewing.
2. Conquer Fraying Thread Ends with a Touch of Hairspray
The universal frustration of a fraying thread end is something every sewist has encountered. Just when you’re poised to thread your needle, the fibers splay out, making the seemingly simple act of passing the thread through the needle’s eye a tedious, time-consuming, and often infuriating ordeal. This seemingly minor annoyance can quickly dampen your sewing enthusiasm and interrupt your flow. Fortunately, there’s a quick, ingenious, and readily available solution often found right in your bathroom cabinet: a simple spritz of hairspray.
- Understanding the Fraying Problem: Threads, particularly those made from natural fibers, are prone to unraveling at the cut end. This creates a fluffy, uncooperative tip that resists passing through the minuscule eye of a sewing needle, forcing you to repeatedly trim and try again.
- Hairspray to the Rescue: A quick, light spritz of hairspray onto the very tip of your thread acts as an instant, temporary stiffener. It effectively binds the individual fibers together, transforming the unruly end into a firm, pointed tip that slips through the needle’s eye with surprising ease and minimal effort.
- Simple Application Technique: Hold the thread end a few inches away from the hairspray can to avoid saturating it. Apply a tiny, fine mist, then gently roll or twist the thread end between your thumb and forefinger to form a neat, sharp point. Allow it to air dry for just a second or two, and your thread will be perfectly prepped for quick and effortless threading.
- Alternative Stiffening Solutions: If hairspray isn’t immediately at hand, several other common items can achieve a similar stiffening effect. A tiny dab of clear nail polish, a swipe of beeswax, or even running the thread through a thread conditioner can all help create that desired stiff, non-fraying point. The ultimate goal is to consolidate the thread fibers for easier handling.
3. Elevate Your Pattern Cutting with Hardware Store Washers as Weights
Achieving precise, accurate cuts is an absolutely fundamental step for the success and professional finish of any sewing project. Traditional methods often involve meticulously pinning paper patterns to fabric, a process that can be time-consuming, potentially lead to puckering or distortion, and even damage delicate materials by creating unwanted holes. Pattern weights offer a vastly superior alternative, and you don’t need to spend a fortune on specialized sewing notions. Your local hardware store holds the key to perfectly flat patterns and immaculate cuts: simple, inexpensive metal washers.
- The Pitfall of Pattern Pins: Pins can inadvertently shift the fabric or pattern piece, create small, permanent holes, and are tedious to insert and remove, especially on large or intricate pattern sections. They can also cause delicate fabrics to stretch or distort when pinned tightly.
- Why Pattern Weights Are Superior: Pattern weights apply even pressure to hold your pattern firmly in place against the fabric without piercing it. This stability allows for smoother, more precise cutting, particularly when using a rotary cutter which demands a completely flat and un-bunched surface.
- Washers as DIY Weights: Standard metal washers, readily available in various sizes and weights at any hardware store, are incredibly effective and remarkably economical. Their substantial weight is more than sufficient to keep even larger patterns from sliding or shifting, ensuring consistent and accurate cuts. The variety of sizes means you can choose weights appropriate for different pattern pieces.
- Personalization and Practicality: For a touch of personalization, you can easily customize your washer weights. Wrap them in coordinating fabric scraps, glue felt or cork to the bottom to protect delicate surfaces and prevent slipping, or paint them in cheerful colors to brighten your sewing space. This clever hack not only saves money but also ensures your fabrics remain pristine and perfectly aligned for cutting.
4. Keep Your Scissors Razor Sharp with a Simple Aluminum Foil Trick
Dull sewing scissors are a veritable nightmare for any sewist. They snag fabric, leave behind ragged, unprofessional edges, and transform what should be a precise, clean cut into a frustrating battle against resistant material. The quality of your cuts directly impacts the overall professional finish and fit of your sewing projects, making razor-sharp scissors an absolute, non-negotiable necessity. While professional sharpening is certainly an option for long-term maintenance, there’s a surprisingly simple, quick, and highly effective DIY hack using common household aluminum foil to keep your blades in top condition between sharpenings.
- The Critical Importance of Sharpness: Clean, crisp cuts are fundamental for accurate pattern pieces, which in turn lead to garments and sewn items that fit perfectly, drape beautifully, and have a polished appearance. Dull blades, on the other hand, can stretch, fray, and irreparably damage fabric, especially delicate or finely woven types, costing you time and material.
- The Aluminum Foil Sharpening Secret: The abrasive action generated by repeatedly cutting through multiple layers of aluminum foil works wonders by gently re-aligning and slightly refining the microscopic edges of your scissor blades. While it won’t restore severely damaged blades, it’s a fantastic method for maintaining and improving edge quality, keeping your scissors performing optimally for longer periods.
- How to Execute the Hack: Take a piece of standard aluminum foil, approximately 8-10 inches in length. Fold this piece several times over, creating a thick, multi-layered strip of foil. Using your dull sewing scissors, systematically cut narrow strips (about 1/4 to 1/2 inch wide) along the entire length of the folded foil. Repeat this cutting process several times – the more cuts you make, the better the effect. You’ll quickly notice a significant improvement in your scissors’ ability to cut cleanly and effortlessly.
- Essential Scissor Maintenance Tips: To extend the life and sharpness of your fabric scissors, always adhere to the golden rule: use dedicated fabric scissors ONLY for fabric. Never, under any circumstances, use them for paper, cardboard, plastics, or other non-fabric materials, as this is the fastest way to dull and damage their precision blades. Store them safely, ideally in a separate case or sheath, to prevent accidental nicks or damage.
5. Ensure Perfect Measurements Every Time: Attach a Tape Measure to Your Table
Accuracy is undeniably paramount in sewing. Even a slight deviation in measurement can cascade into significant problems, leading to ill-fitting garments, mismatched components, or projects that simply don’t come together as intended. Constantly searching for your tape measure, struggling to hold it steady while marking, or grappling with its unwieldy nature can be a significant time sink and a common source of measurement errors. A truly brilliant and surprisingly simple solution is to integrate your tape measure directly and permanently into your primary workspace.
- The Recurring Measurement Challenge: The repetitive cycle of picking up, precisely positioning, and carefully re-reading a loose, flexible tape measure introduces numerous opportunities for inconsistency and inevitably slows down your workflow. It also requires an extra hand, which is often needed for holding fabric.
- The Permanent Measurement Solution: Securely attach a flexible fabric or vinyl tape measure along a prominent edge or side of your cutting table, sewing machine extension table, or even your craft desk. This clever placement creates an always-present, hands-free measuring guide that is consistently exactly where you need it, eliminating the search and fumbling.
- Effective Attachment Methods: You can use strong double-sided fabric tape for a temporary but firm hold, a durable spray adhesive for a more permanent bond, or even small, strategically placed screws (if your table’s construction allows and you’re comfortable with it) to fix the tape measure in place. Crucially, ensure it’s perfectly straight and that the zero mark aligns with a convenient starting point for consistent measuring.
- Multifaceted Benefits for Precision: This indispensable hack provides an instant, visual reference for quick measurements of fabric lengths, pattern pieces, or project components. It’s incredibly helpful for squaring off fabric, measuring long lengths without interruption, and streamlining marking and even pressing tasks where precise dimensions are critical. It significantly improves efficiency and measurement accuracy across all your sewing activities.
6. Smooth Sailing for Dull Pins: The Simple Bar Soap Trick
Have you ever encountered the frustrating experience of struggling to push a straight pin through multiple layers of fabric, feeling significant resistance, and fearing you might snag or damage your precious material? Dull pins are a pervasive nuisance in any sewing room, making the essential act of pinning tedious, arduous, and potentially destructive. Before you consider discarding those troublesome pins, try a fantastically simple, inexpensive, and incredibly effective hack that will make them glide through fabric with remarkable ease: a piece of dry bar soap.
- The Problem with Weary Pins: Over time, the fine tips of straight pins can become dull, slightly bent, or accumulate microscopic residues from fabric softeners or starches. This degradation dramatically increases friction as you attempt to insert them, making pinning difficult and often leading to snagging or puckering, especially through dense, tightly woven, or delicate fabrics.
- Soap as a Miraculous Lubricant: The dry bar soap acts as an incredibly effective lubricant. As you poke the pin into the soap, it coats the pin with a tiny, invisible layer of residue that drastically reduces friction. This lubrication allows the pin to effortlessly pierce and glide through multiple layers of fabric without resistance, almost as if it were a brand-new, super-sharp pin.
- Effortless Application: To revive your collection of dull or sticky pins, simply poke each pin into a bar of dry, unused soap a few times. There’s no need to rub vigorously; just pushing the pin through the soap is sufficient for it to pick up an adequate amount of lubricating film. Ensure the soap is dry to avoid transferring moisture to your fabric.
- Immediate and Lasting Benefits: You will immediately notice a dramatic improvement in how much easier and smoother your pins penetrate even challenging fabrics. This simple trick not only saves you significant time and effort but also minimizes the risk of distorting your fabric, snagging delicate threads, or bending your pins. It’s a fantastic, eco-friendly way to extend the lifespan and utility of your existing pin collection, making every pinning task a breeze.
7. Achieve Consistent Seam Allowances with Two Pencils and a Rubber Band
Maintaining a consistent, uniform seam allowance is not just a detail; it’s a cornerstone of achieving professional-looking, well-fitting sewing projects. Uneven seam allowances can lead to crooked seams, mismatched garment pieces, and a finished item that simply doesn’t hang or fit correctly. For those moments when you need a quick, reliable, and perfectly parallel guide for a specific seam allowance, especially beneficial for beginners or for swift marking tasks, this ingenious pencil and rubber band hack is an absolute lifesaver, ensuring unparalleled accuracy.
- The Universal Seam Allowance Struggle: Freehand marking, or relying solely on the markings on your sewing machine’s throat plate, can sometimes lead to inconsistencies. This is particularly true when navigating curves, working with slippery fabrics, or attempting to mark quickly under pressure, resulting in variations that can impact the final outcome.
- The DIY Parallel Marker Creation: Take two standard graphite pencils and position them parallel to each other. Securely wrap a rubber band around their middle, ensuring they are held together firmly and maintain their parallel alignment. Carefully adjust the rubber band’s tension and the exact spacing between the pencil tips until they are precisely the distance apart that matches your desired seam allowance (e.g., 8mm, 1/4 inch, 1/2 inch, etc.). You might need to experiment a little with the rubber band’s position or try different sizes of rubber bands to achieve perfect spacing.
- Effortless Marking Technique: With your fabric laid flat and smoothed, place your homemade parallel marker on the fabric. Use one pencil tip to ride smoothly along the raw edge of your fabric, a previous stitch line, or the edge of a pattern piece. The second pencil tip will then effortlessly draw a perfectly parallel line at your desired, consistent seam allowance, ensuring remarkable uniformity and precision in your markings.
- Ideal Applications for Precision: This versatile hack is perfect for a multitude of tasks: accurately marking hem lines, creating uniform topstitching guides, precisely adding seam allowances to patterns you’ve drafted yourself, or simply for practicing straight-line stitching with a consistent guide. It provides a simple, highly visual, and exceptionally effective guide that dramatically improves the accuracy and neatness of your sewing, making every seam look professionally executed.
Beyond the Basics: More Smart Sewing Solutions for Every Crafter
While Nadira037’s brilliant tips provide an excellent foundation for enhancing your sewing efficiency, the expansive world of sewing offers endless opportunities for improvement and creative problem-solving. Here are a few additional tried-and-true hacks and techniques that will further streamline your process, reduce common frustrations, and significantly enhance your overall sewing experience, making it even more rewarding:
8. Organize Your Bobbins with Unparalleled Ease
Loose bobbins unwinding and creating a tangled mess of threads in your sewing drawer or notions box are a common source of annoyance and wasted time. Prevent this frustrating chaos and ensure your bobbins remain neatly paired with their matching thread spools by implementing simple yet highly effective organizing solutions. Bobbin rings, bobbin clamps, or even a small piece of sticky tack, washi tape, or a dedicated bobbin storage box are inexpensive and highly efficient ways to maintain order and keep your threads perfectly tidy.
9. Prevent Fraying Edges with a Dab of Clear Nail Polish
For small, delicate areas particularly prone to fraying, such as the ends of a buttonhole that won’t be reinforced, a freshly cut raw edge that won’t be enclosed in a seam, or the tip of a ribbon, a tiny, careful dab of clear nail polish can work absolute wonders. Apply it sparingly and allow it to dry completely. This creates a subtle yet durable barrier that effectively locks the fabric fibers in place, preventing unsightly unraveling without adding noticeable bulk or stiffness to your finished project.
10. Utilize a Lint Roller for Swift & Efficient Clean-Ups
Your sewing space, by its very nature, inevitably accumulates stray threads, tiny fabric fibers, and dust particles. A standard lint roller is your absolute best friend for quick, efficient, and effortless clean-ups. Use it to quickly tidy up your cutting mat, the surface of your sewing machine, your ironing board, and even your clothes before you leave the sewing room. It’s a much faster and more convenient solution than a vacuum cleaner for addressing small, localized messes of fuzz and lint.
11. Keep a Dedicated Scrap Jar for Small Creative Projects
Resist the urge to toss those seemingly insignificant tiny fabric scraps! A designated “scrap jar” or small container can quickly become a treasure trove of possibilities for future creative endeavors. These small, often vibrant pieces are absolutely perfect for appliqué designs, miniature patchwork blocks, testing out new stitches or machine settings, or adding charming, unique details to doll clothes, small accessories, or embellishments. It’s a fantastic way to promote sustainability and continuously spark new waves of creativity.
12. Assemble a Compact, Portable Sewing Kit for Emergencies
A small, well-stocked portable sewing kit is an indispensable companion for mending emergencies, unexpected wardrobe malfunctions, travel, or taking to sewing classes or workshops. Curate a kit that includes essential items such as a few hand sewing needles, a small pair of thread snips, a small selection of commonly used thread colors, a few safety pins, a comfortable thimble, and a couple of spare buttons. An empty Altoids tin, a small cosmetic bag, or a dedicated travel sewing kit case works perfectly for this purpose.
13. Repurpose Old Jeans for Muslins and Practice Sessions
Before committing to cutting into your precious, expensive fashion fabric, especially when working with a new or unfamiliar pattern, it’s always wise to create a “muslin” or test garment. Old denim jeans provide a wonderfully sturdy, readily available, and cost-effective fabric for this very purpose. They are also excellent for practicing new sewing techniques, experimenting with stitch settings, making tension adjustments on your machine, or trying out embroidery designs without wasting valuable new material, promoting resourcefulness.
14. Invest in Superior Lighting for Precision and Comfort
Proper, ample lighting is absolutely crucial for both accuracy in your sewing and your long-term personal comfort. A well-lit sewing area significantly reduces eye strain, helps you clearly see intricate stitches and fabric details, and ensures you can accurately distinguish between subtle fabric colors and shades. Consider investing in an adjustable task lamp specifically designed for crafting to brightly illuminate your sewing machine needle area and your cutting surface, enhancing precision and minimizing fatigue.
Elevate Your Craft: The Journey to Smarter, More Joyful Sewing
These invaluable sewing hacks and practical tips, profoundly inspired by the innovative spirit of Nadira037 and thoughtfully augmented by collective wisdom from the wider sewing community, are much more than mere shortcuts. They represent transformative pathways to a more enjoyable, significantly more productive, and undeniably precise sewing experience. By thoughtfully integrating these simple yet remarkably powerful techniques into your regular crafting routine, you will undoubtedly find yourself sewing with greater confidence, tackling complex projects with increased ease, and consistently achieving professional-looking results with remarkable efficiency and satisfaction.
The inherent beauty of the global sewing community lies in its incredible willingness to openly share knowledge, exchange creative ideas, and genuinely inspire one another. Therefore, do not hesitate to enthusiastically experiment with these diverse ideas, adapt them cleverly to your unique specific needs and preferred crafting style, and even challenge yourself to develop your own ingenious and clever sewing solutions. Remember, every single stitch you make is a meaningful step forward in your personal creative journey, and with these smart, insightful strategies firmly in your toolkit, you are exceptionally well-equipped to tackle any sewing project with boundless enthusiasm, unwavering skill, and immense joy.
Now, with this wealth of knowledge at your fingertips, it’s truly your turn to put these brilliant ideas into active practice. Dive headfirst into your next exciting sewing adventure armed with newfound efficiency, enhanced precision, and a revitalized sense of craftsmanship. As Nadira037 so brilliantly demonstrates through her shared wisdom, a little bit of ingenuity and smart thinking goes an incredibly long way in the world of textiles. Happy sewing, and may all your wonderful creations be filled with immense joy, unparalleled precision, and an abundance of personal satisfaction!