
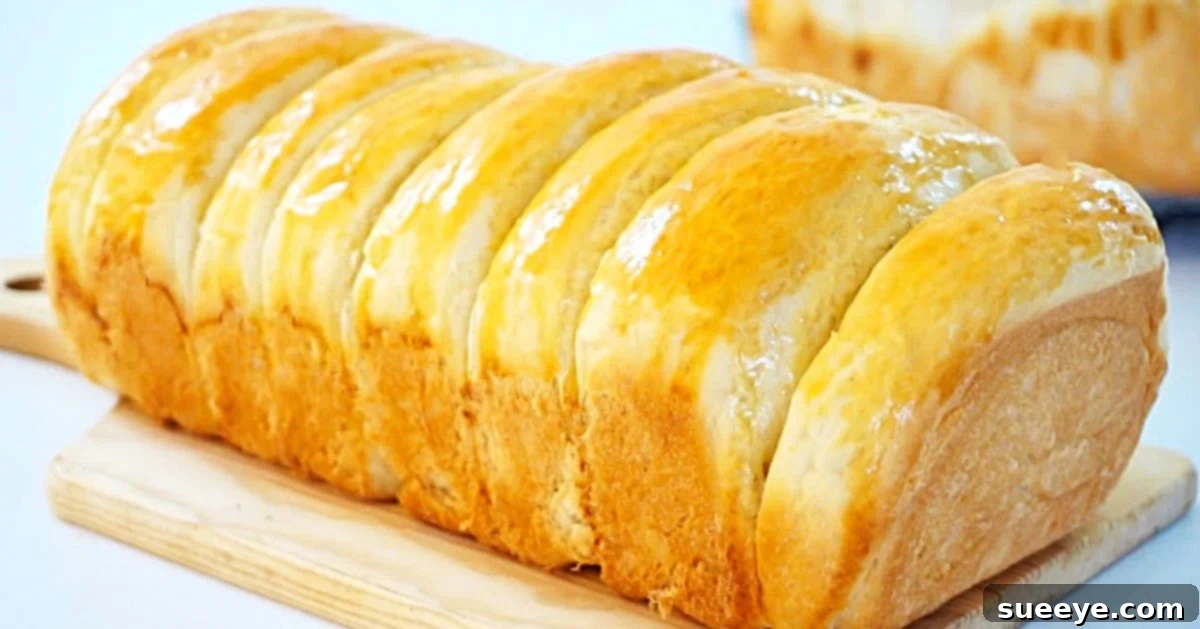
Ultimate Soft Cream Cheese Bread Recipe: Homemade & Easy
There’s nothing quite like the aroma and taste of freshly baked homemade bread. It’s a culinary pleasure that brings warmth and comfort to any home. While traditional loaves are always welcome, sometimes a recipe comes along that elevates the experience to an entirely new level. That’s precisely what happened when I stumbled upon this incredible cream cheese bread video recipe tutorial by Savor Easy on YouTube. From the moment I saw it, I knew this uniquely tender and subtly tangy bread would become a staple in my baking repertoire.
This isn’t just any bread; it’s a delightfully succulent loaf that boasts an unbelievably soft crumb and a delicate flavor profile, thanks to the addition of cream cheese. It’s wonderfully versatile, making it an excellent companion to any meal, a fantastic base for sandwiches, or simply a treat to enjoy on its own. Imagine sinking your teeth into a slice of this heavenly bread, perhaps as a side to a hearty soup, or even better, envisioning a gourmet BBQ sandwich built upon its soft, yielding texture – doesn’t that sound absolutely divine? This recipe promises a homemade bread experience that’s both rewarding to make and utterly delicious to devour.
Why This Cream Cheese Bread Will Be Your New Favorite
Beyond its simple deliciousness, there are several compelling reasons why this soft cream cheese bread stands out and is sure to become a beloved recipe in your kitchen:
- Unrivaled Softness: The star ingredient, cream cheese, contributes an incredible moistness and tenderness to the dough, resulting in a bread that practically melts in your mouth. It’s a texture you won’t find in many other homemade loaves.
- Subtle, Distinctive Flavor: The cream cheese imparts a delicate tang and richness that perfectly balances the slight sweetness of the dough. It’s not overwhelmingly cheesy, but rather a nuanced flavor that enhances every bite.
- Remarkably Versatile: Whether you serve it warm with butter, toast it for breakfast, use it to make gourmet sandwiches, or offer it as a sophisticated side dish, this bread adapts beautifully to any occasion.
- Rewarding Baking Experience: Despite its impressive outcome, the process of making this bread is straightforward and incredibly satisfying. There’s immense joy in transforming simple ingredients into such a magnificent creation.
- Homemade Goodness: Skip the store-bought options and enjoy the unparalleled freshness and quality that only homemade bread can offer. You control the ingredients, ensuring a wholesome and delightful product for your family.
Essential Ingredients for Your Soft Cream Cheese Bread
Crafting this exquisite bread begins with a careful selection of common pantry staples. Each ingredient plays a crucial role in achieving the signature softness and flavor of this cream cheese loaf. Here’s what you’ll need, along with a little insight into their purpose:
- 3 1/2 cups all-purpose flour: The foundation of our bread. All-purpose flour provides the necessary structure, allowing the dough to be kneaded and rise beautifully.
- 1/4 cup granulated sugar: More than just for sweetness, sugar feeds the yeast, helping it activate and produce the carbon dioxide needed for a light and airy texture. It also contributes to the bread’s golden-brown crust.
- 1 teaspoon of salt: Essential for flavor balance and controlling yeast activity. Salt enhances the overall taste of the bread, preventing it from tasting bland.
- 2 1/4 teaspoons dry active yeast: The leavening agent that makes our bread rise. Ensure your yeast is fresh for optimal results. This amount is equivalent to one standard packet of dry active yeast.
- 1 large egg: Adds richness, moisture, and helps with the structure and tenderness of the dough. It also contributes to a beautiful golden crust.
- 1 cup of milk: Provides necessary liquid for the dough, contributing to its softness and helping to activate the yeast. Warm milk (not hot!) is ideal for yeast activation.
- 3/4 cups softened cream cheese: The star ingredient! Softened cream cheese introduces incredible moisture, tenderness, and a delightful, subtle tang that sets this bread apart. Make sure it’s at room temperature for smooth incorporation.
- 1/4 cup softened unsalted butter: Adds richness, flavor, and contributes to a tender crumb. Like cream cheese, ensure your butter is softened to room temperature for easier mixing.
- For the Egg Wash: 1 egg and 2 tablespoons of milk: This simple mixture is brushed over the loaves before baking to create a beautiful, shiny, and golden-brown crust. It also helps with even browning.
Step-by-Step Directions: Crafting Your Delicious Cream Cheese Bread
Creating this soft cream cheese bread is a rewarding process. Follow these detailed steps to achieve a perfectly baked, incredibly tender loaf. This comprehensive guide, inspired by the wonderful tutorial from Savor Easy on YouTube, ensures success even for novice bakers.
Step 1: Activate the Yeast and Prepare Wet Ingredients
Begin by gently warming your milk until it’s lukewarm (around 105-115°F or 40-46°C). It should feel warm but not hot to the touch; too hot will kill the yeast. Pour the warm milk into a large mixing bowl, then sprinkle the 2 1/4 teaspoons of dry active yeast over the top, along with a pinch of the granulated sugar. Stir gently and let it sit for 5-10 minutes until it becomes foamy. This indicates your yeast is active and ready to work.
In a separate bowl, whisk together the softened cream cheese, softened unsalted butter, and the egg until smooth and well combined. This ensures these rich ingredients are evenly distributed throughout the dough.
Step 2: Combine Dry and Wet Ingredients to Form the Dough
In a large bowl, or the bowl of a stand mixer fitted with a dough hook, combine the all-purpose flour, remaining granulated sugar, and salt. Make a well in the center of the dry ingredients.
Pour the activated yeast mixture and the cream cheese-butter-egg mixture into the well of the dry ingredients. Mix on low speed with the dough hook, or by hand with a sturdy spoon, until a shaggy dough forms. Gradually increase the speed (if using a mixer) or continue mixing by hand until all the flour is incorporated.
Step 3: Knead the Dough to Perfection
Turn the shaggy dough out onto a lightly floured surface if kneading by hand, or continue kneading with the dough hook in your stand mixer. Knead for approximately 8-10 minutes. The dough should transform from sticky to smooth, elastic, and slightly tacky. It should spring back slowly when gently poked. Proper kneading is crucial for developing the gluten structure that gives bread its chewiness and ability to hold its shape.
Step 4: First Rise (Proofing)
Lightly grease a large clean bowl with a little oil. Place the kneaded dough into the bowl, turning it once to coat the entire surface with oil. This prevents the dough from drying out. Cover the bowl tightly with plastic wrap or a clean kitchen towel.
Place the bowl in a warm, draft-free spot (like a turned-off oven with the light on, or near a warm window) for 1 to 1.5 hours, or until the dough has doubled in size. The exact time will depend on the warmth of your environment.
Step 5: Punch Down, Divide, and Shape the Loaves
Once the dough has doubled, gently punch it down to release the air. Turn the dough out onto a lightly floured surface. You can choose to make one large loaf, or divide the dough into two equal portions for two smaller loaves, or even multiple rolls as demonstrated by Savor Easy. For a traditional loaf, shape each portion into an oblong or round loaf, tucking the edges underneath to create a smooth top.
If you’re opting for the Savor Easy style of sliced roll loaves, divide the dough into several equal pieces. Gently roll each piece into a small ball or oblong shape, then arrange them side-by-side in your prepared loaf pans. This creates that beautiful, pull-apart bread texture.
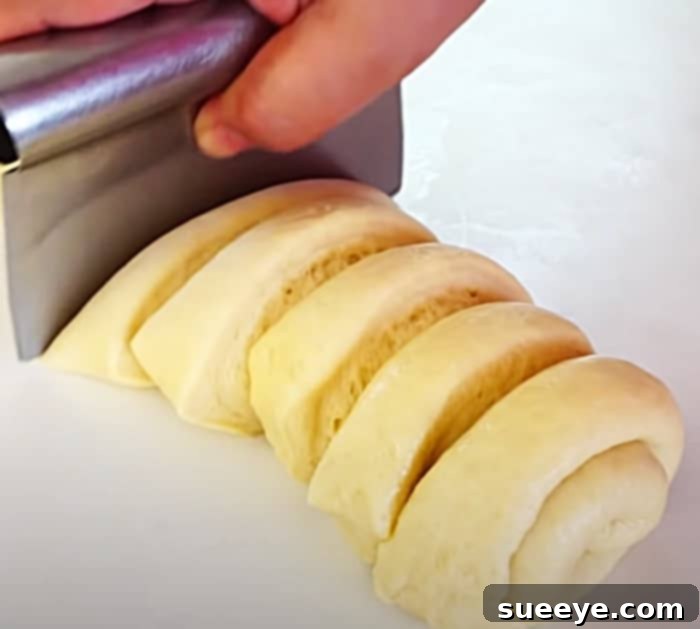
Prepare your loaf pans by lightly greasing them or lining them with parchment paper.
Step 6: Second Rise (Proofing)
Place your shaped dough or individual rolls into the prepared loaf pans. Cover the pans loosely with plastic wrap or a clean kitchen towel. Allow the dough to rise again in a warm, draft-free spot for another 30-45 minutes, or until it has visibly increased in size and looks puffy. It won’t necessarily double but should look light and airy.
Step 7: Prepare the Egg Wash and Bake
Preheat your oven to 350°F (175°C). In a small bowl, whisk together the egg and 2 tablespoons of milk for the egg wash. Once the dough has completed its second rise, gently brush the top of each loaf or roll with the egg wash. This will give your bread a beautiful golden sheen and a slightly crispy crust.
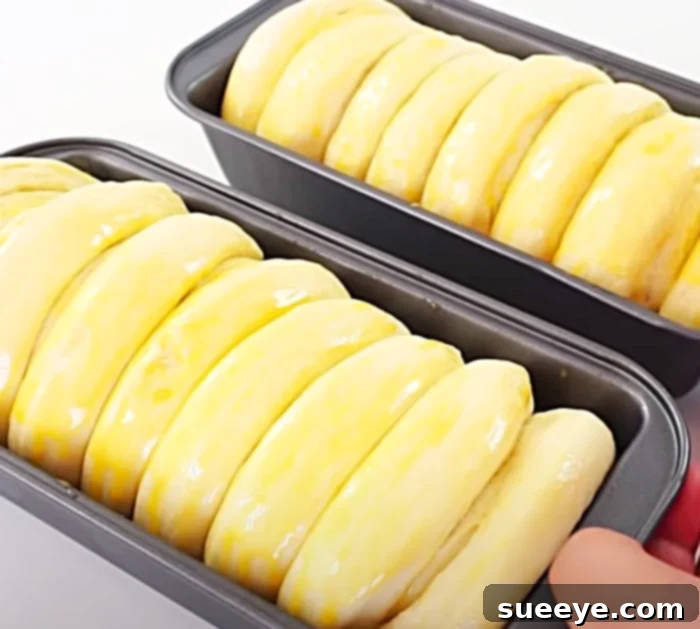
Place the loaf pans into the preheated oven and bake for approximately 25-30 minutes, or until the bread is golden brown on top and sounds hollow when tapped on the bottom. An instant-read thermometer inserted into the center of the loaf should register around 200-210°F (93-99°C).
Step 8: Cool and Enjoy
Once baked, remove the bread from the oven and immediately turn it out onto a wire rack to cool completely. Allowing the bread to cool on a rack prevents the bottom from becoming soggy. While it’s tempting to slice into it right away, cooling is crucial for the internal structure to set properly. Once cooled, slice and serve this fabulous homemade cream cheese bread. Enjoy!
Expert Tips for Perfect Homemade Cream Cheese Bread
Achieving bakery-quality bread at home is easier than you think with a few helpful pointers:
- Room Temperature Ingredients: Ensure your cream cheese, butter, and egg are at room temperature. This allows them to cream together smoothly and incorporate evenly into the dough, leading to a more consistent and tender crumb.
- Don’t Rush the Yeast: Give your yeast ample time to activate in the warm milk. Foamy bubbles are a clear sign it’s alive and ready to leaven your bread.
- Kneading is Key: Don’t skimp on kneading time. Developing the gluten properly is crucial for a soft, elastic dough that rises well and holds its shape. If using a stand mixer, let it do the work; if by hand, embrace the process!
- Proofing Environment: A warm, draft-free spot is ideal for rising. If your kitchen is cool, a turned-off oven with the light on creates a perfect environment.
- Test for Doneness: While visual cues are helpful, tapping the bottom of the loaf (it should sound hollow) or using an instant-read thermometer (200-210°F or 93-99°C internally) provides the most accurate way to ensure your bread is fully baked.
- Cool Completely: Resist the urge to slice hot bread. Cooling allows the starches to set, resulting in a better texture and preventing a gummy interior.
Creative Variations to Elevate Your Cream Cheese Bread
While this recipe is perfection on its own, don’t hesitate to experiment with these delightful variations to customize your cream cheese bread:
- Sweet Swirl: Before the second rise, roll out the dough into a rectangle, spread a thin layer of softened butter, sprinkle with cinnamon sugar, and roll it up jelly-roll style before placing it in the loaf pan.
- Herbed Savory: Incorporate 1-2 tablespoons of finely chopped fresh herbs like chives, rosemary, or dill into the dough during the kneading stage for a fragrant savory loaf perfect with dinner.
- Garlic & Herb: Mix in a teaspoon of garlic powder and dried oregano or basil to the dry ingredients for a delicious garlic herb cream cheese bread, fantastic with Italian meals.
- Citrus Zest: Add the zest of one lemon or orange to the wet ingredients for a bright, aromatic twist that complements the cream cheese beautifully.
- Fruity Goodness: Gently fold in 1/2 cup of dried cranberries or chopped apricots during the final stages of kneading for a touch of sweetness and texture.
- Cheese Lover’s Dream: For an extra cheesy kick, add 1/2 cup of shredded cheddar or Monterey Jack cheese to the dough along with the flour.
Delicious Ways to Enjoy Your Cream Cheese Bread
The versatility of this soft cream cheese bread means there are countless ways to enjoy it:
- Breakfast Delight: Toast a slice and spread with jam, marmalade, or simply butter. It also pairs wonderfully with scrambled eggs.
- Gourmet Sandwiches: Its soft texture makes it an ideal choice for elevated sandwiches. As originally envisioned, it would make an incredible BBQ sandwich, or try it with sliced turkey and cranberry sauce.
- Accompaniment to Meals: Serve it as a side to hearty soups, stews, or salads. Its subtle tang can cut through rich flavors beautifully.
- Simple Snack: Enjoy a slice plain, perhaps with a cup of coffee or tea, to appreciate its unique flavor and texture.
- Sweet Treat: Drizzle with a light glaze made from powdered sugar and milk for a sweet dessert bread.
Storage and Reheating Tips
To keep your homemade cream cheese bread fresh and delicious:
- At Room Temperature: Store cooled bread in an airtight container or a bread bag at room temperature for up to 3-4 days.
- Freezing: For longer storage, slice the cooled bread and freeze in an airtight freezer bag for up to 2-3 months. Thaw slices as needed or toast directly from frozen.
- Reheating: To enjoy warm, you can gently reheat slices in a toaster, oven (at 300°F/150°C for a few minutes), or microwave (for very short bursts to avoid toughness).