
Grandma’s Classic Chocolate Pie: A Timeless Homemade Dessert Recipe
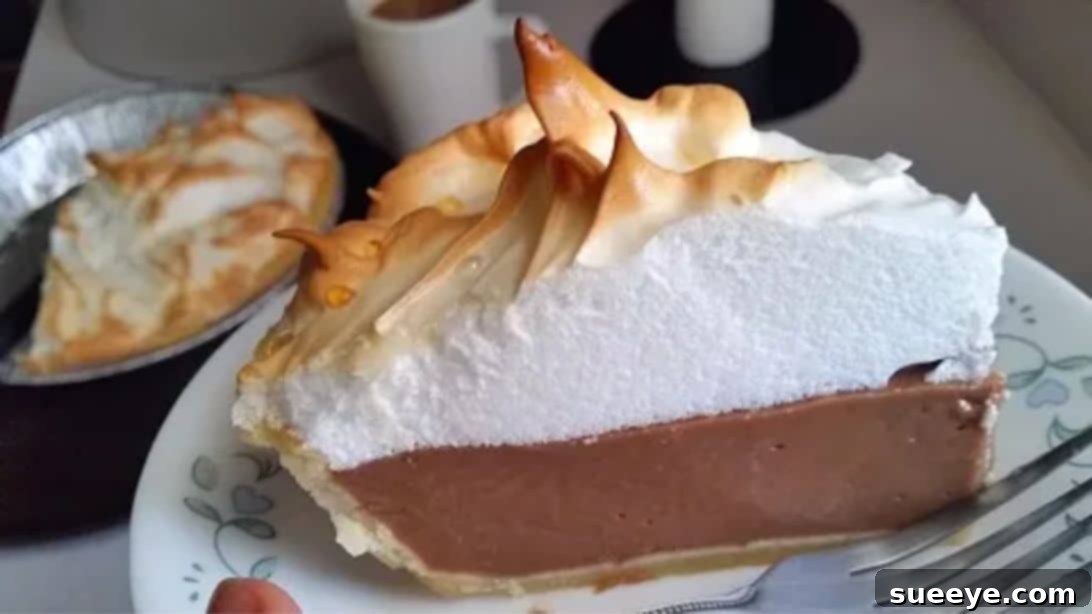
There’s nothing quite like a slice of homemade chocolate pie to bring back cherished memories of childhood and family gatherings. This classic chocolate pie, a beloved recipe inspired by the culinary wisdom of Chef Buck, promises a rich, creamy filling topped with a cloud-like meringue that tastes just like Grandma used to make. Perfect for any occasion, from holiday feasts to a simple Sunday dinner, this dessert is a testament to the enduring appeal of traditional baking. Whether you’re a seasoned baker or just starting your culinary journey, this beginner-friendly tutorial will guide you through every step, ensuring a perfect, nostalgic chocolate pie every time. Get ready to create a truly unforgettable dessert that will delight your taste buds and warm your heart!
Unlocking the Secrets to a Perfect Homemade Chocolate Meringue Pie
Embarking on the journey to bake a classic chocolate meringue pie is a rewarding experience. This particular recipe masterfully balances a deeply satisfying, smooth chocolate custard with a light, airy meringue that achieves a beautiful golden-brown finish. The key to its success lies in careful preparation and understanding the purpose behind each step. From tempering egg yolks to achieving stiff meringue peaks, we’ll cover all the essential techniques that transform simple ingredients into a show-stopping dessert. Prepare to impress your family and friends with a pie that’s not only delicious but also a labor of love.
Essential Ingredients for Your Classic Chocolate Pie
Gathering high-quality ingredients is the first step towards baking an exceptional chocolate pie. This recipe calls for fresh, common pantry staples that, when combined with care, create an irresistible dessert.
For the Deep Dish Pie Crust:
- 1 deep dish pie crust (store-bought or homemade, ensure it’s unbaked)
For the Rich Chocolate Filling:
- 1 cup granulated sugar
- 2½ cups whole milk (for a creamy texture)
- 1 ounce unsweetened chocolate, shaved or finely chopped (for intense chocolate flavor)
- 3 large egg yolks (reserve the egg whites for the meringue)
- ½ tsp fine sea salt
- 5 tbsp cornstarch (to thicken the filling to perfection)
- ½ tsp pure vanilla extract
- ½ tsp almond extract (enhances the chocolate beautifully)
For the Fluffy Meringue Topping:
- 6 tbsp granulated sugar (divided into 2 tbsp and 4 tbsp portions)
- 1 tbsp cornstarch
- ½ cup cold water
- 3 large egg whites (reserved from the filling)
- ¼ tsp cream of tartar (helps stabilize the egg whites for a sturdy meringue)
Step-by-Step Guide to Baking Grandma’s Favorite Chocolate Pie
Creating this classic chocolate pie is a delightful process. Follow these detailed instructions carefully to ensure a truly remarkable dessert.
Step 1: Preparing Your Crust and Crafting the Silky Chocolate Filling
Begin by preparing your deep dish pie crust. To prevent the crust from becoming soggy, gently poke several holes across the bottom and sides with a fork. This allows steam to escape during baking. Pre-bake the pie crust according to package directions, or until it’s lightly golden and set, then set it aside to cool completely. This crucial step prevents a “wet bottom” pie.
Next, we’ll create the luscious chocolate filling. In a medium-sized, heavy-bottomed saucepan, combine the granulated sugar, cornstarch, and salt. Add the shaved unsweetened chocolate. Gradually pour in the milk, whisking constantly to ensure there are no lumps and the dry ingredients are fully incorporated. Place the saucepan over medium heat, continuing to stir consistently. This continuous stirring is vital to prevent scorching and to help the chocolate melt smoothly.
Continue cooking and stirring for approximately 15 to 20 minutes. You’ll notice the mixture beginning to thicken and bubble gently. Once it reaches a full boil and is bubbling consistently, set a timer for 1 minute and continue to stir vigorously as the chocolate mixture simmers. This ensures the cornstarch is fully cooked out, preventing a starchy taste. After 1 minute, remove the saucepan from the heat.
Now, it’s time to temper the egg yolks. Tempering is essential to prevent the yolks from scrambling when added to the hot chocolate mixture. In a separate small bowl, lightly whisk the 3 reserved egg yolks. Carefully scoop about 4 to 5 tablespoons of the hot chocolate mixture into the whisked egg yolks, stirring constantly and briskly as you add the hot mixture. This slowly raises the temperature of the egg yolks without cooking them.
Once the egg yolks are tempered, gradually stir the egg yolk mixture back into the saucepan with the hot chocolate filling, ensuring it’s thoroughly combined. Return the saucepan to the stove over medium heat and bring it back to a gentle simmer, cooking for just 1 more minute while stirring continuously. This final cook helps to fully incorporate the egg yolks and achieve the perfect, thick consistency for your filling. Remove the saucepan from the heat and stir in the vanilla extract and almond extract. Their aromas will instantly elevate the filling. Pour the hot chocolate filling immediately into your pre-baked and cooled pie shell, spreading it evenly. Allow the pie to cool at room temperature while you prepare the meringue.
Step 2: Mastering the Fluffy Meringue Topping
Creating a stable and delicious meringue involves a few careful steps. In a small saucepan, combine 1 tablespoon of cornstarch, 2 tablespoons of sugar, and ½ cup of cold water. Whisk these ingredients together until smooth. Place the saucepan over medium heat and continue to stir constantly until the mixture thickens into a clear, glossy paste. This cornstarch slurry acts as a stabilizer for the meringue, helping it hold its shape and preventing weeping. Once thickened, remove from heat and immediately place the saucepan into a larger pan filled with ice water, stirring occasionally, to cool it down completely. This rapid cooling is essential before incorporating it into the egg whites.
Next, prepare the egg whites. Ensure your mixing bowl and whisk attachments are immaculately clean and free of any grease, as even a tiny amount can prevent the egg whites from whipping properly. In a large mixing bowl, combine the 3 reserved egg whites and the cream of tartar. Begin beating the mixture with an electric mixer on medium speed until it becomes frothy, resembling soap suds. At this stage, add 2 tablespoons of sugar and continue beating for about 10 more seconds until the sugar is dissolved.
Increase the mixer speed to medium-high. Gradually add the remaining 2 tablespoons of sugar, a little at a time, while continuing to beat. Watch carefully as the egg whites transform, becoming glossy and starting to form soft peaks. Continue beating until the mixture holds firm, shiny peaks when the whisk is lifted.
With the mixer still running on low speed, slowly drizzle the completely cooled cornstarch mixture into the stiff egg whites. Increase the speed back to medium-high and continue beating until very stiff, glossy peaks form. The meringue should be firm and hold its shape perfectly.
Carefully spread the fluffy meringue over the cooled chocolate pie filling, ensuring it reaches the edges of the crust to seal the filling. For an attractive finish, use the back of a spoon or a small spatula to create decorative peaks and swirls on the surface of the meringue. These peaks will brown beautifully in the oven.
Preheat your oven to 400°F (200°C). Bake the pie for about 10 to 12 minutes, or until the tips of the meringue peaks are beautifully golden brown. Keep a close eye on it to prevent burning. Once achieved, carefully remove the pie from the oven. This is the most crucial part for setting the filling and meringue: allow the pie to cool completely at room temperature for several hours (ideally 4-6 hours, or even overnight) before attempting to slice it. Rushing this step can lead to a messy slice and a meringue that “weeps.”
Pro Tips for a Flawless Homemade Chocolate Meringue Pie
- Prevent a Soggy Crust: Always pre-bake your pie crust until it’s lightly golden. This creates a barrier against the wet filling. You can also brush the pre-baked crust with a thin layer of egg white before the final bake to further waterproof it.
- Temper Eggs Slowly: When adding the hot chocolate mixture to the egg yolks, do so slowly and steadily while whisking constantly. This prevents the yolks from scrambling and ensures a smooth, creamy filling.
- Cleanliness is Key for Meringue: Ensure your mixing bowl and whisk attachments are spotlessly clean and free of any grease. Even a tiny trace of fat can prevent egg whites from whipping into stiff peaks. Using a glass or metal bowl is often preferred over plastic, which can retain grease.
- Don’t Rush Cooling: Allowing the pie to cool completely for several hours at room temperature is crucial for the filling to set properly and for the meringue to stabilize, preventing it from weeping. Patience is a virtue when baking this pie!
- Perfect Meringue Peaks: For beautifully defined meringue peaks, use the back of a spoon to gently lift and create swirls. For a more rustic look, you can use a fork to create textured ridges.
Serving Suggestions and Storage Tips for Your Chocolate Pie
Once your Grandma’s Classic Chocolate Pie has fully cooled and set, it’s ready to be enjoyed! This pie is absolutely delicious on its own, but a dollop of whipped cream (if you’re not already indulging in the meringue!), a sprinkle of chocolate shavings, or a side of fresh berries can elevate the experience. Serve slices at room temperature for the best texture and flavor. To store any leftovers, cover the pie loosely with plastic wrap or aluminum foil. It will keep well in the refrigerator for 2-3 days. However, meringue can sometimes “weep” or lose its texture over time, so it’s generally best enjoyed within the first day or two for optimal freshness and appearance.
Delicious Variations to Personalize Your Chocolate Pie
While this classic recipe is perfect as is, you can certainly add your own twist to create unique flavor profiles:
- Mint Chocolate Pie: Add ¼ to ½ teaspoon of pure peppermint extract along with the vanilla and almond extracts for a refreshing minty kick. A few drops of green food coloring can also be added to the filling for a festive look.
- Espresso Chocolate Pie: Dissolve 1 teaspoon of instant espresso powder or coffee granules in a tablespoon of hot water and add it to the chocolate filling along with the extracts. Coffee enhances the chocolate flavor beautifully.
- Nutty Chocolate Pie: Sprinkle a layer of finely chopped toasted pecans or walnuts over the cooled chocolate filling before adding the meringue for a delightful textural contrast.
- Dark Chocolate Obsession: For those who prefer a richer, less sweet chocolate experience, you can increase the unsweetened chocolate to 1.5 or 2 ounces, or even use a mix of unsweetened and bittersweet chocolate.
All images are credited to Chef Buck via YouTube. Be sure to visit his channel and subscribe for more fantastic cooking tutorials!