
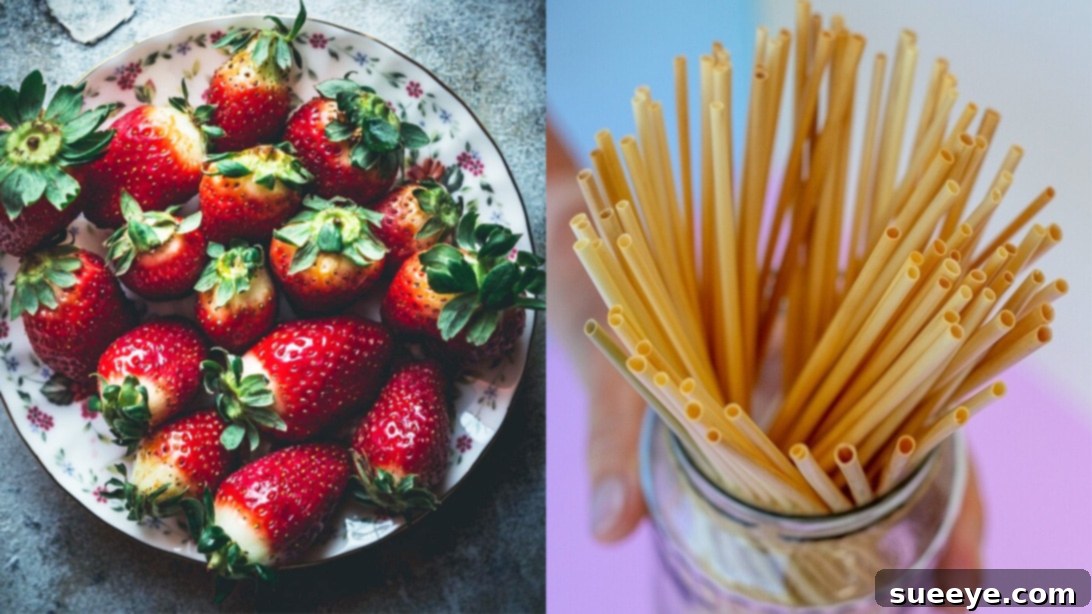
Effortlessly Hull Strawberries with a Straw: The Ultimate Kitchen Hack
Imagine this: you’ve just brought home a fresh punnet of vibrant red strawberries, bursting with potential for delicious desserts, refreshing snacks, or a healthy addition to your breakfast. But then comes the familiar chore of hulling them – painstakingly removing the green leafy cap and the tough white core. Traditional methods often involve a knife, which can be slow, messy, and wasteful, cutting away precious berry flesh. What if there was a simpler, faster, and more efficient way, using an everyday item you likely already have within arm’s reach?
Enter the ingenious straw hack! Yes, that humble drinking straw isn’t just for sipping your favorite beverages; it’s also your secret weapon for perfectly hulled strawberries every single time. This clever technique not only streamlines your fruit preparation but also minimizes waste and maximizes the delicious, succulent part of the berry. Praised by home cooks and featured in viral videos, this method is a true game-changer for anyone who loves strawberries. Plus, as a delightful bonus, you can even transform the removed stems into charming strawberry “palm trees” for a fun food decor twist, as wonderfully demonstrated by channels like ForkNPlate.
Say goodbye to bruised berries and hello to perfectly prepared strawberries with this simple, safe, and surprisingly effective method. Whether you’re a seasoned chef or a kitchen novice, mastering this essential strawberry hulling trick will elevate your fruit prep game. Let’s dive into how to execute this technique flawlessly, ensuring your strawberries are always at their absolute best.
Why Hull Strawberries? Enhancing Your Culinary Experience
Before we delve into the “how,” let’s briefly touch upon the “why.” Hulling strawberries isn’t merely about aesthetics; it significantly enhances your overall eating experience. The green leafy cap, known as the calyx, and the firm, often pale white core are generally undesirable for consumption. The calyx can introduce a slightly bitter taste and a rough, fibrous texture, while the core is typically woody, less sweet, and doesn’t offer the same luscious burst of flavor as the surrounding red flesh.
Furthermore, proper hulling is crucial for presentation, especially if you’re using strawberries in fruit salads, delicate tarts, smoothies, or as elegant garnishes. A neatly hulled strawberry looks more appealing and contributes to a more refined dish. While conventional tools like a paring knife or a dedicated strawberry huller certainly get the job done, they often remove more precious fruit than necessary or can be cumbersome to use, especially when processing a large batch. The straw method, however, offers a precise and remarkably waste-efficient alternative, preserving the maximum amount of that sweet, juicy berry flesh for you to enjoy.
Gathering Your Simple Tools: The Power of Minimalist Preparation
One of the most appealing aspects of this strawberry hulling hack is its remarkably minimal requirement for specialized tools. You truly only need two basic items, making it accessible to virtually anyone:
- Fresh Strawberries: The star of our show! When selecting strawberries, opt for those that are firm to the touch, possess a vibrant, deep red color, and have fresh, green caps. Avoid berries that appear overly soft, bruised, or show any signs of mold. The fresher and firmer the strawberry, the easier it will be to hull and, naturally, the better it will taste. Consider organic options if you are concerned about pesticides.
- A Drinking Straw: This is your unexpected hero! Any standard drinking straw can work, whether it’s made of plastic, sturdy paper, metal, or bamboo. The most important characteristic is that it should be rigid enough to push cleanly through the strawberry without bending or collapsing under gentle pressure. Reusable straws, made from materials like stainless steel or bamboo, are an excellent eco-friendly choice, making this hack even more sustainable and reducing single-use plastic waste.
That’s it! No fancy gadgets to buy, no sharp knives to worry about (for this step, at least). Just these simple, everyday items transforming your strawberry preparation from a chore into an effortless delight.
Essential First Step: Washing Strawberries Properly (The Chef’s Secret for Longevity and Flavor)
Before any hulling can commence, it’s absolutely crucial to wash your strawberries thoroughly. However, unlike many other fruits and vegetables, strawberries demand a specific, delicate washing technique to maintain their tender texture, vibrant color, and exquisite flavor. Simply rinsing them under a strong stream of running water, as you might an apple or a potato, can actually do more harm than good, leading to bruised, waterlogged, and significantly less flavorful berries.
Strawberries are highly porous and act like tiny sponges, readily absorbing water. Washing them too vigorously or allowing them to soak in water for an extended period can cause their delicate cell walls to break down, resulting in mushy, pale, and unappetizing fruit. Professional chefs and culinary experts consistently recommend a gentle soaking method to effectively clean them without causing any damage. This ensures you successfully remove dirt, pesticides, and any tiny hidden critters, all while preserving the berry’s natural integrity and peak taste.
Step-by-Step Guide to Washing Strawberries Like a Pro:
- Gather Your Supplies: You’ll need a large, clean bowl (preferably wider than it is deep), plenty of cold water, and a clean paper towel or a salad spinner for drying.
- Prepare the Soaking Bath: Fill your large bowl with a generous amount of very cold water. The colder the water, the better, as the chill helps the strawberries retain their firmness and prevents them from getting mushy.
- Submerge Gently: Carefully place your strawberries into the bowl of cold water. It’s important to avoid dumping them in forcefully, as this can easily bruise their delicate skin. Ensure all the berries are fully submerged.
- The Soaking Process: Allow the strawberries to soak for approximately 30 minutes to an hour. This crucial soaking period gives any clinging dirt, sand, dust, or small insects ample time to detach and settle at the bottom of the bowl, negating the need for harsh scrubbing. During this time, you can gently swish the strawberries around with your hands a few times to help dislodge any stubborn particles.
- Optional Gentle Rinse: After soaking, carefully drain the murky water. If you feel it’s necessary, you can give the strawberries a very quick, gentle rinse under a low-pressure stream of cool water. Be extremely mindful not to let them sit under the running water for too long.
- Thorough Drying – A Critical Step: This step cannot be emphasized enough. Carefully remove the strawberries from the water and spread them out in a single layer on a clean paper towel. Gently pat them dry with another clean paper towel. Alternatively, a salad spinner lined with paper towels can significantly speed up the drying process. It is absolutely essential that the strawberries are completely dry before you proceed with hulling, as any excess moisture can make them slippery, difficult to handle, and more prone to bruising.
Pro Tip for Storage: Only wash strawberries immediately before you plan to eat or hull them. Washing and then storing them wet will drastically reduce their shelf life and significantly promote premature mold growth. Unwashed strawberries, stored correctly in a breathable container in the refrigerator, will last much longer.
The Straw Hulling Technique: A Quick, Clean, and Satisfying Method
Once your strawberries are perfectly washed and thoroughly dry, they are primed and ready for the main event: hulling with a straw! This method is not only incredibly satisfying to execute but also remarkably efficient, saving you time and effort in the kitchen.
Follow these simple, step-by-step instructions for perfectly hulled strawberries:
- Prepare Your Workspace: Lay out your clean, dry strawberries on a clean surface. Have your chosen straw ready. It’s also helpful to have a small plate or bowl nearby to collect the removed hulls.
- Position the Strawberry: Gently but firmly hold a single strawberry between your thumb and forefinger. Ensure you have a secure grip without squeezing too hard, as this can easily damage the delicate fruit. Position the strawberry so that its pointed tip (the bottom of the berry, opposite the stem) is facing you.
- Insert the Straw: Take your straw and carefully insert it into the bottom (pointed end) of the strawberry. The goal is to aim the straw directly upwards, towards the center of the strawberry where the green stem and its fibrous core are attached.
- Push Through with Steady Pressure: With consistent, gentle pressure, slowly push the straw upwards through the entire length of the strawberry. You will feel a slight resistance as the straw navigates through the fruit’s flesh. Maintain steady pressure, and the straw will eventually pierce through to the top.
- Experience the “Pop” Moment: As the straw reaches the very top of the strawberry, it will elegantly push out the green leafy cap and its attached white core in one neat, cylindrical piece. You’ll often feel a small, satisfying “pop” as the hull cleanly detaches from the berry.
- Remove and Observe: Once the stem and core are completely removed and appear clearly at the top of the strawberry, gently pull the straw all the way through the berry. You will be left with a perfectly hulled strawberry featuring a clean, central hole, ready for immediate enjoyment or further culinary preparation. Discard the removed hull.
- Continue with Ease: Repeat this straightforward process for all your remaining strawberries. You’ll quickly discover that with just a little practice, you can hull an entire punnet of strawberries in mere minutes, making fruit prep a breeze.
Troubleshooting Tip: What if the straw bends or breaks? Don’t fret! If your chosen straw isn’t sturdy enough and starts to bend or buckle, simply grab another one. This is where durable reusable metal or bamboo straws truly shine, as they are often more rigid and resilient for this specific task. However, even standard plastic straws work exceptionally well if you apply consistent and gentle pressure.
Beyond Hulling: Creative Uses for Your Strawberries and Stems
Now that you possess a bounty of beautifully and cleanly hulled strawberries, the culinary possibilities are truly endless! Enjoy them fresh as a healthy and refreshing snack, slice them into vibrant fruit salads, or effortlessly incorporate them into your favorite desserts such as shortcakes, tarts, parfaits, and smoothies. The neat, central hole created by the straw also makes them absolutely perfect for stuffing with a dollop of whipped cream, a drizzle of melted chocolate, a spoonful of yogurt, or even a mini marshmallow for an elegant and delightful presentation.
But the fun doesn’t stop with just the berries themselves! Remember the delightful suggestion about creating “strawberry palm trees”? This is a fantastic and imaginative way to add a whimsical and charming touch to your food presentation, particularly when hosting parties or serving children. Simply gather the removed green stems (calyxes) together in small bunches and use them creatively as the “fronds” for your miniature strawberry “palm trees.” You can even use a small toothpick to secure them upright on a plate, surrounded by your delicious, perfectly hulled strawberries, creating an adorable edible landscape.
The Eco-Friendly Advantage: Repurposing Straws for a Sustainable Kitchen
In an age where environmental consciousness and sustainable practices are increasingly paramount, this strawberry hulling hack offers a wonderful and practical eco-friendly benefit. Instead of mindlessly discarding single-use plastic straws after just one drink, you can give them a valuable second life! This ingenious method actively encourages the mindful repurposing of items that might otherwise quickly end up in landfills or contribute to plastic pollution in our precious oceans.
Even if you’ve already made the commendable transition to reusable straws made of durable materials like metal, bamboo, or glass, they can still serve this incredibly useful dual purpose. By extending the utility and lifespan of these everyday objects, we collectively take a small but significant step towards reducing waste and embracing a more sustainable and responsible lifestyle. Consider keeping a few clean, dedicated straws specifically for this kitchen task, or simply wash and reuse your regular drinking straws. It’s a simple, mindful act that contributes positively to a larger environmental impact and fosters a sense of resourcefulness in your kitchen.
Tips for Success and Sharing the Joy of This Simple Hack
To ensure you achieve the best possible results every single time you hull strawberries with a straw, keep these practical tips firmly in mind:
- Choose the Freshest, Firmiest Strawberries: Firmer berries are significantly easier to hull cleanly and will hold their shape better.
- Always Wash Properly: Adhere strictly to the gentle soaking and thorough drying method outlined above. This is crucial for both hygiene and preserving the berry’s texture.
- Use a Clean Straw: Hygiene is paramount, especially since the straw will come into direct contact with your food. Always use a clean straw.
- Practice Makes Perfect: Don’t get discouraged if your first few attempts aren’t absolutely flawless. Like any new technique, you’ll quickly develop a feel for the right pressure, angle, and motion with a little practice.
- Share the Knowledge: This brilliant kitchen hack is simply too good to keep to yourself! Impress your family and friends with your newfound strawberry-hulling prowess and enthusiastically spread the word about this quick, easy, and eco-conscious kitchen trick. It’s a simple act that can genuinely make fruit preparation more enjoyable and efficient for everyone.
Conclusion: Embrace the Simplicity and Joy of Strawberry Hulling
Hulling strawberries no longer needs to be a tedious or time-consuming task that might deter you from enjoying this delightful and healthy fruit. With the clever, simple, and incredibly effective straw method, you can completely transform your fruit preparation into a quick, clean, and even genuinely fun experience. From ensuring proper, gentle washing to executing the perfect hull, this comprehensive guide provides you with all the essential knowledge and practical tips needed to master this indispensable kitchen hack.
So, the very next time you reach for those luscious, ruby-red strawberries, remember that humble, yet powerful, drinking straw. It’s not just a tool for sipping your favorite beverages; it’s your key to perfectly prepared berries, minimal waste, and a wonderful touch of culinary creativity. Go ahead, confidently try this amazing trick, savor your delicious, perfectly hulled strawberries, and most importantly, have fun with your newfound kitchen skill!