
Easy & Elegant Pumpkin Painting Ideas: Transform Your Fall Decor
As the leaves begin to change and the crisp autumn air settles in, it’s the perfect time to embrace the spirit of the season with captivating fall decor. Pumpkins, the quintessential symbol of autumn, offer an incredible canvas for creativity. If you’re looking for a fresh, less messy, and more durable alternative to traditional carving, then pumpkin painting is your answer! Get ready to transform ordinary pumpkins into extraordinary decorative masterpieces that will impress your family, friends, and neighbors alike.
This guide will walk you through three wonderfully beautiful and remarkably easy pumpkin painting ideas. Whether you’re short on time or new to DIY crafts, these no-carve techniques require minimal steps and deliver maximum visual impact. Say goodbye to the gooey mess of carving and hello to elegant, long-lasting pumpkin art. We’ll explore a classic striped look, a sophisticated black design, and a vibrant nail polish marbling technique. Ready to get started? Watch the inspiring video tutorial by HGTV Handmade on YouTube for a visual guide!
Essential Materials for Your Pumpkin Art Projects
Before diving into the creative process, gathering your materials is key. The beauty of these pumpkin painting projects lies in their simplicity, often utilizing supplies you might already have on hand. Here’s a comprehensive list of what you’ll need:
- Pumpkins: Choose various sizes and shapes for an interesting display. Ensure they are clean and dry before painting.
- White Paint: A versatile base coat, especially for lighter designs or as a primer. Acrylic craft paint works wonderfully.
- Black Paint: Ideal for creating dramatic contrasts or sophisticated monochrome looks.
- Assorted Colors of Paint: Unleash your creativity! Acrylic paints are recommended for their versatility and quick drying time.
- Foam Paint Applicator: Great for achieving smooth, even base coats quickly.
- Paintbrushes: A variety of sizes for different details – larger ones for broader strokes, smaller ones for fine lines.
- Painter’s Tape: Essential for creating clean, crisp lines and stripes. Look for painter’s tape designed for delicate surfaces if your pumpkin has a smooth skin.
- Plastic Cups: Handy for holding paints, mixing colors, and providing a stable base for small pumpkins while drying.
- Nail Polish: A unique medium for creating stunning marbled effects. Gather several colors for a vibrant finish.
- White Paint Marker: Perfect for adding intricate details, drawing patterns, or writing on darker painted surfaces.
- Bowl or Container: Specifically for the nail polish marbling technique – ensure it’s disposable or easy to clean.
Pro Tip: For longer-lasting painted pumpkins, especially if displayed outdoors, consider using an exterior-grade acrylic paint and finishing with a clear sealant spray once your designs are completely dry.
Step-by-Step Pumpkin Painting Directions
Let’s get started on transforming your pumpkins! Each design offers a unique aesthetic and a straightforward process, making them enjoyable for crafters of all ages and skill levels.
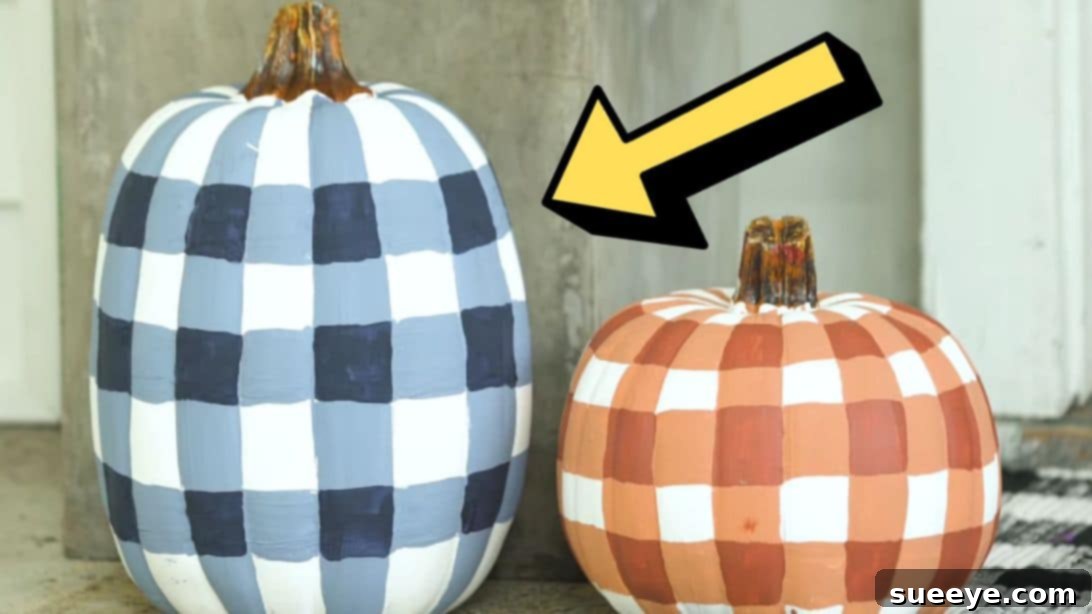
#1: The Classic Striped Pumpkin
A timeless design that adds elegance and a touch of modern flair to your fall decor. This striped pumpkin is surprisingly easy to create and allows for endless color combinations.
- Prepare Your Pumpkin: Select a clean, smooth pumpkin. Begin by coating it completely with white paint using a foam applicator for an even finish. Allow the first coat to dry thoroughly before applying a second coat if needed to achieve opaque coverage. Patience here is key for a flawless base.
- Apply Painter’s Tape: Once your white base is completely dry, carefully wrap painter’s tape horizontally around the pumpkin. Strive to space the tape strips as evenly as possible to ensure a balanced striped pattern. You can use a ruler or simply eyeball it for a more organic look. Press the tape down firmly to prevent paint bleeding underneath.
- Add Your Chosen Colors: Now, it’s time for color! Mix the paint colors you desire in plastic cups. Apply your chosen paints to the spaces in between the tapes. You can use a single color, alternating colors, or even a gradient effect. Don’t be afraid to experiment with your palette.
- Remove Tape and Refine: While the paint is still slightly wet (but not runny), carefully remove the painter’s tape. This helps achieve crisp lines. If any paint has bled, use a small brush and your base white paint to clean up the edges. You can also adjust the width of each stripe by gently scraping away paint or adding more with a fine brush.
- Create Vertical Accents (Optional but Recommended): For an extra dimension and a grid-like effect, draw vertical lines around the pumpkin. Aim for these vertical lines to be roughly the same width as your horizontal stripes for visual harmony. Apply a bit more paint at the intersections where vertical and horizontal lines meet to make them stand out.
- Final Drying: Allow your beautifully striped pumpkin to dry completely. This might take several hours, depending on the paint thickness and humidity.
#2: The Sophisticated Black Pumpkin
For a sleek, modern, and undeniably chic look, a black pumpkin offers a striking contrast and serves as a fantastic canvas for intricate white details. This design brings a touch of gothic elegance perfect for Halloween or a sophisticated fall display.
- Prime with Black: Choose your pumpkin and give it a full coat of black paint. Use a foam applicator to ensure smooth, even coverage. Allow it to dry completely. Apply additional coats as necessary until the pumpkin is opaque black.
- Create Tape Guides: Once the black paint is thoroughly dry, wrap painter’s tape horizontally around the pumpkin. Apply about three evenly spaced strips. These tape lines will serve as guides for your designs and help create visual separation.
- Draw Your Designs: With the tape in place, use a white paint marker to draw any lines, shapes, or patterns you desire in between the taped sections. You can go for intricate mandalas, simple dots, geometric patterns, or even spooky spiderwebs for Halloween. The white marker against the black background will pop beautifully.
- Remove Tape and Add Borders: Carefully remove the painter’s tape. You’ll notice unpainted black stripes where the tape was. Now, use your white paint marker to draw additional lines or patterns within these newly revealed black stripes, creating borders or continuous patterns that flow across the pumpkin. This adds depth and completes the design.
- Allow to Dry: Let your elegant black pumpkin dry completely before displaying it.
#3: The Unique Nail Polish Coated Pumpkin (Marbled Effect)
This technique is not only incredibly fun but also produces stunning, one-of-a-kind marbled patterns that are impossible to replicate. It’s a fantastic way to add a splash of unexpected color and texture to your pumpkin collection.
- Prepare Your Marbling Station: Fill a disposable container or a bowl with water. Ensure the water is at room temperature, as very cold or hot water can affect how the nail polish spreads.
- Drizzle Nail Polish: Drizzle various colors of nail polish onto the surface of the water. Work quickly, as nail polish dries fast when exposed to air. You can swirl the colors gently with a toothpick if you wish to create more intricate patterns, but be swift!
- Dip Your Pumpkin: Holding the pumpkin by its stem or bottom, carefully and swiftly dip it into the water, ensuring its exterior picks up the floating nail polish. Roll it slightly to coat different areas. The nail polish will adhere to the pumpkin, creating a beautiful marbled effect.
- Repeat if Desired: If you’re not satisfied with the first dip, you can repeat the process with fresh water and nail polish until you achieve your desired look. Each dip will yield a unique pattern.
- Allow to Dry: Place the marbled pumpkin on a piece of parchment paper or a drying rack, and let it dry completely. The nail polish will set to a durable, glossy finish.
General Tips for Perfect Painted Pumpkins
To ensure your painted pumpkins look fantastic and last throughout the fall season, consider these extra tips:
- Clean Your Pumpkins: Before painting, wipe down your pumpkins with a damp cloth to remove any dirt or debris, then dry them thoroughly. This ensures better paint adhesion.
- Work in a Well-Ventilated Area: Especially when using spray sealants or nail polish, good ventilation is important for safety and comfort.
- Protect Your Workspace: Lay down newspaper or a drop cloth to protect your surfaces from paint spills.
- Layering is Key: For opaque and vibrant colors, apply multiple thin coats of paint rather than one thick coat. Allow each layer to dry completely before adding the next.
- Seal for Longevity: If your pumpkins will be displayed outdoors, consider applying a clear acrylic sealant spray after the paint has fully dried. This protects them from the elements and helps the colors last longer.
- Display Creatively: Group pumpkins of different sizes and designs together. Add elements like fall leaves, gourds, candles (safely!), or hay bales to create a cohesive and inviting display.
Why Choose Painted Pumpkins Over Carved Ones?
While carving is a beloved Halloween tradition, painted pumpkins offer several distinct advantages:
- No Mess: Forget the sticky, stringy guts! Painting eliminates the mess and makes cleanup a breeze.
- Lasts Longer: Carved pumpkins typically only last a few days before rotting. Painted pumpkins, especially if sealed, can last for weeks, sometimes even months, giving you extended enjoyment.
- Safer: No sharp tools are needed, making pumpkin painting a much safer activity, especially for families with young children.
- More Design Versatility: The possibilities with paint are endless. You can create intricate patterns, realistic scenes, abstract art, or even characters, offering far more creative freedom than carving.
- Child-Friendly: Painting is an excellent activity for kids of all ages, allowing them to express their creativity safely.
With these easy and inspiring ideas, you’re well-equipped to create stunning pumpkin displays that will elevate your fall and Halloween decor. Whether you prefer the classic elegance of stripes, the modern sophistication of black, or the vibrant whimsy of marbled nail polish, there’s a design here for everyone. So grab your paints, pick your pumpkins, and let your creativity shine!
*All images in this article are credited to HGTV Handmade via YouTube. We highly recommend visiting their channel and subscribing for more fantastic DIY and craft ideas!