
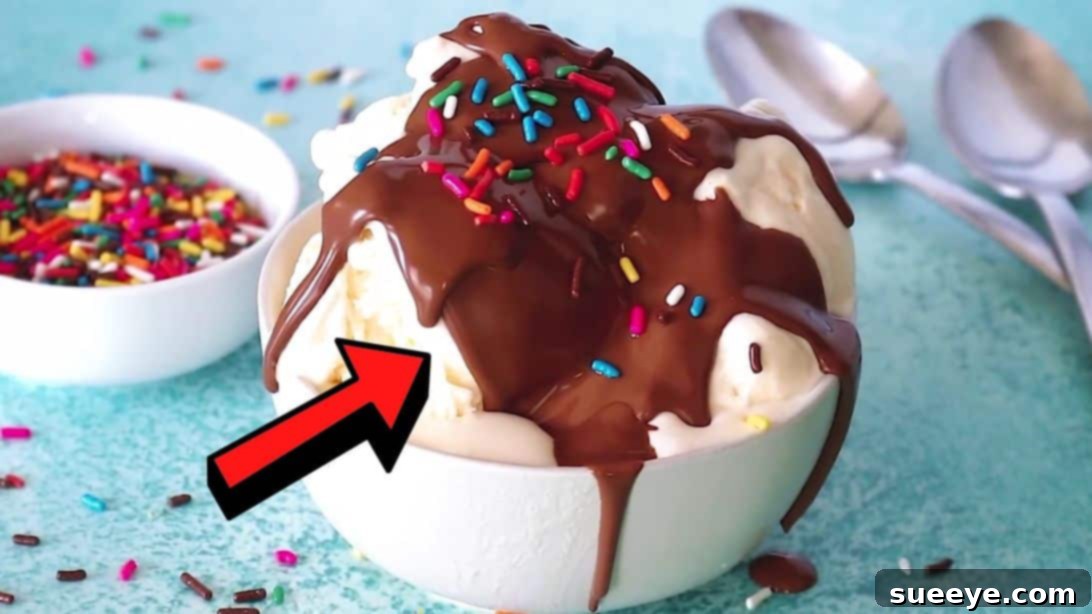
There’s an undeniable joy that comes with a scoop of ice cream, especially after a satisfying meal or as a refreshing escape on a scorching day. What makes this frozen delight even better? The perfect topping! While sprinkles, nuts, and various candies are delightful, there’s a certain enchantment in a chocolate shell that hardens instantly upon contact with cold ice cream, creating a satisfying crack with every spoonful. If you’ve ever dreamt of recreating that magic at home, you’re in for a treat.
We’ve discovered an incredibly simple yet utterly delightful recipe for homemade magic chocolate shell that requires just two ingredients and comes together in minutes. Forget store-bought alternatives with their lengthy lists of unpronounceable ingredients; this homemade version is pure, unadulterated bliss. Inspired by a fantastic tutorial from The Slow Roasted Italian on YouTube, this recipe is a game-changer for anyone who loves ice cream. Both kids and adults alike will be captivated by its charm and crave its delicious crunch. Get ready to transform your ordinary ice cream experience into something truly extraordinary with this easy-to-follow guide.
The Science of Instant Hardening: How Magic Shell Works
The secret to the “magic” in magic shell lies in one key ingredient: coconut oil. Unlike regular chocolate, which would simply melt into a sauce when warm and remain soft when chilled (unless mixed with other fats or emulsifiers), coconut oil has a unique property. It’s solid at room temperature and melts easily when heated, but crucially, it solidifies very quickly when exposed to cold temperatures. When melted chocolate chips are combined with coconut oil, the coconut oil holds the chocolate in a liquid state. As soon as this mixture hits a cold surface, like ice cream, the coconut oil rapidly cools and solidifies, taking the chocolate with it. This creates that wonderfully crisp, snappy chocolate shell we all adore. This simple scientific principle allows you to create a professional-quality topping with minimal effort and ingredients, making it an ideal choice for a quick and impressive dessert.
Essential Ingredients for Your Homemade Chocolate Shell
The beauty of this recipe truly lies in its simplicity. You only need two components to create this magical topping, making it incredibly accessible and quick to prepare.
- 2 cups of Milk Chocolate Chips: While milk chocolate chips are a fantastic starting point for a classic, sweet shell, feel free to get creative! You can easily substitute these with semi-sweet, dark chocolate, or even white chocolate chips depending on your preference. High-quality chocolate chips will yield a smoother, richer-tasting shell, so choose your favorite brand. This quantity provides a generous amount, perfect for multiple servings or storing for future use.
- ¼ cup of Coconut Oil: Refined or unrefined coconut oil will work equally well. Refined coconut oil has a neutral flavor, which means your chocolate shell will taste purely like chocolate. Unrefined (virgin) coconut oil retains a subtle coconut flavor, which can be a delightful addition if you enjoy that tropical note. Choose whichever suits your palate best, as both will provide the necessary fat and rapid solidification properties for the magic to happen. Ensure your coconut oil is solid at room temperature before you begin.
Step-by-Step Directions: Crafting Your Perfect Chocolate Shell
Creating this homemade magic chocolate shell is incredibly straightforward. Follow these simple steps for a flawless, crunchy topping every time:
- Combine Ingredients: Begin by adding both the chocolate chips and the coconut oil into a microwave-safe mixing bowl. Ensure the bowl is large enough to comfortably stir the mixture once melted.
- Microwave with Care: Place the bowl in the microwave and heat in short intervals, typically 30 seconds at a time. After each interval, remove the bowl and stir the mixture thoroughly, even if the chocolate chips don’t appear fully melted. The residual heat from the bowl and the already melted chocolate will continue to melt the remaining chips. Continue this process until the chocolate chips are almost completely melted and the mixture looks smooth and glossy. Avoid overheating, as this can scorch the chocolate and make it grainy.
- Achieve Smoothness: Once most of the chocolate chips have melted, remove the bowl from the microwave and continue stirring until the mixture is perfectly smooth and all the chocolate has dissolved. There should be no lumps. The goal is a uniform, pourable consistency.
- Cool and Transfer: Allow the melted chocolate mixture to cool down slightly. It should still be warm and liquid, but not piping hot. Carefully transfer the chocolate shell mixture to a tall mason jar or an airtight container. A jar is ideal for easy pouring and storage.
- Ready to Serve: Your homemade magic chocolate shell is now ready! You can pour it directly over your favorite ice cream, and watch as it magically hardens into a delightful, crunchy shell within seconds. For a thicker shell, let the mixture cool completely to room temperature before pouring, or even chill it slightly in the refrigerator for about 10-15 minutes (stirring occasionally) before use.
- Personalize Your Dessert: For an extra touch of flair, feel free to add sprinkles, chopped nuts, or even a drizzle of caramel or white chocolate over your ice cream and hardened shell. Enjoy this delightful treat!
Tips for a Flawless Homemade Chocolate Shell Experience
While this recipe is incredibly simple, a few expert tips can elevate your homemade magic chocolate shell from good to absolutely perfect:
- Don’t Overheat the Chocolate: This is crucial. Overheating chocolate can cause it to seize or become grainy and dull. Always microwave in short bursts (30 seconds) and stir diligently between each interval. The residual heat will do most of the work. If you notice any signs of scorching (a burnt smell or gritty texture), it’s best to start over.
- Use Good Quality Ingredients: Since there are only two ingredients, their quality significantly impacts the final taste. Opt for chocolate chips you genuinely enjoy eating on their own. For coconut oil, choose a brand you trust.
- Ensure Coconut Oil is Solid: For the “magic” to work consistently, the coconut oil should be solid at room temperature before you start. This ensures the correct ratio for rapid hardening.
- Adjusting Consistency: If your chocolate shell seems too thick after melting and stirring, you can add a tiny bit more coconut oil (start with ½ teaspoon) and re-microwave for 10-15 seconds, stirring well. If it seems too thin and doesn’t harden quickly enough, you might need to add a few more chocolate chips, melt, and stir.
- Keep Your Ice Cream Cold: The colder your ice cream, the faster and more effectively the chocolate shell will harden. Pull your ice cream out of the freezer just before serving.
- Clean and Dry Utensils: Any moisture introduced into melting chocolate can cause it to seize and become clumpy. Ensure your bowl and stirring spoon are completely dry.
Creative Customizations and Serving Suggestions
This basic two-ingredient chocolate shell recipe is a fantastic canvas for culinary creativity. Here are some ideas to make it uniquely yours:
- Flavor Variations:
- Dark Chocolate Enthusiast: Swap milk chocolate chips for semi-sweet or dark chocolate for a richer, less sweet experience.
- White Chocolate Dream: Use white chocolate chips for a visually striking and creamy shell, perfect for contrasting with dark ice cream flavors or adding a pop of color with sprinkles.
- Minty Fresh: Add a few drops of food-grade peppermint extract to the melted chocolate mixture for a refreshing mint-chocolate shell.
- Citrus Zest: Grate a tiny bit of orange or lemon zest into the warm chocolate for a subtle, aromatic twist.
- Spicy Kick: A pinch of cayenne pepper can add an unexpected and delightful warmth to a dark chocolate shell.
- Nutty Notes: Stir in a tablespoon of finely chopped nuts (like almonds or pecans) to the melted chocolate for added texture within the shell.
- Beyond Ice Cream:
- Fruit Dipping: Dip fresh fruit like strawberries, banana slices, or apple wedges into the warm chocolate shell for a quick and impressive dessert.
- Donut Glaze: Drizzle over plain donuts or churros for an instant hardening chocolate coating.
- Cake or Cupcake Topping: Use it as a quick pour-over glaze for cakes or cupcakes, creating a shiny, firm layer.
- Cookie Decorator: Dip cookies or biscotti for an extra layer of chocolatey goodness.
- Garnish Galore: Before the shell completely hardens on your dessert, quickly sprinkle with mini chocolate chips, colorful sprinkles, crushed candy pieces, or even a dusting of sea salt for a gourmet touch.
Storage and Shelf Life of Your Homemade Magic Shell
One of the many advantages of this homemade chocolate shell is its excellent storage capabilities. Once prepared, your magic shell can be stored at room temperature in an airtight container, such as the mason jar you transferred it to earlier. There’s no need for refrigeration, as the coconut oil will solidify the mixture anyway. Stored properly, it can last for several weeks, if not months, provided it’s kept in a cool, dark place away from direct sunlight.
When you’re ready to use it again, simply microwave the jar (without the lid, of course) for 30-second intervals, stirring thoroughly after each, until it returns to a smooth, pourable consistency. The beauty is that it can be melted and re-solidified multiple times without losing its magical properties. This makes it a perfect make-ahead component for spontaneous dessert cravings or last-minute entertaining.
Why Choose Homemade Over Store-Bought? The Advantages of DIY
While store-bought chocolate shell toppings are convenient, making your own offers significant advantages:
- Ingredient Control: You know exactly what goes into your dessert. No high-fructose corn syrup, artificial flavors, or unnecessary preservatives. Just pure chocolate and coconut oil.
- Cost-Effective: Buying chocolate chips and coconut oil is often more economical in the long run than repeatedly purchasing small bottles of commercial magic shell.
- Superior Flavor and Texture: Homemade typically tastes fresher and more vibrant. You can also customize the chocolate type to your exact preference (milk, dark, white). The texture tends to be snappier and less waxy than many commercial versions.
- Fun and Rewarding: There’s a certain satisfaction that comes from creating something delicious from scratch. It’s a simple project that yields impressive results.
- Dietary Considerations: For those with specific dietary needs, making it at home allows you to ensure it’s gluten-free, dairy-free (if using dairy-free chocolate), or vegan-friendly by selecting appropriate chocolate chips.
Frequently Asked Questions (FAQs)
- Can I use any other oil instead of coconut oil?
- Coconut oil is key because it’s solid at room temperature and melts quickly. Other oils like vegetable oil or olive oil will not make the chocolate harden into a crisp shell on cold ice cream; they would simply keep the chocolate liquid or create a softer ganache-like texture.
- My chocolate shell is too thick/thin. What did I do wrong?
- If it’s too thick, it might be too cool, or you might need a tiny bit more coconut oil (add ½ teaspoon at a time). If it’s too thin and doesn’t harden well, you might have too much coconut oil, or it’s not cold enough when poured. Try adding a few more chocolate chips and remelting, or ensure your ice cream is very cold.
- How long does it take for the shell to harden?
- It should harden almost instantly, within 5-10 seconds, upon contact with cold ice cream. If it’s taking longer, your chocolate mixture might be too warm, or your ice cream might not be cold enough.
- Can I make this dairy-free or vegan?
- Absolutely! Simply ensure you use dairy-free or vegan chocolate chips (many dark chocolate chips are naturally dairy-free, but always check the ingredients). The coconut oil is already plant-based, making this an excellent option for those with dietary restrictions.
- My chocolate seized! What now?
- Chocolate seizes when it comes into contact with even a tiny amount of water. This makes it thick, grainy, and unusable. Unfortunately, once chocolate has seized, it’s very difficult to salvage for a smooth shell. To prevent this, ensure all your utensils and bowls are completely dry, and avoid getting any water or steam into the melting chocolate.
With this simple, two-ingredient recipe, you’re now equipped to create delightful, crunchy chocolate shells that will elevate any ice cream experience. It’s quick, easy, and incredibly versatile, offering endless possibilities for customization and enjoyment. Whether you’re making it for a special occasion or just a regular Tuesday night treat, this homemade magic chocolate shell is guaranteed to bring smiles and satisfy sweet cravings.
Give this recipe a try and prepare to amaze your family and friends. We guarantee both kids and adults will absolutely love it! Don’t forget to watch the original video tutorial by The Slow Roasted Italian on YouTube for a visual guide. Happy scooping!
*Special thanks to The Slow Roasted Italian via YouTube for inspiring this fantastic recipe and for all images used here. If you enjoyed this recipe, be sure to visit their channel for more incredible culinary creations and subscribe for endless cooking inspiration!