
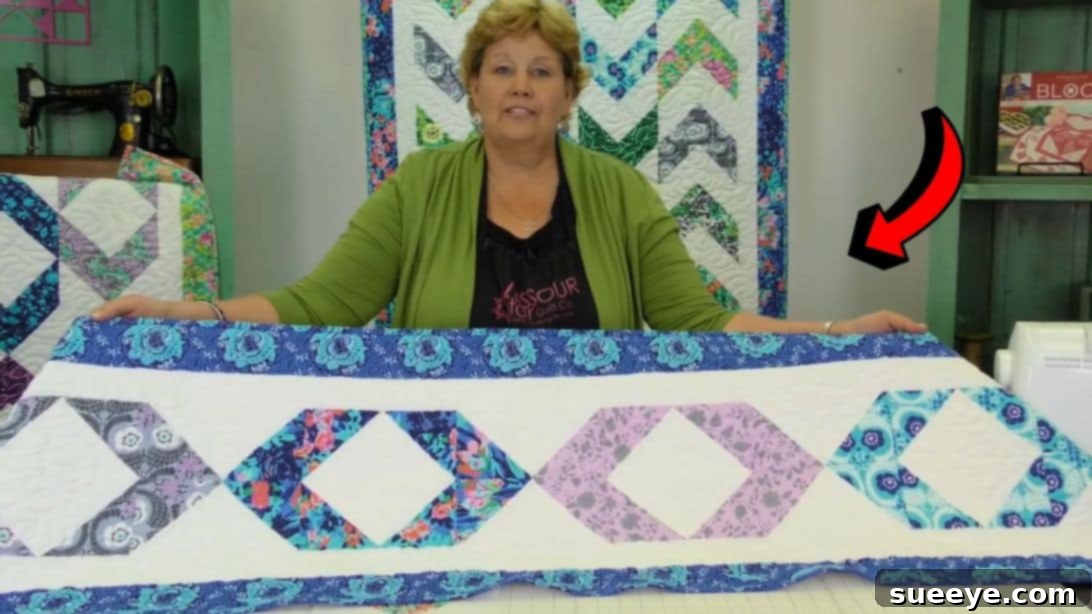
Ready to embark on a delightful quilting journey this weekend? Look no further than this incredibly satisfying chevron block quilt pattern, brilliantly simplified by the experts at Missouri Star Quilt Company. Crafted with beginners in mind, this project is not only quick to complete but also a fantastic way to master fundamental quilting techniques, especially the efficient creation of half-square triangles (HSTs).
If you’re already familiar with the basics of quilting and have a knack for HSTs, you’ll find this project an absolute breeze. However, even if you’re a complete novice, renowned quilter Jenny Doan guides you through every step, leveraging her famous “Magic 8” method. This clever technique allows you to produce eight perfect half-square triangles from just two squares of fabric in a single go, eliminating the tedious process of making them one by one. Get ready to create stunning zig-zag patterns with surprising speed and ease!
RELATED: Easy Chevron Potholders
The beauty of this quilt lies in its simplicity and versatility. For this particular project, you’ll primarily need 10-inch squares – often referred to as “layer cakes” in the quilting world. A pack of vibrant colored squares paired with a pack of contrasting background squares will form the foundation of your design. These pre-cut squares are a quilter’s best friend, saving you precious time on cutting and ensuring uniformity.
Once transformed into HSTs using the Magic 8 method, you’ll combine just four of these matched fabric pieces to assemble a single chevron block. The true magic happens when you start arranging these blocks. The possibilities are endless, allowing you to create a variety of stunning patterns, from charming baby quilts and elegant table runners to full-sized masterpieces. Jenny’s video tutorial provides an invaluable visual guide, showcasing different layout options to inspire your creativity and help you choose the perfect design for your next project.
Gathering Your Quilting Supplies for the Chevron Quilt
Successful quilting always begins with the right materials. For this delightful chevron quilt, we’re focusing on simplicity and efficiency, which is why 10-inch pre-cut squares are a fantastic choice. These “layer cakes” eliminate a significant amount of cutting time, allowing you to jump straight into the fun of sewing. Here’s what you’ll need to get started on your own beautiful chevron quilt:
- 42 pieces of 10″ colored squares: These will form the vibrant, patterned half of your half-square triangles. Feel free to choose a coordinated fabric line for a cohesive look, or mix and match prints for an eclectic, scrappy appeal.
- 42 pieces of 10″ solid squares: These will serve as the contrasting background for your half-square triangles. A crisp white, cream, or light grey often works wonderfully to make your colorful prints pop, but don’t hesitate to experiment with darker solids for a more dramatic effect.
- 2 yards of outside border fabric: The border frames your quilt top, giving it a finished and polished appearance. Consider a fabric that complements your main squares, either pulling out a color from your prints or providing a strong contrast.
- Backing Fabric: While not explicitly listed in the original, you’ll need backing fabric (typically around 3.5 to 4 yards for a throw-sized quilt, depending on the final dimensions). This can be a solid, a coordinating print, or even a pieced back for added interest.
- Batting: The middle layer of your quilt, batting provides warmth and structure. Choose a type that suits your preference, such as cotton, polyester, or a blend.
- Binding Fabric: Around 0.5 yards will be sufficient for binding, which finishes the edges of your quilt. This is another opportunity to add a decorative touch or a pop of contrasting color.
- Basic Quilting Tools: Don’t forget your sewing machine, rotary cutter, cutting mat, quilting ruler, fabric marking tool (pencil or chalk), thread, pins, and an iron with an ironing board.
Selecting your fabrics is one of the most exciting parts of quilting. Don’t be afraid to play with different color palettes and fabric collections. Whether you prefer bright and bold, soft and subtle, or a mix of modern and traditional, the chevron pattern will showcase your fabric choices beautifully.
How to Master the Chevron Block: A Step-by-Step Guide
The core of this stunning chevron quilt lies in its simple yet effective block construction, powered by the ingenious “Magic 8” method for creating half-square triangles. Follow these detailed steps to build your blocks with precision and speed, even if you’re new to quilting.
Step 1: Preparing Your Fabric for the Magic 8 HSTs
The first step in creating your chevron blocks involves preparing your 10-inch squares for the Magic 8 method. This technique is a fantastic time-saver, allowing you to create eight HSTs at once, ensuring consistency and accuracy. Begin by selecting one 10-inch colored square and one 10-inch background square. Place them right sides together, ensuring all edges are perfectly aligned. Accuracy in this initial step will contribute significantly to the precision of your finished HSTs.
Next, using a ruler and a fabric marking tool (such as a Frixion pen, chalk, or a fine-tip fabric marker), draw a diagonal line from corner to corner across your stacked squares. Repeat this in the opposite direction, creating a distinct “X” on the top fabric. This “X” will serve as your guide for cutting later. Finally, using your sewing machine, sew a seam a scant 1/4 inch away from both sides of each drawn line. This means you will have a total of four parallel lines of stitching: two on one side of the “X” and two on the other, creating a stitched box around your drawn lines. Remember to backstitch at the beginning and end of each seam to secure your stitches.
Step 2: Precision Cutting and Pressing Your Half-Square Triangles
Once your sewing is complete, it’s time to transform your stitched square into eight individual half-square triangles. This step requires careful cutting to maintain accuracy. First, take your prepared square to your cutting mat. Using your rotary cutter and a long ruler, cut the square in half horizontally and then vertically, ensuring your cuts are straight and precise. This will yield four smaller squares, each containing parts of your stitched lines. Next, carefully cut directly along the two diagonal lines that you drew in Step 1, cutting through the stitched areas. It’s crucial that all your layers are perfectly lined up before you make these cuts to ensure symmetrical HSTs.
After cutting, you will have eight raw HSTs. The next vital step is pressing. First, “set the seams” by pressing the sewn seams flat as they were stitched. This helps to meld the stitches into the fabric, creating flatter and more stable blocks. Then, carefully open each HST, pressing the seam allowance towards the darker fabric. Pressing towards the darker fabric helps to prevent the seam allowance from showing through the lighter fabric on the finished quilt. Once pressed, your half-square triangles should measure 4 1/2 inches square. If any of your HSTs are slightly off-size, now is the perfect time to “square them up” using a specialized HST ruler or a regular quilting ruler. Squaring up ensures all your blocks are the same size, leading to a much more accurate and professional-looking finished quilt.
Step 3: Assembling the Iconic Chevron Quilt Block
With your perfectly pressed and squared-up half-square triangles ready, it’s time to assemble them into the distinctive chevron block. Each block requires four HSTs. Begin by laying out your four HSTs to form the classic chevron pattern. For instance, you might place the first two HSTs with their colored sections facing each other, creating a peak. Then, position the remaining two HSTs with their background (white) sections facing each other, forming the valley of the chevron. This arrangement creates a visual flow that defines the chevron design.
Once you’re satisfied with the layout, you’ll sew them together in two rows. Sew the first two HSTs together along one side, creating the top row. Then, sew the remaining two HSTs together for the bottom row. Press the seams open or towards opposite sides for each row (e.g., press the top row’s seam to the left and the bottom row’s seam to the right). This alternating pressing technique is crucial as it allows your seams to “nest” when you join the two rows, reducing bulk and ensuring perfectly matched points. Finally, align the two rows, carefully nesting the seams, and sew them together to complete your chevron block. Take your time with this step, using pins to hold everything in place, especially at the seam intersections, to ensure sharp, crisp points.
Step 4: Designing with Chevron Blocks: Layout Variations
Now that you have your individual chevron blocks, the true artistry begins with arranging them to form your quilt top. This block is incredibly versatile, allowing for a multitude of stunning designs. For instance, for a charming baby quilt, you might assemble four blocks per row. By alternating the direction of the “arrows” or zig-zags in each consecutive block, you create a dynamic, undulating pattern. A typical baby quilt might consist of five such rows, sewn together to form the quilt center. This classic arrangement produces the traditional, continuous chevron stripe.
However, don’t limit your imagination! You can experiment with different rotations of each block to create entirely new patterns. For example, by rotating some blocks, you can form striking diamond shapes across your quilt. Or, by orienting all the blocks in the same direction, you can create a strong, directional flow. Consider a more intricate design where blocks form stars or other geometric motifs. Lay out your blocks on a design wall or even a clean floor to visualize your composition before you sew them together. This step is crucial for ensuring you love the final look. Play with different color placements too – grouping similar colors or scattering them for a scrappy aesthetic can dramatically alter the quilt’s overall feel. Once satisfied, sew your blocks into rows, and then sew the rows together to complete your quilt top, pressing seams as you go for a flat, beautiful finish.
Bringing Your Chevron Quilt to Life: Beyond the Blocks
Once your chevron quilt top is meticulously pieced together, the journey isn’t quite over. The next steps involve adding the final touches that transform your quilt top into a cherished, functional piece of art. Begin by attaching your outer border fabric, which frames your design and often provides an opportunity to increase the quilt’s size and visual impact. Measure carefully and sew with a consistent 1/4-inch seam allowance for crisp, straight borders.
Next comes the “quilting sandwich.” Layer your quilt backing (right side down), then your batting, and finally, your chevron quilt top (right side up) on a flat surface. Secure these layers together using pins, basting spray, or basting stitches. This ensures all layers stay in place during the actual quilting process. You can choose to quilt by hand for a traditional, cozy feel, or use your sewing machine to create intricate patterns or simple straight lines that highlight your chevron design. Finally, the edges of your quilt will be finished with binding – strips of fabric sewn around the perimeter to create a clean, durable, and attractive edge. This final step not only secures the raw edges but also adds another element of design to your beautiful handmade quilt.
Expert Tips for a Stunning Chevron Quilt
Achieving a professional-looking quilt, especially for beginners, often comes down to a few key practices. Always maintain a consistent 1/4-inch seam allowance throughout your project; this is fundamental for blocks to fit together perfectly. Pressing correctly is also paramount: press seams flat first to “set” them, then press towards the darker fabric (unless nesting seams dictates otherwise) to minimize bulk and ensure your lighter fabrics remain opaque. Don’t rush the squaring-up process for your HSTs – it’s a small step that makes a huge difference in the overall accuracy of your quilt. Lastly, embrace the process and allow for imperfections; every handmade quilt tells a unique story, and yours will be no different. Enjoy the creative journey!
Learn from the Master: Jenny Doan’s Chevron Block Quilt Tutorial
While this guide provides a comprehensive overview, seeing the steps in action is invaluable. Jenny Doan from Missouri Star Quilt Company is a beloved quilting instructor known for her clear, encouraging, and easy-to-follow tutorials. Watching her demonstrate the Magic 8 method, guide you through block assembly, and showcase various layout options will undoubtedly clarify any questions and boost your confidence. Her infectious enthusiasm and practical tips make learning a joy. Don’t miss the opportunity to learn directly from one of the best in the quilting community by watching her full video tutorial.
Crafting this chevron block quilt is more than just a sewing project; it’s an opportunity to create something beautiful, practice valuable quilting skills, and produce a cherished item for your home or as a heartfelt gift. The combination of simple techniques and striking design makes it an ideal choice for quilters of all levels. So grab your fabric, fire up your sewing machine, and get ready to create a magnificent chevron quilt that will undoubtedly impress!