
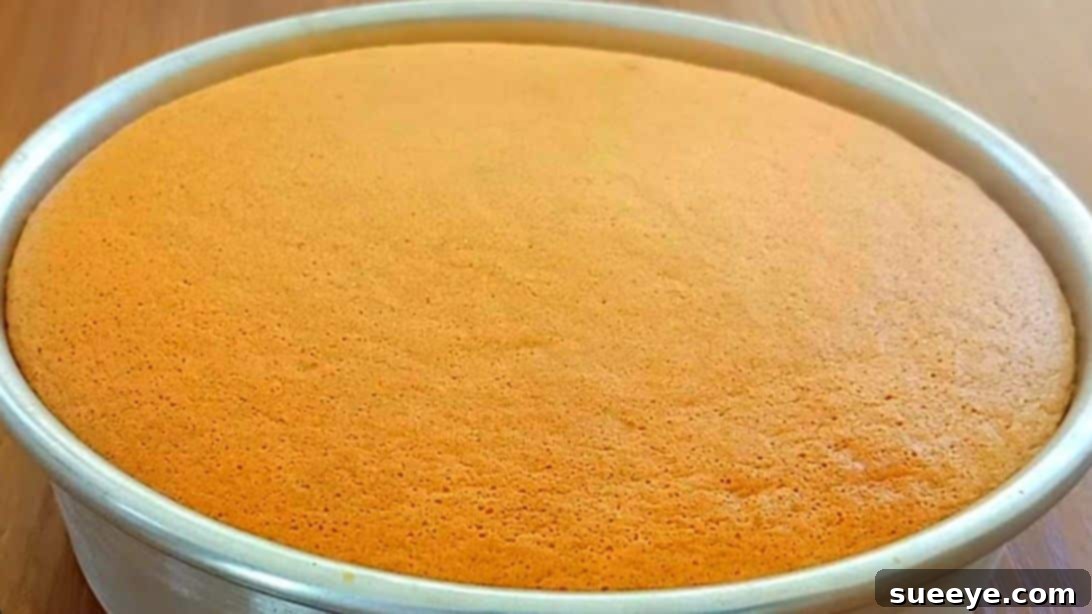
Welcome to the ultimate guide for baking an incredibly light, airy, and exquisitely delicious vanilla sponge cake using only four essential ingredients! Whether you’re taking your first steps into the world of baking or you’re a seasoned home cook looking for a reliable, no-fuss recipe, this guide is crafted for your success. Inspired by the simplicity and charm of Siblings Food Hunter, this recipe proves that culinary magic doesn’t require a lengthy ingredient list or complex techniques. It’s about harnessing the power of basic components to create something truly delightful.
Our 4-ingredient vanilla sponge cake is celebrated for its delicate texture and subtle, inviting sweetness. It’s a versatile base that beautifully complements a myriad of toppings and fillings, making it perfect for any occasion – from a casual afternoon tea to a celebratory gathering. Imagine a cake so tender it practically melts in your mouth, forming the ideal foundation for fresh berries, a cloud of whipped cream, a rich chocolate ganache, or even a vibrant fruit compote. This comprehensive guide will meticulously walk you through each step, offering invaluable tips and insights to ensure you achieve that coveted, consistent fluffy texture every single time. Get ready to bake a homemade treat that not only looks impressive but tastes absolutely heavenly!
Why This 4-Ingredient Vanilla Sponge Cake is Your New Go-To Recipe
This particular recipe stands out in the vast world of baking, earning its place as a cherished favorite for many home bakers. Its appeal lies in its straightforward nature coupled with consistently impressive results:
- Unbeatable Simplicity: Featuring just four core ingredients – eggs, sugar, flour, and vanilla – this recipe streamlines your shopping and significantly cuts down on preparation time. It’s a testament to the idea that fewer ingredients can lead to more flavor and less fuss.
- Perfect for Beginners: Designed with ease in mind, every step is explained clearly and concisely. We demystify the baking process, making it an ideal entry point for anyone eager to learn the fundamentals of cake making without intimidation. No fancy equipment is needed, just enthusiasm and basic kitchen tools.
- Achieve Legendary Fluffiness: The method emphasizes crucial techniques for incorporating and retaining air within the batter. This attention to detail is what guarantees the wonderfully light, airy, and tender crumb that defines a truly exceptional sponge cake.
- Incredibly Versatile: While it shines bright with its pure vanilla essence, this sponge cake is a magnificent blank canvas. It’s robust enough to be layered, delicate enough to be served simply, and adaptable enough to welcome various flavor enhancements and dessert creations. From elegant trifles to celebratory layered cakes, its potential is boundless.
- Quick & Rewarding: The active preparation time for this cake is surprisingly minimal. You’ll move from gathering ingredients to placing your cake in the oven swiftly, meaning you can whip up a stunning homemade dessert without spending hours in the kitchen. The reward of a freshly baked, golden-brown sponge is immediate and immensely satisfying.
Before we dive into the fascinating process, let’s gather our simple yet powerful ingredients and delve into the unique role each plays in bringing this delectable, fluffy vanilla sponge cake to life. Understanding your ingredients is the first step towards baking perfection.
Ingredients for Your Perfect Vanilla Sponge Cake
The true beauty of this recipe lies in its minimalist ingredient list. While the requirements are few, the quality and proper preparation of these four components are paramount to achieving that characteristic light, airy, and ethereal texture that defines a perfect sponge cake. A golden rule for sponge cakes: ensure all your ingredients are at room temperature before you begin. This crucial step allows them to combine more smoothly and, most importantly, facilitates maximum aeration, which is key to your cake’s rise and lightness.
- 4 Large Whole Eggs: Eggs are undoubtedly the star performers in this recipe. They serve multiple vital functions: providing essential structure, contributing richness to the flavor, and, most critically, acting as the primary leavening agent. When whipped vigorously, eggs trap air, creating a stable foam that gives the sponge its incredible lift and delicate crumb. Using room temperature eggs ensures they whip up to their highest possible volume, trapping more air and resulting in a lighter cake.
- 3/8 cup (approx. 75g or 1/3 cup + 2 tbsp) Granulated Sugar: Sugar does more than just sweeten the cake; it’s a vital component for moisture and tenderness. When beaten together with the eggs, sugar helps to stabilize the egg foam, allowing it to hold air more effectively and preventing deflation. It also contributes to the beautiful golden-brown crust.
- 5/8 cup (approx. 75g or 1/2 cup + 2 tbsp) Cake Flour or All-Purpose Flour: For the most tender and softest crumb, cake flour is the preferred choice due to its lower protein content. Lower protein means less gluten development, which translates to a more delicate texture. However, don’t fret if you only have all-purpose flour; it works wonderfully too! Just ensure you sift it thoroughly, which helps to lighten it and prevent any lumps, integrating smoothly into your airy batter.
- 1 teaspoon Vanilla Extract (optional, but highly recommended for classic flavor): While technically optional, vanilla extract adds a beautiful, warm, and inviting aromatic depth that perfectly complements the sweetness of the cake. It elevates the overall flavor profile without overpowering it. Feel empowered to explore other flavor extracts like almond, lemon, or orange if you wish to experiment and create different taste experiences.
Pro Tip for Chocolate Lovers: Craving a delicious, rich chocolate sponge cake? It’s an easy adaptation! Simply adjust your flour proportions: use 1/2 cup of cake flour and replace the remaining 1/8 cup with 1/4 cup of unsweetened cocoa powder. This substitution introduces a delightful, deep cocoa flavor while maintaining the cake’s delicate, airy texture. Remember to sift the cocoa powder with the flour!
The cake mold specifically used in this recipe measures 6 inches in diameter. This size is ideal for yielding a beautifully risen, perfectly proportioned sponge that is wonderful for intimate gatherings or personal enjoyment. Before you start mixing, make sure your pan is ready and properly prepared!
Essential Equipment for a Seamless Baking Experience
While our ingredient list is wonderfully short, having the right tools on hand can significantly enhance your baking journey, making it smoother and more enjoyable. You don’t need a professional chef’s kitchen, but these key items will undeniably set you up for success with your fluffy sponge cake:
- Electric Hand Mixer or Stand Mixer: This is arguably the most crucial piece of equipment for this recipe. Achieving the proper volume and consistency when whipping the eggs and sugar is paramount, and an electric mixer does this efficiently and effectively. While a hand whisk can be used, be prepared for a substantial arm workout and a much longer beating time to reach the desired foamy, light “ribbon stage.”
- Large Mixing Bowls: It’s beneficial to have at least two large mixing bowls – one dedicated to whipping your eggs and sugar, and another for sifting your dry ingredients to keep things organized and prevent cross-contamination.
- Fine-Mesh Sieve: An indispensable tool for ensuring a perfectly smooth, lump-free batter. It’s essential for sifting your cake flour (and cocoa powder, if you’re making the chocolate variation) to aerate them and remove any unwanted clumps.
- Rubber Spatula: This flexible tool is invaluable for gently folding in the flour. Its soft edge allows you to carefully combine ingredients without deflating the precious air you’ve incorporated into the egg mixture, which is vital for a light sponge.
- 6-inch Round Cake Pan: Adhering to the specified pan size ensures your cake rises correctly and has the intended thickness. A springform pan can be particularly convenient for easy unmolding without damaging your delicate sponge.
- Parchment Paper: Crucial for lining the bottom of your cake pan. This non-stick barrier guarantees your cake won’t stick and can be effortlessly removed, preserving its beautiful base.
- Toothpick or Thin Skewer: Useful for two purposes: gently swirling through the batter to release large air bubbles before baking, and testing the cake’s doneness during the last few minutes of baking.
- Oven: A well-functioning oven is key. Proper preheating is non-negotiable for even baking. Investing in an oven thermometer is highly recommended, as oven temperatures can often vary from what the display indicates.
Step-by-Step Instructions for Your Fluffy Vanilla Sponge Cake
Follow these detailed instructions precisely, paying close attention to the nuances of each step, to ensure you achieve a consistently perfect, light, and airy vanilla sponge cake every single time. Remember, gentleness and accuracy are your best friends in sponge cake baking!
Step 1: Preheat Your Oven and Prepare Your Pan with Precision
Begin by preheating your oven to the exact temperature of 320 degrees F (160 degrees C). Allowing your oven ample time to reach and stabilize this temperature is absolutely vital for even baking and ensuring your cake achieves its optimal rise. While the oven is preheating, meticulously prepare your 6-inch round cake pan. Tear a piece of parchment paper to perfectly fit the bottom of the pan. You can lightly grease the very bottom of the pan with a tiny bit of butter or non-stick spray before placing the parchment paper; this helps the paper adhere smoothly. Critically, avoid greasing the sides of the pan. The sponge cake batter needs to “grip” the sides of the pan as it rises, providing structure and height. Greasing the sides can cause the cake to slip down, resulting in a denser texture and a less impressive rise.
Step 2: Master the Egg and Sugar Whipping for Maximum Aeration
In a large, impeccably clean mixing bowl (ensure there’s no grease residue, as this can hinder the eggs from whipping properly), carefully crack the 4 whole eggs. Add the precisely measured 3/8 cup of granulated sugar to the eggs. Now, using either an electric hand mixer or a stand mixer fitted with a whisk attachment, begin beating the mixture. Start on a medium speed for about a minute, then increase to medium-high speed. Continue beating vigorously for a significant period, typically between 7 to 10 minutes, or even longer depending on your mixer’s power.
The goal is to transform the mixture into a very pale yellow, thick, foamy, and substantially increased volume. When you lift the beater, the mixture should fall back into the bowl in a slow, continuous “ribbon” that gracefully holds its shape on the surface for several seconds before gradually dissolving. This crucial “ribbon stage” is the cornerstone of a light sponge cake; it signifies that maximum air has been incorporated and the egg foam is stable enough to support the flour, providing the cake with its remarkable lift and delicate structure. Be patient at this stage – it’s the most important for your cake’s success!
Step 3: Gently Infuse with Aromatic Vanilla Flavor
Once your egg and sugar mixture has attained the perfect ribbon stage consistency, it’s time to introduce the flavor. Carefully add the 1 teaspoon of vanilla extract. Mix it in very gently on the lowest speed of your mixer for only a few seconds, or even better, carefully fold it in with a rubber spatula. The key here is to combine it just until it’s evenly distributed without overmixing. Excessive mixing at this point can begin to deflate the precious air you’ve worked so hard to incorporate, compromising the final lightness of your sponge.
Step 4: Incorporate the Flour with Utmost Gentleness to Preserve Air
Now, the most delicate step: incorporating the dry ingredients. Sift the 5/8 cup of cake flour (or all-purpose flour) directly over the egg mixture. It’s highly recommended to do this in two separate additions, rather than all at once. Sifting is an absolutely essential step for two main reasons: it breaks up any potential clumps in the flour, ensuring a smooth batter, and it aerates the flour, making it significantly lighter and easier to fold in without deflating the delicate egg foam.
After adding the first half of the sifted flour, use a large whisk or, preferably, a flexible rubber spatula to gently fold it into the egg mixture. Employ a “cut and fold” motion: gently slice through the center of the batter with your spatula, sweep it to the bottom of the bowl, and then fold it up and over the top, turning the bowl a quarter turn as you go. The objective is to combine the flour just until no dry streaks remain, being exceedingly careful not to overmix. Overmixing will rapidly develop the gluten in the flour, which will lead to a tough, dense, and chewy cake – exactly what we’re trying to avoid in a light sponge. Repeat this gentle folding process with the second half of the flour. Finish by using your spatula to carefully scrape down the sides and bottom of the bowl, ensuring all ingredients are thoroughly, yet ever so gently, combined.
Step 5: Prepare for Baking – Pour Batter and Degas for an Even Crumb
With the utmost care, pour the delicately aerated batter into your previously prepared 6-inch cake pan, ensuring it spreads evenly across the bottom. Once the batter is in the pan, it’s important to address any large air bubbles that might be trapped within. You can gently insert a thin stick or a toothpick into the batter and swirl it around a few times to release these larger pockets. A more common and often highly effective method is to gently, yet firmly, tap the cake pan on your kitchen counter two or three times. This action helps to coax any significant air pockets to the surface, which prevents unsightly large holes or tunnels in your finished cake and contributes to a beautifully even, fine crumb texture. Be gentle but firm – you want to release large bubbles without deflating the entire batter.
Step 6: Bake Until Golden, Springy, and Perfectly Done
Immediately after preparing the batter and degasing, carefully place the cake pan into your preheated 320 degrees F (160 degrees C) oven. Bake for approximately 25 to 30 minutes. It’s crucial to understand that baking times can vary slightly from oven to oven, so consider this a guideline. Keep a watchful eye on your cake, especially during the latter half of the baking process. The cake is typically done when its top is a beautiful golden brown, and when gently pressed with a fingertip, it springs back immediately. Another reliable test for doneness is to insert a clean toothpick or thin skewer into the very center of the cake; if it comes out clean with no wet batter attached, your sponge cake is perfectly baked! Resist the temptation to open the oven door too early during baking, particularly during the first 15-20 minutes, as the sudden drop in temperature can cause the delicate structure of the cake to collapse and sink.
Step 7: Cool, Unmold, and Prepare for Serving with Joy
Once your exquisite sponge cake is baked to perfection, carefully remove it from the oven. Allow the cake to cool in its pan, placed on a wire rack, for about 5 to 10 minutes. This brief cooling period within the pan is essential; it allows the cake’s delicate structure to set and firm up slightly, which significantly reduces the risk of it tearing or breaking when you unmold it. After this initial cooling, gently run a thin, sharp knife or an offset spatula around the inner edges of the pan to loosen the cake from any sticking points. Then, invert the cake onto the wire rack, carefully lift off the pan, and gently peel away the parchment paper from the bottom of the cake.
It is paramount that you allow the cake to cool completely on the wire rack before attempting to slice it or apply any decorations. A warm sponge cake is exceptionally fragile and prone to crumbling or collapsing under the pressure of a knife or frosting. Once fully cooled to room temperature, your magnificent 4-ingredient vanilla sponge cake is ready to be transferred to a serving plate. Now, the moment you’ve been waiting for – your masterpiece is complete and ready to be enjoyed!
Tips for a Consistently Perfect Sponge Cake
Achieving a perfect sponge cake consistently involves a keen eye for detail and a mastery of a few fundamental techniques. Integrate these essential tips into your baking routine, and you’ll be producing flawless sponges with confidence:
- Embrace Room Temperature Ingredients: This point cannot be overemphasized, especially concerning eggs. Eggs at room temperature whip up to a significantly higher volume and create a much more stable foam compared to cold eggs. This superior aeration is the fundamental secret to a truly light and lofty sponge cake.
- Prioritize Accurate Measurements: Baking is a precise science. While cup measurements are provided, using a kitchen scale for flour and sugar (e.g., 75g for both in this recipe) offers the most accurate and consistent results, especially crucial for recipes with non-standard fractional cup measurements. Precision minimizes variability.
- Patiently Whip Eggs to the Ribbon Stage: This is the single most critical step. Do not rush it. Continue beating the eggs and sugar until they reach that characteristic “ribbon stage” – thick, pale, voluminous, and holding a ribbon for several seconds on the surface. This extensive aeration is what provides the cake with its inherent lift and ethereal, delicate texture.
- Master the Art of Gentle Folding: Once you introduce the flour, your mixer’s job is done. Switch to a rubber spatula and employ a gentle “cut and fold” technique. Overmixing at this stage will rapidly develop the gluten in the flour, which inevitably leads to a tough, dense, and undesirable cake texture, completely undoing all the aeration work.
- Always Sift Your Flour: Make sifting a non-negotiable step for all your dry ingredients (flour, cocoa powder). Sifting accomplishes two vital tasks: it eliminates any lumps, ensuring a smooth batter, and it aerates the flour, making it lighter and easier to incorporate into the delicate egg mixture without causing deflation.
- Correct Pan Preparation is Key: Ensure you properly line the bottom of your cake pan with parchment paper. Crucially, resist the urge to grease the sides of the pan. The batter needs a surface to cling to as it rises, providing necessary support and achieving maximum height. Greased sides will cause the cake to slip back down.
- Verify Your Oven Temperature: Oven temperatures can be notoriously inaccurate. Invest in a reliable oven thermometer to ensure your oven is truly at the specified temperature (320°F/160°C). An oven that’s too hot can result in a cake that browns too quickly on the outside and remains undercooked inside, while one that’s too cool can lead to a flat, dense sponge.
- Resist Opening the Oven Door: During the initial two-thirds of the baking time, keep that oven door firmly shut! The sudden influx of cold air can cause the delicate, rising structure of the cake to collapse, resulting in a sunken center. Patience is a virtue in baking.
- Allow for Complete Cooling: This step is just as important as baking. Always allow your cake to cool fully on a wire rack before attempting to cut or decorate it. A warm sponge cake is inherently fragile and will likely crumble or tear when handled, compromising its beautiful texture and appearance.
Creative Variations and Delightful Serving Suggestions
While our 4-ingredient vanilla sponge cake is absolutely delightful in its purest form, its versatility is one of its greatest assets. It serves as an exceptional foundation, ready to be transformed into an array of magnificent and personalized desserts. Let your culinary imagination soar!
Exciting Flavor Variations:
- Bright Citrus Burst: For a refreshing and zesty twist, finely grate the zest of one lemon, orange, or lime into the batter along with the vanilla extract. The citrus oils add a beautiful aromatic lift and a subtle tangy note.
- Elegant Nutty Indulgence: Introduce a delightful texture and depth of flavor by folding in a tablespoon of very finely ground nuts (such as almonds, hazelnuts, or pistachios) with the flour. This adds a sophisticated touch.
- Warm & Spicy Comfort: A pinch of ground cinnamon, a dash of nutmeg, or a hint of cardamom can infuse your sponge with comforting warmth and aromatic complexity, especially perfect for cooler seasons.
- Coffee Lover’s Dream: Replace the vanilla extract with an equal amount of high-quality coffee extract, or incorporate a tablespoon of strong, cooled espresso directly into the wet ingredients for a subtle yet distinct coffee flavor.
- Floral Notes: For a truly unique and delicate flavor, add a few drops of food-grade rosewater or orange blossom water (start with a tiny amount and add more to taste).
Delightful Serving Suggestions:
- Simply Classic & Elegant: The simplest presentations are often the most effective. Dust your cooled sponge cake with a light veil of powdered sugar, then serve alongside a vibrant medley of fresh berries (strawberries, raspberries, blueberries) and a generous dollop of freshly whipped cream.
- Rich & Decadent Chocolate: Elevate the experience by drizzling the cake with melted dark chocolate, a homemade chocolate sauce, or a luxurious chocolate ganache.
- Fruity & Zesty Delight: Layer individual slices or cubes of sponge cake with homemade fruit compotes (like cherry, peach, or berry), tangy lemon curd, or your favorite fruit jams. You can even create charming mini trifles by cubing the cake and layering it with custard, fresh fruit, and cream.
- Quick & Glossy Glaze: For a touch of extra sweetness and an attractive sheen, whisk together powdered sugar with a splash of milk, lemon juice, or even a fruit liqueur to create a simple yet effective glaze.
- The Ultimate Tea Time Treat: Enjoy a substantial slice of your homemade sponge cake with your preferred hot beverage – be it a robust coffee, a fragrant Earl Grey, or a soothing herbal infusion. It’s the perfect companion for an afternoon break.
- Foundation for Layer Cakes: This sturdy yet delicate sponge is robust enough to be carefully split into two or even three layers. Fill it with your favorite buttercream frosting, luscious pastry cream, fruit fillings, or even a light mousse for a more elaborate and impressive celebration cake.
Storage Tips to Keep Your Sponge Cake Fresh and Delicious
To ensure your perfectly baked vanilla sponge cake retains its delightful freshness, light texture, and exquisite flavor for as long as possible, adhere to these straightforward storage guidelines:
- Room Temperature (Unfrosted): If your sponge cake is unfrosted and stored correctly, it can remain wonderfully fresh at room temperature for up to 2 to 3 days. The key is to keep it in an airtight environment; a specialized cake dome, a large airtight container, or even tightly wrapped in plastic wrap and then aluminum foil will prevent it from drying out and absorbing ambient odors. Place it on your kitchen counter, away from direct sunlight or heat sources.
- Refrigeration (Frosted or Extended Freshness): Should your cake be adorned with perishable frostings, such as fresh whipped cream, cream cheese frosting, or a custard-based filling, refrigeration becomes a necessity. Cover the cake loosely with plastic wrap or place it within an airtight container. In the refrigerator, it will maintain its quality for approximately 4 to 5 days. For the best taste and texture, allow refrigerated cake to come to room temperature for about 30 minutes before serving.
- Freezing for Long-Term Storage: Sponge cake freezes remarkably well, making it an excellent option for meal prepping desserts or saving leftovers. Once your cake is entirely cooled (this is critical!), wrap the unfrosted cake tightly in several layers of plastic wrap, ensuring no air can penetrate. Follow this with an additional layer of aluminum foil for extra protection against freezer burn. Stored this way, it can last in the freezer for up to 1 to 2 months without significant loss of quality. To thaw, simply transfer the wrapped cake to the refrigerator overnight, then bring it to room temperature before serving or decorating.
- Protect from Direct Heat and Sunlight: Regardless of whether it’s stored at room temperature or refrigerated, always keep your cake away from direct sunlight, hot oven exhausts, or any other heat sources. Heat can accelerate spoilage, melt frostings, and compromise the delicate texture of your sponge.
Conclusion: Your Journey to Baking Perfection
Congratulations! You have now successfully navigated the art of creating a truly beautiful, incredibly light, and wonderfully flavorful 4-ingredient vanilla sponge cake. This recipe serves as a delightful testament to the fact that simplicity, when coupled with a little patience and attention to detail, can indeed yield the most satisfying and impressive culinary results. From the initial moments of patiently whisking eggs to achieve that ethereal ribbon stage, all the way to the final golden-brown perfection emerging from your oven, every step in this guide has been carefully designed to lead you towards a faultless bake.
Remember, the world of baking is a continuous journey of learning, discovery, and delightful experimentation. Once you’ve mastered this fundamental sponge, feel empowered and confident to explore its endless possibilities. Don’t shy away from experimenting with new flavor infusions, creative toppings, or innovative serving styles. This versatile cake is truly a magnificent blank canvas, eagerly awaiting your unique creative touch. Share your delicious creations with loved ones, revel in the rewarding process, and most importantly, savor every single delicate bite of your homemade masterpiece. Happy baking, and may your kitchen always be filled with the sweet aroma of success!