
DIY Beaded Solar Lanterns: Illuminate Your Patio with Boho Chic and Sustainable Charm
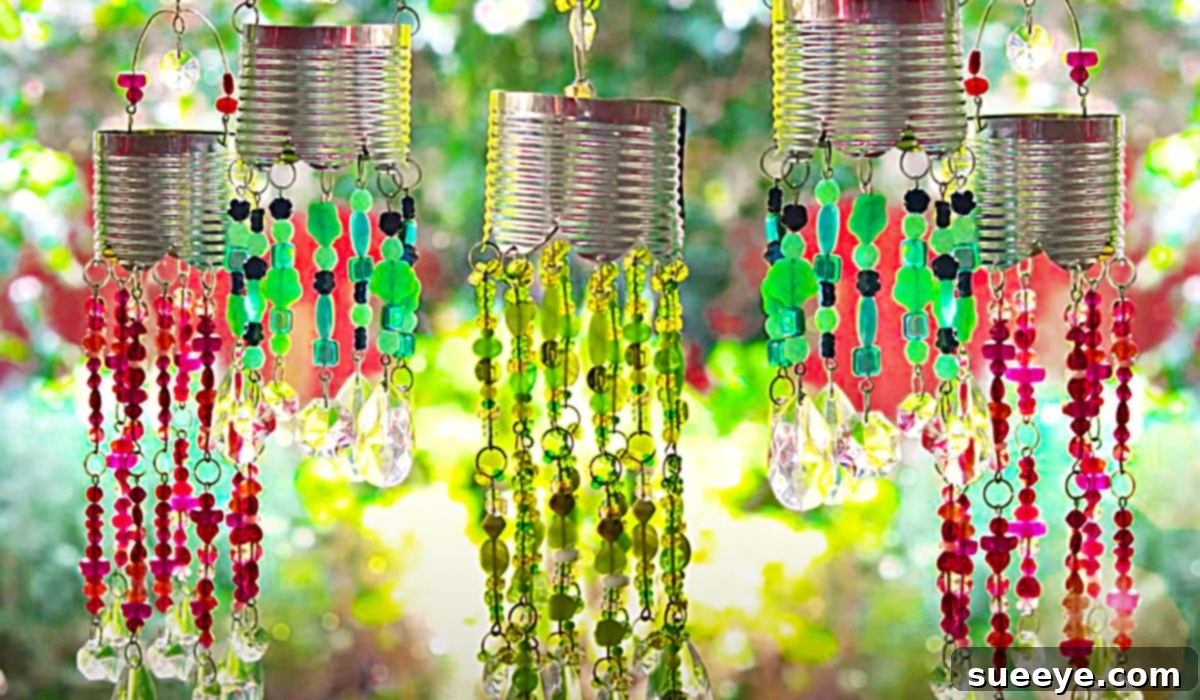
Transforming your outdoor living areas into a serene, inviting oasis doesn’t have to break the bank. With a little creativity and some readily available materials, you can craft breathtaking DIY beaded solar lanterns that exude bohemian elegance and provide eco-friendly illumination. This project is not just about making a light source; it’s about infusing personality, charm, and a sustainable touch into your garden, patio, or balcony.
Recently, I stumbled upon an incredibly inspiring DIY solar lantern video tutorial by Mark Montano on YouTube. The moment I saw these gorgeous luminaries, I knew they were the perfect addition to my new boho-themed patio decor. What truly captivated me was how affordable, simple, and utterly beautiful these lanterns turned out to be. Beaded lighting instantly uplifts any environment, creating a vibrant, inviting atmosphere. The added bonus of them being solar-powered means absolutely no fuss with wires or electrical outlets – just pure, effortless ambiance.
Join us as we dive into creating these charming solar lanterns. You’ll be amazed at how easily you can turn everyday items into stunning pieces of decor that capture the essence of laid-back luxury and sustainable living.
Why DIY Your Outdoor Lighting? The Benefits Explained
Opting for homemade solar lanterns offers a multitude of advantages beyond just their aesthetic appeal:
- Cost-Effective: Many of the primary materials, like tin cans, are items you might already have or can acquire for very little, making this an incredibly budget-friendly decor solution.
- Sustainable and Eco-Friendly: By upcycling tin cans, you’re giving new life to discarded items, reducing waste, and contributing to a greener planet. Solar power means zero electricity consumption from the grid, lowering your carbon footprint.
- Unique & Personalized: Store-bought decor can be generic. DIY projects allow for complete customization, ensuring your lanterns perfectly match your personal style and existing decor theme.
- Easy to Make: Despite their intricate appearance, these lanterns are surprisingly simple to construct, making them an ideal project for crafters of all skill levels.
- Versatile Decor: Perfect for patios, gardens, balconies, outdoor dining areas, or even camping. Their portable, wire-free design means you can place them anywhere the sun shines.
- Instant Vibe Creator: Beaded elements and the gentle glow of solar lights combine to create an immediate sense of warmth, relaxation, and bohemian charm.
Essential Materials for Your Boho Beaded Solar Lanterns
Gathering your supplies is the first exciting step in bringing your vision to life. Most of these items are easily found at hardware stores, craft shops, or even in your recycling bin!
- Tin Cans (Assorted Sizes): Look for various sizes (e.g., coffee, soup, vegetable cans) to create visual interest. Ensure they are clean and have no sharp edges from opening. Upcycling is at the heart of this project!
- Small Solar Lights: Choose compact, standalone solar path lights or garden stake lights. You’ll be using the top solar panel and light unit. These are widely available and inexpensive. Ensure they are fully charged before use for best results.
- A Pair of Metal Cutters: Essential for shaping and cutting the tin cans. A sturdy pair designed for sheet metal will make the job easier and safer.
- A Pair of Protective Gloves: Non-negotiable for safety when handling and cutting metal. Thick work gloves will protect your hands from sharp edges.
- Hole Puncher or Metal Awl: For creating small holes for wiring and decorative patterns. A leather punch or a specialized metal punch offers different size options.
- Bendable Wire (Craft Wire or Picture Hanging Wire): Medium-gauge wire (e.g., 18-20 gauge) is ideal for creating sturdy handles and attaching beads. Copper or galvanized wire works well.
- Assortment of Beads: This is where the “beaded” magic happens! Choose glass beads, acrylic beads, wooden beads, or even natural elements like shells. Think about colors and textures that align with your boho aesthetic.
- Pliers (Round-nose and Flat-nose): Extremely helpful for bending wire, opening jump rings, and securing beads.
- Sandpaper or Metal File (Optional but Recommended): To smooth down any sharp edges after cutting, ensuring a safer finish.
- Rust-Inhibiting Spray Paint (Optional): If you want to color your cans or protect them from rust, especially if they will be exposed to the elements. Matte or metallic finishes can enhance the boho look.
- Clear Acrylic Sealer (Optional): To protect painted surfaces and add durability, particularly for outdoor use.
Directions: Step-by-Step Guide to Crafting Your Beaded Solar Lanterns
Creating these gorgeous boho luminaries is a rewarding process. Follow these detailed steps to bring your solar lanterns to life:
Step 1: Prepare Your Tin Cans
- Clean Thoroughly: Wash your tin cans inside and out with warm soapy water to remove any food residue and labels. Peel off labels completely.
- Remove Sharp Edges: If the can opening has any sharp edges, carefully use pliers to bend them inwards or sand them down with a metal file to ensure safety.
- Dry Completely: Ensure the cans are completely dry before proceeding, especially if you plan to paint them.
Step 2: Design and Cut Your Tin Cans
- Plan Your Design: Decide on the pattern you want to cut into the can. Simple vertical or horizontal strips work well, as do geometric shapes or abstract designs. Use a marker to lightly sketch your pattern. Remember, these cuts will allow light to shine through and give the can flexibility for shaping.
- Safety First: Don your protective gloves before you begin cutting.
- Make the Cuts: Using your metal cutters, carefully follow your marked lines. You can cut strips from the top down to about 1-2 inches from the bottom, allowing you to splay out the strips later for a unique look. Alternatively, make decorative perforations.
- Shape the Cans (Optional): If you cut strips, gently push them outwards to create a more open, spherical, or basket-like shape. This adds to the boho aesthetic and allows more light to escape. Smooth any new sharp edges with a file.
Step 3: Punch Holes for the Handle and Decorations
- Handle Holes: On opposing sides near the top rim of each can, punch two small holes using your hole puncher. These will be for attaching the wire handle.
- Decorative Holes (Optional): If you plan to attach beads directly to the can or create intricate light patterns, punch additional small holes in your desired areas. These can also be part of the light diffusion pattern.
Step 4: Create and Attach the Wire Handle
- Cut the Wire: Measure a length of bendable wire sufficient to create a handle, allowing extra on each end for securing. A good starting point is about 10-12 inches, adjustable based on can size and desired hang length.
- Form the Handle: Thread one end of the wire through one of the top holes you punched in the can. Bend and twist the wire securely around itself inside the can to form a loop or knot that won’t pull through.
- Add Beads to Handle (Optional): Before securing the second end, you can string beads onto the wire handle for extra embellishment.
- Secure the Handle: Thread the other end of the wire through the second hole on the opposite side of the can and secure it in the same manner. Ensure the handle is sturdy enough to hold the lantern’s weight.
Step 5: Embellish with Beads
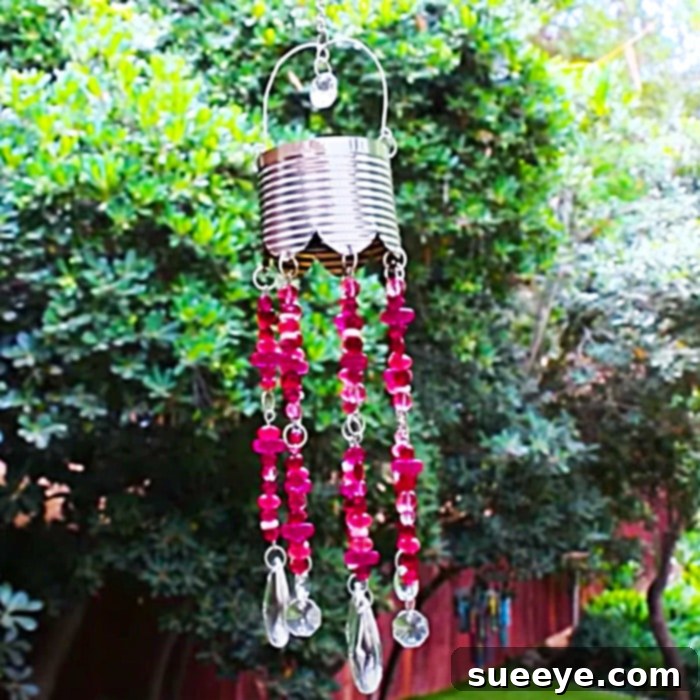
- Design Your Bead Sections: This is where your creativity truly shines! Cut smaller lengths of wire (e.g., 4-6 inches). String beads onto these wires in various patterns, colors, and lengths. You can create small dangling chains, clusters, or individual beaded strands.
- Attach Beads to the Can: Use pliers to attach these beaded wire sections to the bottom edges of your cut strips, or to the decorative holes you punched in Step 3. You can also wrap beaded wires around the can’s body or create a beaded fringe along the bottom edge.
- Ensure Security: Double-check that all bead attachments are secure so they don’t fall off when the lantern is moved or exposed to wind.
Step 6: Integrate the Solar Light
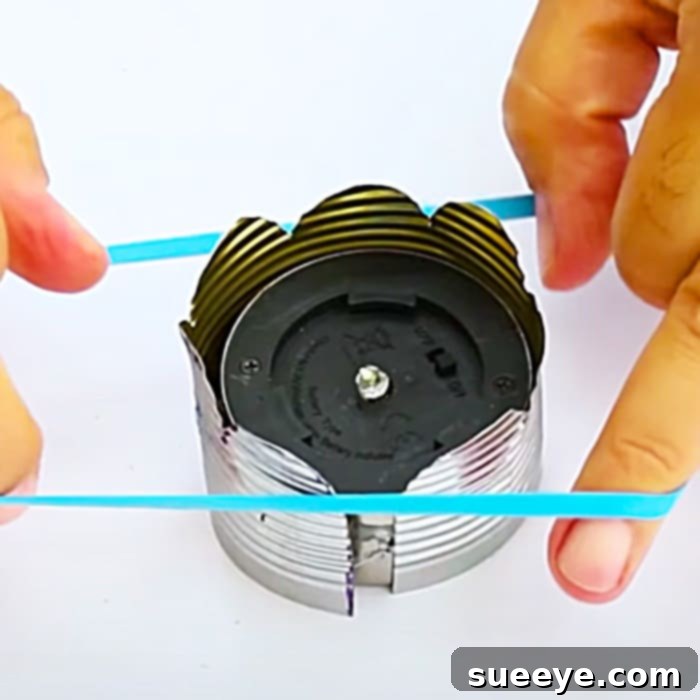
- Disassemble Solar Light: Carefully remove the solar panel and light unit from its plastic housing or stake. You’ll typically find a small LED light, a battery compartment, and the solar panel.
- Position the Solar Unit: Place the solar light unit inside the top opening of your tin can. The solar panel needs to be facing upwards to absorb sunlight.
- Secure the Light: You can create a small wire cradle inside the can to hold the solar unit in place, or simply rest it on the inside rim if it fits snugly. Some crafters even glue it in place using strong, weather-resistant adhesive. Ensure it’s stable and won’t fall out.
Step 7: Finishing Touches and Placement
- Paint and Seal (Optional): If desired, spray paint your entire lantern with a rust-inhibiting paint. Once dry, apply a clear acrylic sealer for added protection against the elements, especially for outdoor use. Allow ample drying time.
- Charge and Enjoy: Place your newly crafted beaded solar lanterns in a spot where the solar panel can receive direct sunlight for at least 6-8 hours a day.
- Hang and Admire: Once charged, hang them on your porch, patio, garden hooks, or outdoor pergolas. As dusk settles, watch your lanterns come alive, casting beautiful, soft light and transforming your outdoor space into a magical retreat.
Creative Customization Ideas for Your Solar Lanterns
The beauty of DIY lies in endless possibilities for personalization. Here are some ideas to make your tin can solar lanterns truly unique:
- Vary Bead Types: Mix and match glass, wooden, ceramic, and acrylic beads for diverse textures and light reflections. Consider seed beads for intricate details or larger focal beads for a statement.
- Color Schemes: Use beads in a single color palette (e.g., all blues and greens for a coastal feel) or create a vibrant rainbow effect.
- Paint Effects: Experiment with metallic spray paints (gold, copper, silver) for a sophisticated look, or use matte paints for a rustic, earthy feel. Stencils can add patterns to the can’s surface.
- Perforation Patterns: Instead of cutting strips, use a hammer and nail (or awl) to create tiny holes in intricate patterns (stars, spirals, mandalas) that will cast beautiful light patterns when illuminated.
- Themed Decor: Adapt your lanterns to specific themes. For a nautical look, use blue and white beads with small shell accents. For a rustic farmhouse style, opt for natural twine and simple wooden beads.
- Multiple Can Sizes: Create a collection of lanterns using different sized tin cans. Hang them at varying heights to create a dynamic and visually appealing display.
- Add Charms or Bells: Incorporate small metal charms, bells, or upcycled jewelry pieces to your beaded strands for extra sparkle and gentle tinkling sounds in the breeze.
Care and Maintenance for Long-Lasting Luminaries
To ensure your beautiful DIY solar lanterns continue to shine brightly for seasons to come, a little care goes a long way:
- Clean Solar Panels: Periodically wipe down the solar panel with a soft, damp cloth to remove dust, dirt, or debris that can hinder charging efficiency.
- Protect from Extreme Weather: While solar lights are designed for outdoor use, bringing them indoors during severe storms, heavy snow, or prolonged periods of freezing temperatures can extend their lifespan.
- Check for Rust: If you didn’t paint or seal your cans, keep an eye out for rust, especially at cut edges. A quick touch-up with rust-inhibiting paint can prevent further damage.
- Battery Replacement: The rechargeable batteries in solar lights typically last 1-2 years. If your lantern stops glowing as brightly or for as long, it might be time to replace the battery (usually an AA or AAA NiMH rechargeable battery).
- Secure Hangings: Periodically check the wire handles and hanging points to ensure they remain secure and free from wear.
Conclusion: Illuminate Your World with DIY Charm
This project is a testament to the beauty of upcycling and the joy of creating something truly spectacular with your own hands. These DIY beaded solar lanterns are not just gorgeous decor pieces; they are symbols of creativity, sustainability, and personal style. Imagine your patio bathed in the soft, enchanting glow of these handmade luminaries, each bead catching the light, creating a truly magical atmosphere.
Whether you’re looking to refresh your outdoor space, embark on a fun crafting adventure, or find a unique gift, these tin can solar lanterns are a perfect choice. They are affordable, environmentally friendly, and utterly charming. So, gather your materials, let your imagination soar, and prepare to illuminate your world with these beautiful, boho-inspired creations!