

Welcome to the ultimate guide for crafting the most delightful homemade strawberry cake you’ll ever taste! This isn’t just another cake recipe; it’s a nostalgic journey back to childhood, capturing the essence of sweet, vibrant strawberries in every bite. For years, a pink, flavorful strawberry cake has been my go-to request for any celebration, and this particular recipe has consistently proven to be the absolute best I’ve encountered. Its perfect balance of sweetness, tang, and unparalleled moistness makes it an instant classic.
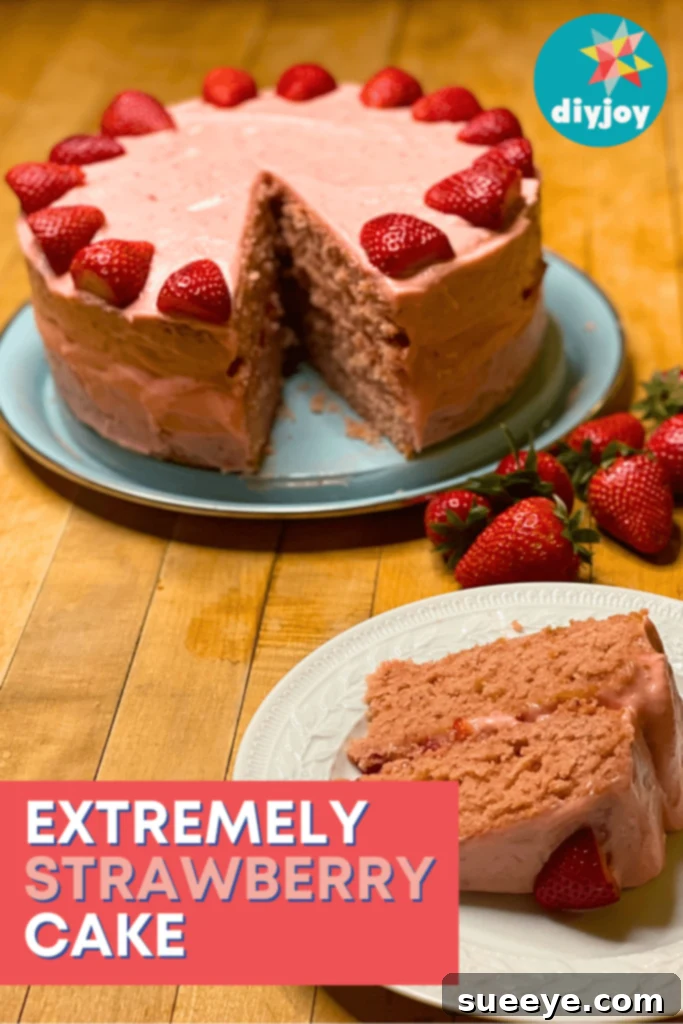
What sets this recipe apart is its incredible depth of strawberry flavor, achieved through a clever combination of fresh strawberry puree and a touch of strawberry Jello mix. This unique pairing amplifies the fruit’s natural sweetness and vibrant color, resulting in a cake that’s not only visually stunning but also unbelievably delicious. Beyond its exceptional taste, this cake boasts an impressive moistness that lasts for several days – though, honestly, it rarely survives past day two in my home! It’s an essential addition to any dessert repertoire, surprisingly simple to create, and guaranteed to impress even the most discerning palates.
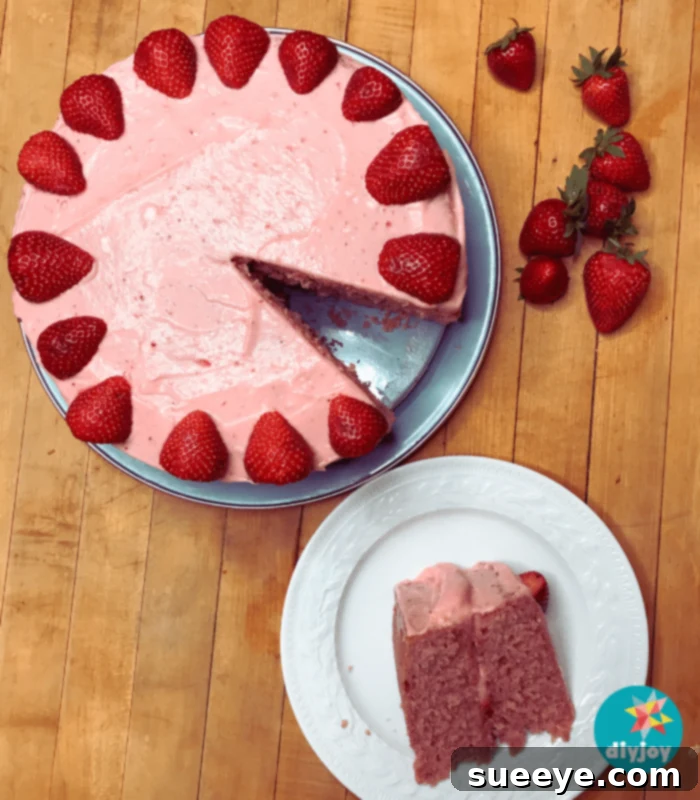
Despite its gourmet appearance and rich flavor, this easy strawberry cake is remarkably straightforward to prepare. Many home bakers are often intimidated by baking from scratch, but you’ll be pleasantly surprised at how quickly and effortlessly this recipe comes together. We focus on clear steps and simple techniques, making it accessible for bakers of all skill levels. Unlike some more intricate cake designs, this one embraces simplicity, making decoration a joy rather than a chore. The true stars here are the fresh strawberries, which we use generously to adorn the cake, creating an elegant and inviting finish with minimal effort.
This versatile dessert is perfect for a myriad of occasions. Imagine serving this beautiful cake at a joyful birthday celebration, a romantic Valentine’s Day dinner, a charming baby shower, an elegant bridal shower, or even for my personal favorite – brunch! Who says you can’t enjoy a slice of decadent cake before noon? Its vibrant color, fresh taste, and comforting homemade feel make it a centerpiece for any gathering, adding a touch of warmth and sophistication that will have everyone asking for the recipe.
Why This Homemade Strawberry Cake Recipe Stands Out
There are countless strawberry cake recipes available, but this one consistently receives rave reviews for several key reasons, solidifying its place as a favorite:
- Unmatched Strawberry Flavor: We don’t just add a hint of strawberry; we leverage both fresh strawberry puree and a subtle touch of strawberry Jello mix to create an intense, authentic berry flavor that permeates every crumb. This dual approach ensures a truly vibrant and unforgettable taste experience that tastes like pure summer.
- Incredibly Moist Texture: Thanks to carefully balanced wet ingredients, the natural moisture from the strawberry puree, and the unique addition of Jello, this cake remains delightfully moist and tender for days. This quality makes it perfect for preparing ahead of time, ensuring it’s always fresh when served.
- Effortlessly Beautiful: While it looks professionally baked, the decorating process is wonderfully simple. Fresh strawberries do all the heavy lifting, allowing for stunning presentation without the need for complex piping techniques or advanced decorating skills.
- Perfect for Any Occasion: From casual family desserts to grand celebrations, its charming appearance and irresistible flavor make it suitable for any event, big or small. It’s a true crowd-pleaser that fits seamlessly into any festive spread.
- From-Scratch Satisfaction: Experience the joy and pride of baking a completely homemade cake that tastes infinitely better than any store-bought alternative. The rich flavor and tender texture are a testament to the love and care put into its creation.
Essential Ingredients for Your Delicious Strawberry Cake
Crafting the perfect cake starts with the right ingredients. For the best results, ensure all cold ingredients (butter, milk, eggs, cream cheese) are at room temperature. This allows them to emulsify properly, creating a smoother, more uniform batter and a lighter, fluffier cake that rises beautifully. High-quality ingredients also make a noticeable difference in the final flavor profile.
Dry Ingredients
- 3 cups All-Purpose Flour: The structural backbone of our cake. For the lightest texture, we recommend sifting your flour or at least whisking it well to aerate it before measuring.
- 2 teaspoons Baking Powder: Our primary leavening agent, crucial for a good rise and an airy, tender crumb. Ensure your baking powder is fresh for optimal results.
- 1 teaspoon Salt: A small but mighty ingredient, salt is crucial for balancing sweetness, enhancing all the other flavors, and preventing the cake from tasting bland.
Wet Ingredients
- 2 tablespoons Pure Vanilla Extract: Opt for high-quality pure vanilla for the best flavor profile. Its warm, aromatic notes beautifully complement the strawberries.
- 1/2 cup Whole Milk (at room temperature): Adds essential moisture and contributes significantly to the cake’s tender and rich texture.
- 1 cup Unsalted Butter (2 sticks), softened to room temperature: Essential for richness, flavor, and creating a light, fluffy cake crumb when properly creamed with sugar.
- 2 cups Granulated Sugar: Provides sweetness, helps retain moisture, and aids in creating a beautiful golden-brown crust.
- 2 large Eggs (at room temperature): Binds the ingredients together, adds structure, moisture, and richness to the batter.
- 4 large Egg Whites (at room temperature): Contributes to a lighter, airier cake texture and a brighter, more vibrant cake color without adding the extra richness or density from yolks.
- 3 tablespoons Strawberry Jello Mix (dry powder): The secret ingredient for an intensified, vibrant strawberry flavor and a lovely pink hue throughout the cake. It also helps with moistness.
- 2/3 cup Strawberry Puree (from fresh or thawed frozen strawberries, see Step One for preparation): The star ingredient, offering fresh, natural strawberry essence, a beautiful color, and additional moisture.
Decadent Strawberry Cream Cheese Frosting
No strawberry cake is truly complete without a luscious, tangy cream cheese frosting. This recipe creates a perfectly balanced frosting that’s rich, creamy, and bursting with fresh strawberry flavor – the ideal complement to our moist cake.
- 1/4 cup Unsalted Butter, softened to room temperature (1/2 stick): Provides richness and a smooth, stable base for the frosting.
- 6 ounces Cream Cheese, softened to room temperature: The signature tangy flavor and creamy consistency of the frosting. Always use full-fat brick-style cream cheese for the best texture and stability.
- 4 cups Powdered Sugar (confectioners’ sugar): Sweetens the frosting and gives it a smooth, velvety, and pipeable consistency.
- 2 tablespoons Strawberry Puree (reserved from cake preparation, see Step One): Infuses the frosting with natural fresh strawberry flavor and a delicate pink tint.
- 1/4 teaspoon Salt: Balances the sweetness and truly enhances the cream cheese’s tangy notes, making the flavors pop.
- 1 teaspoon Pure Vanilla Extract: Complements the strawberry and cream cheese flavors beautifully, adding depth and warmth.
- 1 teaspoon Strawberry Jello Mix (dry powder): Further boosts the strawberry flavor and enhances the frosting’s lovely pink color.
For Decorating
- 1 cup Sliced Fresh Strawberries: Essential for layering between the cake tiers and beautifully garnishing the top. Choose ripe, firm, and vibrant berries for the best appearance and taste.
Essential Equipment You’ll Need
Having the right tools makes the baking process smoother, more efficient, and ultimately more enjoyable, ensuring your baking success:
- Two 9-inch Round Cake Pans
- Parchment Paper
- Nonstick Cooking Spray
- Large Mixing Bowls (at least 2-3 for separating ingredients)
- Whisk (for dry ingredients and wet flavor enhancers)
- Electric Mixer (a stand mixer with a paddle attachment is ideal, but a good hand mixer works perfectly)
- Food Processor or Blender (essential for making smooth strawberry puree)
- Rubber Spatula (for scraping down bowls and folding ingredients gently)
- Measuring Cups and Spoons (for accurate ingredient measurement)
- Wire Rack (for cooling cakes evenly and preventing sogginess)
- Serrated Knife or Cake Leveler (optional, for trimming cake layers flat for a professional look)
- Offset Spatula (invaluable for spreading frosting smoothly)
- Serving Plate or Cake Stand
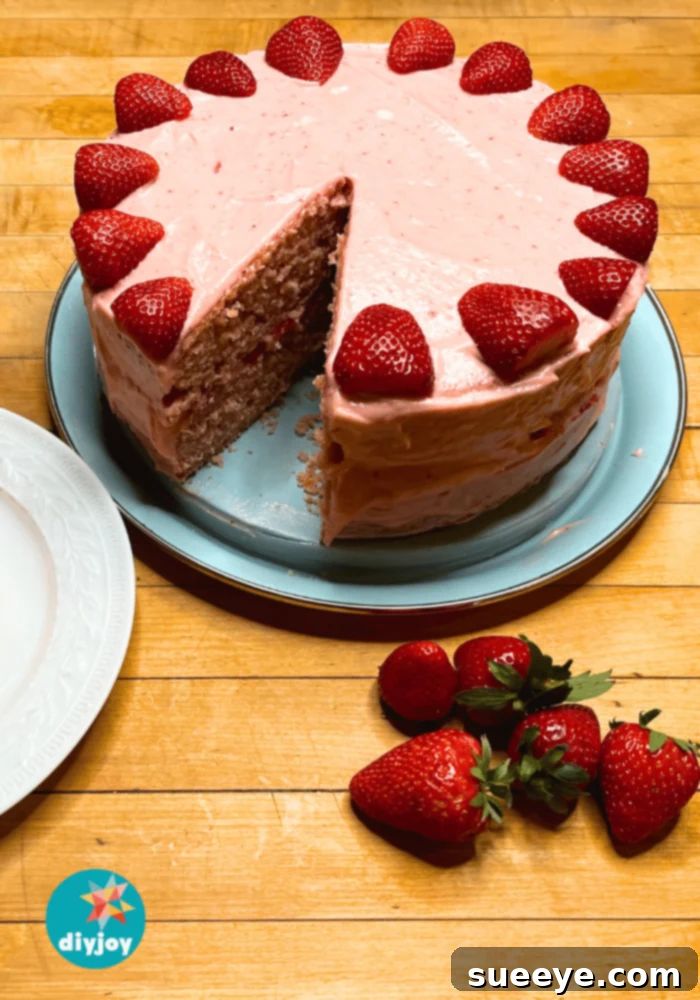
Before you begin any mixing, ensure your oven is properly preheated to 350°F (177°C). An accurately preheated oven is critical for even baking and proper cake rise.
Step-by-Step Instructions for Making the Best Strawberry Cake
Step One: Prepare Your Cake Pans and Strawberry Puree
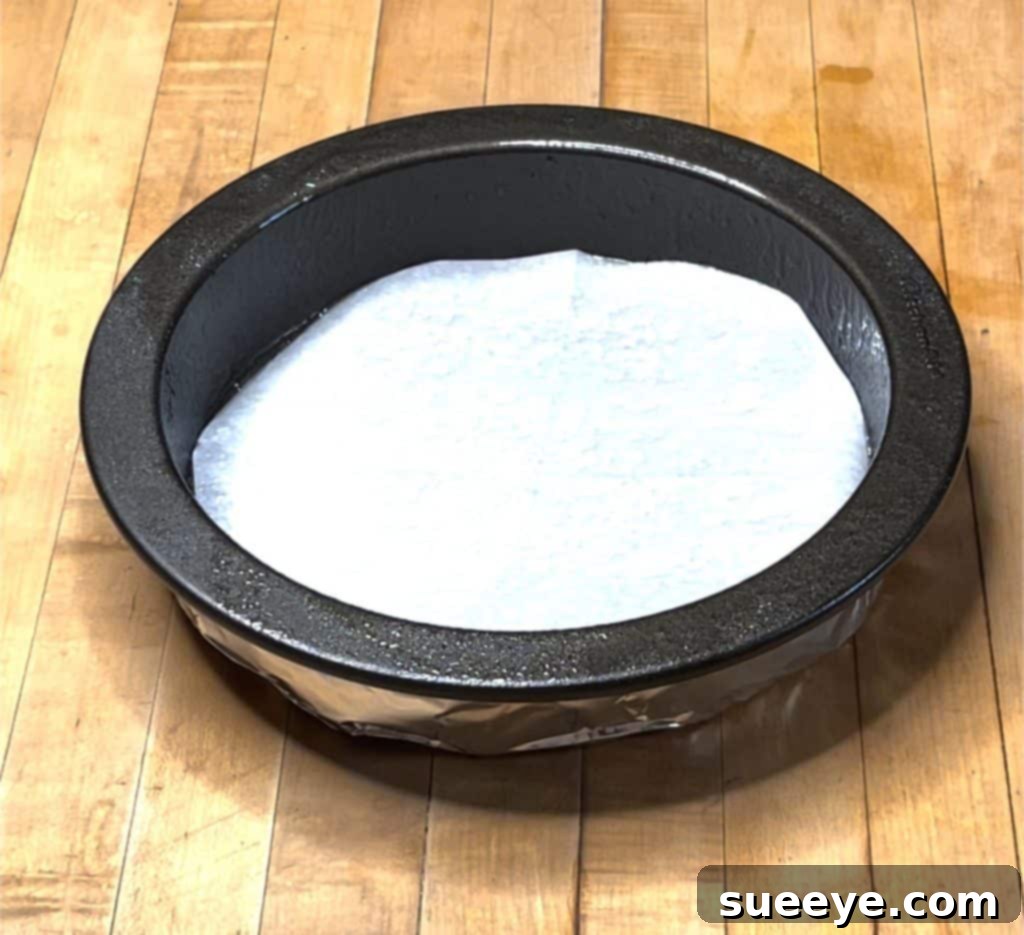
Begin by preparing your cake pans to ensure your beautiful cake layers release easily and cleanly. Line the bottoms of two 9-inch round cake pans with parchment paper circles. This creates a foolproof non-stick barrier. Then, generously coat the parchment paper and the entire inside of the pans with nonstick cooking spray. This crucial double-layer step prevents any sticking and ensures perfectly intact cake layers, a critical first step for a successful cake.
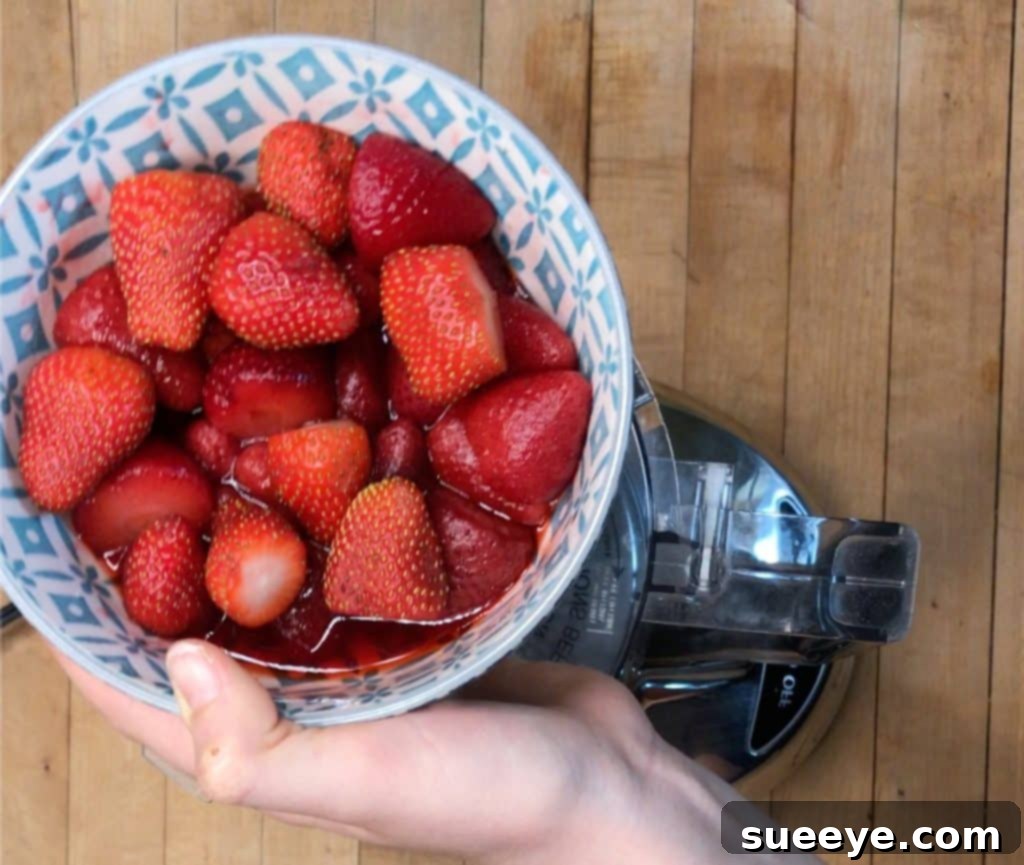
Next, let’s create our vibrant and flavorful strawberry puree. Rinse and hull about 2 cups (approximately 1 pound) of fresh, ripe strawberries. If fresh strawberries are out of season or unavailable, thawed frozen strawberries work perfectly fine; just be sure to drain any excess liquid. Place the prepared strawberries into a food processor or blender and process until completely smooth. You’ll need 2/3 cup of this vibrant puree for the cake batter itself, and remember to reserve precisely 2 tablespoons of the remaining puree for your frosting. This methodical preparation ensures a consistent and intense strawberry flavor throughout your entire dessert.
Step Two: Combine Dry Ingredients Thoroughly
In a large mixing bowl, combine your dry ingredients: the 3 cups of all-purpose flour, 2 teaspoons of baking powder, and 1 teaspoon of salt. Using a whisk, thoroughly combine them until they are well integrated and no lumps remain. This step is vital as it evenly distributes the leavening agent and salt throughout the flour, ensuring a uniform rise and a perfectly balanced flavor in your finished cake. Don’t skip this aeration step!
Step Three: Prepare Wet Flavor Enhancers for the Cake Batter
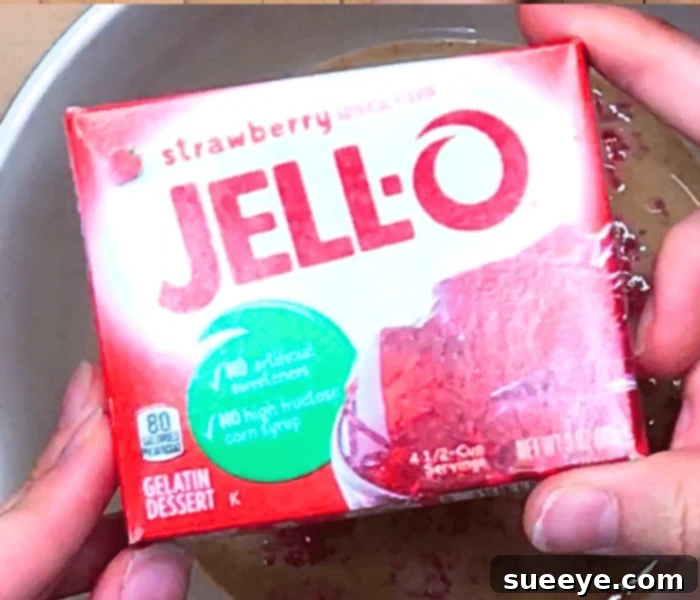
In a separate medium-sized bowl, whisk together the measured strawberry puree (2/3 cup), 1/2 cup of room-temperature whole milk, 2 tablespoons of pure vanilla extract, and 3 tablespoons of the dry strawberry Jello mix. Stir this mixture vigorously until the Jello powder is mostly dissolved and no significant lumps remain. This vibrant liquid mixture forms the heart of our cake’s strawberry infusion, giving it both deep flavor notes and that unmistakable beautiful pink color.
Step Four: Cream Butter and Sugar, Then Incorporate Eggs
In the bowl of an electric mixer fitted with the paddle attachment (or using a reliable hand mixer), cream together the 1 cup of softened unsalted butter and 2 cups of granulated sugar. Beat on high speed for approximately two minutes, or until the mixture becomes remarkably light, fluffy, and visibly pale in color. This creaming process is essential as it incorporates air, which is crucial for achieving a tender and airy cake texture.
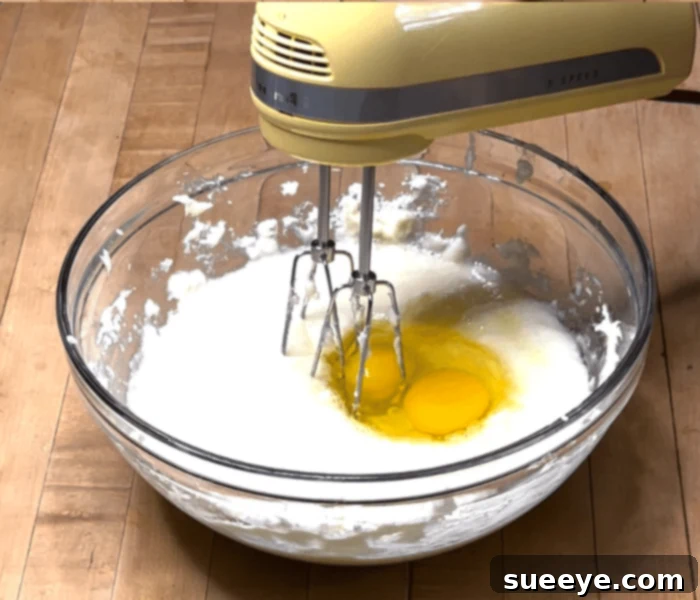
Next, add the 4 large egg whites one at a time, beating well after each addition until fully incorporated into the butter-sugar mixture. Follow with the 2 whole large eggs, again beating thoroughly after each addition until just combined. Remember to scrape down the sides of the bowl as needed to ensure all ingredients are thoroughly mixed and no butter or sugar remains stuck to the sides. This egg mixture adds essential richness and structure to the developing batter.
Step Five: Alternate Adding Dry and Wet Mixtures to Batter
With the mixer on its lowest speed, carefully add about half of the prepared dry ingredients (from Step Two) to the creamed butter and sugar mixture. Mix only until just incorporated, being extremely careful not to overmix. Overmixing at this stage can develop the gluten in the flour, leading to a tough and undesirable cake texture.
Step Six: Introduce the Strawberry Liquid Mixture
Now, pour in all of the wet strawberry mixture (from Step Three) into the batter. Mix on low speed until just combined. At this point, you’ll notice the batter beginning to take on its beautiful, vibrant pink hue, characteristic of a delicious strawberry dessert.
Step Seven: Finish with Remaining Dry Ingredients (Gentle Mixing is Key)
Add the remaining half of the dry ingredients to the batter. Continue to mix on the lowest speed, observing closely, and stop as soon as the flour streaks disappear. As soon as you no longer see any visible dry flour, immediately stop mixing. Gentle mixing here is absolutely crucial to maintaining a tender, delicate crumb in your finished cake.
Step Eight: Bake the Strawberry Cake Layers to Perfection
Evenly divide the beautifully pink batter between your two prepared 9-inch cake pans. Use a spatula to gently smooth the tops for even baking. Place the pans in your preheated 350°F (177°C) oven and bake for approximately 25-30 minutes. Baking times can vary depending on your oven, so it’s wise to start checking for doneness around the 25-minute mark. To test if they’re perfectly done, insert a clean toothpick into the center of a cake. If it comes out clean, the cakes are ready. Once baked, remove the cakes from the oven and let them cool in their pans on a wire rack for about 10-15 minutes before carefully inverting them onto the wire rack to cool completely. It’s imperative that they are fully cooled before frosting to prevent the frosting from melting and sliding off.
Step Nine: Prepare the Luscious Strawberry Cream Cheese Frosting
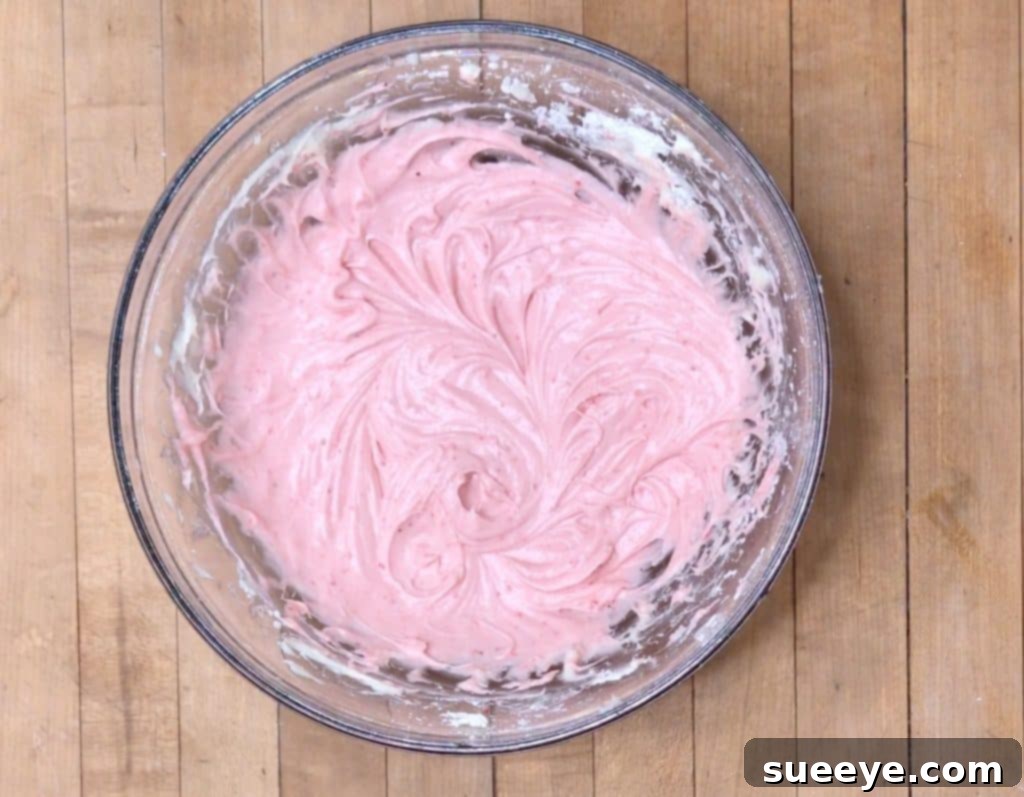
While your cake layers are baking and cooling, you can whip up the incredibly delicious strawberry cream cheese frosting. In the bowl of an electric mixer, cream together the 1/4 cup of softened unsalted butter and 6 ounces of softened full-fat cream cheese until the mixture is light, airy, and fluffy, typically about 2-3 minutes on medium speed. Gradually add the 4 cups of powdered sugar, starting on low speed to prevent a ‘sugar cloud,’ then increasing to medium until fully incorporated and smooth. Finally, add the 2 tablespoons of reserved strawberry puree, 1/4 teaspoon of salt, 1 teaspoon of pure vanilla extract, and 1 teaspoon of dry strawberry Jello mix. Beat until the frosting is light, creamy, and wonderfully spreadable. If the frosting seems too thin, you can add a little more powdered sugar; if too thick, a tiny splash of milk or cream will loosen it.
Step Ten: Assemble and Decorate Your Strawberry Masterpiece
Once your cake layers are completely cool to the touch, it’s time for the fun and rewarding part – assembly and decoration! To secure your cake firmly, place a small spoonful of frosting in the center of your serving plate or cake stand, then gently place the first cake layer on top, pressing down lightly. This acts as an anchor, preventing the cake from sliding.
Spread a generous, even layer of the strawberry cream cheese frosting over the top of the first cake layer using an offset spatula. On top of this delicious frosting layer, artfully arrange a single layer of your fresh sliced strawberries. This adds a delightful burst of fresh fruit, texture, and flavor in every bite.
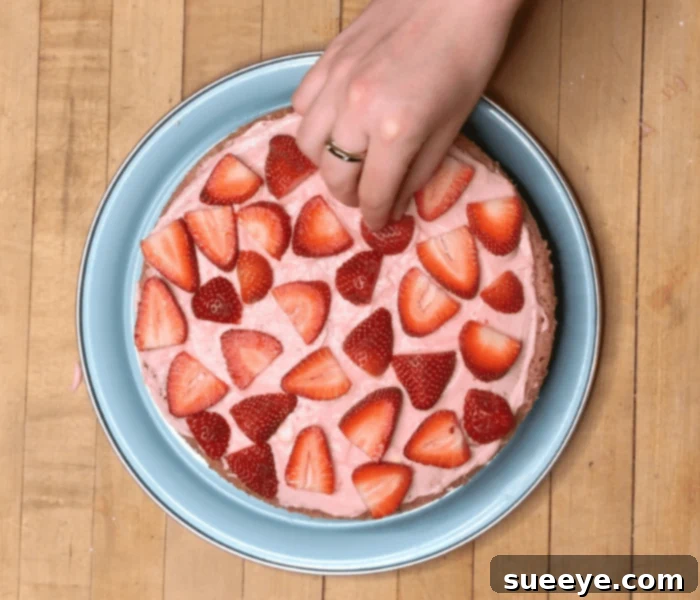
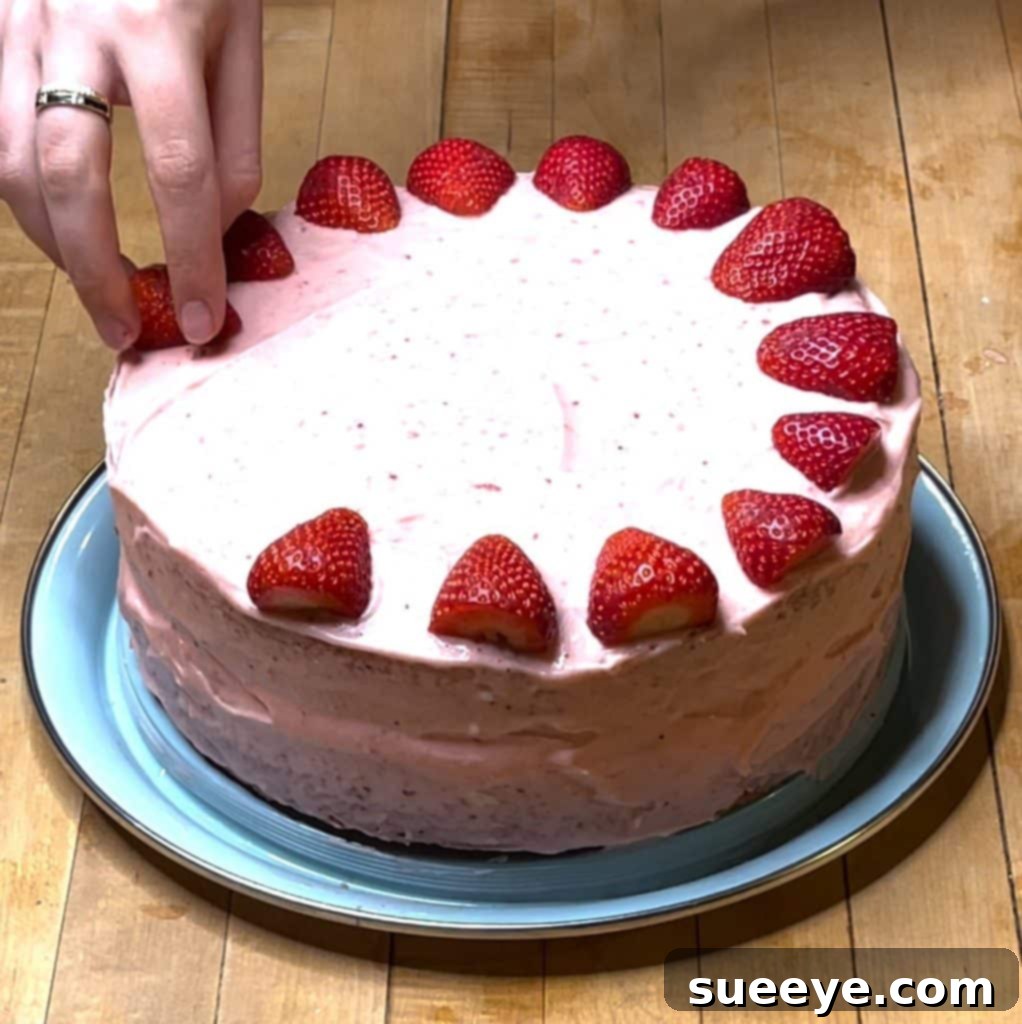
Carefully place the second cake layer directly on top of the strawberries and frosting. Now, use your offset spatula to spread the remaining frosting over the top and down the sides of the entire cake, aiming for a smooth and elegant finish. Don’t worry about achieving absolute perfection; a slightly rustic, homemade charm is always beautiful and inviting. Finally, arrange more sliced fresh strawberries decoratively on top of the cake. You can create a beautiful border, a scattered design, or a full layer of berries for maximum impact. Your stunning homemade strawberry cake is now ready to serve and impress!
If you’re not serving immediately, the cake can be refrigerated. It keeps beautifully for several days when stored properly in an airtight container in the refrigerator, allowing you to enjoy its fresh flavors over time.
Pro Tips for Achieving Strawberry Cake Perfection
Mastering this easy strawberry cake recipe is simple with these expert tips:
- Room Temperature Ingredients are Key: This cannot be stressed enough! Softened butter, room temperature eggs, milk, and cream cheese emulsify much better. This results in a smoother batter, a lighter, more tender cake, and a silky, lump-free frosting. Plan ahead and take them out of the fridge at least 30-60 minutes before you start.
- Don’t Overmix the Batter: Once you add the flour, mix only until just combined and no streaks of dry flour remain. Overmixing develops gluten, which can result in a tough, dense, and less tender cake.
- Measure Flour Correctly: For accurate measuring, spoon flour into your measuring cup and then level it off with a straight edge (like the back of a knife). Do not scoop directly from the bag, as this can compact the flour and lead to adding too much flour, making your cake dry.
- Taste Your Strawberries: The natural sweetness of strawberries can vary widely. If your puree seems particularly tart, you might consider adding a tiny pinch of granulated sugar to it (though generally not necessary with this recipe).
- Cool Cakes Completely: Resist the urge to frost warm cakes. Warmth will melt your delicate cream cheese frosting, causing it to slide off and create a messy situation. Patience while cooling is a virtue here!
- Chill Your Frosting if Needed: If your kitchen is warm and your cream cheese frosting feels too soft to spread easily, pop it in the refrigerator for 15-20 minutes to firm up slightly. Give it a quick whisk before using.
- Level Your Cake Layers (Optional but Recommended): For a more professional and stable stacked cake, you can use a serrated knife or a dedicated cake leveler to gently trim the domed tops of your cooled cake layers flat before frosting.
Make-Ahead and Freezing Tips for Convenience
This easy strawberry cake recipe is wonderfully accommodating if you need to prepare it in advance or wish to save some for later. These tips will help you manage your baking schedule efficiently:
- Make-Ahead Cake Layers: You can bake the cake layers up to 24 hours in advance. Once completely cooled, wrap each layer tightly in plastic wrap and store them at room temperature or in the refrigerator. This allows you to tackle the baking one day and the frosting/assembly the next, spreading out your effort.
- Freezing Cake Layers: For longer storage, cooled cake layers can be individually wrapped tightly in plastic wrap, then again in aluminum foil, and frozen for up to 2-3 months. To thaw, simply transfer them to the refrigerator overnight or allow them to come to room temperature on the counter for a few hours before frosting.
- Freezing a Whole Frosted Cake: If you miraculously have leftovers (or want to prepare a dessert well in advance), the entire frosted cake can be frozen! First, place the cake in the freezer uncovered for about an hour to allow the frosting to firm up. Then, wrap it tightly in several layers of plastic wrap, followed by aluminum foil to prevent freezer burn. It can be frozen for up to 1 month. To serve, thaw the cake in the refrigerator overnight, then let it sit at room temperature for 30-60 minutes before slicing.
Common Questions About This Delicious Strawberry Cake
Here are answers to some frequently asked questions to help you bake with confidence and troubleshoot any potential issues with your homemade strawberry cake:
- Can I use frozen strawberries for the puree? Yes, absolutely! Thaw them completely and drain any excess liquid thoroughly before pureeing to avoid adding too much moisture to your batter, which could affect the cake’s texture.
- Why do I need both whole eggs and egg whites? This combination is a secret to success! The whole eggs provide richness, structure, and binding properties, while the additional egg whites contribute to a lighter, more tender crumb and a brighter, more vibrant cake color without making the cake too dense or heavy.
- Can I make this cake in different sized pans? While this recipe is optimized for two 9-inch pans, you could adjust. For example, three 8-inch round pans would likely work with a slightly reduced baking time (check at 20-22 minutes). A 9×13 inch sheet cake would require about 30-35 minutes. Always test with a toothpick for doneness, as baking times will vary.
- My frosting is too runny/too stiff. What can I do? If your frosting is too runny, gradually add more powdered sugar, a tablespoon at a time, until it reaches your desired spreadable consistency. If it’s too stiff, add a tiny bit of milk or cream (1/2 teaspoon at a time) until it’s perfectly smooth and spreadable.
- How do I store leftover strawberry cake? This cake, especially with its delicious cream cheese frosting, should be stored in an airtight container in the refrigerator for up to 3-4 days. For the best flavor and texture, allow it to come to room temperature for about 30 minutes before serving.
Indulge in the Joy of Homemade Strawberry Cake
There’s something truly special and deeply satisfying about a homemade cake, and this strawberry cake recipe embodies that sentiment perfectly. With its vibrant color, intense fresh strawberry flavor, and incredibly moist texture, all crowned with a tangy, luscious cream cheese frosting, it’s a dessert that brings joy to every occasion and every bite. Whether you’re celebrating a significant milestone, hosting a special gathering, or simply craving a delicious treat to brighten your day, this recipe promises a delightful baking experience and an even more delightful eating experience. So gather your ingredients, follow these simple steps, and prepare to bake the best strawberry cake your taste buds have ever encountered – a true testament to the beauty of home baking!
For a complete visual guide to crafting this masterpiece, watch our detailed step-by-step YouTube video tutorial:
Here’s the Step by Step YouTube Video Tutorial for Strawberry Cake