
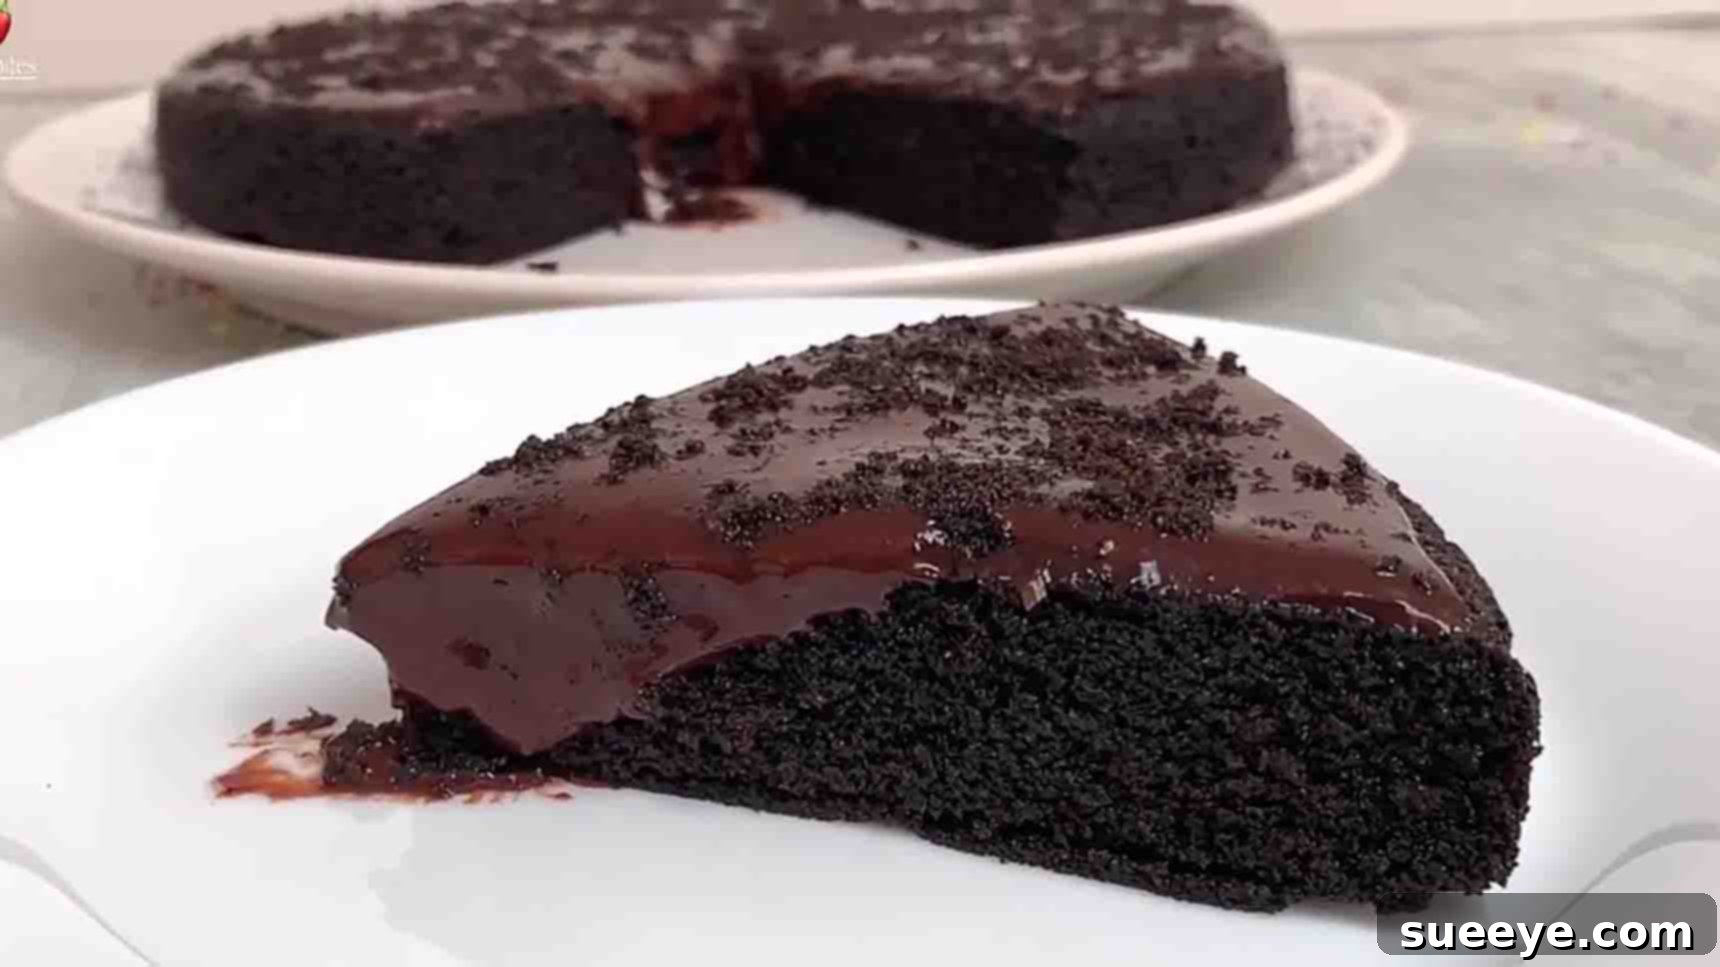
Are you often struck by those sudden dessert cravings, but the thought of a complicated recipe or a trip to the bakery feels like too much effort? We all have those moments when we just want something quick, easy, and undeniably delicious. Good news! We’ve found the ultimate solution to satisfy your sweet tooth without the fuss: an incredible 3-ingredient Oreo biscuit cake recipe. Inspired by a fantastic tutorial from Spice Bites on YouTube, this recipe is a game-changer for anyone who loves easy baking (or rather, “un-baking,” as it requires no traditional oven!).
Get ready to impress yourself and your loved ones with a rich, moist, and perfectly chocolatey cake that comes together with minimal effort and just a handful of staple ingredients. This isn’t just an easy pastry; it’s quite possibly the simplest and most satisfying dessert you’ll ever create. Forget long ingredient lists or complex techniques; this recipe focuses on simplicity and speed, making it perfect for novice bakers, busy parents, or anyone looking for a quick treat. Let’s dive into how you can make this delightful Oreo cake today!
Ingredients for Your Easy Oreo Cake
The beauty of this recipe lies in its minimalist approach. You only need three core ingredients, which you might already have in your pantry. These simple components combine to create a surprisingly rich and flavorful cake that will have everyone asking for seconds.
- 2 large packets of Oreo biscuits (approximately 24-30 biscuits, 250-300g total): The star of our show! Oreos provide both the cake’s base flavor and a significant portion of its structure. You can use classic Oreos or experiment with different flavors like peanut butter, mint, or even red velvet for a unique twist.
- 1 & 1/2 tsp baking powder: This is our leavening agent, responsible for giving the cake its light and airy texture. Ensure your baking powder is fresh for the best rise.
- Fresh milk (approximately 1 to 1 & 1/2 cups): Milk acts as the binding agent, bringing all the dry ingredients together to form a smooth batter. Whole milk is recommended for richness, but you can also use low-fat milk or even non-dairy alternatives like almond milk or oat milk for dietary preferences.
That’s it! Just three simple items stand between you and a delicious homemade cake. Gather these, and you’re halfway to dessert heaven.
Directions: Crafting Your No-Oven Oreo Delight
This recipe employs a clever “no-oven” baking method using a saucepan, making it accessible even if you don’t have a traditional oven or prefer not to use it. Follow these steps carefully for the best results.
Step 1: Preparing Your Baking Setup and Batter
The first step involves setting up your “makeshift oven” and then preparing the luscious Oreo batter. Precision here ensures a perfectly baked cake.
A. Set Up Your No-Oven Baking Environment:
Begin by preparing your saucepan, which will act as your baking chamber. Choose a large, heavy-bottomed saucepan with a tight-fitting lid. This setup mimics an oven by trapping heat evenly.
- Preheat the Pan: Place your chosen saucepan on your stovetop. Add a generous layer of salt (about 1-2 cups) to the bottom of the pan and spread it out evenly. This salt layer helps to distribute heat more consistently and prevent the cake from burning.
- Create a Trivet: Next, place a small, heat-proof bowl or an oven-safe metal ring, upside down, directly on top of the salt. This elevates your cake mold, preventing direct contact with the hot salt and allowing for indirect, even heating.
- Heat It Up: Cover the saucepan tightly with its lid. Heat it on a medium flame for about 10 to 15 minutes. This crucial preheating step ensures the saucepan reaches the optimal temperature before your cake goes in, similar to preheating an oven.
B. Prepare Your Oreo Batter:
While your saucepan is preheating, it’s time to transform those delicious Oreo biscuits into a smooth, decadent batter.
- Crush the Oreos: Take your two large packets of Oreo cookies. You can either add them to a food processor and grind them finely until they resemble a dark, uniform powder, or, if you don’t have a food processor, place them in a sturdy Ziploc bag and crush them thoroughly with a rolling pin or the bottom of a heavy pan. The goal is a fine crumb with no large chunks.
- Combine Dry Ingredients: Transfer the finely powdered Oreo cookies into a large mixing bowl. Add 1 & 1/2 teaspoons of baking powder to the Oreo powder. Use a whisk or a spoon to mix these dry ingredients very well. This ensures the baking powder is evenly distributed throughout the Oreo crumbs, which is vital for an even rise in your cake.
- Add Wet Ingredients Gradually: Now, it’s time to introduce the milk. Begin by adding about half a cup of fresh milk to the dry mixture. Start mixing gently. Continue adding the remaining milk gradually, a little at a time, while continuously mixing. The exact amount of milk needed can vary slightly depending on the Oreo brand and consistency, so aim for a smooth, pourable batter with no lumps. It should be thick enough to hold its shape slightly but still runny enough to spread evenly in the cake mold, similar to a pancake batter or a thick milkshake consistency. Avoid overmixing; mix just until combined.
Step 2: Baking, Cooling, and Serving Your Delicious Cake
With your batter ready and your saucepan preheated, the final steps involve baking the cake to perfection and preparing it for enjoyment.
A. Prepare the Cake Mold and Bake:
Choosing the right cake mold and preparing it properly ensures your cake bakes evenly and releases easily.
- Prepare Your Mold: Lightly grease your chosen cake mold (a 6 or 7-inch round pan works well) with butter or oil. Then, line the bottom with a circle of parchment paper. This double layer of protection prevents sticking and makes demolding effortless.
- Pour the Batter: Carefully pour your smooth Oreo batter into the prepared cake mold, spreading it evenly with a spatula.
- Place in Saucepain: Gently open your preheated saucepan, being careful of the hot steam. Carefully place the cake mold on top of the inverted bowl or trivet inside the saucepan.
- Bake to Perfection: Cover the saucepan tightly with its lid once more. Cook the cake on a medium to high heat for approximately 35 to 40 minutes. The exact time may vary based on your stovetop’s heat and the size of your pan. To check for doneness, carefully lift the lid (again, watch for steam) and insert a toothpick into the center of the cake. If it comes out clean, your cake is ready. If not, cover and cook for a few more minutes, checking periodically.
B. Cool and Serve:
Patience is a virtue, especially when it comes to cooling a freshly baked cake. Proper cooling ensures a perfect texture and easy slicing.
- Remove and Cool: Once baked, carefully remove the cake mold from the saucepan using oven mitts. Place the mold on a wire rack and allow the cake to cool completely in the mold. This is a crucial step; attempting to unmold a hot cake can cause it to break or stick.
- Demold and Finish: Once the cake has cooled completely (this might take 1-2 hours), carefully run a knife around the edges of the mold to loosen it. Invert the cake onto a plate, gently tapping the bottom of the mold until the cake releases. Peel off the parchment paper.
- Optional Toppings: For an extra touch of indulgence, you can pour some chocolate syrup or melted chocolate ganache generously over the top of the cake. Other fantastic options include a dollop of whipped cream, a dusting of cocoa powder or powdered sugar, or a sprinkle of colorful sprinkles. Fresh berries like raspberries or strawberries also make a wonderful addition, adding a hint of freshness to the rich chocolate.
Your incredibly easy, homemade Oreo biscuit cake is now ready to be served! Slice it up and enjoy this delightful creation with a cup of coffee or a glass of milk.
Tips for a Perfect 3-Ingredient Oreo Biscuit Cake
While this recipe is incredibly simple, a few extra tips can ensure your cake turns out perfectly every time:
- Don’t Overmix the Batter: Once you add the milk, mix just until the ingredients are combined and no dry streaks remain. Overmixing can develop the gluten in the flour (from the Oreos), leading to a tougher cake.
- Check Baking Powder Freshness: Baking powder loses its potency over time. To check if it’s still good, add a teaspoon to half a cup of hot water. If it fizzes vigorously, it’s fresh. If not, it’s time for a new batch.
- Adjust Milk Quantity: The amount of milk can vary. It’s better to add slightly less initially and then add more spoonful by spoonful until you reach the desired pourable consistency.
- Tight-Fitting Lid is Key: Ensure your saucepan lid fits tightly to trap the heat and moisture effectively, allowing the cake to cook evenly. If your lid isn’t perfectly snug, you can place a clean kitchen towel under it to seal better.
- Cool Completely: We can’t stress this enough! A warm cake is fragile and prone to breaking. Letting it cool completely allows the cake to firm up and makes it much easier to handle and slice.
Creative Variations and Customizations
One of the joys of baking is being able to personalize recipes. While this Oreo cake is fantastic as is, here are some ideas to make it uniquely yours:
- Different Oreo Flavors: Experiment with mint Oreos, golden Oreos, peanut butter Oreos, or any seasonal flavor that catches your eye for a distinct taste.
- Add-ins: Fold in a handful of chocolate chips, white chocolate chunks, or even some chopped nuts (like walnuts or pecans) into the batter before pouring it into the mold.
- Flavor Boosters: A tiny dash of vanilla extract (about 1/2 teaspoon) can enhance the overall flavor profile. A pinch of instant coffee powder can also deepen the chocolate notes without making the cake taste like coffee.
- Frosting Fun: Instead of just syrup, consider topping your cooled cake with a simple chocolate ganache, cream cheese frosting, or even a classic buttercream.
- Decorative Touches: Garnish with extra crushed Oreos, chocolate shavings, fresh mint leaves, or a drizzle of caramel sauce for an eye-catching finish.
Storage Tips
If you happen to have any leftovers (which is unlikely!), store the cake in an airtight container at room temperature for up to 2-3 days. For longer storage, you can refrigerate it for up to a week. Make sure it’s well-covered to prevent it from drying out.
Final Thoughts: Your Easiest Dessert Awaits!
This 3-ingredient Oreo biscuit cake recipe is a testament to how incredible desserts don’t have to be complicated or time-consuming. It’s the perfect solution for those moments when you crave something sweet but want to keep things simple. Whether you’re a seasoned baker or just starting your culinary journey, this recipe is incredibly forgiving and yields a delightful treat every time.
So, what are you waiting for? Grab those Oreos, a little milk, and some baking powder, and get ready to whip up a truly magical cake without even turning on your oven. Share your creations with friends and family, and prepare to be showered with compliments for your easy yet impressive dessert!
3-Ingredient Oreo Biscuit Cake Recipe: A Quick Overview
Here’s a quick recap of the star recipe itself for your convenience:
Yields: 1 (6-7 inch) cake
Prep time: 10-15 minutes
Cook time: 35-40 minutes
Ingredients:
- 2 large packets of Oreo biscuits (approx. 24-30 biscuits)
- 1 & 1/2 tsp baking powder
- 1 to 1 & 1/2 cups fresh milk (or non-dairy alternative)
Directions:
- Prepare Baking Setup: In a large, heavy-bottomed saucepan, spread a generous layer of salt on the bottom. Place a small, heat-proof bowl upside down on the salt. Cover the saucepan with a tight-fitting lid and preheat on medium heat for 10-15 minutes.
- Make Oreo Batter: Finely grind the Oreo biscuits into a powder using a food processor or a Ziploc bag and rolling pin. Transfer the powdered Oreos to a large bowl. Add 1 & 1/2 tsp baking powder and mix well. Gradually add fresh milk, mixing until you achieve a smooth, pourable, lump-free batter (approximately 1 to 1.5 cups total milk). Avoid overmixing.
- Bake the Cake: Grease a 6 or 7-inch cake mold and line the bottom with parchment paper. Pour the prepared Oreo batter into the mold. Carefully place the cake mold into the preheated saucepan, on top of the inverted bowl. Cover tightly with the lid and cook on medium to high heat for 35-40 minutes, or until a toothpick inserted into the center comes out clean.
- Cool and Serve: Carefully remove the cake mold from the saucepan and let it cool completely on a wire rack. Once cooled, invert onto a plate, remove the parchment paper. Optionally, pour chocolate syrup, ganache, or other desired toppings over the cake before slicing and serving. Enjoy your quick and easy homemade Oreo cake!