
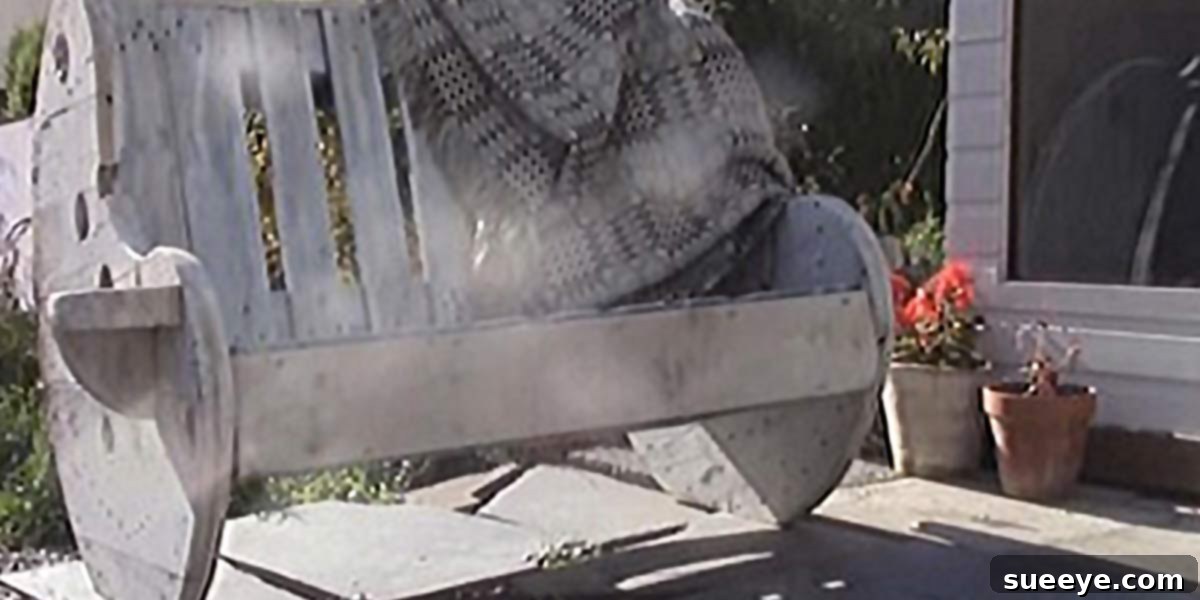
Craft Your Own Shabby Chic Pallet & Cable Reel Bench: A Detailed DIY Guide
Are you yearning for a unique piece of furniture that perfectly blends rustic charm with sustainable living for your front porch, patio, or garden? Look no further! The enchanting allure of a shabby chic bench, crafted from repurposed pallets and cable reels, is not just a dream but an achievable DIY project. This isn’t just a bench; it’s a statement, a conversation starter, and a testament to your creativity and commitment to eco-conscious design. Its distinctive farmhouse appearance can transform any outdoor space into a cozy, inviting haven, even if your home isn’t a traditional farmhouse. We often find beauty in vintage and rustic items, appreciating their character and the stories they tell, and this bench project is an embodiment of that passion for transforming forgotten materials into fabulous, functional art.
Embracing the charm of upcycled materials, this project allows you to create a piece that is not only aesthetically pleasing but also environmentally friendly and incredibly budget-friendly. Imagine the satisfaction of looking at a sturdy, beautiful bench that you’ve brought to life with your own hands, giving new purpose to materials that might otherwise have ended up in a landfill. This guide will walk you through every step, ensuring you have all the knowledge needed to embark on this rewarding journey, from sourcing your materials to applying the final, personal touches.
Why Choose a Pallet and Cable Reel Bench?
Opting for a bench made from pallets and cable reels offers a multitude of benefits, extending beyond its immediate aesthetic appeal:
- Unique Aesthetic Appeal: This design beautifully marries industrial elements (from the cable reels) with rustic wood (from pallets), creating a versatile piece that complements various decor styles. Whether your preference is shabby chic, farmhouse, industrial, or even bohemian, this bench can be customized to fit seamlessly. Its inherent character and distressed look lend an authentic, lived-in feel that mass-produced furniture simply cannot replicate.
- Sustainability and Upcycling: In an age where environmental consciousness is paramount, repurposing materials is a powerful statement. By choosing to build with pallets and cable reels, you’re actively participating in waste reduction, giving these items a second life and diverting them from landfills. This eco-friendly approach is not only good for the planet but also imbues your furniture with a sense of purpose and a compelling backstory.
- Cost-Effectiveness: One of the most attractive aspects of this project is its affordability. Pallets and cable reels are often available for free or at very low cost, significantly reducing the overall expense compared to purchasing new outdoor furniture. Your primary investment will be in tools, fasteners, and finishing materials like paint or sealer, making it an excellent option for budget-conscious DIY enthusiasts.
- Personalization and Satisfaction: There’s an unparalleled sense of accomplishment that comes from crafting something with your own hands. This project offers ample opportunities for personalization, from the dimensions and design modifications to the choice of paint colors, distressing techniques, and cushions. The final product isn’t just a bench; it’s a reflection of your style, effort, and creativity.
- Durability (with proper treatment): When properly constructed and treated with weather-resistant finishes, a pallet and cable reel bench can be surprisingly durable, standing up to the elements and providing years of enjoyment. The robust nature of the materials, especially the solid wood of cable reels, ensures a sturdy foundation for your seating.
Gathering Your Materials: The Treasure Hunt
The first and often most exciting part of this project is the treasure hunt for your primary materials. Finding pallets and cable reels can be an adventure in itself, and knowing where to look and what to look for is key.
Finding Pallets:
- Construction Sites & Industrial Areas: Many businesses receive goods on pallets and are often happy for people to take them off their hands, saving them disposal costs. Always ask for permission before taking anything.
- Local Businesses: Retail stores, hardware stores, nurseries, and feed stores often have surplus pallets. A polite inquiry can often yield free materials.
- Craigslist & Facebook Marketplace: Check the “Free Stuff” or “Materials” sections. People frequently post when they have pallets available for pickup.
- What to Look For:
- “HT” Stamp: Ensure the pallets are stamped with “HT,” meaning they have been heat-treated to prevent pests. Avoid pallets marked “MB” (methyl bromide), as this chemical treatment is toxic.
- Condition: Look for sturdy pallets with minimal damage, rot, or excessive staining. Some superficial damage or signs of wear are fine, as they contribute to the shabby chic aesthetic, but avoid anything structurally unsound.
- Cleanliness: Inspect for spills of unknown liquids, as these could be hazardous.
Finding Cable Reels (or Spools):
- Power Companies & Electrical Contractors: These are primary sources for cable reels. They often have large, empty spools that they need to dispose of. A phone call or visit can be very fruitful.
- Construction Sites: Larger construction projects often use significant amounts of cable, leaving behind various sizes of reels.
- Industrial Suppliers: Companies that deal with large quantities of wire or cable may also have reels available.
- Craigslist & Facebook Marketplace: Similar to pallets, reels sometimes appear in free or inexpensive listings.
- What to Look For:
- Appropriate Size: Consider the desired height and width of your bench. Cable reels come in many sizes.
- Structural Integrity: Ensure the reel is solid, with no major cracks or breaks in the wood or plywood discs.
- Cleanliness: Like pallets, avoid reels with suspicious stains.
Other Essential Supplies:
- Wood Glue: High-quality, waterproof wood glue for strong joints.
- Screws: Exterior-grade wood screws (e.g., galvanized or stainless steel) of various lengths for assembling the bench.
- Sandpaper: Assorted grits (from coarse to fine) for preparing the wood surfaces.
- Wood Filler (Optional): For filling any large gaps or imperfections.
- Paint/Stain/Sealer: Exterior-grade paint (chalk paint for shabby chic, or weather-resistant latex), wood stain, or clear outdoor sealer to protect and finish your bench.
- Brushes/Rollers: For applying finishes.
Tools You’ll Need
Having the right tools will make the building process smoother and safer. Here’s a list of what you’ll likely need:
- Safety Gear: Essential for any DIY project. This includes safety glasses, work gloves, and a dust mask.
- Measuring Tape & Pencil: For accurate measurements and marking cuts.
- Saw: A circular saw is excellent for straight cuts on pallet wood. A jigsaw can be useful for more intricate cuts, and a reciprocating saw can help significantly with pallet disassembly.
- Drill/Driver: For pre-drilling holes and driving screws.
- Pry Bar & Hammer: Absolutely crucial for carefully disassembling pallets without damaging the wood.
- Orbital Sander or Sanding Blocks: For smoothing rough pallet wood and preparing surfaces for finishing.
- Clamps: Various clamps (bar clamps, C-clamps) can be immensely helpful for holding pieces in place while glue dries or screws are driven.
- Square: To ensure all cuts and assemblies are perfectly square.
Step-by-Step Guide: Building Your Dream Bench
With your materials and tools ready, it’s time to bring your vision to life. This process involves careful planning, precise cuts, and secure assembly.
Step 1: Disassemble & Prepare Pallets
This is often the most challenging but crucial step. Pallets are designed to be strong, so taking them apart requires patience and technique.
- Safety First: Don your safety glasses and gloves.
- Pry Apart: Using a hammer and pry bar, carefully separate the top deck boards from the stringers (the thicker pieces that run perpendicular). Work slowly, prying near the nails to minimize splitting the wood. You might need to cut some nails with a reciprocating saw if they are stubborn.
- Remove Nails: Once separated, remove all old nails from the retrieved boards. A claw hammer or a specialized nail puller works best.
- Clean & Inspect: Brush off any dirt or debris. Inspect each board for rot, significant cracks, or hidden nails. Set aside the best boards for your bench.
- Initial Sanding: Give the pallet boards a rough sand (e.g., 80-grit sandpaper) to remove splinters and smooth the surface. This makes them easier and safer to work with.
Step 2: Prepare Cable Reels
Your cable reels will serve as the sturdy end supports for your bench.
- Clean Thoroughly: Wipe down the cable reels to remove any dirt, grease, or grime.
- Sand Smooth: Pay particular attention to the edges and any rough spots on the cable reel discs. Use 80-120 grit sandpaper to achieve a smooth finish, especially where people might touch them.
- Decide on Configuration: You can use full cable reel ends as the bench supports, or if you prefer a lower bench or want to maximize material, you could potentially cut them in half (though this is more complex and requires careful measurement and cutting). For most standard benches, using the full reel ends provides excellent stability and a unique look.
Step 3: Cut Pallet Wood to Size
Now it’s time to measure and cut the pallet wood for the seat and backrest of your bench. The exact dimensions will depend on your desired bench size.
- Measure Your Space: Determine the ideal length of your bench. Remember to account for the width of the cable reel ends.
- Cut Seat Slats: Cut several pallet boards to the desired length for the seat. The number of boards will depend on their width and your desired seat depth. Leave a small gap between slats for drainage.
- Cut Backrest Slats: Similarly, cut boards for the backrest. You might want these slightly shorter or angled for comfort.
- Cut Support Pieces: You’ll need additional pallet wood for the frame that connects the seat to the cable reels and provides support for the backrest.
Step 4: Assemble the Seat Frame
This is the skeleton of your bench seat.
- Create Side Supports: Using some of your sturdier pallet wood, create two long support pieces that will connect to the cable reel ends. These will run along the front and back edges of your seat.
- Attach Cross Supports: Cut shorter pieces to act as cross-supports between the side supports, forming a rectangular frame. Use wood glue and exterior-grade screws to create a strong, stable frame. Pre-drill holes to prevent splitting.
- Lay Seat Slats: Place your cut seat slats evenly across this frame. Maintain consistent spacing between slats. Attach them securely with wood glue and screws, ensuring they are flush and level.
Step 5: Integrate Cable Reels as Legs/Ends
The cable reels now become the defining feature of your bench.
- Position Reels: Stand your two prepared cable reel ends upright, parallel to each other, at the desired distance apart to support your seat frame.
- Attach Seat Frame: Carefully lift the assembled seat frame and position it on top of the cable reel ends. The height of the seat will be determined by how high you attach the frame to the reels. For a standard bench, aim for a seat height of around 18-20 inches from the ground.
- Securely Fasten: Use long, exterior-grade screws to attach the seat frame to the cable reel ends. You’ll likely need to screw through the seat frame and into the solid wood discs of the reels. Add wood glue between contacting surfaces for extra strength. Use multiple screws at various points for maximum stability. Ensure the bench is level and wobble-free.
Step 6: Construct the Backrest
A comfortable backrest makes all the difference.
- Create Backrest Supports: Cut two vertical support pieces from pallet wood. These will attach to the back of your seat frame and extend upwards to support the backrest slats. You can angle these slightly backward for a more comfortable recline.
- Attach Supports: Securely screw these backrest supports to the rear of your seat frame and, if possible, into the cable reel ends for added stability.
- Attach Backrest Slats: Arrange your cut backrest slats horizontally across these vertical supports. Space them evenly. Attach with wood glue and screws. Consider an ergonomic curve by slightly staggering the slats or using a slightly different angle for each.
Step 7: Reinforce and Secure
Always double-check your work for safety and longevity.
- Check All Fasteners: Ensure all screws are tight and there are no protruding nail heads.
- Add Brackets (Optional but Recommended): For extra strength, consider adding L-brackets or corner braces at critical joints, especially where the seat meets the cable reels and where the backrest attaches.
- Test Stability: Gently test the bench for any wobbles or weak points. Reinforce as needed.
Finishing Touches: Bringing Your Bench to Life
The finishing stage is where your bench truly transforms and takes on its unique shabby chic or farmhouse character, while also gaining protection from the elements.
Sanding, Filling, and Priming:
- Final Sanding: Go over the entire bench with progressively finer sandpaper (e.g., 120-grit, then 220-grit) to achieve a smooth finish. This is crucial for comfort and for paint adhesion. Pay extra attention to any areas that will be frequently touched.
- Fill Imperfections (Optional): Use exterior-grade wood filler to fill any large nail holes, cracks, or deep imperfections. Once dry, sand smooth.
- Prime (if painting): If you plan to paint your bench, apply one or two coats of exterior-grade primer. Primer helps the paint adhere better, provides a more uniform finish, and offers an extra layer of protection.
Painting/Staining:
- Shabby Chic Look: For this popular style, choose a light, often pastel, color paint (e.g., antique white, light blue, soft green). Apply two coats. Once dry, use sandpaper (or a sanding block) to strategically distress the edges, corners, and raised areas, revealing the bare wood or a darker base coat beneath. This creates an aged, worn look. You can also apply a dark wax over the paint for an even older, richer effect.
- Farmhouse Rustic: For a more classic rustic look, you might opt for a wood stain that enhances the natural grain of the pallet wood, followed by a clear sealer. Alternatively, a solid color exterior paint in a classic shade like barn red, forest green, or a muted grey can work wonders.
- Color Choice: Consider your existing outdoor decor and the overall aesthetic you’re aiming for. Light colors tend to make spaces feel more open and airy, while darker colors can add a sense of groundedness.
Sealing and Protection:
This step is non-negotiable for outdoor furniture made from repurposed wood.
- Apply Sealer: Whether you’ve painted or stained your bench, apply at least two to three coats of a high-quality, exterior-grade clear sealer or polyurethane. This will protect the wood from moisture, UV rays, and general wear and tear, ensuring your bench lasts for many seasons.
- Edge Protection: Pay extra attention to end grain and edges, as these are most susceptible to water absorption.
- Allow Drying Time: Follow the manufacturer’s instructions for drying and re-coat times.
Personalizing Your Bench: Make It Truly Yours
Once the construction and finishing are complete, it’s time for the fun part: making your bench uniquely yours.
- Cushions and Pillows: Add comfortable outdoor cushions and decorative throw pillows in colors and patterns that complement your home and garden. This instantly elevates comfort and style.
- Stenciling or Decorative Painting: Consider stenciling a farmhouse-inspired phrase, a family name, or a simple design onto the backrest or seat.
- Functional Additions: Small details like attaching a bottle opener to the side, adding a small storage cubby underneath the seat, or even incorporating small plant holders can enhance its utility and charm.
- Placement: Strategically place your bench on your front porch to greet guests, on your back patio for a cozy reading nook, or in a quiet corner of your garden as a serene resting spot.
Safety Considerations
Throughout this project, safety should always be your top priority:
- Material Sourcing: Always use “HT” (heat-treated) pallets and avoid “MB” (methyl bromide) treated ones. Inspect all materials for hazardous stains or chemicals.
- Tool Use: Familiarize yourself with all power tools before use. Always wear appropriate personal protective equipment, including safety glasses, hearing protection, and gloves.
- Structural Integrity: Ensure all joints are secure and the bench is stable. A wobbly bench is a safety hazard. Over-engineer if necessary.
- Splinter Prevention: Thorough sanding and sealing are crucial to prevent splinters, especially if the bench will be used by children.
- Ventilation: When painting or sealing, work in a well-ventilated area to avoid inhaling fumes.
Building your own shabby chic pallet and cable reel bench is an incredibly rewarding project. It’s an opportunity to create a stunning, functional piece of furniture that reflects your personal style, saves money, and contributes to a more sustainable lifestyle. The process, while requiring effort and patience, culminates in a unique masterpiece that will be cherished for years to come. So gather your materials, enlist a helper if you wish, and embark on this creative journey. We hope you enjoy your beautifully crafted bench as much as we enjoy ours, a true testament to the beauty of repurposing and the joy of DIY!