
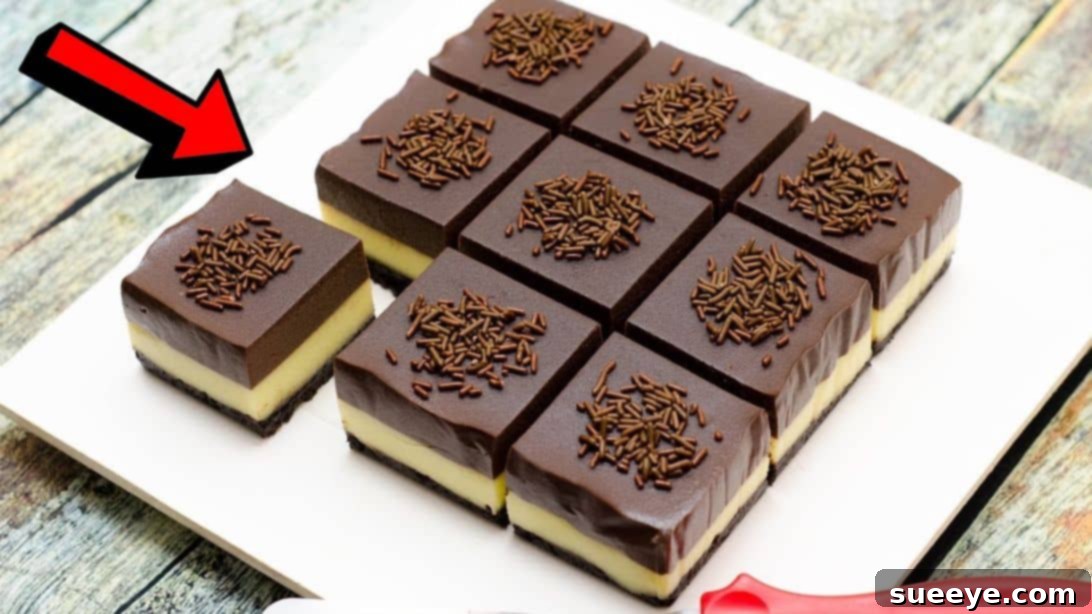
Prepare to delight your taste buds with this incredibly easy and utterly delicious no-bake 3-layer pudding cake. This recipe, inspired by the creative culinary experts at N’Oven – Cake & Cookies on YouTube, combines the irresistible crunch of an Oreo cookie base with luscious layers of creamy milk pudding and rich chocolate pudding. The best part? No oven is required! This makes it a perfect dessert for any occasion – whether you’re looking for a quick snack, a crowd-pleasing party treat, or a refreshing end to a hearty dinner. Get ready to impress your family and friends with this simple yet spectacular creation.
Essential Ingredients for Your No-Bake Pudding Cake
Crafting this delightful dessert requires a few readily available ingredients, divided into three distinct sections for each layer. Quality ingredients make a noticeable difference in the final taste and texture of your pudding cake.
Oreo Cookie Base: The Crunchy Foundation
The foundation of our no-bake pudding cake is a rich and buttery Oreo crust. This layer provides a delightful texture contrast to the smooth puddings above it.
- 2 cups of finely crushed Oreo cookie crumbs (approximately 24-28 cookies, depending on size, crushed with cream filling)
- ¼ cup of unsalted butter, melted (this binds the crumbs and adds richness)
- ¼ cup of sweetened condensed milk (adds extra sweetness and helps create a firm base)
Creamy Milk Pudding Layer: A Smooth, Sweet Core
This light and creamy layer provides a perfect balance to the rich chocolate. Agar-agar powder is key here for a firm, gelatin-like set without using animal-based gelatin.
- 2 tbsp of agar-agar powder (ensure it’s powdered for easier dissolving, not flakes)
- ¼ cup of cold water (for dissolving the agar-agar)
- 1½ cup of whole milk (for a rich, creamy texture)
- 1/3 cup of granulated sugar (adjust to your sweetness preference)
- 1 tbsp of cornstarch (helps thicken the pudding and provides a smooth mouthfeel)
- 1 tbsp of custard powder (enhances flavor and adds a beautiful pale yellow hue)
Decadent Chocolate Pudding Layer: The Rich Topping
The final layer is a luxurious chocolate pudding, providing a deep, satisfying flavor that complements the milk pudding and Oreo base.
- 1½ cup of whole milk
- 1/3 cup of granulated sugar
- 1 tbsp of cornstarch
- ¼ cup of unsweetened cocoa powder (for intense chocolate flavor)
- 2 tbsp of chocolate chips (for added richness and a more pronounced chocolate taste)
- Chocolate sprinkles, for garnish and visual appeal
Step-by-Step Instructions: Crafting Your No-Bake Masterpiece
Creating this impressive 3-layer pudding cake is simpler than you might imagine. Follow these detailed steps to ensure a perfect result every time.
Step 1: Preparing the Irresistible Oreo Base
The first step sets the foundation for your entire dessert. Start by preparing your Oreo cookie crumbs. You can achieve this by placing whole Oreos (with their cream filling) in a food processor and pulsing until finely crushed, or by placing them in a sealed plastic bag and crushing them with a rolling pin until a fine crumb is achieved. In a large mixing bowl, combine these fine Oreo cookie crumbs with the melted butter. Fold them together thoroughly until the crumbs are evenly moistened. Next, add the sweetened condensed milk and continue to mix until all ingredients are well incorporated and the mixture resembles wet sand. The condensed milk acts as an additional binder, ensuring a stable base.
Prepare a 6-inch square cake pan by lining it completely with parchment paper, leaving an overhang on the sides. This overhang will make it incredibly easy to lift the finished dessert out of the pan. Transfer the Oreo mixture to the bottom of the prepared pan. Using the back of a spoon or your fingers, spread the mixture evenly across the base of the pan, pressing down gently but firmly. This compaction is crucial for a stable crust. Once pressed, place the pan in the refrigerator for at least 10 minutes, or until the base is completely chilled and firm. This chilling time prevents the pudding layers from seeping into the base and helps it hold its shape.
Step 2: Crafting the Creamy Milk Pudding Layer
While your Oreo base is chilling, you can begin preparing the first pudding layer. In a small bowl, combine the agar-agar powder with ¼ cup of cold water. Stir this mixture vigorously until the agar-agar powder is completely dissolved. Set this aside, as it will be added to the hot milk mixture later to activate its setting properties. In a medium-sized saucepan, combine the 1½ cups of milk, 1/3 cup of granulated sugar, and 1 tablespoon of cornstarch. Whisk these ingredients together until the sugar and cornstarch are fully dissolved and there are no lumps. Next, add the 1 tablespoon of custard powder, whisking continuously until it is thoroughly combined and smooth.
Place the saucepan on the stove over medium-low heat. Cook the mixture, stirring constantly with a whisk, for a few minutes until it begins to gently simmer and slightly thicken. At this point, add about 2 teaspoons of your dissolved agar-agar mixture into the saucepan. Continue to whisk constantly for another 2-3 minutes. The pudding should visibly thicken to a consistency similar to a pourable custard. Ensure the agar-agar is fully incorporated and cooked to activate its gelling properties. Do not let it boil vigorously.
Step 3: Layering the Milk Pudding and Preparing the Chocolate Layer
Once your milk pudding has reached the desired thickened consistency, remove it from the heat. Retrieve your chilled Oreo base from the refrigerator. Carefully and slowly pour the warm milk pudding mixture evenly over the compacted Oreo base. Be gentle to avoid disturbing the base layer. Once poured, immediately place the pan back into the refrigerator to allow this layer to set. It needs at least 10 minutes to chill and firm up sufficiently before the next layer is added. A well-chilled layer ensures clean, distinct lines between your pudding layers.
While the milk pudding layer is setting, you can start preparing the decadent chocolate pudding layer. In a separate, clean saucepan, combine 1½ cups of milk, 1/3 cup of granulated sugar, and 1 tablespoon of cornstarch. Give these ingredients a good whisk until everything is well combined and smooth. Next, sift in ¼ cup of unsweetened cocoa powder. Sifting prevents lumps and ensures a silky-smooth chocolate pudding. Continue to whisk until the cocoa powder is fully incorporated and the mixture is uniform in color. Place this saucepan on a stove over medium-low heat. Cook for a few minutes, stirring constantly, until the mixture starts to warm through. Add the 2 tablespoons of chocolate chips and continue whisking until they are completely melted and the pudding starts to thicken. This creates a rich and glossy chocolate base.
Step 4: Finishing with Chocolate Pudding and Final Chilling
After the chocolate chips have melted and the pudding has begun to thicken, add the remaining dissolved agar-agar mixture to the chocolate pudding. Give it a good whisk to ensure the agar-agar is thoroughly incorporated throughout the mixture. Continue to cook for another 2-3 minutes, stirring constantly, until the chocolate pudding thickens significantly to a pourable custard consistency. Remove it from the heat.
Retrieve the pan from the refrigerator; the milk pudding layer should now be firm to the touch. Carefully pour the warm chocolate pudding mixture evenly over the chilled milk pudding layer. Gently shake the pan lightly to ensure the surface is smooth and even. Return the pan to the refrigerator for a final chill. Allow it to set for at least another 10 minutes, or ideally, 1-2 hours for it to be completely firm and easy to slice. The longer it chills, the cleaner your slices will be.
Once completely set, lift the entire dessert out of the pan using the parchment paper overhang. Carefully peel off the parchment paper from the sides. Place the large pudding cake block onto a cutting board and slice it into desired bar sizes or squares. For a beautiful finish, sprinkle generously with chocolate sprinkles on top. This no-bake 3-layer pudding cake is best served chilled. Enjoy every delightful bite!
Tips for Achieving Pudding Perfection
- Crumb Consistency: Ensure your Oreo crumbs are fine and uniform for a solid base that won’t crumble apart.
- Agar-Agar Dissolution: It’s crucial to fully dissolve agar-agar in cold water before adding it to hot liquids. If not dissolved properly, it won’t set your puddings effectively.
- Constant Stirring: For both pudding layers, continuous stirring prevents lumps, scorching, and ensures an even cook and smooth texture.
- Layer Chilling: Do not rush the chilling time between layers. Each layer needs to be firm before the next is poured on to prevent mixing and ensure distinct, clean lines.
- Smooth Puddings: If you find your pudding mixtures have any small lumps after cooking, you can strain them through a fine-mesh sieve before pouring them into the pan for an extra smooth finish.
- Parchment Paper is Your Friend: The parchment paper lining is essential for easy removal of the entire dessert from the pan. Don’t skip this step!
Variations and Customizations: Make It Your Own
This no-bake pudding cake recipe is wonderfully versatile, allowing for numerous delicious variations:
- Cookie Base Alternatives: Instead of Oreos, try digestive biscuits, graham crackers, or even shortbread cookies. Mix in finely chopped nuts like pecans or almonds for added crunch.
- Pudding Flavor Swaps:
- Coffee Pudding: Add instant coffee powder to the milk pudding for a mocha twist.
- Caramel Pudding: Substitute some of the sugar with caramel sauce or add a swirl of dulce de leche to the milk layer.
- Fruit Puree Layer: For a lighter, tangier layer, create a simple fruit puree (e.g., strawberry, mango) thickened with a little agar-agar and layer it in.
- Topping Ideas: Beyond chocolate sprinkles, consider:
- Fresh berries (strawberries, raspberries, blueberries) for color and freshness.
- Whipped cream or a light cream cheese frosting swirl.
- Chocolate shavings, cocoa powder dust, or a drizzle of chocolate syrup.
- Crushed nuts or toasted coconut flakes.
- Different Pan Shapes: While a square pan makes neat bars, you can use a round springform pan for a more traditional cake look. Adjust parchment paper accordingly.
Serving and Storage Suggestions
This no-bake 3-layer pudding cake is best enjoyed chilled. Slice into individual portions just before serving to maintain its freshness and presentation. For optimal taste and texture, store any leftovers in an airtight container in the refrigerator for up to 3-4 days. This dessert does not freeze well due to the pudding’s texture. Always ensure it’s kept cold to maintain its firm set.
Why Choose This Easy No-Bake Delight?
In a world where time is a precious commodity, this no-bake dessert stands out as a true culinary gem. It offers the elegance and complexity of a multi-layered cake without the fuss of baking. The combination of textures – the crisp cookie base and the silky smooth puddings – along with the balanced sweetness, makes it an unforgettable treat. It’s an ideal recipe for beginner bakers, busy hosts, or anyone craving a delicious dessert with minimal effort. Plus, it’s a fantastic way to involve younger family members in the kitchen, as there’s no hot oven to worry about. Experience the joy of creating a stunning dessert that looks as good as it tastes, perfect for any gathering or a simple indulgence.
All image credit belongs to N’Oven – Cake & Cookies via YouTube. Follow and subscribe to her channel for more incredible dessert recipes and creative ideas!