
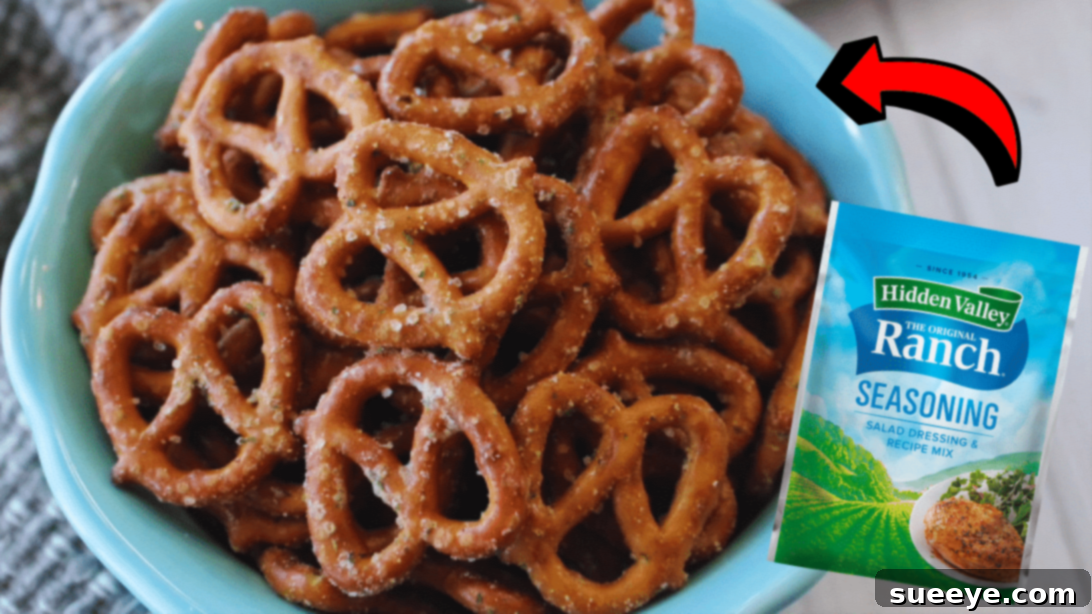
Irresistibly Crunchy Garlic Ranch Pretzels: The Ultimate Easy Snack Recipe
Prepare to transform your snack game with this incredibly simple yet addictively delicious Garlic Ranch Pretzels recipe, originally inspired by the culinary experts at Eating on a Dime on YouTube. Forget plain, boring pretzels; once you experience the savory punch of garlic perfectly blended with the tangy zest of ranch, your perception of snack time will forever change. This recipe elevates ordinary pretzels into an extraordinary treat that everyone, from the pickiest eaters to the most discerning foodies, will absolutely adore. It’s the quintessential snack idea, wonderfully kid-friendly, making it a guaranteed hit for family gatherings, school lunchboxes, or simply a satisfying crunch during your afternoon break.
What truly sets these Garlic Ranch Pretzels apart is not just their phenomenal flavor, but also the remarkable ease of preparation. You can have these seasoned delights ready for the oven in mere minutes, requiring minimal effort and no complex cooking skills. Even better, this crowd-pleasing snack calls for only four basic ingredients, many of which you likely already have in your pantry. We’ll guide you through each step, ensuring you achieve perfectly seasoned, crunchy pretzels every single time. Get ready to bake a batch that will disappear faster than you can say “garlic ranch!”
Why These Garlic Ranch Pretzels Are a Must-Try Snack
In a world of complicated recipes, sometimes the simplest creations yield the most satisfying results. Our Garlic Ranch Pretzels recipe is a testament to this philosophy. They offer a delightful crunch paired with an explosion of savory flavors that make them incredibly hard to resist. Here’s why this snack deserves a permanent spot in your recipe collection:
- Effortlessly Delicious: With just four ingredients and minimal hands-on time, you can create a gourmet-tasting snack that belies its simplicity.
- Crowd-Pleasing Power: The combination of garlic and ranch is universally loved. These pretzels are perfect for parties, game nights, potlucks, or just a casual get-together with friends and family.
- Kid-Approved: Their familiar flavor profile and fun crunch make them a huge hit with children, offering a more exciting alternative to plain snacks.
- Versatile Snacking: Enjoy them on their own, serve them alongside a sandwich or soup, or even crush them to use as a flavorful topping for salads or casseroles.
- Budget-Friendly: Utilizing common, inexpensive pantry staples, this recipe proves that delicious snacks don’t have to break the bank.
- Customizable: While the basic recipe is fantastic, it also provides an excellent canvas for personalization. Add a touch of spice, a hint of cheese, or other herbs to tailor them to your taste.
RELATED: Looking for other easy and delicious snack ideas? Check out our Easy Kitchen Sink Cookies Recipe for another treat that uses simple ingredients to create something truly special.
Ingredients for Irresistible Garlic Ranch Pretzels:
One of the beauties of this recipe lies in its minimalist ingredient list. You don’t need obscure spices or exotic oils; just a few readily available items will do the trick. Here’s what you’ll need to create your batch of garlic ranch goodness:
- ½ cup of oil (canola, vegetable, or coconut oil are all excellent choices. Choose a neutral-flavored oil to let the ranch and garlic shine, or coconut oil for a subtle, unique twist.)
- 1 tsp of garlic powder (Garlic granules can also work, but powder typically dissolves and coats more evenly. Adjust to your preference for a stronger garlic kick.)
- 1 packet of Ranch Dressing Mix (A standard 1 oz or 1.25 oz packet of dry ranch seasoning mix is perfect. Hidden Valley is a popular choice, but any brand will do.)
- 1 (1 lb) bag of pretzels (Mini twist pretzels are ideal as they offer more surface area for the seasoning and are easy to handle. Sourdough hard pretzels or even pretzel sticks can also be used for different textures.)
How to Make the Best Garlic Ranch Pretzels: A Step-by-Step Guide
Making these seasoned pretzels is incredibly straightforward. Follow these simple steps to ensure a perfectly coated, deliciously crunchy snack every time. The key is even distribution of the flavorful coating and proper baking technique.
Step 1: Prepare Your Workstation and Oven
Before you begin mixing, preheat your oven to 270°F (132°C). This low temperature is crucial for slowly toasting the pretzels and allowing the flavors to meld without burning. Line a large baking sheet with parchment paper or a silicone baking mat. This will prevent sticking and make cleanup a breeze. Gather your mixing bowl, whisk, and all ingredients to have them readily accessible.
Step 2: Combine the Flavorful Coating
In a large mixing bowl, pour in the ½ cup of oil. Add the 1 teaspoon of garlic powder and the entire packet of ranch dressing mix. Using a whisk or fork, stir these ingredients together thoroughly until they are fully combined and form a smooth, well-blended liquid. Make sure there are no dry clumps of seasoning; the oil should evenly suspend all the flavorful particles.
Step 3: Coat the Pretzels Evenly
Now, add the 1-pound bag of pretzels to the bowl with the seasoning mixture. Gently, yet thoroughly, mix everything together. The goal is to coat every single pretzel piece evenly with the savory ranch and garlic oil. Use a rubber spatula or a large spoon to fold and stir the pretzels, ensuring they are all glistening with the seasoning. If you prefer, an even easier method is to combine the oil, garlic powder, and ranch mix directly into a large Ziploc bag. Add the pretzels to the bag, seal it tightly, and then gently shake and tumble the bag until all the pretzels are uniformly coated. This method often ensures maximum coverage with minimal mess.
Step 4: Bake to Perfection
Carefully transfer the coated pretzels from the bowl or bag onto your prepared baking sheet. Spread them out into a single, even layer. It’s important not to overcrowd the baking sheet; if necessary, use two baking sheets to ensure the pretzels bake evenly and crisp up rather than steam. Place the baking sheet(s) into the preheated oven and bake for approximately 20 minutes. During the baking process, you can gently stir the pretzels halfway through (around the 10-minute mark) to promote even toasting and prevent sticking, though this isn’t strictly necessary if they are in a single layer.
Step 5: Cool and Serve
Once the 20 minutes are up, remove the baking sheet from the oven. The pretzels might not feel completely crispy immediately, but they will become perfectly crunchy as they cool. Allow them to cool completely on the baking sheet before transferring them to a serving bowl or an airtight container. Cooling is essential for achieving that satisfying snap. Once cooled, they are ready to be enjoyed! Prepare for them to disappear quickly.
Tips for Perfectly Crunchy and Flavorful Garlic Ranch Pretzels
While the recipe is straightforward, a few expert tips can elevate your Garlic Ranch Pretzels from good to absolutely phenomenal:
- Even Coating is Key: Whether you use a bowl or a Ziploc bag, ensure every pretzel is well-coated. This guarantees a consistent flavor in every bite and helps the pretzels crisp up evenly.
- Don’t Overcrowd the Pan: Give your pretzels space! Baking them in a single layer prevents steaming, which can lead to soggy pretzels. If you have too many, use multiple baking sheets.
- Low and Slow Baking: The 270°F (132°C) temperature is crucial. It allows the seasoning to bake onto the pretzels and for them to dry out and become extra crunchy without burning the delicate spices.
- Cool Completely: Patience is a virtue here. The pretzels will achieve their ultimate crispness only after they have cooled down completely. Resist the urge to snack on them warm (it’s hard, we know!).
- Experiment with Oil: While canola or vegetable oil is standard, trying olive oil for a slightly different savory note or melted coconut oil for a subtle sweetness can add interesting dimensions.
- Check Your Pretzels: Oven temperatures can vary. Keep an eye on your pretzels towards the end of the baking time to ensure they don’t get too dark. They should be golden brown and aromatic.
Flavor Variations and Customizations
The beauty of this Garlic Ranch Pretzels recipe lies in its adaptability. Once you’ve mastered the basic version, feel free to get creative and experiment with different flavor profiles:
- Spicy Kick: Add ¼ to ½ teaspoon of cayenne pepper or red pepper flakes to the seasoning mix for a fiery twist.
- Cheesy Goodness: Mix in 2-3 tablespoons of grated Parmesan cheese (the finely grated variety works best) along with the other seasonings for a cheesy ranch explosion. Nutritional yeast can also provide a similar savory, cheesy flavor for a dairy-free option.
- Herbal Delight: Introduce additional dried herbs like dill, parsley, or chives to complement the ranch flavor. Start with ½ teaspoon of any dried herb and adjust to taste.
- Smoky Undertones: A pinch of smoked paprika (¼ to ½ teaspoon) can add a wonderfully smoky depth to your pretzels.
- Everything Bagel Twist: Add 1-2 teaspoons of everything bagel seasoning to the mix for an extra layer of savory crunch and texture.
- Onion Lover’s Dream: For an enhanced savory flavor, add ½ teaspoon of onion powder along with the garlic powder.
- Different Pretzel Shapes: While mini twists are great, don’t hesitate to use pretzel sticks, pretzel rings, or even sourdough hard pretzels for a different bite and texture. Just ensure they are all broken into roughly similar sizes for even coating and baking.
- Other Seasoning Mixes: This method isn’t exclusive to ranch! Experiment with taco seasoning, chili seasoning, or even your favorite homemade spice blend for a whole new snack experience.
You might also like this: If you enjoy the savory crunch of pretzels, you’ll love our Easy Pretzel-Crusted Chicken with Cheese Sauce Recipe, which incorporates pretzels in an unexpected and delicious way for a main course!
Serving and Storage Suggestions
These Garlic Ranch Pretzels are incredibly versatile and store well, making them perfect for meal prep or spontaneous snacking.
Serving Ideas:
- Standalone Snack: Enjoy them straight from the bowl for a satisfying crunch anytime.
- Party Appetizer: A bowl of these pretzels is always a hit at parties, game days, and social gatherings. They’re a simple yet impressive offering.
- Lunchbox Treat: Pack a small handful in lunchboxes for a flavorful alternative to plain chips.
- Soup and Salad Topping: Crush them lightly and sprinkle over creamy soups or green salads for an added texture and flavor boost.
- Trail Mix Addition: Combine them with nuts, seeds, and dried fruit for a custom savory-sweet trail mix.
- Gift Idea: Package them in pretty bags or jars with ribbons for a thoughtful, homemade edible gift during holidays or special occasions.
Storage:
To maintain their optimal crispness and flavor, proper storage is essential. Once completely cooled, transfer the Garlic Ranch Pretzels to an airtight container or a heavy-duty resealable bag. Store them at room temperature in a cool, dry place away from direct sunlight. They will remain fresh and crunchy for up to 1-2 weeks. Avoid refrigerating them, as this can introduce moisture and cause them to lose their crispness. If they start to lose their crunch after a few days, you can briefly re-bake them at a low temperature (around 250°F / 120°C) for 5-10 minutes to revive their crispness.
Easy Garlic Ranch Pretzels Recipe: Final Thoughts
There you have it – a remarkably simple recipe for Garlic Ranch Pretzels that delivers maximum flavor and crunch with minimal effort. This snack is a true game-changer, proving that you don’t need a pantry full of exotic ingredients or hours in the kitchen to create something truly delicious and memorable. Whether you’re preparing for a party, looking for a quick after-school snack, or just craving something savory and satisfying, these pretzels are sure to hit the spot.
We encourage you to try this recipe, experiment with the suggested variations, and make it your own. It’s a fantastic foundation for endless snacking possibilities. Get ready to impress your family and friends with this irresistible treat, and watch as they disappear in record time!
*A huge thank you to Eating on a Dime via YouTube for inspiring this fantastic recipe and for providing the wonderful images used throughout this article. Their channel is a treasure trove of easy and affordable meal ideas, so be sure to give them a visit and subscribe for more culinary inspiration!