
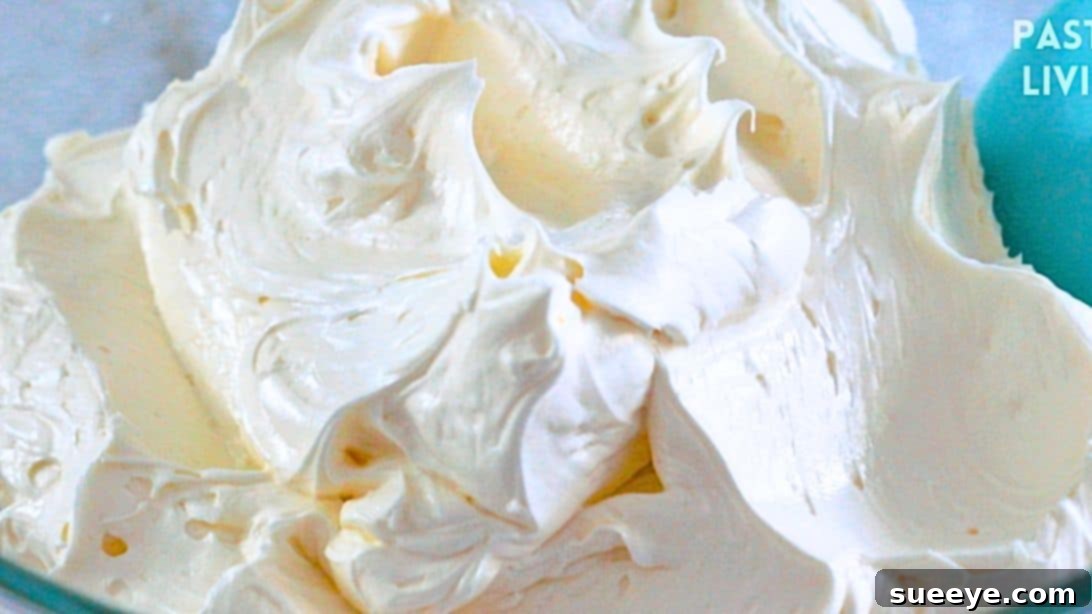
Mastering Perfect Swiss Meringue Buttercream: A No-Fail Guide
For many baking enthusiasts, Swiss Meringue Buttercream (SMBC) is the gold standard when it comes to frosting. Its incredibly smooth, silky texture, combined with a less cloyingly sweet profile compared to traditional American buttercream, makes it a favorite for decorating cakes, cupcakes, and pastries. While its reputation might suggest complexity, achieving a consistently perfect batch of SMBC is entirely within reach with the right knowledge and techniques.
At its heart, buttercream can truly elevate any baked good, transforming a simple muffin or cupcake into a delightful treat. However, a common frustration for home bakers is ending up with a buttercream that’s either too loose and runny or strangely curdled. These texture issues not only make piping a nightmare but also significantly diminish the overall enjoyment of your delicious creations. The good news is, attaining that dreamy, stable consistency isn’t just for professional pastry chefs. With a few crucial insights, anyone can master this luxurious frosting.
Fortunately, expert guidance is available to demystify the process. We’re thrilled to share insights derived from the brilliant teachings of Pastry Living with Aya on YouTube. Her proven methods offer a roadmap to a no-fail Swiss Meringue Buttercream that promises perfection every single time. This comprehensive guide will break down the essential ingredients, meticulous steps, and invaluable tips to ensure your buttercream is consistently smooth, stable, and utterly delicious.
Understanding Swiss Meringue Buttercream
Before diving into the recipe, let’s briefly understand what makes Swiss Meringue Buttercream unique. Unlike American buttercream, which relies on powdered sugar beaten with butter, SMBC starts with a meringue base. Egg whites and granulated sugar are gently heated over a water bath, then whipped into a glossy, stable meringue. This process not only pasteurizes the egg whites but also fully dissolves the sugar, resulting in a remarkably smooth texture. Once the meringue is cooled, butter is gradually incorporated, creating a light, airy, and incredibly stable frosting that holds its shape beautifully and takes on flavors wonderfully.
Essential Ingredients for Success
Crafting flawless Swiss Meringue Buttercream begins with high-quality ingredients. Each component plays a vital role in achieving that coveted smooth and stable consistency. Pay close attention to the details for each ingredient:
- Egg Whites (150 grams or 5.3 ounces, approx. 4½ to 5 large eggs): Fresh, large egg whites are ideal. Ensure there is absolutely no yolk contamination, as fat can prevent the whites from whipping into a proper meringue. Using a kitchen scale for precise measurement is highly recommended for consistent results.
- Granulated Sugar (225 grams or 1¼ cups): Standard granulated sugar works perfectly. The heating process over the water bath ensures the sugar fully dissolves, eliminating any grainy texture in the final buttercream.
- Unsalted Butter (453 grams or 4 sticks): Unsalted butter is crucial as it gives you complete control over the salt content, allowing for a balanced flavor. It should be softened but still cool to the touch – neither cold and hard nor overly greasy and melted. Ideally, it should hold its shape when pressed lightly. Cut it into 1-inch cubes for easier incorporation.
- Flavoring of Choice: This is where you can truly personalize your buttercream. Options include pure vanilla extract or vanilla bean paste, fruit purees (strained to remove solids), melted and cooled chocolate, espresso powder, citrus zest, or various extracts like almond or peppermint.
Key Equipment for Your Buttercream Journey
Having the right tools can make all the difference in the success of your Swiss Meringue Buttercream. Ensure you have these items readily available and meticulously clean:
- Stand Mixer with Whisk Attachment: This is indispensable for achieving the necessary volume and stability in your meringue. A hand mixer can work for smaller batches but will require more effort and time.
- Heatproof Mixing Bowl: A stainless steel or glass bowl that fits snugly over a saucepan without touching the simmering water.
- Saucepan: For creating the water bath.
- Rubber Spatula: Essential for scraping down the sides of the bowl and folding.
- Kitchen Thermometer: A digital instant-read thermometer is critical for accurately gauging the temperature of the egg white and sugar mixture. This ensures food safety and optimal sugar dissolution.
- Kitchen Scale: For precise ingredient measurements.
Step-by-Step Directions to Flawless Swiss Meringue Buttercream
Follow these detailed steps closely to achieve a magnificent Swiss Meringue Buttercream that will impress every time:
- Prepare the Meringue Base:
Combine the egg whites and granulated sugar in a large, heatproof mixing bowl. Whisk them together briefly just to combine. Place this bowl over a saucepan containing about 1-2 inches of simmering (not boiling) water, ensuring the bottom of the bowl does not touch the water. The steam will gently heat the mixture.
Continue to whisk the mixture constantly over the simmering water. This continuous movement is vital to prevent the egg whites from scrambling. Scrape down the sides of the bowl frequently to ensure even heating and sugar dissolution. Heat the mixture until it reaches 160°F (71°C) on your kitchen thermometer, and all sugar crystals have completely dissolved. You can test this by rubbing a small amount of the mixture between your fingers; it should feel completely smooth, not grainy.
- Whip the Meringue:
Once the egg white and sugar mixture reaches the target temperature and is smooth, carefully remove the bowl from the water bath. Immediately wipe the bottom of the bowl dry to prevent any residual water from entering your meringue. Transfer the hot mixture to the bowl of your stand mixer fitted with the whisk attachment.
Begin whipping the mixture on high speed. Continue to whip until the meringue forms stiff, glossy peaks and the bowl feels cool to the touch. This can take anywhere from 10 to 15 minutes, depending on your mixer and the ambient temperature. As the meringue cools and becomes firm, gradually reduce the speed. Switch to medium speed once it’s warm, and reduce to low speed when it’s just slightly warm to ensure a smooth, stable meringue with minimal large air bubbles.
- Incorporate the Butter:
With the mixer running on low speed, begin adding the cubed, softened unsalted butter one cube at a time. Allow each cube to be mostly incorporated before adding the next. This step requires patience. As you add the butter, the mixture might look curdled, soupy, or separated. This is perfectly normal and often referred to as “the ugly stage.” Do not despair! Continue mixing on medium speed. The buttercream will eventually come together, transforming into a smooth, creamy, and cohesive frosting. This process can take several minutes.
- Add Flavoring:
Once your buttercream is smooth and unified, it’s time to add your desired flavor. Start with a small amount and taste as you go, adjusting to your preference. For extracts, add directly. For fruit purees or melted chocolate, ensure they are cooled to room temperature before adding to prevent the buttercream from breaking. Mix on low speed until the flavoring is fully incorporated.
- Achieve Ultimate Smoothness:
For an extra-silky texture and to remove any remaining air bubbles, switch the mixer to the lowest speed setting and let it run for 2-3 minutes. This slow mixing helps to smooth out the buttercream, making it ideal for piping and decorating.
- Pipe and Serve:
Transfer the finished Swiss Meringue Buttercream to a piping bag fitted with your desired tip. You can now elegantly pipe it onto your cooled muffins, cupcakes, cakes, or any other delightful pastry. Serve immediately or store as recommended below.
Expert Tips for a No-Fail Swiss Meringue Buttercream
Beyond the basic steps, these crucial tips from the masters, like Pastry Living with Aya, will ensure your buttercream journey is always a successful one:
#1: Immaculate Cleanliness is Paramount: Any trace of oil, grease, or even residual liquid on your mixing bowl, whisk, or spatula can severely hinder the egg whites from whipping into a stable meringue. Fat is the enemy of meringue. Always ensure all your equipment is sparkling clean and completely dry before you begin. A quick wipe down with a paper towel dampened with lemon juice or vinegar can help eliminate any invisible grease.
#2: Master the Water Bath Temperature: When heating the egg white and sugar mixture, opt for a gentle simmer, not a rolling boil. Intense heat can cook the egg whites too quickly, leading to scrambled egg bits in your meringue. A gentle simmer provides consistent, even heat, allowing the sugar to dissolve gradually and the egg whites to gently warm up to the safe temperature without coagulating.
#3: Whisk Constantly Over Heat: As stated in tip #2, preventing cooked egg whites is key. Continuously whisking the mixture while it’s over the water bath ensures that the heat is distributed evenly throughout. This prevents the edges or bottom of the bowl from overheating and cooking the eggs. Remember to scrape down the sides of the bowl frequently to incorporate any sugar crystals that might stick there.
#4: The Magic Number: 160°F (71°C): Reaching this precise temperature is critical for multiple reasons. Firstly, it effectively pasteurizes the egg whites, eliminating any potential salmonella risk, making your buttercream safe to consume. Secondly, this temperature guarantees that all the sugar crystals completely dissolve, preventing a grainy texture in your final buttercream. Thirdly, heating to this temperature creates a more stable meringue structure, which is vital for a buttercream that holds its shape beautifully and doesn’t collapse.
#5: Strategic Meringue Whipping: The whipping process isn’t just about speed; it’s about timing and temperature. Immediately after removing the hot mixture from the water bath, whip it on high speed. This rapidly cools the meringue and develops strong, stiff peaks. As the meringue cools and transitions from hot to warm, reduce the speed to medium. Finally, when it’s just slightly warm or cool to the touch, reduce the speed to low. This gradual reduction in speed helps to refine the meringue’s texture, creating a smooth, stable base with tiny, uniform air bubbles, which translates to a silkier buttercream.
#6: Butter Temperature Matters: Your unsalted butter should be soft enough to indent easily with your finger but still cool to the touch and hold its shape. If it’s too cold, it won’t incorporate smoothly and may create lumps. If it’s too warm or melted, it will make your buttercream soupy and unable to emulsify properly. Cubing it helps it soften evenly and incorporate more smoothly.
#7: Patience During Butter Incorporation: The “ugly stage” when adding butter is a test of patience. The mixture may look like curdled cottage cheese or a runny soup. This is completely normal! Continue mixing on medium speed. The emulsion will eventually come together. Don’t stop too early, and resist the urge to add more butter or sugar at this point, as it will often resolve itself with continued mixing.
#8: Flavoring Wisdom: When adding flavorings, ensure they are at room temperature. Cold liquids or solids can shock the buttercream and cause it to curdle. For liquid extracts, add a little at a time, tasting and adjusting. For purees or melted chocolate, ensure they are fully cooled before gently folding them in. Start with less, you can always add more.
#9: The Low-Speed Polish: After all ingredients are incorporated, let your mixer run on the lowest speed for a few minutes. This process helps to work out any large air bubbles that may have been incorporated during the high-speed whipping. The result is an incredibly smooth, velvety buttercream that is a dream to pipe and decorate with.
#10: Troubleshooting Common Issues:
- Too Soupy/Runny: This usually means the butter was too warm, or the meringue wasn’t cooled enough. Place the entire mixer bowl (with buttercream) in the refrigerator for 15-20 minutes, then re-whip on medium-high speed until it comes together.
- Curdled/Broken: Often, this is just the “ugly stage” that needs more mixing. If it persists, try the refrigeration method above. Alternatively, if the kitchen is very cold, gently warm the sides of the mixer bowl with a blow dryer while mixing on low.
- Too Stiff: If your buttercream is too stiff after chilling, let it come to room temperature, then re-whip it on low speed until smooth and pliable.
- Grainy: This indicates the sugar wasn’t fully dissolved. Ensure you always reach 160°F (71°C) and test for graininess between your fingers before whipping the meringue.
Creative Flavor Variations for Your Buttercream
Once you’ve mastered the basic Swiss Meringue Buttercream, the possibilities for flavor innovation are endless. Here are a few popular ideas to inspire your culinary creativity:
- Classic Vanilla: Enhance with high-quality vanilla extract or, for a more intense flavor and visual appeal, vanilla bean paste.
- Rich Chocolate: Fold in cooled, melted dark or milk chocolate, or whisk in sifted cocoa powder for a deep, fudgy flavor.
- Fresh Fruit: Incorporate concentrated fruit purees (like raspberry, strawberry, or passion fruit) that have been strained to remove seeds and excess water.
- Coffee/Espresso: Dissolve instant espresso powder in a tiny bit of hot water, cool it, then mix it into your buttercream for a delightful coffee kick.
- Nutty Notes: Add finely ground nuts or a quality nut butter for an irresistible nutty flavor.
- Citrus Zest: Brighten your buttercream with finely grated zest from lemons, oranges, or limes.
Storage and Re-whipping Your Swiss Meringue Buttercream
One of the many advantages of Swiss Meringue Buttercream is its excellent shelf life and versatility in storage. Freshly made buttercream can be stored at room temperature for up to 2 days in an airtight container if your kitchen is cool (below 70°F/21°C). For longer storage, refrigerate it for up to a week or freeze it for up to a month.
When you’re ready to use refrigerated or frozen buttercream, allow it to come to room temperature completely. This is crucial for successful re-whipping. Once at room temperature, place it in your stand mixer and re-whip on low speed for a few minutes until it becomes smooth, light, and fluffy again. If it looks curdled at first, continue mixing; it will come back together. A few seconds of gentle heat from a blow dryer on the outside of the mixing bowl can also help if it’s struggling to re-emulsify.
Conclusion: Your Journey to Perfect Buttercream Starts Here
Embracing the art of Swiss Meringue Buttercream opens up a world of sophisticated baking. By understanding the critical role of each ingredient, following precise techniques, and diligently applying these expert tips, you can consistently achieve a stable, smooth, and delicious buttercream. No more runny frosting or crumbly textures – just pure, velvety perfection ready to adorn your most cherished baked goods.
Remember, practice makes perfect, and with the valuable guidance from sources like Pastry Living with Aya, you’re well on your way to becoming a buttercream master. So, gather your ingredients, fire up your mixer, and prepare to elevate your baking to new, delicious heights. Happy baking!
*All image credit belongs to Pastry Living with Aya via YouTube. Follow and subscribe to her channel for more incredible baking insights!