
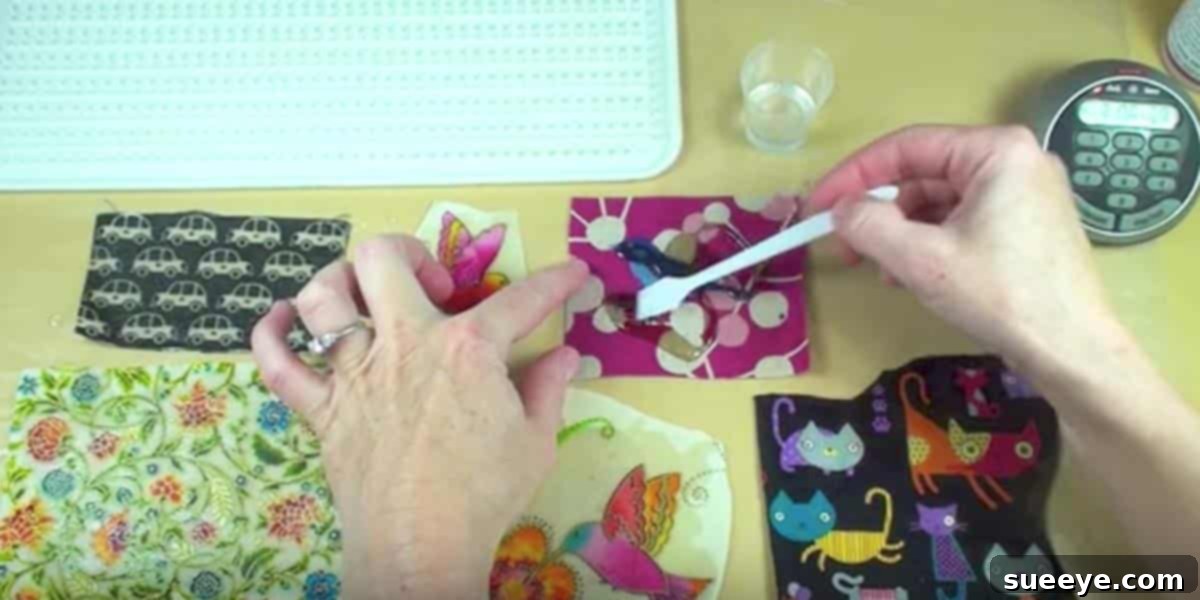
DIY Fabric Resin Jewelry & Crafts: Transform Scraps into Sparkling Treasures
Are you searching for an exciting and endlessly creative DIY project that transforms ordinary fabric scraps into extraordinary, personalized treasures? Look no further! We’re thrilled to introduce you to a captivating crafting technique that allows you to embed your favorite bits and pieces of fabric into crystal-clear resin, creating stunning jewelry, decorative buttons, unique pins, charming magnets, and a myriad of other shiny keepsakes. This method is not only incredibly fun and easy to master but also wonderfully versatile, making it perfect for crafters of all skill levels.
Imagine breathing new life into those precious fabric remnants you’ve been collecting – the tiny swatches from a beloved garment, a nostalgic pattern from a sewing project, or vibrant prints that simply begged to be saved. This innovative resin craft is the ultimate solution for utilizing those fabulous little scraps, turning them into wearable art or delightful gifts that carry a touch of your personal story. Prepare to be inspired as we delve into the magic of fabric resin crafting!
What is Fabric Resin Crafting?
At its core, fabric resin crafting involves encapsulating small pieces of fabric within a clear epoxy resin. This process preserves the fabric, gives it a beautiful, glossy finish, and makes it durable enough for various applications. By carefully layering fabric inside resin molds or bezels, you can create intricate designs, vibrant patterns, and unique textures that are impossible to achieve with traditional jewelry making. The resin acts as a magnifying glass, often enhancing the colors and details of your chosen fabrics, resulting in truly captivating pieces.
This technique opens up a world of possibilities, allowing you to create custom accessories that perfectly match your style or thoughtful, one-of-a-kind gifts for friends and family. It’s a fantastic way to combine your love for textiles with the modern appeal of resin art, yielding professional-looking results with relatively simple tools and materials.
Why You’ll Love This DIY Project
There are countless reasons why fabric resin crafting has become a favorite among DIY enthusiasts. Its blend of creativity, sustainability, and personal expression makes it a truly rewarding endeavor:
1. Sustainability and Scrap Busting
One of the most appealing aspects of this project is its commitment to sustainability. Every crafter knows the struggle of accumulating fabric scraps – pieces too small for most projects but too lovely to discard. This technique provides a brilliant solution, transforming those often-overlooked remnants into valuable components for new creations. It’s a fantastic way to minimize waste, give new purpose to cherished fabrics, and craft guilt-free!
2. Limitless Versatility
The applications for fabric resin pieces are truly endless. While the original inspiration might be jewelry, don’t stop there! Think beyond bracelets and pins. You can create:
- Jewelry: Pendants, earrings, rings, brooches, cufflinks.
- Fashion Accessories: Hair clips, barrettes, bag charms, zipper pulls.
- Home Decor: Fridge magnets, decorative pushpins, small coasters, keychains.
- Embellishments: Unique buttons for clothing, decorative elements for scrapbooks or cards.
The only limit is your imagination!
3. Easy and Accessible for All Skill Levels
Despite the stunning results, fabric resin crafting is surprisingly straightforward. You don’t need years of crafting experience or specialized artistic skills to get started. The basic steps are simple to follow, making it an excellent project for beginners. With a little patience and attention to detail, anyone can achieve beautiful, professional-looking pieces.
4. Personalization at Its Best
Crafters adore the ability to infuse their unique personality into their projects, and fabric resin does exactly that. By selecting fabrics that hold sentimental value, represent your favorite colors, or showcase patterns you adore, you can create truly bespoke items. Design pieces that perfectly complement your wardrobe, reflect your hobbies, or tell a personal story. This level of customization makes each item uniquely yours.
5. Perfect for Handmade Gifts
Handmade gifts always carry an extra layer of thoughtfulness and care. Fabric resin crafts make exceptionally heartwarming presents. Imagine gifting a friend a necklace made from a piece of fabric from a dress you both loved, or creating custom magnets for family members featuring fabric scraps from a child’s first blanket. These personalized touches elevate a simple gift into a cherished keepsake, perfect for birthdays, holidays, or just because.
6. A Wonderful Group Activity for All Ages
This project is not just for solo crafting; it’s a fantastic activity for groups! Just last weekend, I had the pleasure of doing this with my grandkids. They absolutely adore our DIY sessions and are always eager to discover what creative adventure awaits them next. It’s truly heartwarming to see their excitement and pride in their handmade creations. My granddaughters, for instance, crafted the most adorable little bracelets, picking out their favorite fabric pieces and seeing them transform.
This also makes an ideal project for youth organizations. If you’re a Brownie or Girl Scout troop leader, keep this idea in your back pocket! When I was a troop leader, I was constantly on the hunt for engaging and educational projects to do with the girls. In those days, we didn’t have the incredible wealth of resources like Pinterest and YouTube that are readily available today. We are incredibly fortunate to have such accessible inspiration and step-by-step tutorials at our fingertips now. This project encourages fine motor skills, creativity, and the joy of making something beautiful from scratch.
Essential Materials You’ll Need
Getting started with fabric resin crafting is quite simple. Here’s a list of the basic materials and tools you’ll want to have on hand:
- Two-Part Epoxy Resin: This is the core component. Look for clear casting resin specifically designed for jewelry or crafts.
- Fabric Scraps: Gather a variety of colors, patterns, and textures. Small pieces work best – think ½ inch to 2 inches, depending on your mold size.
- Silicone Molds or Bezel Settings: Molds come in various shapes (circles, squares, ovals, hearts) for pendants, earrings, or magnets. Bezel settings are metal frames where you pour resin, often used for necklaces or rings.
- Mixing Cups and Stir Sticks: Small, disposable plastic or silicone cups and craft sticks for mixing your resin.
- Protective Gloves: Essential for protecting your hands from resin.
- Work Surface Protection: A silicone mat, wax paper, or plastic sheeting to protect your table from spills.
- Tweezers or Toothpicks: For carefully placing fabric and popping air bubbles.
- Craft Scissors or Rotary Cutter: For precisely cutting your fabric pieces.
- Jewelry Findings (Optional): If making jewelry, you’ll need jump rings, clasps, earring hooks, pin backs, magnet blanks, or keychain hardware.
- Clear Sealant (Optional): For some delicate fabrics, a thin layer of clear-drying glue or sealant can prevent the resin from “wetting out” the fabric too much.
A Simplified How-To Guide
While we strongly recommend watching a comprehensive video tutorial for the best results (which we’ll link to shortly!), here’s a general overview of the steps involved in fabric resin crafting:
- Prepare Your Workspace: Ensure you’re in a well-ventilated area, and cover your work surface thoroughly. Have all your materials laid out.
- Cut Your Fabric: Cut your chosen fabric scraps to fit your molds or bezels. Remember that you’ll likely want multiple layers of resin, so your fabric shouldn’t fill the mold completely.
- Mix the Resin: Following the manufacturer’s instructions *precisely*, measure and mix the two parts of your epoxy resin. This usually involves equal parts of resin and hardener. Stir slowly and thoroughly to avoid introducing too many bubbles.
- Pour the First Layer: Pour a small amount of mixed resin into your mold or bezel, just enough to create a thin base layer. Use a toothpick to spread it evenly and pop any obvious bubbles.
- Place Your Fabric: Carefully place your fabric pieces onto the wet resin base using tweezers or a toothpick. Arrange them as desired. You might need to gently press them down to ensure they are fully saturated.
- Pour the Top Layer: Once the fabric is positioned, slowly pour the remaining resin over the fabric, filling the mold or bezel to your desired level.
- Remove Bubbles: Use a toothpick, lighter flame (quickly waved over the surface), or a heat gun (from a distance) to pop any remaining air bubbles. Be gentle and patient.
- Cure Time: Allow your resin pieces to cure completely according to the resin manufacturer’s instructions. This typically takes 12-24 hours, but can vary. Keep them in a dust-free environment.
- Finish and Assemble: Once fully cured, demold your pieces. If needed, you can sand rough edges. Then, attach any jewelry findings like jump rings, chains, clasps, or pin backs to complete your unique creations.
Tips for Success and Safety Precautions
To ensure your fabric resin projects turn out beautifully and safely, keep these tips in mind:
- Read Resin Instructions: Always follow the specific instructions provided with your resin kit. Measurement ratios and cure times can vary.
- Ventilation is Key: Work in a well-ventilated area or even outdoors if possible, as resin fumes can be strong.
- Accurate Measurement: Resin requires precise measuring of its two parts. Use separate measuring cups or syringes for accuracy. Inaccurate ratios can prevent proper curing.
- Prevent Bubbles: Stir your resin slowly and gently. Warming your resin bottles slightly before mixing can also help reduce viscosity and bubbles.
- Safety First: Always wear protective gloves and consider eye protection. Avoid direct skin contact with uncured resin.
- Test Fabric: Before committing to a large project, test a small piece of your fabric with resin to see how it reacts. Some fabrics might become translucent or change color slightly when saturated.
- Patience During Curing: Resist the urge to touch or move your pieces before they are fully cured. Premature handling can leave fingerprints or distort the shape.
- Keep it Dust-Free: Dust and pet hair are magnets for wet resin. Cover your curing pieces with a box or dome to protect them.
Dive Deeper: Watch the Tutorial!
Ready to see this exciting technique in action? We highly recommend watching the step-by-step tutorial by LittleWindowsResin. Their expert guidance will walk you through every stage, ensuring you gain the confidence to start your own stunning fabric resin projects. Get ready to be inspired and have an absolute blast turning your fabric scraps into amazing, one-of-a-kind masterpieces!
Once you watch the tutorial, you’ll see just how accessible and rewarding this craft truly is. Prepare to unleash your inner artist and discover the endless possibilities that await with fabric resin crafting!