
The Ultimate Guide to Sparkling Stove Grates: An Easy Cleaning Hack Revealed
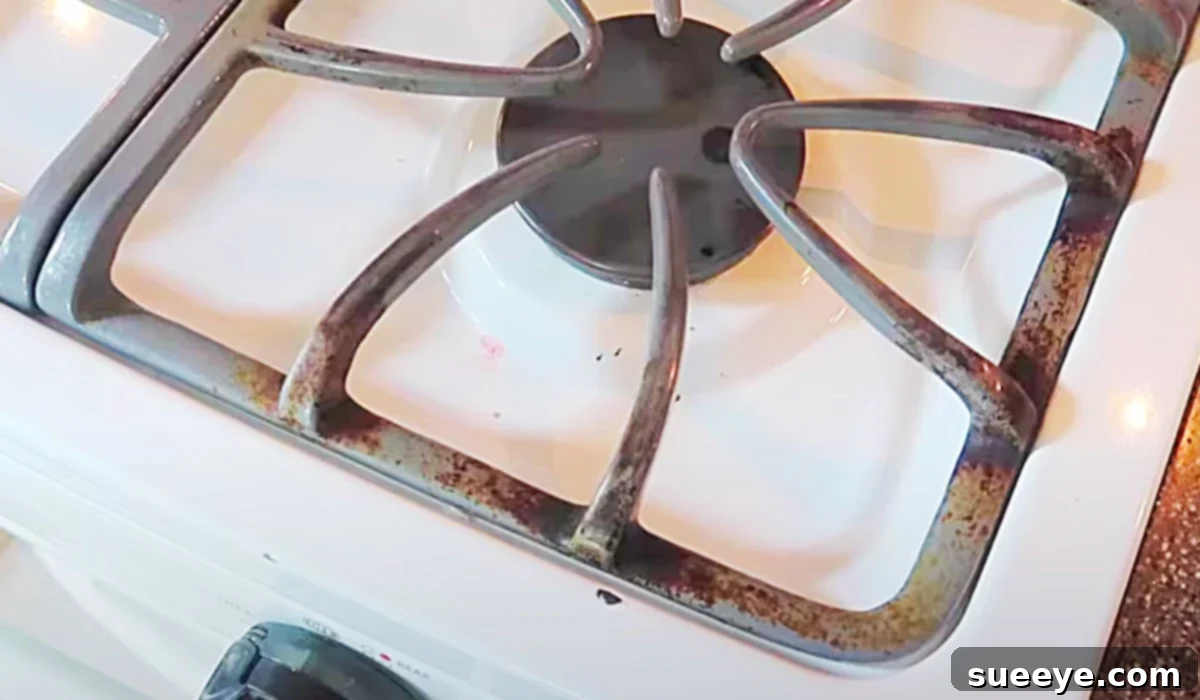
In the heart of every bustling kitchen lies the stovetop, an essential appliance that endures daily spills, splatters, and the inevitable buildup of grease and baked-on food. While many modern ovens boast convenient self-cleaning functions for their interiors, the challenging task of cleaning stove grates often falls to manual effort. These grates, whether part of a beloved vintage range or a contemporary model, are notorious for accumulating stubborn grime that can seem impossible to remove. If you’ve ever felt overwhelmed by the prospect of tackling heavily soiled stove grates, you’re not alone. Fortunately, a brilliant and highly effective cleaning hack has emerged, offering a straightforward path to gleaming results. Inspired by the expert insights of Andrea Jean Cleaning on YouTube, this guide will walk you through an efficient method to restore your stove grates to their original shine, making kitchen cleanup a much less daunting task.
The Unseen Benefits of Maintaining Pristine Stove Grates
Beyond the immediate visual appeal, regularly cleaning your stove grates offers a multitude of practical advantages. Dirty grates can do more than just detract from your kitchen’s aesthetics; they can also affect cooking efficiency, harbor bacteria, and even pose a subtle fire risk. Built-up grease and food debris can hinder even heat distribution, leading to unevenly cooked meals and wasted energy. From a hygiene perspective, neglected grates become breeding grounds for germs, which can then transfer to your cooking utensils and food. Furthermore, excessive grease accumulation can become combustible, increasing the potential for flare-ups during cooking.
For enthusiasts of vintage appliances or anyone who cherishes their current stove, proper maintenance, including thorough grate cleaning, is vital for extending the appliance’s lifespan and ensuring optimal performance. It’s crucial to understand the distinction between oven interior cleaning and stovetop cleaning, especially concerning warranties. Most newer ovens with a self-cleaning feature are designed for that function to be used exclusively for the oven’s internal cavity. Using abrasive cleaners or traditional scrubbing methods inside a self-cleaning oven can damage its specialized enamel lining and potentially void the manufacturer’s warranty. However, cleaning the stovetop and its grates is an entirely separate endeavor and typically has no bearing on your oven’s internal warranty. This distinction grants you the freedom to meticulously clean your grates without concern for internal oven mechanisms.
Gather Your Arsenal: Essential Materials for This Grate Cleaning Hack
This remarkably effective stove grate cleaning hack, widely showcased by experts like Andrea Jean Cleaning, requires only a few common household items. The beauty of this method lies in its simplicity and the powerful combination of these easily accessible materials. Before you begin your grate restoration project, ensure you have the following:
- Heavy-Duty Protective Gloves: Essential for safeguarding your hands from potentially strong degreasers and the abrasive action of scrubbing. Standard rubber dishwashing gloves are usually sufficient.
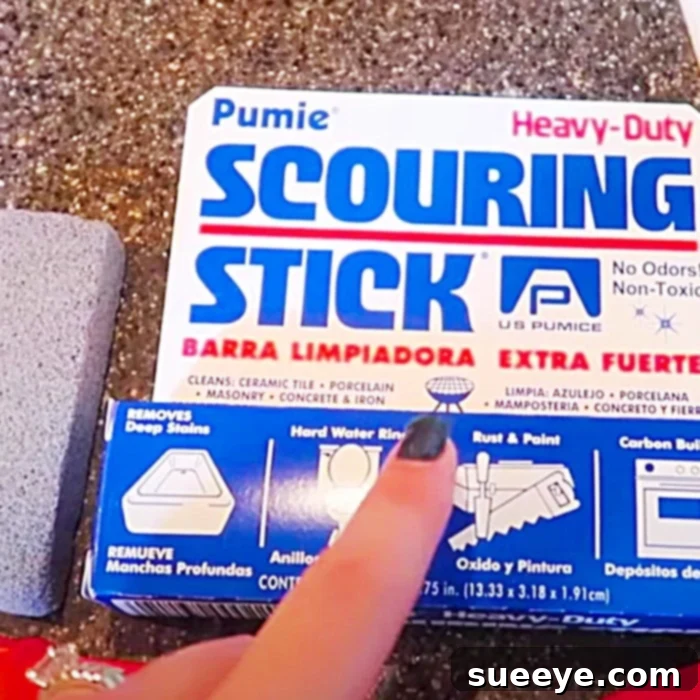
- A Pumi Stone (Pumice Stone): This is the star of our cleaning hack. A pumice stone is a naturally occurring, lightweight, and porous volcanic rock. Its mildly abrasive texture is perfect for gently yet effectively scraping away stubborn, baked-on food and grease from metal surfaces without causing damage, provided it’s used correctly.
- A Bowl of Hot Water: Warm or hot water is crucial. It helps to loosen grease and grime and acts as a rinsing agent for your pumice stone during the cleaning process, keeping it effective.
- A Powerful Kitchen Degreaser: Select a high-quality kitchen degreaser designed to cut through tough grease and oil. There are many excellent commercial products available that are specifically formulated for this purpose.
Having these items ready will streamline your cleaning process, allowing for an efficient transition from preparation to achieving brilliantly clean stove grates.
Your Step-by-Step Guide to Immensely Sparkling Stove Grates
With all your materials at hand, let’s dive into the simple yet incredibly powerful steps to transform your grime-covered stove grates into spotless components. This method is designed to tackle even the most persistent baked-on food residues and grease, making them seem to disappear with minimal effort.
Step 1: Preparation and Initial Loosening of Grime
Begin by carefully removing all the grates from your stovetop. It’s often beneficial to give them an initial rinse or even a short soak. Place the grates in a sturdy sink, a large utility tub, or even an old laundry basin. Fill the container with very hot water and add a squirt of your regular dish soap. Allow the grates to soak for at least 15 to 30 minutes. This preliminary soak helps to loosen surface grime and softens some of the baked-on food, preparing them for the degreaser and making the subsequent steps more effective, especially for heavily soiled grates.
Step 2: Apply Degreaser and Allow to Penetrate
After the initial soak, drain the water from the container. Ensure you are wearing your heavy-duty gloves to protect your hands. Now, generously spray or apply your chosen kitchen degreaser directly onto the stove grates. Make sure to cover all areas that are caked with burnt-on food, grease, and stubborn stains. For particularly thick layers of grime, don’t hesitate to apply a more concentrated amount. Once applied, allow the degreaser to sit and work its magic for several minutes. A dwell time of 5 to 10 minutes is usually sufficient, but for extremely tough spots, you might extend this to 15 minutes. This crucial period allows the chemical compounds in the degreaser to break down and lift the stubborn residues, significantly easing the scrubbing process.
Step 3: The Pumi Stone Scrub for Miraculous Results
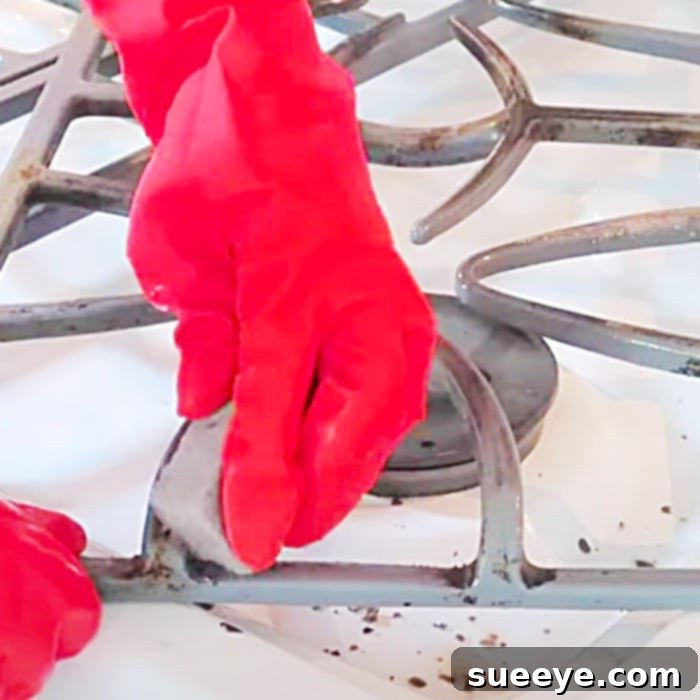
This is where the cleaning hack truly shines. Take your Pumi stone and, with moderate pressure, begin to scrub the areas where you applied the degreaser. You will be astonished at how effortlessly the burnt residue and baked-on food start to lift away from the grate surface. The mild abrasive quality of the Pumi stone, combined with the powerful action of the degreaser, works in tandem to dissolve and scrape off even the most solidified grime. Work methodically in small sections, always keeping an eye on the progress. For reaching into tighter corners and crevices, use the edge of the Pumi stone. As you scrub, the stone will accumulate some of the grime; simply rinse it periodically in your bowl of hot water to clean it and maintain its effectiveness.
Step 4: Rinse Thoroughly and Dry Completely
Once you are satisfied that all the baked-on food, grease, and grime have been effectively removed from your stove grates, it’s time for the final rinse. Rinse each grate thoroughly under hot running water, ensuring that all traces of the degreaser and loosened residue are completely washed away. You might want to use a stiffer brush or an old toothbrush to clean out any remaining bits in intricate designs or hard-to-reach crevices. After rinsing, it is paramount to dry the grates completely. Use a clean towel or paper towels to wipe them dry, or allow them to air dry fully. This step is especially critical for cast iron grates, as it prevents rust formation. Once dry, your grates are ready to be placed back on your stove, looking as good as new.
Pro Tips for Ultra-Clean Grates and Lasting Cleanliness
While the degreaser and Pumi stone method is incredibly powerful, incorporating a few additional strategies can enhance your results and help maintain the cleanliness of your stove grates for longer periods.
- For Extra-Stubborn Buildup: If your grates are exceptionally dirty or have years of accumulated grime, consider an extended soak. After applying the degreaser, you can place the grates in a sealed plastic bag overnight. This creates a powerful environment where the degreaser can continue to break down grime, making scrubbing significantly easier the next day.
- Alternative Abrasives (Use with Caution): While the Pumi stone is generally safe for most metal grates, for very delicate enamel-coated grates or lighter stains, a non-scratch scouring pad might be a gentler option. Always test any abrasive tool on an inconspicuous area first to ensure it won’t scratch or damage the surface.
- The Natural Power of Baking Soda and Vinegar: For those who prefer natural cleaning solutions or as a preliminary treatment, a paste made from baking soda and a small amount of water can be applied to the grates. Allow it to sit and dry, then spray with white vinegar. The fizzing reaction helps lift grime. This method is excellent for general cleaning but might require more elbow grease than the Pumi stone hack for heavy char.
- Seasoning Cast Iron Grates: If your stove features cast iron grates, after cleaning and drying them completely, you can re-season them. Lightly coat them with a thin layer of vegetable oil (like canola or flaxseed oil) and bake them in a low oven (around 250°F or 120°C) for about an hour. Let them cool in the oven. This process helps create a protective, non-stick surface and prevents rust.
- The Golden Rule: Regular Maintenance: The most effective way to avoid the need for intensive scrubbing is consistent, regular cleaning. A quick wipe-down of your grates after each major cooking session, or a more thorough wash once a week, can prevent food from hardening and becoming deeply embedded, making future cleanups much quicker and easier.
Safety First: Important Precautions for a Safe Cleaning Experience
When working with powerful cleaning agents and abrasive tools, prioritizing safety is paramount. Adhering to these precautions will ensure a safe and effective cleaning process:
- Ensure Adequate Ventilation: Always work in a well-ventilated area when using degreasers, as many products can emit strong fumes. Open windows, turn on an exhaust fan, or work in an outdoor space if possible.
- Wear Protective Gloves: Heavy-duty gloves are non-negotiable. They protect your skin from chemical burns, irritation, and the abrasive nature of the Pumi stone.
- Read Product Instructions: Always follow the specific instructions and safety warnings provided by the manufacturer of your chosen degreaser. Pay attention to recommended dwell times and any special handling procedures.
- Protect Surrounding Surfaces: When scrubbing, be mindful of splashes and drips. Protect countertops, flooring, and other nearby surfaces that could be damaged by the cleaning solution or residue.
- Avoid Sensitive Appliance Components: While cleaning the grates, be careful not to allow cleaning products to seep into any sensitive parts of your stove, such as electric ignition mechanisms, gas lines, heating coils, or ventilation fans. Such contact could lead to damage or malfunction.
- Test Abrasive Tools: Although a Pumi stone is generally safe for most metal grates, if you have any doubts about your specific grate material, perform a quick test on a small, inconspicuous area first to ensure it does not cause scratching or discoloration.
Conclusion: Embrace a Spotless Stovetop and Effortless Cleaning
The sight of dirty, grease-laden stove grates can be a source of frustration, often leading to procrastination in kitchen cleaning. However, with the right knowledge and a few simple tools, achieving sparkling clean grates is not just a dream, but an easily attainable reality. This powerful hack, combining the strength of a quality degreaser with the gentle abrasive action of a Pumi stone, offers an efficient and remarkably effective solution for tackling even the most stubborn baked-on food and grease. You no longer need to dread the task of stove grate cleaning; instead, you can look forward to a more hygienic, efficient, and visually appealing cooking space.
By consistently applying these straightforward steps and incorporating regular maintenance into your kitchen routine, you will not only extend the life and beauty of your stove but also enhance your overall cooking experience. So, gather your materials, roll up your sleeves, and prepare to be genuinely impressed by how easily you can transform your stove grates from grimy to gleaming. Your kitchen, and indeed your culinary endeavors, will undoubtedly benefit from the renewed sparkle and cleanliness.
If you found this comprehensive guide helpful and are inspired to tackle your stove grates, consider sharing this valuable hack with friends, family, and fellow cooking enthusiasts. A clean kitchen is, after all, a happier and healthier kitchen!
For a visual demonstration of this incredible method, we encourage you to watch the original video tutorial by Andrea Jean Cleaning on YouTube.