
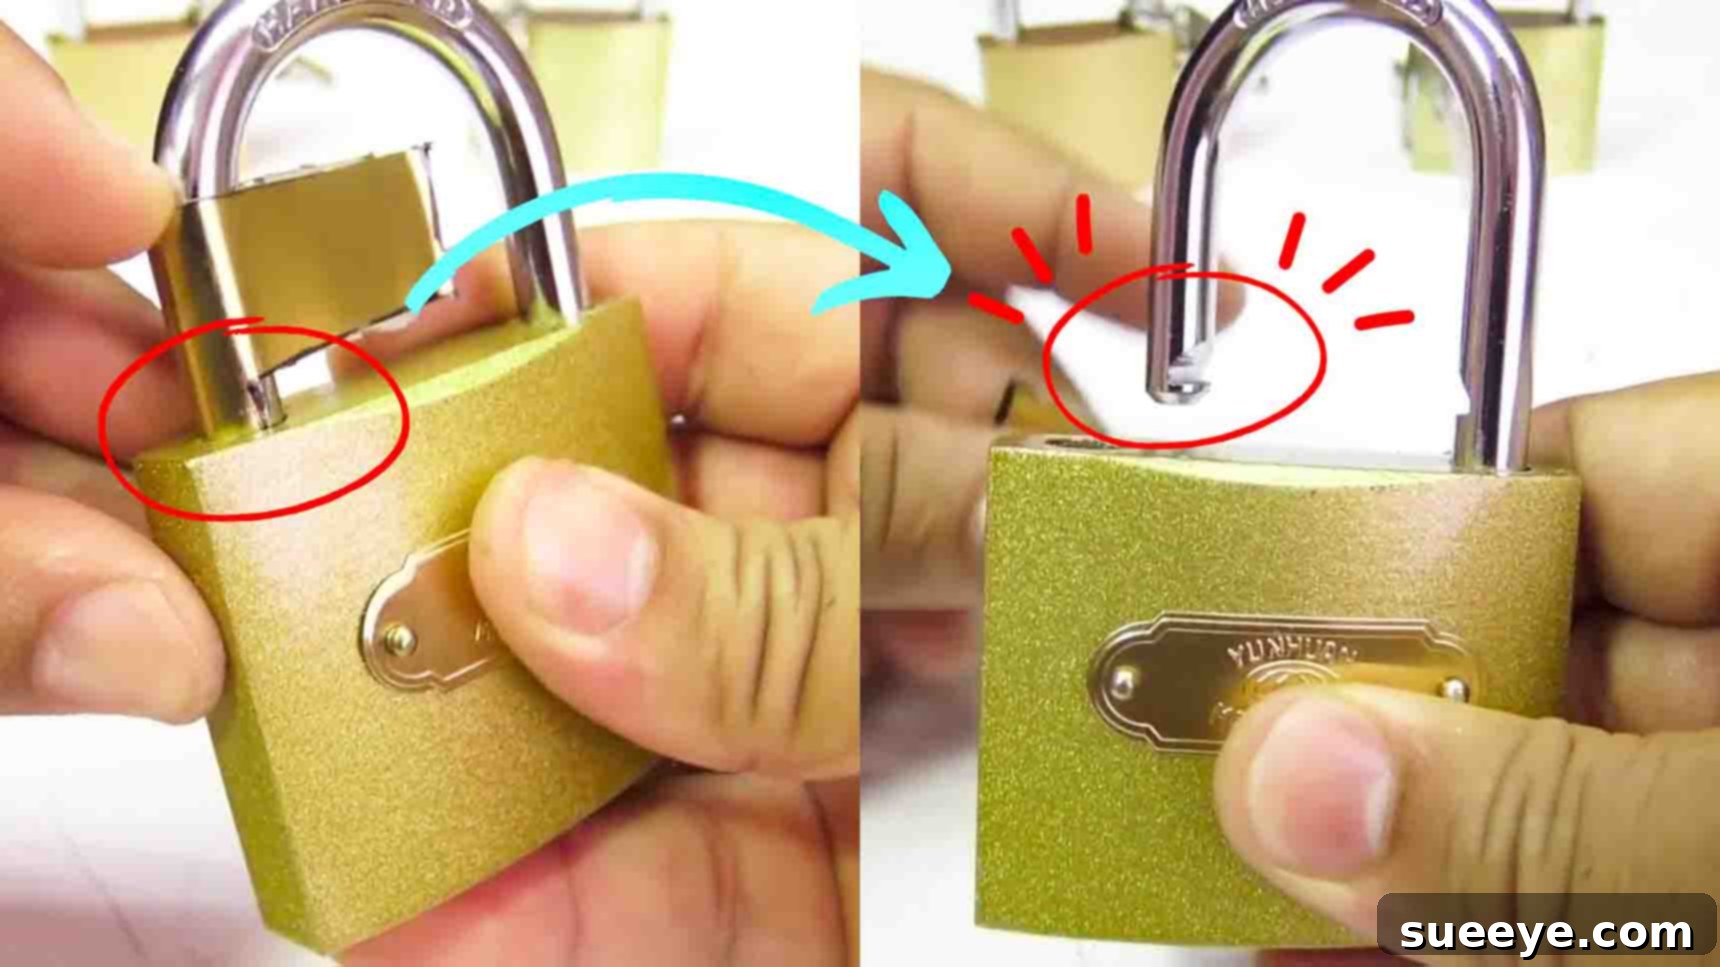
Unlock Your Padlock: 3 Ingenious Ways to Open a Lock Without a Key
We’ve all been there: the frustrating moment you realize your keys are nowhere to be found, and that crucial padlock remains stubbornly locked. Whether it’s for a shed, a gate, or a locker, a lost key can halt your plans and cause significant inconvenience. While calling a locksmith is always an option, sometimes you need a quick, DIY solution right now. Luckily, the creative minds at Show Maker on YouTube have shared three ingenious hacks that can help you regain access to your padlock without the original key. These methods are designed for emergency situations and general educational purposes, empowering you with practical skills for common, low-security padlocks.
Before diving into these clever techniques, it’s crucial to understand a few things. These methods are generally effective on simpler padlocks and may not work on high-security models designed to resist tampering. Always prioritize safety, wear appropriate protective gear, and remember that these tricks should only be used on your own property or with explicit permission from the owner. Let’s explore these innovative solutions that could save you time and hassle when your keys go missing!
Method 1: The Tin Lid Shimming Technique
Bypassing the Lock Mechanism with a Simple Tin Lid
One of the most accessible and surprisingly effective methods involves transforming an ordinary tin lid into a makeshift shimming tool. This technique targets the internal spring-loaded latch that holds the shackle in place, allowing you to release it without manipulating the tumblers of the lock cylinder.
Materials You’ll Need:
- A thin metal tin lid (e.g., from a soda can, aluminum food container, or even a sturdy disposable aluminum baking pan).
- A pair of sharp scissors or tin snips.
- A marker (optional, for drawing the shape).
Step-by-Step Instructions:
- Prepare Your Tin Lid: Find a suitable tin lid that is thin enough to be flexible but sturdy enough to hold its shape. A standard soda can is often perfect once cut. Clean any residue from the lid.
- Draw the “T” Shape: Using a marker, carefully draw a “T” shape onto the tin lid. The vertical part of the “T” should be long enough to wrap around the shackle and extend into the padlock body, while the horizontal top part provides grip and stability. The exact dimensions will vary slightly depending on the size of your padlock’s shackle, but generally, aim for a width of about 1/4 to 1/2 inch for the vertical stem and a length of about 1 to 2 inches for the entire shape.
- Cut Out the Shape: Using your scissors or tin snips, meticulously cut out the “T” shape. Be very careful during this step, as metal edges can be sharp. Ensure the edges are as smooth as possible to prevent snagging.
- Shape Around the Shackle: Gently wrap the vertical stem of your newly cut “T” around one of the shackle’s arms, near where it enters the padlock body. You want it to conform closely to the shackle’s curve.
- Insert the Tip: Slowly and carefully slide the tip of the “T” shape into the narrow gap between the shackle and the padlock body. You’re aiming for the point where the shackle mechanism is located internally. This gap is often on the side opposite the keyhole, but can vary.
- Manipulate and Turn: Once the tip is inserted, gently turn or twist the “T” shape while applying slight pressure. The goal is to push down or depress the spring-loaded latch inside the padlock that secures the shackle. With the right amount of pressure and wiggling, you’ll feel the mechanism release, and the padlock will spring open.
Tips for Success:
- Practice Makes Perfect: This method requires a bit of finesse. Don’t get discouraged if it doesn’t work on the first try.
- Choose the Right Lid: A slightly thicker aluminum can (like some energy drink cans) can offer more rigidity than a standard soda can, which might be too flimsy for some locks.
- Smooth Edges: Ensure your cut “T” has no jagged edges that could get stuck or break off inside the lock.
- Listen for the Click: A successful attempt is often accompanied by a small “click” as the mechanism releases.
Method 2: The Machine Screw and Wing Nut Leverage Method
Applying Pressure to Force a Padlock Open
This technique relies on creating significant outward pressure on the padlock’s shackle, exploiting any manufacturing tolerances or slight weaknesses in the lock’s construction. It’s a brute-force method, but when executed correctly, it can be surprisingly effective for certain types of padlocks.
Materials You’ll Need:
- A 5/8 inch machine screw (or similar diameter that fits snugly between the shackle and lock body). The length should be sufficient to accommodate two wing nuts and still extend into the lock.
- Two wing nuts that fit your machine screw.
- A pair of strong pliers or a small adjustable wrench.
Step-by-Step Instructions:
- Prepare the Screw and Nuts: Thread the first wing nut all the way down to the head of the machine screw. This nut will act as a base or anchor against one side of the shackle.
- Position the Second Wing Nut: Thread the second wing nut onto the screw, but only about halfway or just enough so that it can still be turned easily by hand or with pliers. This nut will be used to apply pressure.
- Place the Assembly: Carefully position the screw assembly within the opening of the padlock. The head of the screw (with the first wing nut) should rest against the inside edge of one shackle arm, while the second wing nut should be positioned against the inside edge of the other shackle arm. The screw itself will span the gap.
- Apply Initial Pressure: Use your hand to tighten the second wing nut a little, just enough so that the screw assembly is firmly wedged between the two shackle arms.
- Alternate Turning with Pliers: Now, using your pliers or wrench, gently turn the padlock handle (shackle) and the second wing nut alternately. The key here is to apply gradual, increasing outward pressure. As you turn the wing nut, it will push against the shackle, forcing it apart. Periodically, you may need to adjust your grip on the shackle with the pliers to get better leverage.
- Release the Lock: Continue applying pressure by turning the wing nut and adjusting the shackle with pliers. You should eventually hear or feel the lock mechanism give way, and the padlock will unlock.
Tips for Success:
- Gradual Pressure: Do not apply sudden, excessive force. This can damage the lock or your tools and potentially cause injury.
- Correct Screw Size: The machine screw must be the right diameter to fit snugly but not too tightly between the shackle arms.
- Patience is Key: This method can take time and a steady hand. Keep tightening the wing nut in small increments.
- Not for All Locks: This method is most effective on laminated or cheaper, weaker padlocks where the shackle is not as robustly reinforced.
Method 3: The Thin Metal Latch Release Technique
Targeting the Internal Latch with a Custom Shim
This method involves creating a custom tool from a thin piece of metal to directly manipulate the internal locking latch, similar to the tin lid method but often requiring more precision and sometimes a bit of augmentation to the tool itself.
Materials You’ll Need:
- A small piece of thin, strong metal (e.g., spring steel, a feeler gauge, or a piece of hobby brass/aluminum sheeting). It should be thin enough to slide into a tight gap but rigid enough not to bend easily.
- A soldering iron and a small bit of solder (optional, for creating a protrusion). Alternatively, a file or abrasive to create a small hook/notch.
- A small hammer or mallet (for gentle tapping).
Step-by-Step Instructions:
- Shape the Metal: Take your thin piece of metal and carefully wrap it around the handle (shackle) of the padlock, just as it enters the lock body. The goal is to get the approximate curve and contour of the shackle’s entry point. Cut the metal so you have a strip that can easily slide into the gap.
- Create a Latch-Engaging Feature: This is a crucial step. On the inner part of your metal strip (the side that will face inside the lock), you need to create a small protrusion or hook. The original description suggests soldering a bit of iron. Alternatively, you can use a file or dremel to create a tiny barb or angled tip. This feature is designed to catch and depress the internal locking latch.
- Identify the Insertion Point: The “edge of the keyhole” mentioned typically refers to the narrow gap between the shackle and the lock body, often on the side where the shackle is held by a spring-loaded latch, or near the keyway itself, but bypassing it. This requires some understanding of padlock anatomy.
- Insert and Tap: Carefully insert your custom metal tool into the identified gap. With the small hammer, gently tap the back of the metal strip. The idea is for the protrusion you created to slide past the shackle and push against the internal locking mechanism, disengaging it. This can require very precise placement and gentle, controlled tapping.
- Release the Lock: As you tap and apply pressure, the internal mechanism will be pushed out of its locking position, allowing the shackle to spring open.
Tips for Success:
- Precision is Paramount: This method demands a high degree of accuracy in both tool creation and insertion.
- Right Material: The metal must be strong enough not to deform under pressure but thin enough to enter the gap.
- Gentle Tapping: Avoid striking too hard. The goal is subtle manipulation, not brute force, which could damage the lock irrevocably or injure your hand.
- Understand Lock Anatomy: A basic understanding of how a padlock’s internal latch works will greatly assist in positioning your tool effectively.
Important Disclaimers and Safety Precautions
While these methods can be incredibly useful in a pinch, it’s vital to approach them with responsibility and caution.
- Ethical Use Only: These techniques are strictly for opening your own property or property for which you have explicit permission to access. Using them on someone else’s property without consent is illegal and unethical, potentially leading to serious legal consequences. This guide is for educational purposes only.
- Safety First:
- Eye Protection: When cutting metal or tapping with a hammer, small fragments can fly. Always wear safety glasses.
- Hand Protection: Metal edges can be sharp. Consider wearing gloves to protect your hands from cuts.
- Avoid Excessive Force: Over-forcing any of these methods can cause injury, break your tools, or permanently damage the padlock, making it impossible to open even with the correct key later.
- Mind Your Surroundings: Be aware of anyone nearby, especially when using tools that could cause projectiles or sudden movements.
- Lock Damage: There’s always a risk of damaging the padlock’s internal mechanisms, rendering it unusable or difficult to open even after the emergency. Be prepared for this possibility.
- Not for High-Security Locks: These methods are generally effective on simpler, cheaper padlocks. High-security locks are designed with anti-shimming and anti-forcing features that will likely render these tricks useless.
When to Use These Techniques (and When Not To)
Knowing when these DIY lock-opening methods are appropriate is just as important as knowing how to perform them.
- Use When:
- You’ve lost the key to your own personal padlock and need immediate access to its contents (e.g., shed, locker, toolbox).
- It’s an emergency, and waiting for a locksmith is not feasible or too costly for the value of the padlock/contents.
- You are practicing and learning about lock mechanisms on a lock you own, for educational purposes.
- The padlock is of low value, and potential damage is not a significant concern.
- Avoid When:
- The padlock belongs to someone else, and you do not have explicit permission to open it.
- The padlock secures valuable items or property, and damaging the lock or failing to open it safely would be a major problem. In such cases, a professional locksmith is the safer and more reliable option.
- You are in a public place where attempting to open a lock without a key might be misinterpreted or cause alarm.
- The lock is a high-security padlock designed to withstand tampering. You’re more likely to damage your tools or the lock without success.
Conclusion: Empowering Yourself with Practical Knowledge
Losing a key can be a minor annoyance or a major headache, but these three ingenious methods shared by Show Maker offer empowering solutions for those moments of keyless despair. From the humble tin lid to a robust machine screw setup and a precise metal shim, each technique provides a unique way to bypass a padlock’s security when traditional access isn’t an option. While fascinating and practical, remember that these skills come with a significant responsibility.
Always use these techniques ethically and safely, respecting the law and the property of others. With a little practice, the right tools, and a clear understanding of the risks involved, you can effectively navigate those frustrating “lost key” scenarios and regain access to your locked possessions. Share these valuable insights with friends and family, but always emphasize the importance of responsible application. Being prepared for unexpected situations is always a smart move!