
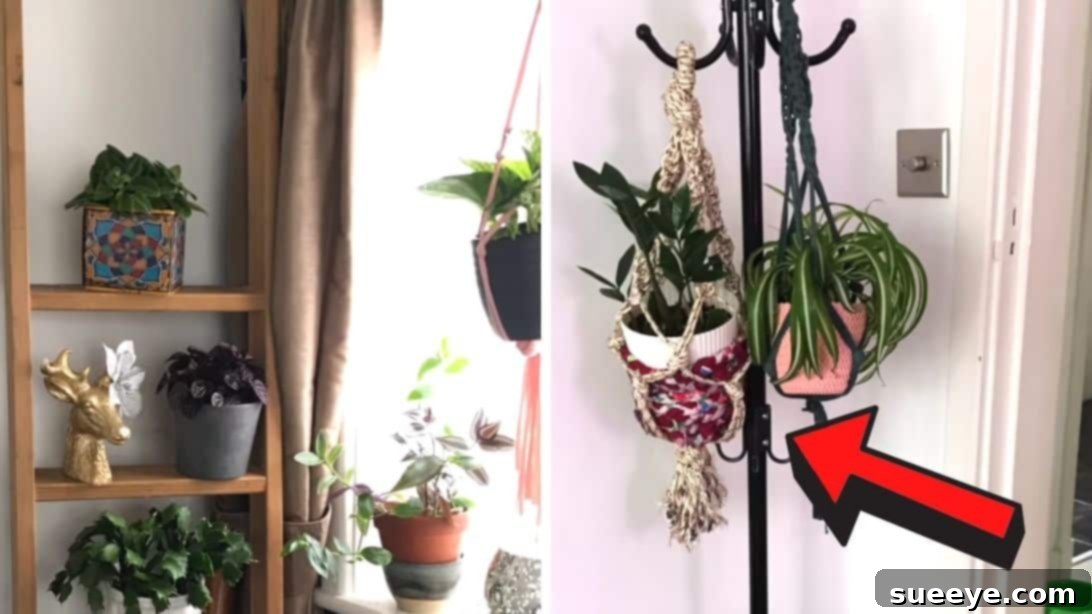
Do you dream of a lush indoor garden but find yourself limited by the constraints of renting? Many plant enthusiasts face the challenge of wanting to beautify their living spaces with vibrant greenery without risking their security deposit. Drilling holes or hammering nails into walls is often a strict no-go for tenants. But what if we told you that creating a stunning display of hanging plants is not only possible but also incredibly easy, affordable, and completely renter-friendly?
Inspired by innovative ideas like those shared by Sarah Bird on YouTube, we’ve compiled a comprehensive guide to 10 ingenious DIY hacks that allow you to hang your favorite plants with confidence. These solutions are specifically designed for renters, requiring no permanent alterations to your home. Get ready to transform your apartment, condo, or rented house into a botanical oasis, making the most of every inch of vertical space. Say goodbye to cluttered windowsills and hello to stunning, elevated greenery that breathes life into your home.
Why Renter-Friendly Plant Solutions Are Essential
For renters, decorating often comes with a unique set of rules. The desire to personalize a space often clashes with lease agreements that prohibit significant alterations. This is especially true for plant lovers, who often find themselves eyeing ceilings and walls for potential hanging spots, only to be deterred by the thought of damage. Renter-friendly plant solutions aren’t just about avoiding a landlord’s wrath; they’re about smart, temporary, and versatile design choices that empower you to create a beautiful home without compromise.
These hacks offer incredible flexibility. You can easily rearrange your plant display, take everything with you when you move, and experiment with different setups without any long-term commitment. They are cost-effective, often utilizing items you might already own or can acquire cheaply, and surprisingly effective at creating the dynamic, multi-level plant arrangements you’ve always dreamed of. From maximizing small living rooms to adding charm to overlooked corners, these ideas prove that a green thumb and a rental agreement can happily coexist.
Top 10 Renter-Friendly Hanging Plant DIY Hacks for a Greener Home
1. The Versatile Coat Hat Stand: A Vertical Plant Haven
Who says a coat hat stand is just for coats and hats? Many multi-hook coat stands, often featuring eight or more hooks on top and additional ones in the middle, offer an excellent framework for creating a compact, vertical hanging garden. This hack is a game-changer for those with limited floor space, as it consolidates multiple plants into a single footprint.
To implement this, simply drape your hanging plants from the various hooks. You can use S-hooks for easier attachment, especially for planters with smaller loops. Choose plants with trailing foliage like Pothos, Philodendrons, String of Pearls, or Spider Plants to maximize the cascading effect. The beauty of this solution lies in its mobility; you can effortlessly reposition your entire plant collection to follow the sun or to simply refresh your room’s layout. Ensure your coat stand is sturdy enough to handle the combined weight of your chosen plants and their pots, especially after watering.
2. Repurpose an A-Frame Ladder for Multi-Tiered Greenery
An old wooden or even a modern decorative ladder can be transformed into a stylish and functional plant display. Leaning an A-frame ladder against a wall instantly creates multiple levels for your plants without needing any wall fixtures. The approach you take depends on the ladder’s design:
- Thin Steps: If your ladder has narrow steps, use S-hooks or macrame hangers to suspend plants directly from the rungs. This allows for a beautiful cascading effect.
- Wide Steps: For ladders with broader steps, you can directly place potted plants on each step. This offers stability and showcases individual plants more prominently.
Consider the aesthetic of your ladder – a rustic wooden ladder adds warmth, while a painted or metal one can introduce a modern touch. Position your ladder in a well-lit area, perhaps near a window, to ensure all your plants receive adequate light. This hack not only provides ample space for numerous plants but also serves as a striking decorative element in any room. Always ensure the ladder is stable and securely leaned against the wall to prevent accidents.
3. Command Hooks & Curtain Rod Magic: A Window Wonderland
This popular hack creates an instant hanging bar for plants in front of a window or across an alcove. It’s incredibly versatile and relies on the strength of Command Hooks, which adhere firmly to walls without damage and remove cleanly.
How to Set It Up:
- Choose Your Hooks: Select Command Hooks that are specifically designed for curtain rods or have a suitable hook design. Crucially, check their weight rating. You’ll need to calculate the combined weight of your plants, pots, and the curtain rod itself. It’s always best to overestimate and use multiple hooks for added security.
- Measure & Position: Decide where you want your hanging display. Use a level to mark the exact spots for your hooks. For a standard window, two hooks might suffice, but for wider spans or heavier plants, use four or more evenly spaced hooks along the rod.
- Install Hooks: Follow the Command Hook instructions precisely, ensuring the surface is clean and dry. Apply firm pressure for the recommended time.
- Insert Rod & Hang Plants: Once the hooks are securely in place (allow sufficient curing time as per instructions), thread your curtain rod through the hooks. Now, you can hang your plants using S-hooks, macrame hangers, or plant clips. This setup is ideal for plants that love bright, indirect light, turning your window into a vibrant, airy display.
4. Leverage Tension Rods for Instant Greenery
Tension rods are unsung heroes of renter-friendly decor. Designed to fit snugly between two surfaces by creating tension, they require no drilling or adhesive. This makes them perfect for temporary plant displays in a variety of locations.
Ideal Locations:
- Window Frames: Install a tension rod within a window frame to hang lightweight plants, maximizing natural light. This is excellent for herbs in the kitchen or small trailing plants.
- Doorways: Use a tension rod in an unused doorway to create a green archway.
- Shower Stalls: For moisture-loving plants like ferns or orchids, a tension rod across a shower stall or near a bathroom window provides the ideal humid environment.
- Alcoves/Closets: Transform a small, unused nook into a plant display.
When choosing a tension rod, ensure it’s robust enough for your chosen plants. Lighter, smaller plants in plastic or lightweight terracotta pots are best suited for this method. Combine with S-hooks or string to hang your planters securely.
5. Command Strip Wall-Mounted Hooks: Secure & Stylish
This hack provides a more traditional “hook-on-the-wall” look without the permanence of nails. It involves a simple yet ingenious modification to leverage the strength of Command Strips.
The Method: Instead of screwing hooks directly into your wall, attach wall-mounted hooks (the kind designed to be screwed into a wall) to a small, sturdy block of wood. Then, use powerful Command Strips to adhere this wooden block securely to your wall.
Benefits:
- Enhanced Weight Capacity: By distributing the weight over a larger surface area (the wooden block) and using multiple Command Strips, you can often achieve a higher weight capacity than with individual Command Hooks.
- Aesthetic Appeal: The wooden block can be painted or stained to match your decor, offering a more finished and intentional look than simple adhesive hooks.
- Versatility: Once the block is mounted, you have a solid anchor point to screw in various types of hooks (J-hooks, C-hooks, etc.) suitable for different plant hangers.
Always ensure the Command Strips are rated for the total weight, and give them ample time to cure before hanging your plants. This hack is excellent for creating permanent-looking plant installations that are fully reversible.
6. Embrace S-Hooks and Over-the-Door Solutions for Instant Hanging Space
Sometimes, the simplest tools yield the most effective solutions. S-hooks and over-the-door hooks are incredibly versatile for creating instant hanging spots without any damage.
- S-Hooks: These simple, curved hooks can be used in countless ways. Hang them from existing curtain rods, open shelving, tension rods, or even from the top of an open cupboard door. They are perfect for suspending lightweight plants in macrame hangers or small pots with built-in loops. Their ease of use allows for quick rearrangement and flexible plant displays.
- Over-the-Door Hooks: Designed to slip over the top edge of a door, these hooks are fantastic for utilizing vertical space that often goes overlooked. While not ideal for heavily trafficked doors, they can be perfect for hanging plants on a closet door, pantry door, or the back of a bedroom door. Choose sturdy metal hooks for heavier plants, or lighter plastic ones for smaller air plants or trailing varieties. Ensure the door can still close properly with the hook in place.
Both options are excellent for creating temporary displays or adding a touch of green to unexpected places. They are incredibly affordable and require absolutely no tools or installation.
7. Maximize Space with Over-the-Toilet Storage Units
The bathroom, often a smaller space, can still be a haven for plants, especially those that thrive in humidity. Over-the-toilet storage units are designed to fit around your toilet, providing vertical shelving without taking up extra floor space.
While primarily designed for toiletries, the shelves on these units are perfect for placing potted plants. Choose plants that love moisture, such as ferns, peace lilies, or orchids, and enjoy the added greenery in your bathroom. You can also hang smaller, lightweight plants from the top bar of some units using S-hooks, further maximizing vertical space. This method adds a refreshing touch to an often-neglected area and helps create a spa-like atmosphere.
8. Transform a Clothes Rack into a Mobile Plant Haven
If you love the idea of a mobile plant display but want more spread-out space than a coat stand offers, a freestanding clothes rack is your answer. These racks, typically used for hanging garments, offer a long horizontal bar perfect for suspending multiple plants.
Unlike a coat stand, a clothes rack allows you to space your plants out more, giving each one room to breathe and cascade beautifully. This is ideal for showcasing a variety of trailing plants or for creating a “green screen” effect. Many clothes racks are also on wheels, making them incredibly easy to move around your home to catch the best light or simply to redecorate. Ensure the rack is stable and can support the combined weight of your planters. Consider adding a shelf or two at the bottom for additional potted plants, maximizing its potential.
9. The Clever Pole Across the Cupboard Gap
Do you have an unused gap between two cupboards, perhaps above a sink or countertop, or even between built-in shelving units? This often-overlooked space can be ingeniously transformed into a hanging plant display using a simple pole.
Find a sturdy wooden dowel or a metal rod that fits snugly between your cupboards. To prevent it from rolling or moving, secure it in place. You can do this by using strong adhesive hooks (like Command Hooks) on the inside walls of the cupboards to cradle the ends of the pole, or by placing small, heavy objects on top of the pole ends (within the cupboard space) if the gap is wide enough. Once secured, use S-hooks to hang lightweight plants. This hack creates a custom, minimalist plant display that looks built-in and makes excellent use of awkward spaces.
10. Nail-In Curtain Rod Hooks for Window Frames
For renters with window frames that allow for minimal, discreet intervention, “nail-in” or “no-drill” curtain rod brackets can be a fantastic solution. These specific types of brackets often feature tiny, thin pins that tap into the top of a wooden window frame, leaving almost imperceptible holes when removed.
How it Works: These hooks typically have small, sharp pins on the back that you gently tap into the top edge of a wooden window frame using a hammer. The holes they create are so small they are usually easily patched or overlooked upon moving out. Once installed, you can thread a lightweight curtain rod through them and hang your plants. This method is ideal for plants that require ample natural light, as it places them directly in the window’s path. Always check your lease agreement regarding even small nail holes, and ensure your window frames are made of wood. Choose lightweight planters to avoid putting undue stress on the frame.
General Tips for Happy Hanging Plants in Rented Spaces
Beyond the clever hacks, maintaining healthy hanging plants in a rental requires a few additional considerations:
- Choose the Right Plants: Opt for trailing varieties like Pothos, Philodendron, English Ivy, String of Pearls, or Spider Plants that naturally grow downwards, making them perfect for hanging displays. Consider light and humidity needs for your specific spaces.
- Watering Techniques to Avoid Drips: This is crucial for renters! Always take your hanging plants down to water them in a sink or bathtub, allowing them to fully drain before rehanging. Alternatively, use planters with self-watering reservoirs or incorporate drip trays that are securely attached to the bottom of your pots to catch any excess water.
- Light Considerations: Observe how light moves through your home throughout the day. Place plants where they will thrive without direct, scorching sun unless they specifically require it. Rotate your plants regularly to ensure even growth on all sides.
- Potting Mix and Drainage: Use a well-draining potting mix to prevent root rot, and always choose pots with drainage holes. If you use decorative cachepots without drainage, ensure you have a smaller nursery pot inside with adequate drainage space at the bottom.
- Regular Rotation and Maintenance: Turn your hanging plants every few weeks to encourage symmetrical growth. Dust leaves gently, prune as needed, and check for pests regularly.
- Monitor Weight Limits: Always be mindful of the weight capacity of your chosen hanging solution. Soil can become surprisingly heavy when wet, so choose lightweight pots (plastic, lightweight terracotta, or coco coir liners) for anything hung from adhesive hooks or tension rods.
Create Your Dream Indoor Jungle Today!
Transforming your rented space into a vibrant, plant-filled sanctuary doesn’t have to be a daunting task. With these 10 renter-friendly DIY hanging plant hacks, you can confidently introduce the beauty and tranquility of nature into your home without compromising your lease or your security deposit. From repurposed coat stands to clever tension rod installations, each solution offers a unique way to elevate your greenery and maximize your vertical space. So, gather your plants, choose your favorite hacks, and start creating the lush, inspiring indoor jungle you’ve always dreamed of. Happy planting!