
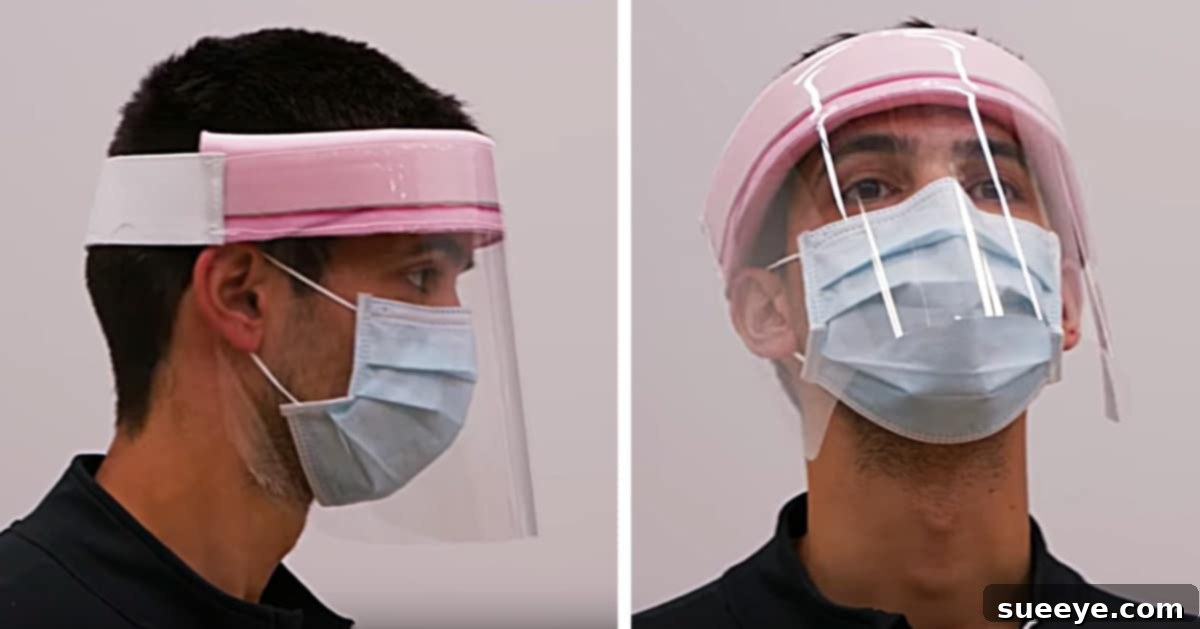
How to Make a DIY Face Shield for Enhanced Personal Protection
In today’s world, prioritizing personal health and safety has become more crucial than ever. With recommendations from leading health organizations like the Surgeon General and The CDC emphasizing the importance of face coverings, many individuals are seeking effective ways to enhance their protective measures. While cloth face masks are widely adopted, a face shield offers an additional layer of defense, providing comprehensive facial coverage. This guide will walk you through creating your own robust face shield, based on an ingenious design by Sailrite, a renowned company in industrial sewing machine manufacturing. This DIY project empowers you to craft a durable and highly effective protective barrier right from your home, offering peace of mind in various social interactions.
Understanding the Role of Face Coverings in Public Health
The guidance from public health experts underscores that wearing face coverings, especially in situations where social distancing is difficult to maintain, significantly reduces the spread of respiratory droplets. While a standard cloth face mask primarily covers the nose and mouth, a face shield expands this protection to the entire face, including the eyes. This distinction is vital as it addresses potential routes of transmission that a conventional mask might miss. For those who seek maximum protection, combining a cloth face mask underneath a face shield creates an optimal barrier, safeguarding against airborne particles and accidental face touching.
Why Choose a DIY Face Shield? Benefits and Applications
A homemade face shield isn’t just a cost-effective solution; it offers several distinct advantages over relying solely on traditional masks. Firstly, it provides a full facial barrier, shielding your eyes, nose, and mouth from direct exposure to droplets. This is particularly beneficial as the eyes are a potential entry point for pathogens. Secondly, face shields can prevent you from touching your face, a common habit that can transfer germs from your hands to your mucous membranes. Thirdly, they are often more comfortable for extended wear, as they don’t press directly against the face and allow for easier breathing, especially for individuals with respiratory sensitivities. Finally, face shields are reusable and relatively easy to clean, making them a sustainable choice for ongoing protection. They are an excellent option for anyone looking for an extra layer of caution, whether in crowded environments, during essential errands, or in professional settings requiring enhanced personal protective equipment (PPE).
The Sailrite Method: A Robust Approach to DIY Protection
The tutorial we’re focusing on comes from Sailrite, a company celebrated for its high-quality industrial sewing machines and comprehensive DIY guides. Their approach to crafting a face shield stands out due to its professional-grade materials and meticulous instructions. Sailrite’s design isn’t just functional; it’s built for durability and comfort, reflecting their expertise in marine and upholstery projects that demand resilience. Their video tutorial, available on Sailrite’s YouTube channel and detailed instructions on their website, breaks down the complex process into manageable steps, making it accessible even for those with intermediate sewing skills. Furthermore, the pattern and material measurements provided are incredibly generous, enabling you to create not just one, but potentially hundreds of masks if you have the need, which can be invaluable for community efforts or large families.
Essential Materials for Your Face Shield Project
Gathering the right materials is the first critical step in ensuring the success and efficacy of your DIY face shield. Sailrite’s design utilizes specific, high-quality components designed for comfort, durability, and a professional finish. Here’s a breakdown of what you’ll need and why each item is important:
- Fabric-Backed 1/2-inch Sew Foam: This specialized foam provides a comfortable and secure cushion for the forehead. The fabric backing adds strength, preventing tears and providing a smooth surface for sewing. Its thickness helps maintain the shield’s structure while ensuring a snug fit without causing discomfort, crucial for extended wear.
- Clear Monofilm (4mil): The core of your shield, 4mil monofilm offers excellent clarity and rigidity. This material is chosen for its ability to provide an unobstructed view while being robust enough to withstand daily use and cleaning. Its specific thickness ensures it’s not flimsy but also not overly heavy, maintaining balance and comfort.
- Nylon Loop White (2 inch) and Nylon Hook White (2 inch): These two components form a secure and adjustable closure system, commonly known as hook-and-loop fasteners (Velcro). The 2-inch width ensures a strong hold, allowing you to customize the fit of the face shield around your head for maximum comfort and stability.
- Elastic White (2 inch): An alternative or supplementary material for the head strap, elastic provides flexibility and a forgiving fit. It can be used in conjunction with the hook-and-loop fasteners for a hybrid closure or as a standalone strap for simplicity, offering different levels of tension and comfort.
- Scribe-All Black Marking Pencil (for vinyl): Traditional pencils or markers might not work effectively on monofilm or sew foam. This specialized marking pencil is designed to write clearly on vinyl and similar synthetic materials, ensuring your pattern lines are precise and visible, which is vital for accurate cutting and sewing.
- Polyester Thread: Opt for high-quality polyester thread. It’s known for its strength, durability, and resistance to UV rays and moisture, making it ideal for a protective item that might be exposed to various environmental conditions and frequent cleaning. It will ensure your seams hold up over time.
- Patterning Material (thin cardboard, paper, etc.): Before cutting your expensive materials, you’ll need to create precise templates. Thin cardboard or sturdy paper works perfectly for this. Accuracy in your patterns translates directly to a well-fitting and professional-looking face shield.
- Ruler, Scissors, Pencil: These basic crafting tools are indispensable for measuring, marking, and cutting. A reliable ruler ensures straight lines, sharp scissors are crucial for clean cuts on foam and monofilm, and a standard pencil is for marking your patterning material.
- Dinner Plate: This might seem unusual, but a standard dinner plate is a fantastic tool for creating the perfectly rounded curves needed for the face shield’s design, particularly for the visor and headpiece edges. It simplifies achieving smooth, consistent arcs that would otherwise be challenging to draw freehand.
- Walking Foot Sewing Machine: This is perhaps the most critical tool for this project. A walking foot machine is designed to feed multiple layers of fabric evenly, preventing shifting and puckering, which is essential when working with thick materials like sew foam and monofilm. While a standard home machine might struggle, a walking foot (or an industrial machine like Sailrite’s) will handle these materials with ease, ensuring strong, even stitches.
Step-by-Step Guide: Crafting Your Own Face Shield
Creating your face shield involves a series of detailed steps, from pattern creation to final assembly. Precision at each stage will ensure a professional-looking and effective protective device. The Sailrite video tutorial offers visual guidance that complements these written instructions, making the process even clearer.
Phase 1: Pattern Creation and Material Preparation
The foundation of a perfect face shield lies in accurate patterns and careful cutting. This phase sets the stage for a well-fitting and functional design.
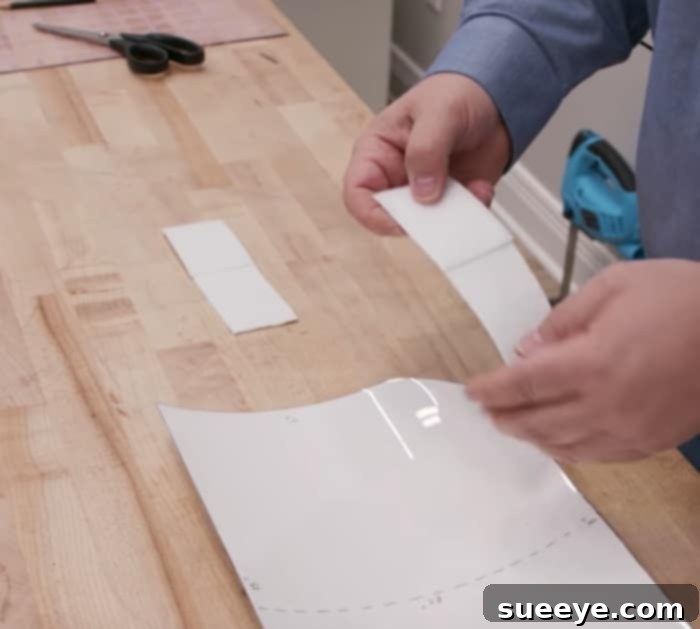
Begin by using your chosen patterning material (thin cardboard or sturdy paper) to create templates for each component of the face shield. The Sailrite instructions provide precise measurements, but you’ll primarily be crafting patterns for the forehead band (from the sew foam) and the clear visor (from the monofilm). For the curves, such as the upper edge of the visor or the ergonomic shape of the forehead band, a dinner plate is an invaluable tool. Place the plate on your patterning material and trace along its edge to create smooth, consistent arcs. Once your patterns are drawn, carefully cut them out with scissors, ensuring clean, crisp edges. Any inaccuracies here will transfer to your final product, so take your time.
With your patterns ready, it’s time to cut your primary materials. Lay the sew foam flat and place your forehead band pattern on top. Using your Scribe-All black marking pencil, trace the pattern onto the foam. This specialized pencil works wonderfully on vinyl and similar surfaces, providing clear lines. Repeat this for the clear monofilm, carefully tracing the visor pattern. Once marked, use sharp scissors to cut out these pieces. Monofilm can be a bit tricky to cut cleanly, so use long, confident strokes. For the nylon loop and hook, and the elastic, measure and cut according to the desired length for the head strap. Remember to account for seam allowances if you plan to sew the ends. Precision in this cutting phase is paramount for a neat finish.
Phase 2: Precision Assembly and Sewing
This phase brings all your carefully cut components together into a functional face shield. The walking foot sewing machine is your best friend here, as it handles the thick and sometimes slippery materials with ease.
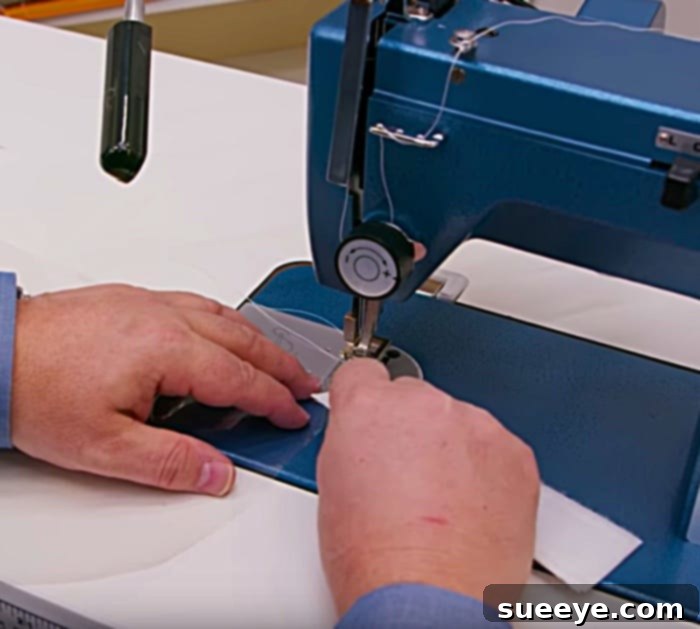
Start by preparing the forehead band. This typically involves sewing the hook-and-loop fasteners or elastic straps to the ends of the sew foam piece. Ensure these are securely attached, as they will bear the tension of holding the shield on your head. You might need to adjust your sewing machine’s tension and use a heavier-duty needle suitable for foam and multiple layers. Next, position the clear monofilm visor onto the upper edge of the sew foam forehead band. This is where accuracy truly matters. Align the edges perfectly, perhaps using temporary clips or double-sided tape designed for fabric to hold it in place before sewing. The goal is to create a seamless, sturdy join that will withstand repeated use.
Now, with your walking foot sewing machine, carefully stitch the monofilm visor to the sew foam forehead band. A walking foot is crucial because it ensures both layers are fed through the machine at the same rate, preventing the monofilm from shifting or bubbling. Use a straight stitch, maintaining an even seam allowance. You might consider a double stitch for added reinforcement, especially along the main connection points. Pay close attention to corners and curves, guiding the material smoothly through the machine. Once the main visor is attached, reinforce any areas where the straps meet the foam. Check all seams for strength and integrity, as this shield is designed for practical protection.
Phase 3: Finishing Touches and Quality Control
With the sewing complete, the final steps involve ensuring your face shield is comfortable, secure, and ready for use. Try on the shield to check the fit. Adjust the hook-and-loop fasteners or elastic until it feels snug but not uncomfortably tight. The shield should sit comfortably on your forehead without impeding your vision or slipping down. Ensure the clear visor extends adequately to cover your entire face, from above your eyebrows to below your chin, and wraps slightly around the sides for maximum protection. Trim any loose threads, and inspect all seams one last time. Your newly crafted face shield is now ready to offer enhanced protection.
Maintaining Your DIY Face Shield: Cleaning and Care
To ensure your homemade face shield remains effective and hygienic, regular cleaning is essential. After each use, especially if you’ve been in a public setting, the shield should be disinfected. Use a soft cloth and a gentle soap and water solution to clean the entire shield, paying particular attention to the clear monofilm visor and the forehead band. Avoid harsh abrasive cleaners or rough sponges, as these can scratch the monofilm, impairing visibility. For disinfection, a diluted bleach solution (following CDC guidelines for surface disinfection) or an alcohol-based wipe (with at least 70% alcohol) can be used. Gently wipe all surfaces and allow them to air dry completely or pat dry with a clean, lint-free cloth. Proper maintenance not only extends the life of your face shield but also ensures it provides the intended level of protection against environmental contaminants.
Conclusion: Empowering Yourself with DIY Safety
Crafting your own face shield is a rewarding project that offers a significant boost to your personal protective measures. By following the detailed guidance from Sailrite, you can produce a high-quality, durable, and effective barrier against airborne particles and droplets. This project exemplifies the power of DIY solutions in promoting health and safety, empowering individuals to take proactive steps in safeguarding themselves and their communities. Whether you’re an ultra-cautious individual, a frontline worker seeking additional protection, or simply someone who values preparedness, this homemade face shield is an excellent addition to your personal safety toolkit. Embrace the satisfaction of creating something functional and vital, contributing to a safer environment for everyone.