
Craft Stunning DIY Lace Earrings: An Easy & Elegant Project
Discover a remarkably simple yet incredibly rewarding crafting project that will undoubtedly garner countless compliments: creating your own exquisite DIY lace earrings. It’s one of those brilliant ideas that makes you wonder why you hadn’t thought of it sooner! This project transforms simple lace scraps into gorgeous, personalized accessories, offering a unique blend of elegance and handmade charm.
Lace jewelry has experienced a significant surge in popularity, captivating fashion enthusiasts with its delicate beauty and intricate designs. Rather than purchasing mass-produced pieces, imagine crafting bespoke earrings that perfectly reflect your style and creativity. This guide will walk you through the process of making these delightful lace earrings, utilizing readily available materials and an incredibly straightforward technique.
Why Choose DIY Lace Earrings?
Crafting your own jewelry offers numerous advantages beyond just saving money. Handmade items possess a unique character and soul that mass-produced accessories often lack. Here are compelling reasons to embark on this handmade jewelry project:
- Unleash Creativity: Every piece of lace offers a world of patterns and textures. You become the designer, choosing the specific motif, color, and finish to match your vision.
- Cost-Effective: This project is incredibly budget-friendly, especially if you have an existing stash of lace scraps from sewing projects, old garments, or even thrift store finds.
- Personalized Style: Unlike off-the-shelf options, your custom earrings will be truly unique, reflecting your taste and complementing your wardrobe perfectly.
- Eco-Friendly Crafting: Repurpose those forgotten lace remnants and breathe new life into them, reducing waste and promoting sustainable crafting practices.
- Perfect Handmade Gifts: These elegant earrings make thoughtful and impressive gifts for friends, family, or anyone who appreciates unique jewelry. You can easily produce several pairs at once, catering to various styles and occasions.
- Quick & Easy: Despite their sophisticated appearance, these earrings are surprisingly quick to make, making them ideal for crafters of all skill levels, even beginners.
The Allure of Lace: Selecting Your Canvas
Lace, with its timeless appeal and diverse patterns, serves as the heart of this project. From delicate floral motifs to intricate geometric designs, the variety of laces available allows for endless creative possibilities. Think about the effect you want to achieve:
Vintage lace can add an antique, romantic touch, while modern lace patterns might offer a bolder, contemporary feel. The beauty lies in discovering the perfect piece that speaks to you.
When selecting your lace, consider its thickness and how well its pattern lends itself to being cut out as a distinct earring shape. Laces like Venise lace, guipure lace, or even embroidered tulle with defined edges work exceptionally well for this project. The more intricate the lace, the more striking your finished earrings will be. Don’t be afraid to experiment with different widths, textures, and even colors of lace.
Gathering Your Materials: What You’ll Need
One of the beauties of this craft is its minimal material requirement. Most items are likely already in your craft stash, or easily acquired. Here’s a detailed list of what you’ll need to create your beautiful lace earrings:
-
Lace Pieces
This is your primary material. Scraps work perfectly! Look for lace with interesting, defined patterns that can be easily trimmed into symmetrical earring shapes. You can find lace remnants at fabric stores, thrift shops, or even by deconstructing old lace garments or doilies. Having a variety of patterns and colors on hand will allow for more creative exploration.
-
Stiffening Agent
This is crucial for giving your lace structure and durability. Without it, the lace would simply flop. There are a few excellent options:
- Mod Podge Gloss: A versatile craft adhesive, sealer, and finish. The gloss variety will give your earrings a beautiful subtle sheen.
- Mod Podge Stiffy: Specifically designed to stiffen fabric, this product works wonders for lace. It provides a very firm hold and ensures your earrings maintain their shape.
- Clear Nail Polish: An excellent alternative if you have it on hand. While not as robust as Mod Podge for large pieces, it’s perfect for smaller lace motifs and can provide a quick, hard finish.
- Fabric Stiffener Sprays: Some crafters prefer a spray-on stiffener for a more even, less messy application, though it might require multiple coats.
Choose the option that best suits your preference for finish and ease of application. Mod Podge is generally recommended for its effectiveness and availability.
-
Earring Findings
These are the metal components that turn your lace pieces into wearable earrings.
- Jump Rings (Two): Small metal rings used to connect different components. Ensure they are strong enough to hold the lace and ear wire securely.
- Earring Wires (Two): Also known as ear hooks or French hooks, these are the pieces that go through your earlobe. Various styles exist, including leverbacks, studs, or even clip-ons if you don’t have pierced ears. Choose a style that is comfortable and complements your design.
Ensure your jump rings and earring wires are made of a hypoallergenic metal if you or the recipient have sensitive skin (e.g., surgical stainless steel, sterling silver, or niobium).
-
Essential Tools
- Sharp Scissors: For precise cutting of the delicate lace patterns.
- Needle-Nose Pliers (or Jewelry Pliers): Absolutely essential for opening and closing jump rings without damaging them or the lace. Having two pairs can make this process even easier.
- Parchment Paper or Wax Paper: To protect your work surface and prevent the stiffening agent from sticking to it while your lace dries.
- Small Bowl or Container: For dipping your lace into the stiffening agent.
- Small Paintbrush (optional): For applying Mod Podge more precisely, especially if you’re not dipping the entire piece.
Step-by-Step Guide to Crafting Your Lace Earrings
Creating these fashion accessories is a straightforward process. Follow these simple steps to transform your lace scraps into stunning earrings:
Step 1: Selecting and Trimming Your Lace
Begin by carefully examining your lace pieces. Identify the specific patterns or motifs you wish to use for your earrings. Symmetry is key here, as you’ll want your pair of earrings to match as closely as possible. Using a sharp pair of scissors, meticulously trim around the chosen lace pattern. Aim for clean, precise cuts that follow the natural contours of the lace design. Consider how the lace will hang once it becomes an earring – do you want the pattern facing a particular direction? Cut two identical or very similar pieces for your pair. If your lace has a repeating pattern, cutting two adjacent sections can often yield perfectly matched pieces. Take your time with this step, as well-cut lace forms the foundation of a beautiful earring.
Step 2: Applying the Stiffening Agent
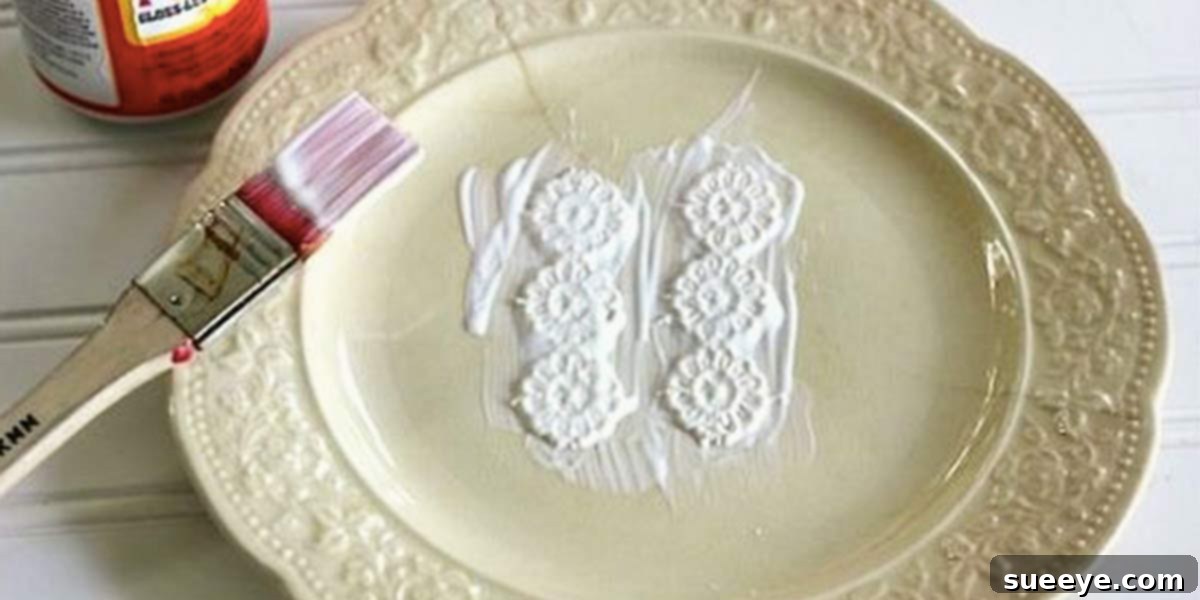
This is where your lace transforms from a delicate fabric into a structured earring. Lay down parchment or wax paper to protect your work surface. Pour a small amount of Mod Podge (or your chosen stiffener) into a shallow bowl. Gently dip each lace piece into the stiffener, ensuring it is fully saturated. Use your fingers or a small paintbrush to work the stiffener into all the nooks and crannies of the lace. Once thoroughly coated, carefully remove the lace piece from the bowl, gently squeezing or dabbing off any excess stiffener. You want the lace to be firm, not dripping. Place the saturated lace pieces flat on your parchment paper. Allow them to dry completely, which can take several hours or even overnight, depending on the humidity and the type of stiffener used. For extra stiffness or a glossier finish, you can apply a second coat once the first is dry. Ensure the pieces are perfectly flat during drying to avoid warping.
Step 3: Attaching Your Earring Findings
Once your lace pieces are completely dry and stiff, they are ready to become earrings. Take one jump ring and, using your needle-nose pliers, carefully twist it open. Never pull it apart like a “C” shape; instead, twist one side forward and the other backward to maintain its circular integrity. Gently thread the open jump ring through a small opening in the stiffened lace piece. Choose a sturdy point in the lace where the jump ring will sit securely. Next, thread the earring wire onto the same jump ring. Once both the lace and the ear wire are securely on the jump ring, use your pliers to twist the jump ring closed, ensuring the ends meet perfectly without any gaps. Repeat this process for the second earring. You now have a beautiful, wearable pair of handmade lace earrings!
Unleash Your Creativity: Design Variations & Personalization
The beauty of this easy craft project lies in its versatility. Once you’ve mastered the basic technique, you can explore countless ways to personalize your lace earrings and make them truly your own:
Color & Embellishments
- Dyeing Lace: Before applying the stiffener, you can dye white or off-white lace using fabric dyes to match specific outfits or create vibrant new looks.
- Glitter & Shine: Mix fine glitter into your Mod Podge before applying it to the lace for a subtle sparkle, or brush glitter over the wet Mod Podge for a bolder effect.
- Beads & Charms: Once the lace is stiff and dry, you can attach small beads, sequins, or tiny charms using strong craft glue or by incorporating them with additional small jump rings.
- Painted Accents: Use acrylic paints to highlight specific parts of the lace pattern or add metallic accents for an opulent touch.
Shapes & Sizes
- Layering Lace: Experiment with layering two different lace patterns or colors on top of each other before stiffening for a multi-dimensional effect.
- Asymmetrical Designs: Don’t feel limited to perfectly matching pairs. Create an “mismatched but complementary” set for a modern, artistic look.
- Larger Statement Pieces: For a dramatic effect, select larger lace motifs. Ensure they are stiff enough to hold their shape without being overly heavy.
Beyond Earrings
The same stiffening technique can be applied to other jewelry and lace crafts:
- Lace Pendants: Create a larger stiffened lace motif and attach it to a necklace chain.
- Brooches & Pins: Glue a pin back onto a stiffened lace piece for a unique accessory.
- Hair Clips: Attach smaller lace pieces to plain hair clips or barrettes for a delicate hair adornment.
- Decorative Embellishments: Stiffened lace can also be used to embellish scrapbooks, cards, or mixed-media art.
Pro Tips for Perfect Lace Earrings
- Work in a Well-Ventilated Area: Especially if using Mod Podge or clear nail polish, ensure good airflow.
- Read Product Instructions: Always refer to the specific drying times and application tips for your chosen stiffening agent.
- Test First: If you’re unsure how a particular lace or stiffener will react, test a small scrap piece first.
- Ensure Full Dryness: Attaching findings to lace that is even slightly damp can lead to weakness or mold. Be patient!
- Care for Your Creations: Avoid submerging your lace earrings in water. If they get wet, gently blot them dry and reshape if necessary. Store them in a jewelry box to prevent bending or snagging.
The Perfect Handmade Gift
These elegant handmade lace earrings are more than just a craft; they’re heartfelt expressions of care. Imagine presenting a beautifully packaged pair of these earrings for a birthday, anniversary, or as a thoughtful bridesmaid gift. Because they are so versatile, you can tailor them to the recipient’s personal style – choosing their favorite colors, specific lace patterns, or even adding a tiny initial charm. They are also fantastic for craft fairs or as small tokens of appreciation. The fact that they are handmade adds an incredible layer of sentiment and uniqueness that store-bought items simply cannot replicate. Consider creating several pairs in various styles to have on hand for last-minute gifts.
Conclusion
This project truly embodies the spirit of creative crafting: taking simple materials and transforming them into something beautiful and personal. With a handful of lace scraps, a common craft adhesive, and a little bit of time, you can create stunning DIY fashion accessories that are both elegant and uniquely yours. Embrace the joy of making, experiment with different designs, and delight in the compliments that are sure to come your way. So gather your materials, unleash your inner designer, and start crafting your own gorgeous customizable lace earrings today!