
Transform Ordinary Bottles into Dazzling Crystal Masterpieces: The Ultimate Borax Craft Guide
Imagine taking a plain, everyday glass bottle or jar and, with a touch of magic and a few common household items, transforming it into a glistening, diamond-like work of art. Sounds impossible, right? Prepare to be astonished! We’re about to unveil a simple, incredibly effective DIY project that allows you to create stunning crystallized bottles and jars that will capture light, spark conversations, and add an exquisite touch to any space. Forget expensive decor; this budget-friendly craft delivers unparalleled beauty that looks like it cost a fortune, but it’s remarkably easy to achieve. Get ready to embark on a creative journey that promises dazzling results!
The Secret Revealed: What You’ll Need for Your Crystal Creation
The beauty of this project lies in its simplicity. You don’t need exotic chemicals or specialized equipment. All the ingredients are readily available, perhaps even in your pantry or laundry room right now. This is where the ordinary becomes extraordinary, enabling you to create unique and captivating home decor with minimal effort and cost.
Essential Materials:
- Glass Bottles or Jars: Any shape or size will do! Empty wine bottles, jam jars, olive oil bottles – choose ones with interesting forms for the best effect. Thoroughly clean them and remove all labels.
- Borax (Sodium Borate): This common laundry booster is the star of our show, responsible for forming the stunning crystals. It’s safe for household use, but always handle with care.
- Hot Water: The hotter, the better, as it helps dissolve the Borax efficiently and create a supersaturated solution crucial for crystal growth.
- Rit Dye or Food Coloring: To add vibrant hues to your crystals. Rit Dye offers intense, lasting colors, while food coloring provides a more subtle tint. Experiment with different shades to match your decor.
- Sandpaper (fine-grit): Optional, but highly recommended for enhancing crystal adhesion. Lightly sanding the glass creates tiny imperfections, giving the crystals more surface to grip onto.
- Large Pot or Heat-Resistant Container: To prepare your Borax solution. Ensure it’s large enough to fully submerge your glass item.
- Stirring Utensil: A spoon or whisk to ensure the Borax dissolves completely.
- String or Twine: For suspending your bottles in the solution without touching the bottom or sides of the container.
- Pencil or Dowel Rod: To rest across the top of your container, holding the string and supporting your suspended bottle.
- Protective Gloves: When handling Borax solution, especially for extended periods or if you have sensitive skin, to prevent irritation.
- Old Towels or Newspaper: To protect your work surface from spills and drips during the process.
Step-by-Step Transformation: Crafting Your Dazzling Crystal Bottles
Get ready to witness an incredible metamorphosis! Follow these easy steps to turn your ordinary glass items into captivating crystal decor pieces. The process is straightforward, but the results are truly spectacular and will leave you, and anyone who sees them, amazed.
-
Preparation is Key: Clean and Roughen Your Glass
Begin by thoroughly cleaning your glass bottles or jars. Remove all labels and adhesive residue, ensuring the surface is pristine. Any grease or dirt can hinder crystal formation. For an even more spectacular and uniform crystal display, lightly sand the exterior of your bottles with fine-grit sandpaper. This creates microscopic nucleation sites – tiny imperfections and a slightly rough surface – giving the Borax crystals more nooks and crannies to latch onto and grow, resulting in a fuller, more dazzling coating.
-
Mixing the Magic Solution: Borax and Hot Water
In your large pot or heat-resistant container, boil enough water to completely submerge your bottle (or the portion you want crystallized). Once boiling or very hot, carefully pour it into your mixing container. Now, add the Borax. The general rule of thumb is three tablespoons of Borax per cup of hot water. Stir continuously until the Borax is completely dissolved. You want a saturated solution, so keep adding and stirring until no more Borax dissolves and you see a slight residue settling at the bottom. This indicates that the water has absorbed as much Borax as it can hold, creating the perfect supersaturated environment for robust crystal growth.
-
Add a Splash of Color: Dyeing Your Crystals
This is where you infuse personality and vibrancy into your creations! Carefully add your chosen Rit Dye or food coloring to the hot Borax solution. Stir well until the color is evenly distributed. Remember, the deeper the dye concentration, the more vibrant your crystals will be. Experiment with different shades to achieve your desired effect, from subtle pastels to rich, jewel tones. You can even create ombre effects by varying the dye concentration if you’re working with multiple bottles or batches.
-
The Submersion: Letting the Crystals Grow
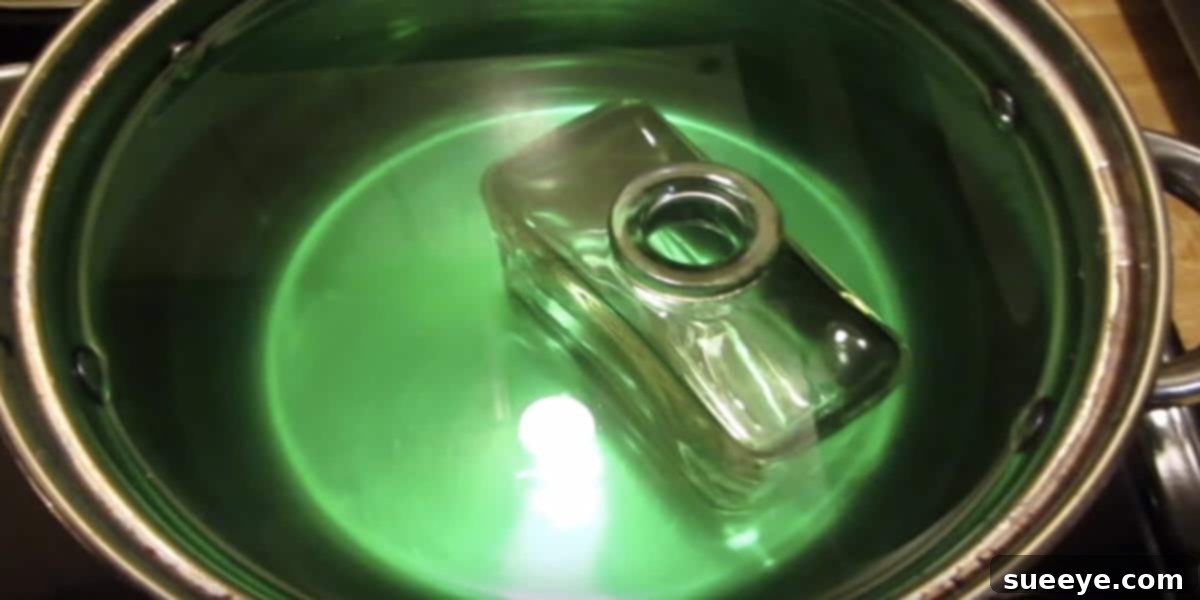
Attach a strong string or twine securely around the neck of your clean, prepped bottle. Lower the bottle into the colored Borax solution, ensuring it is fully submerged. Use a pencil or dowel rod laid across the top of your container to hold the string, suspending the bottle without it touching the bottom or sides of the container. This crucial step allows crystals to form freely and uniformly all around the glass surface. For best results, allow your bottle to soak undisturbed for at least 8-12 hours, or even overnight (up to 24 hours). Patience is a virtue here, as longer soak times generally result in larger, more intricate, and more spectacular crystal formations.
-
The Reveal: Drying Your Sparkling Masterpiece
After the desired soaking time, carefully lift your bottle from the solution. You’ll be absolutely amazed by the sparkling transformation! The bottle will be covered in beautiful, shimmering crystals that catch every glint of light. Hang it in a safe place where it won’t be disturbed, allowing it to air dry completely. This might take several hours. Avoid touching the crystals while they are still wet or fragile. Once fully dry, your dazzling crystal bottle is ready to display! You can gently tap off any very loose crystals, but generally, they adhere quite well to the roughened surface.
The Science Behind the Sparkle: How Borax Works Its Magic
This captivating transformation isn’t magic; it’s basic chemistry in action! Borax, scientifically known as sodium tetraborate, is a compound that dissolves readily in hot water. As the water cools, its capacity to hold dissolved substances decreases. This phenomenon leads to a state called supersaturation, where the solution contains more dissolved Borax than it normally could at cooler temperatures. When the solution cools, the excess Borax particles begin to come out of the solution and re-form into solid crystals. These crystals naturally prefer to grow on a surface, which is why your bottle becomes encrusted. The slower the cooling process, the larger and more defined the individual crystals tend to be. The added sandpaper provides nucleation sites – microscopic imperfections where crystal growth can more easily begin, resulting in a fuller, more uniform, and ultimately more dazzling crystal coating.
Beyond the Bottle: Creative Uses for Your Crystal Creations
Once you’ve created your first crystal masterpiece, you’ll undoubtedly be eager to make more! These stunning pieces aren’t just pretty to look at; they’re incredibly versatile and can enhance your home decor in numerous ways, or make unforgettable, personalized gifts. Their unique shimmer makes them a focal point wherever they are placed.
Inspiring Ways to Display Your Crystal Art:
- Elegant Flower Vases: As mentioned, fresh flowers look absolutely breathtaking in these sparkling vases. The crystals catch the light beautifully, making any floral arrangement instantly more luxurious and captivating.
- Unique Candle Holders: Place a small LED tea light or a pillar candle (ensure it fits safely and doesn’t get too close to the crystals to prevent damage) inside a larger crystallized jar for a soft, shimmering glow that creates a magical, romantic ambiance.
- Stunning Centerpieces: Arrange a collection of different sized and colored crystal bottles on your dining table, mantelpiece, or coffee table for an eye-catching focal point that will undoubtedly draw compliments.
- Decorative Accents: Use them as standalone art pieces on shelves, windowsills, or side tables. The way they interact with natural light, sparkling and refracting colors, is truly mesmerizing throughout the day.
- Thoughtful Handmade Gifts: These personalized crystal bottles make incredible, heartfelt gifts for birthdays, holidays, housewarmings, weddings, or any special occasion. They are unique, beautiful, and carry the charm of being handmade with love.
- Holiday Decor: Imagine these in festive colors for Christmas, Halloween, Easter, or any celebration. Red and green for Christmas, spooky purple and orange for Halloween – the possibilities are endless for adding seasonal sparkle to your home.
- Jewelry Storage: Smaller, wider-mouthed jars can be used to store delicate jewelry, adding a touch of glamour and organization to your vanity or dresser.
- Fairy Garden Elements: Incorporate smaller crystal jars into miniature fairy gardens for an enchanted, shimmering effect.
Mastering the Art: Tips for Perfect Crystals Every Time
While the basic process is remarkably simple, a few expert tips can elevate your crystal creations from lovely to truly magnificent. Practice makes perfect, and these insights will help you achieve consistent, dazzling results that will impress everyone who sees them.
Pro Tips for Crystal Success:
- Choose Your Glass Wisely: Bottles with interesting textures, engravings, or unique shapes will result in more captivating and complex crystal patterns. Clear glass generally works best for allowing the crystal structure and infused color to shine through most effectively.
- Borax Concentration is Key: Don’t be shy with the Borax! A truly saturated solution is crucial for abundant and impressive crystal growth. If you don’t see significant crystal formation after a few hours, your solution might not be saturated enough – try gently reheating the solution and adding more Borax until no more dissolves.
- Patience, Patience, Patience: Resist the urge to pull your bottles out too soon. The longer they soak (within the 8-24 hour window), the larger, more dense, and more dramatic your crystals will become, yielding a richer sparkle.
- Control the Cooling: Allowing the solution to cool slowly (e.g., leaving the pot undisturbed in a room with a stable temperature, perhaps even covering it loosely with a lid) can lead to bigger, more defined, and aesthetically pleasing crystals. Rapid cooling tends to produce smaller, denser, and sometimes less distinct crystals.
- Experiment with Color: Don’t be afraid to mix dye colors to create custom hues that perfectly match your decor or gift recipient’s preferences. Remember that the final crystal color might appear lighter or slightly different from the liquid solution once dry.
- Avoid Overcrowding: If crystallizing multiple items, ensure they don’t touch each other or the sides/bottom of the container, as this can hinder uniform crystal growth and result in uneven coatings.
- Prevent Crystal Flaking: Once dry, handle your crystal creations gently. While Borax crystals are reasonably robust, excessive handling or scraping can cause them to chip or flake. A light coat of clear acrylic spray sealant can offer some protection and added durability, but test it on an inconspicuous area first to ensure it doesn’t dull the sparkle.
- Clean-Up: The Borax solution can be safely poured down the drain with plenty of hot water. Clean your containers immediately after use to prevent crystal residue from hardening and becoming difficult to remove.
Safety First: Important Considerations
While Borax is a common household cleaning product, it’s important to use it responsibly and safely, especially when undertaking craft projects. Keep Borax powder and the prepared solution strictly out of reach of children and pets, as ingestion can be harmful. Avoid prolonged skin contact; wearing gloves when handling the solution, particularly if you have sensitive skin, is recommended. Ensure good ventilation in your workspace to avoid inhaling Borax dust during preparation. Always wash your hands thoroughly with soap and water after completing the project to remove any residual Borax.
Conclusion: Share Your Sparkle with the World!
You’ve just unlocked the secret to transforming ordinary glass into extraordinary, sparkling works of art. The joy of creating these stunning crystal bottles and jars is only surpassed by the delight and disbelief on people’s faces when they see them. They truly won’t believe you made them yourself with such simple, accessible ingredients! Whether you’re enhancing your own home decor, creating unique, heartfelt gifts, or simply enjoying a fun and rewarding craft project, these Borax crystal creations are guaranteed to impress. Don’t keep this amazing technique to yourself – share your dazzling creations and this incredible DIY tutorial with friends, family, and your social media community. Get ready to sprinkle some effortless sparkle into your life and others, one crystal bottle at a time!